Table of Contents
Advertisement
Quick Links
Advertisement
Table of Contents

Subscribe to Our Youtube Channel
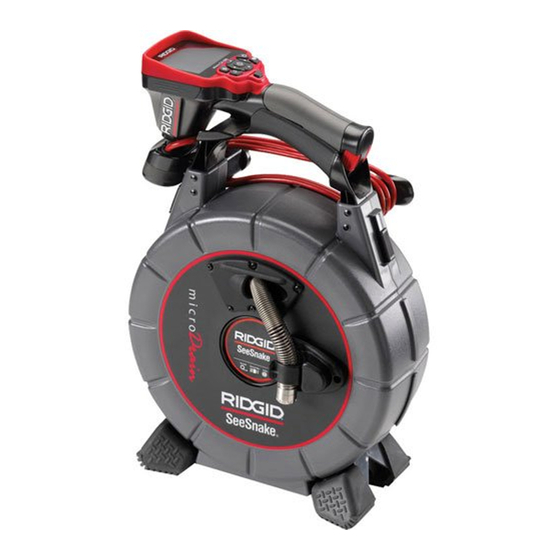
Summary of Contents for RIDGID SeeSnake microDrain 33103
- Page 1 SeeSnake microDrain ® ™ Inspection System SeeSnake ® microDrain™ Record Serial Number below and retain product serial number which is located on nameplate. Serial GlobalTestSupply www. .com Find Quality Products Online at: sales@GlobalTestSupply.com...
-
Page 2: Table Of Contents
SeeSnake ® microDrain™ Inspection System Table of Contents Recording Form for Machine Serial Number ......................1 Safety Symbols................................2 General Safety Information Work Area Safety................................2 Electrical Safety ................................2 Personal Safety ................................2 Equipment Use and Care............................2 Service ..................................3 Specific Safety Information ............................3 SeeSnake microDrain Inspection System Product Safety ..................3 Description, Specifications and Standard Equipment Description ..................................4 Specifications................................4... -
Page 3: Safety Symbols
SeeSnake ® microDrain™ Inspection System Safety Symbols In this operator’s manual and on the product, safety symbols and signal words are used to communicate important safety information. This section is provided to improve understanding of these signal words and symbols. This is the safety alert symbol. -
Page 4: Service
• Contact your local RIDGID distributor. • Disconnect the plug from the power source and/or the battery pack from the equipment before making any adjustments, changing accessories, or storing. -
Page 5: Description, Specifications And Standard Equipment Description
SeeSnake ® microDrain™ Inspection System RIDGID Drain Cleaning Gloves. Never grasp the ro- Dimensions: tating drain cleaning cable with anything else, including Length ......13.25" (33.6 cm) other gloves or a rag. They can become wrapped Depth......6.6 " (16.7 cm) around the cable, causing hand injuries. Only wear Height ......14.2"... -
Page 6: Microdrain System Components
SeeSnake ® microDrain™ Inspection System microDrain System Components Camera Head Case Latch System Cable for Shoulder Strap SeeSnake CCU Case Latch Case Latch Pushrod Rear Case Guide Camera Clip Removable Camera Head Pushrod Front Case Drum Pushrod Figure 3 – Inside Case Feet Assembly Figure 1 –... -
Page 7: Installing System Cable
SeeSnake ® microDrain™ Inspection System If the system cable slip-ring module is not installed, squarely insert the slip-ring module into the hub and twist it clockwise until it locks into position. (See Figure 8.) If changing system cable, twist slip ring module counter clockwise to unlock and squarely retract. -
Page 8: Connecting Microexplorer Camera Monitor To Microdrain System
SeeSnake ® microDrain™ Inspection System and threading it two or three turns into the nut, you reduce wear and tear on the camera system. If you run can pull the nut out. into difficulty moving the camera head through a particu- lar pipe, the centering guides can be easily removed. -
Page 9: Pre-Operation Inspection
SeeSnake ® microDrain™ Inspection System 1. Check work area for: Pre-Operation Inspection • Adequate lighting. • Flammable liquids, vapors or dust that may ignite. WARNING If present, do not work in area until sources have been identified and corrected. The microDrain System is not explosion proof. -
Page 10: Operating Instructions
SeeSnake ® microDrain™ Inspection System outer locking sleeve on the cable connector to retain the 2. Set the microDrain Reel approximately six feet (two system cable in place. Do not twist the cable while meters) from the entry point. This provides ample pushrod for grasping and manipulating without excess tightening the locking sleeve. - Page 11 SeeSnake ® microDrain™ Inspection System adjustments as the drain is being inspected. For in- stance, white PVC pipe requires less light than black PVC. Slight adjustments in lighting brightness can be used to highlight issues discovered during an in- spection. Always use the least amount of lighting to maximize picture quality and reduce heat build up.
-
Page 12: Locating The Microdrain System Sonde
SeeSnake ® microDrain™ Inspection System camera through bends. Do not force the camera head through if there is a large amount of resistance. Be es- pecially careful through Tee’s, as the pushrod could fold over in the Tee and make retrieval difficult or impossible. Watch to make sure that the drum does not hang up during use. -
Page 13: Retrieving The Camera
LEDs can be returned to their normal brightness level to continue the inspection. When the microDrain System Sonde is turned on, a lo- cator such as the RIDGID SR-20, SR-60, Scout, or NaviTrack II set to 512 Hz will be able to detect it. The ®... -
Page 14: Cleaning Instructions
Service and repair of the microDrain System must be The microDrain System can be cleaned by wiping with a performed by a RIDGID Independent Authorized Service soft, damp cloth. Do not use any solvents to clean the Center. -
Page 15: Troubleshooting
SeeSnake ® microDrain™ Inspection System Chart 1 Troubleshooting PROBLEM PROBABLE FAULT LOCATION SOLUTION Check power is correctly plugged in. No power to SeeSnake CCU or microEXPLORER Camera video image not Camera monitor connector. seen. Check switch on monitor/display unit. Connections faulty. Check alignment and pins of connection to microDrain System unit from camera control or display unit.


Need help?
Do you have a question about the SeeSnake microDrain 33103 and is the answer not in the manual?
Questions and answers