Global FREEFIT Installation Manual & Operating Instructions
Hide thumbs
Also See for FREEFIT:
- Installation manual (19 pages) ,
- User manual (11 pages) ,
- Troubleshooting manual (9 pages)

Related Manuals for Global FREEFIT


Summary of Contents for Global FREEFIT
- Page 1 Revised February 2019...
-
Page 2: Table Of Contents
FREEFIT INSTALLATION GUIDE Global Contract Murano Chair Disassembly FreeFit Height Adjustable Tables page 3 FreeFit Height Adjustable Benching (cont’d) Required Tools: Assembly Hardware Bumpers Feet Electrical 2-Column Crossbars Single table trough Safety Glasses Sidebars BWAECF Ceiling Feed Post Global Contract... -
Page 3: Feet
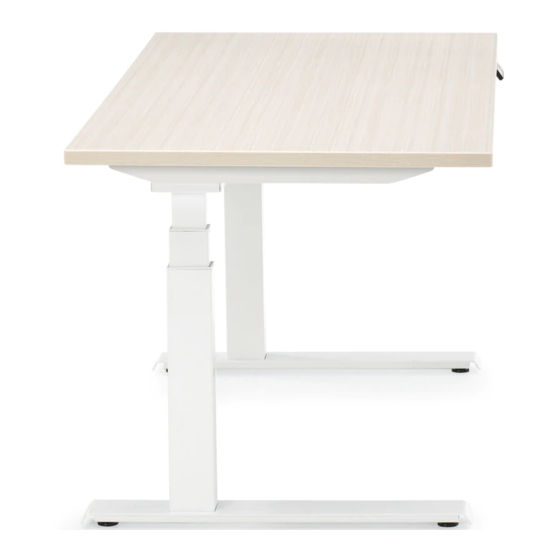
GLOBAL Contract • August 2014 INSTALLATION GUIDELINES FREEFIT INSTALLATION GUIDE Feet Assemble the feet on the columns. Tighten screws firmly. IMPORTANT: Make sure the correct screws are used. Using too long screws may destroy internal parts in the column. Screw Socket Round UNC 5/16- 18x5/8” Zn Crossbars Loosen screws to adjust crossbar length. -
Page 4: Sidebars
Contract GLOBAL • August 2014 INSTALLATION GUIDELINES FREEFIT INSTALLATION GUIDE Sidebars Fasten sidebars in threaded holes on top of crossbars with countersunk screws. Various types of sidebars exist, some of which can be placed in optional positions. The holes closest to the ends of the sidebar are dedicated for fixing of work top but any available hole can be used for this purpose. -
Page 5: Column 90° Telescopic Crossbars
GLOBAL Contract • August 2014 FREEFIT INSTALLATION GUIDE 3-Column 90° Telescopic Crossbars Attach the crossbars on the long side of the housings. Tighten screws firmly. IMPORTANT: Do not use the two middle holes of the crossbars. Do not insert any object in the two middle holes as this Screw socket CSK can damage electronic components. -
Page 6: Electrical 2-Column
FREEFIT INSTALLATION GUIDE Electrical 2-Column The handset is mounted at the front edge of the work top, screwed to the underside with screws supplied with the unit. Connect cables and power supply according to: Power Supply D04 35V/2, 12A AC input 110-240V, 50-60Hz... -
Page 7: Handset Installation
FREEFIT INSTALLATION GUIDE Handset Installation Use the 2 included screws for fixing to the tabletop. If the thickness of the tabletop is less than 1”, please use shorter screws. In situations of sloped tabletop edges, there could be the need for a third fixing point. - Page 8 GLOBAL Contract • August 2014 FREEFIT INSTALLATION GUIDE Using Controls Wheel Controls How to set memory: Upper limit: Units: Upper Limit Lower Limit Calibrate Run/Drive the table to the position you will store, Set the upper limit if there are limited Choose between metric or imperial sitting or standing.
- Page 9 FREEFIT INSTALLATION GUIDE Height Adjustable Back-To-Back Table - Feet FFHABDKS, FFHABDKE Assemble the feet on the columns. Tighten the screws firmly. Important: Make sure the correct screws are used. Using too long screws may destroy the internal parts in the column.
-
Page 10: Column Crossbeam
FREEFIT INSTALLATION GUIDE Column Crossbeam Secure the column crossbeam to the columns. STEP 1: Drive one socket head screw 5/16-18 x 1” into column as illustrated. Do not tighten. STEP 2: Position the column crossbeam’s key-hole over the pre-installed socket head screw and drive in the second socket head screw. - Page 11 FREEFIT INSTALLATION GUIDE Crossbars and Sidebars Do not use the two middle holes of the crossbars. Do not use the two middle holes of the crossbars. Adjustable Crossbar Fixed Crossbar Right hand Sidebar Loosen screws to adjust crossbar length Screw socket CSK UNC 5/16 - 18x1”...
-
Page 12: Bumpers
FREEFIT INSTALLATION GUIDE Bumpers The worksurface is resting on the sidebars and on self-adhesive rubber bumpers placed on the crossbars. These bumpers should be placed close to the fixing screws to avoid the worksurface bending. The rubber bumpers come in two thicknesses. The thicker bumpers are used on the C-channel and not on the fixed crossbars. - Page 13 FREEFIT INSTALLATION GUIDE Back-to-Back Trough Secure the column crossbeam to the columns. STEP 1: Drive two head screws 5/16-18 x 1” into the column crossbeam as illustrated. Do not tighten. STEP 2: Drop in the trough and guide slots over the pre-installed socket head screws. Note: Check if the installation calls for central, shared divider. If so, install the divider’s bottom brackets now, before tightening the socket screws.
- Page 14 FREEFIT INSTALLATION GUIDE BWAETTCxx Table-to-Table Connector Continue with assembling all the remaining table structures, including power troughs and place them in their desired location. Proceed from the first table assembly at the beginning of a run and install the table-to-table connector to organize cables and establish an accurate distance.
-
Page 15: Height Adjustable Single Table - Feet
FREEFIT INSTALLATION GUIDE Height Adjustable Single Table - Feet FFHABSKS, FFHABSKE Assemble the feet on the columns. Tighten screws firmly. IMPORTANT: Make sure the correct screws are used. Using too long screws may destroy the internal parts in the column. - Page 16 FREEFIT INSTALLATION GUIDE Crossbars Loosen screws to Do not use the two middle holes of the crossbars. adjust crossbar length Screw socket CSK UNC 5/16 - 18x1” Zn Adjustable Crossbar Fixed Crossbar Sidebars Fasten sidebars in threaded holes on top of crossbars with countersunk screws.
- Page 17 FREEFIT INSTALLATION GUIDE Bumpers The worksurface is resting on the sidebars and on self-adhesive rubber bumpers placed on the crossbars. These bumpers should be placed close to the fixing screws to avoid the worksurface from bending. The rubber bumpers come in two thicknesses. The thicker bumpers are used on the C-channel and not on the fixed crossbars.
- Page 18 FREEFIT INSTALLATION GUIDE Single Table Trough STEP 1: Drive two socket head screws 5/16-18 x 1” into the single table column crossbeam as illustrated. Do not tighten. STEP 2: Drop in the single-sided trough and guide slots over the pre-installed socket head screws.
- Page 19 FREEFIT INSTALLATION GUIDE BWAECF Ceiling Feed Post Proceed with the installation of the ceiling feed power pole only after all the table assemblies and interconnecting trough bridges have been installed and their position finalized. STEP 1: Remove bottom trough channel.
- Page 20 FREEFIT INSTALLATION GUIDE BWAEEF Floor Feed Housing STEP 1: Rotate the base feed mounting bracket into the bottom slot in the column crossbeam. STEP 2: Push the bracket against the leg column, align the bracket round hole with threaded hole in the bottom of the column crossbeam. (The bracket shares screws with the trough bridge which needs to be installed first, followed by the base feed mounting bracket.) Screw ports on ceiling feed...
- Page 21 FREEFIT INSTALLATION GUIDE Device Holder / Access Door Modules GAADGDH, GAADCTDH, GAADCTPDDH STEP 1: Insert two device holder tabs into the cutouts of the access door. STEP 2: Rotate the device holder 90° clockwise. STEP 3: Ensure that the device holder is properly fixed/installed and able to support phones and tablets.
- Page 22 Worksurfaces Install FreeFit worksurfaces only after having completed installation of the FreeFit table structure, FreeFit troughs, trough bridges and power distribution components. STEP 1: Verify your worksurfaces and specify the location of the access door (if applicable, and if so then left or right location).
- Page 23 FREEFIT INSTALLATION GUIDE Cable Snake The cable snake consists of a number of flexible, interlocking components and a steel bottom bracket. Its purpose is to organize cables between the access door grommet and the FreeFit trough. Each table requires its own cable snake, installed either on the left or right side. Its location is governed by position of the worksurface grommet. If correctly installed, the cable snake will curve towards the center of the table.
- Page 24 FREEFIT INSTALLATION GUIDE Cable Trough Covers Complete the installation of your office equipment, plug in the power and the data cables and organize the path of all cords from the worksurface into the grommet, down the cable snake and, finally, tuck-in all the cable excess in the cable trough.
- Page 25 FREEFIT INSTALLATION GUIDE BWAPCH PC Holder Non-handed PC Holder can be installed on either side of the FreeFit table. If your table is furnished with an access door, please install the PC holder on the side of the door at the configuration which offers the most efficient way of managing cables and utilizing their available length.
- Page 26 FREEFIT INSTALLATION GUIDE Cable Tray Access Door Modules with Cable Tray: GAADCT, GAADCTDH, GAADCTPD, GAADCTPDDH STEP 1: Orient the cable tray so that the rectangular data plate cutout A faces front of the table. STEP 2: Align the cable tray tab holes with pilot holes into the workspace.
- Page 27 FREEFIT INSTALLATION GUIDE Power Bar All Access Door Modules with Cable Tray STEP 1: Insert the two supplied elastic O rings into the cutouts of the cable tray. STEP 2: Thread the power bar through the O rings. STEP 3: Adjust the elastic O rings so that they do not obstruct the outlets or the power bar switch.
- Page 28 Note: The reinforced side of the bracket faces outward. STEP 4: Secure each bracket with supplied 1/4-20 x ¾” machine screws and tighten. Note: FreeFit single table dividers are 72” wide and are provided with 3 brackets. STEP 5: Have two installers hold the divider.
- Page 29 BWASGD - Stationary glass divider BWASFD Stationary framed divider FreeFit stationary laminate and glass dividers share the same bracket kits. STEP 1: Align the two holes in the bracket with the extrusion screw ports. Please note that if the bracket’s direction is off-set, both brackets should be inwardly inset as illustrated.
- Page 30 FREEFIT INSTALLATION GUIDE Stationary Divider Install BWASLLD - Stationary laminate divider BWASGD - Stationary glass divider BWASFD Stationary framed divider Dividers share the same features and steps to connect to the table’s structure: STEP 3: Position the stationary divider above the shared trough between the tables.
- Page 31 FREEFIT INSTALLATION GUIDE Stationary Divider Install (cont’d) STEP 7: Ensure that the worksurfaces are parallel to each other, with a precise 4.5” gap between the rear edges. If not, then adjust the worksurface’s position on the table’s structure. Do not proceed unless both worksurfaces are installed correctly, parallel with 4.5” gap between the rear worksurfaces’ edges.
- Page 32 FREEFIT INSTALLATION GUIDE Stationary Divider Install (cont’d) STEP 8: Press the bracket’s notch against the rear worksurface edge. STEP 9: Establish side-to-side bracket’s location by inserting the roller bushing A into the vertical track B. Leave ” gap C between the bracket and the extrusion.
- Page 33 STEP 2: Secure each bracket with supplied 1/4-20 x ¾” machine screws and tighten. Note: FreeFit single table dividers 72” wide are provided with three brackets. STEP 3: Align the notch in the FreeFit Single table parallel divider bracket with the outside rear edge of the worksurface.
- Page 34 Back-to-Back FreeFit to Bridges Connector The Back-to-Back FreeFit to Bridges Connector provides a power and data connection from Back-to-Back and single FreeFit tables to Back-to-Back Bridges tables. STEP 1: Ensure that the table surfaces of both systems are on axis and exactly 1” apart.
- Page 35 FREEFIT INSTALLATION GUIDE Back-to-Back FreeFit to Bridges Connector globalfurnituregroup.com...
- Page 36 FREEFIT INSTALLATION GUIDE Back-to-Back FreeFit to Bridges Connector - Finished Assembly globalfurnituregroup.com...
- Page 37 FREEFIT INSTALLATION GUIDE Handset Installation Use the 2 included screws for fixing to the tabletop. If the thickness of the tabletop is less than 1”, please use shorter screws. In situations of sloped tabletop edges, there could be the need for a third fixing point.
- Page 38 FREEFIT INSTALLATION GUIDE Using Controls Upper Limit Lower Limit Calibrate Set an Upper Limit when planning overhead storage Set a Lower Limit when planning storage under the table If the height reading displays incorrect height, the height from the table top needs to be calibrated.
Need help?
Do you have a question about the FREEFIT and is the answer not in the manual?
Questions and answers