Table of Contents
Advertisement
Quick Links
Advertisement
Table of Contents

Subscribe to Our Youtube Channel
Related Manuals for Greyp G6 Series


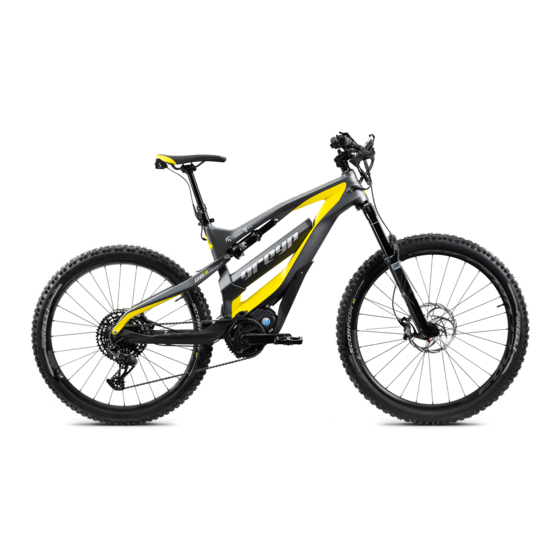
Summary of Contents for Greyp G6 Series
- Page 1 READ BEFORE FIRST RIDE...
- Page 3 BIKE USER MANUAL ENGLISH...
-
Page 4: Table Of Contents
Contents INTRODUCTION BATTERY AND CHARGER Greyp bikes disclaimer Battery technical data General information Important battery information Safety information Charging process General information First start-up about assembly and charging GENERAL NOTES SYSTEM FUNCTIONS ABOUT RIDING Bike parts Riding tips Control unit functions... - Page 5 DASHBOARD Frame Fitness Session Motor Camera Electronics Retro video Brakes Potato Suspension Navigation Drivetrain How to file a claim SOFTWARE UPDATE DISPOSAL Only for EC countries: EC – DECLARATION Greyp G6 mobile application is available OF CONFORMITY on Google PlayStore...
-
Page 7: Introduction
Important notice: Please make sure you read this manual before operating a Greyp bike for the first time. It is very important to follow the instructions in the manual to make sure, you use Greyp in the proper way. Greyp Bikes d.o.o. reserves the right to change the design, com- INTRODUCTION... -
Page 8: Safety Information
Greyp. This manual is not intended as a service and repair manual. The Greyp G6 is classified as a Pedelec. The G6 is a vehicle where the rider’s pedalling is assisted by an electric motor with 5 assist and torque levels, which gives you a range of power assistance. -
Page 9: General Information About Assembly
We strongly advise you to wear a helmet and other safety equipment while riding the Greyp. In some countries, there is an obligation to wear a helmet. Please check if this is the case in your country. Only ride at ambient temperatures between 5°C and 40°C. -
Page 10: General Notes About Riding
General notes about riding The G6 motor provides pedal assistance while you are pedalling, and the vehicle is in motion. The amount of pedal assistance will be higher or lower depending on the amount of force applied to the pedals. If you stop pedalling, the motor will stop providing any assistance. The G6 vehicle can also be ridden as a normal bicycle without motor assistance by switching the vehicle to the OFF mode. -
Page 11: Pre-Ride Inspection
Children riding Greyp bikes are only designed and tested for use by one person at a time. Greyp bikes are not intended for children below 16 years. Do not allow children under 16 years old to drive a Greyp. -
Page 12: Brake Levers - Basics
seat tube. The distance from the centre of the pedal axle to the top of your saddle is your saddle height. Before changing the height of your saddle, you should measure your current saddle height. All seat post models must be inserted into the vehicle’s seat tube to cover the minimum in- sertion line indicated on the seat post. -
Page 13: Suspension - Basics
Suspension – basics You must read and understand the Safety Instructions document included with your product before proceeding with installation. Improperly installed components are extremely danger- ous and could result in severe and/or fatal injuries. If you have any questions about the instal- lation of these components, consult a qualified bicycle mechanic. -
Page 14: Adjusting Compression
Adjusting compression Compression damping controls shock the compression speed during slow compression stroke scenarios, such as rider weight transfer, small impacts, and cornering, which improves control and efficiency. Too much compression damping makes the suspension feel too firm over bumps. To increase or decrease compression damping, rotate the knob or lever in the direction or position indicated on the shock. -
Page 15: Front Suspension
Front suspension Rebound damping controls the suspension fork extension/return speed, which affects traction and control. Optimal rebound damping allows the fork to extend at a controlled speed and maintain traction and control. Rebound that is too fast allows the fork to extend too quickly, which causes the wheel to bounce off objects and the ground resulting in a ‘pogo’... -
Page 16: Assembling Parts Supplied Unassembled
find it helpful to start a ride at a slightly higher pressure than recommended and let out a little air throughout the course of the ride until you find your ideal riding tire pressure. The maxi- mum inflation pressure is 2.6bar (38psi) Assembling parts supplied unassembled Chainguide –... - Page 17 Front reflector Rear reflector Side reflectors CHAINGUIDE OR CHAINGUARD MOUNT NAME/DESCRIPTION TORQUE [NM] CHAINGUIDE ALU PART CHAINGUIDE PLASTIC PART DIN 7991 M5X18 DIN 7991 M5X12 CHAINGUARD CHAINGUARD BUSH ISO 7045 M4X8 GENERAL NOTES ABOUT RIDING...
-
Page 18: Battery And Charger
Greyp vehicle, even if it fits. Turn off the bike, unplug the charger from the battery and remove the battery from the Greyp vehicle before performing work of any kind, such as installation, maintenance, cleaning and/or repair. -
Page 19: Important Battery Information
GREYP G6 BATTERY PACK INFORMATION PROTECTION TYPE: FUSE/ CELL CHRG TEMP, DISCHRG TEMP / CELL VOLTAGE PROTECTION: PROTECTION RATING : 40 A/ 0°C TO 55 °C , -20 °C TO 60 °C / 2.5 TO 4.19 VOLTS SHORT CIRCUIT PROTECTION: 150 A CELL INFORMATION : LG INR18650-MJ1, LI-ION, 3.63V, 3500MAH... -
Page 20: Charging Process
If your battery or charger exhibits any signs of damage, do not use it and immediately bring it to your authorized Greyp Bikes retailer for inspection. WARNING! It is important that you follow the instructions on the label of the battery charger The battery can be charged whether installed in the vehicle or not. -
Page 21: First Start-Up And Charging
40 % if you plan on storing it for a period longer than 1 month. If you plan on storing the Greyp for longer than 6 months, make sure you leave the bike with a state of a charge (SoC) between 30 and 40% It is necessary to check the battery frequently, even if the bike is not being used, in order to avoid permanent damage to the battery. -
Page 22: System Functions
System functions Bike parts BIKE PARTS NAME/DESCRIPTION DISPLAY UNIT (CIM) CHAINSTAY CONTROL UNIT (CBC) PUSHPLATE REAR CAMERA (BUTS) RATIO LEVER BATTERY FRAME SEATSTAY MOTOR SYSTEM FUNCTIONS... -
Page 23: Control Unit Functions
Control unit functions LEGEND NAME/DESCRIPTION ICON FUNCTION TYPE POWER ON/OFF AND STAND BY LONG/SHORT PRESS WALK ASSIST WALK ASSIST PRESS & HOLD TURN ON/OFF FRONT AND LIGHT SHORT PRESS REAR SIGNAL LIGHTS RETRO VIDEO WORKS ONLY WITH MOBILE APP SWITCH BETWEEN DISPLAY SHORT PRESS IN ALL JOYSTICK FUNCTIONS... -
Page 24: Display Unit Information
Display unit information CIM DISPLAY INTERFACE NAME/DESCRIPTION SPEED BATTERY CHARGE / REMAINING DISTANCE RIDE STATISTICS TIME ASSIST LEVEL CADENCE SYSTEM FUNCTIONS... -
Page 25: Power On
Power on To turn on the bike, short press the power button Short press Stand by mode on To turn on the bike, short press the power button Short press Stand by mode off To wake up the bike from stand by mode, press any button on the control unit or move the bike Press any button SYSTEM FUNCTIONS... -
Page 26: Power Off
Power off To turn off the bike, long press the power button Long press Walk assist mode To activate walk assistance mode, press and hold walk assist button Press and hold Lights on/off To turn the lights on or off, short press the light button Short press SYSTEM FUNCTIONS... -
Page 27: Joystick
Joystick To switch between different information on the display unit, move the joystick up or down » TRIP » ODOMETAR » AVERAGE SPEED » TRIP TIME Move in the up or down direction Assist level up/down To change the assistance level, short press the plus or minus assist level button Short press to change by one level SYSTEM FUNCTIONS... -
Page 28: Battery Pack Mount/Dismount
click pull BATTERY PACK MOUNT/DISMOUNT NAME/DESCRIPTION BATTERY BATTERY LOCK SYSTEM FUNCTIONS... -
Page 29: Bike Usage
The vehicle should also be maintained regulally by an authorized Greyp retailer, which means it should be cleaned and lubricated. Regularly clean and lubricate the drivetrain according to the drivetrain manufacturer’s instructions. - Page 30 Do not use a high-pressure water spray directly on the bearings. Even water from a garden hose can penetrate bearing seals and crank interfaces, which can result in increased bearing and crank wear, which can affect the normal function of the bearings. Use a clean, damp cloth and bicycle cleaning agents for cleaning.
-
Page 31: Range
» Charge and discharge cycles. Shifting recommendations For better range, Greyp advises to shifting according to the speed. For low speeds and setting off, low gearing is best. The higher the speed, the higher the gear that can be chosen. For smooth support and optimum range, it is best to release pedal pressure while shifting gears. -
Page 32: Recommended Tightening Of Fasteners
Recommended tightening of fasteners FRAME TORQUE SPECIFICATION NAME / DESCRIPTION TORQUE [NM] RATIO LEVER / FRAME FRAME / CHAINSTAY CHAINSTAY / SEATSTAY SEATSTAY / RATIO LEVER BATTERY LOCK SKID PLATE DROPOUT FRAME / MOTOR RATIO LEVER / REAR SHOCK / FRAME BIKE USAGE... - Page 33 HANDLEBAR PARTS / STEM / TORQUE SPECIFICATION NAME / DESCRIPTION TORQUE [NM] GRIPS / HANDLEBAR SHIFTER / HANDLEBAR BRAKE LEVERS / HANDLEBAR CBC / HANDLEBAR STEM / HANDLEBAR STEM / FRONT FORK CIM / STEM < 2 MAX HEADSET / FRONTFORK SEATPOST / HANDLEBAR BIKE USAGE...
- Page 34 BIKE COMPONENTS TORQUE SPECIFICATION NAME / DESCRIPTION TORQUE [NM] PUSHPLATE / FRAME SPEEDSENSOR / CHAINSTAY SPEEDSENSOR / SPEEDSENSOR HOLDER REAR BRAKE / CHAINSTAY DERAILLEUR / DROPOUT CHAINWHEEL / MOTOR CRANKARMS / MOTOR Y WIRING / PUSHPLATE Y WIRING / FRAME FRONT BRAKE / FRONT FORK CHAINGUIDE ALU PART / FRAME CHAINGUIDE PLASTIC PART / ALU PART...
-
Page 35: Cleaning The Bike
Cleaning the bike Most cleaning can be done with soap, water, sponges and brushes. » Avoid using high-pressure sprayers because water can penetrate through seals. » Avoid using corrosive soaps and strong solvents – always use cleaning products intended for an electric bicycle »... -
Page 36: Warranty
If Greyp is unable to provide a replacement and if a repair is not practical or cannot be made in a timely fashion, Greyp may elect to refund the purchase price in exchange for the return of the product. -
Page 37: Battery
PEDALS Battery The Greyp lithium battery is guaranteed to have 70% of its original tested capacity at the end of the warranty Period. If the battery fails completely during the first 24 months from the original date of purchase, it will be replaced or repaired at no charge. Lithium batteries require care and some maintenance to maximize life expectancy. -
Page 38: Frame
& replacement parts in the first 24 months of bike ownership. Greyp will pay to return the battery to the customer. Greyp retains the right to repair or re- place battery at its sole discretion. All lithium batteries must be shipped as Class 9 dangerous goods (HAZMAT) and must be shipped in accordance with all local and international laws. -
Page 39: Drivetrain
Greyp Bikes d.o.o. or an agreed dealer The product or defective part has to be delivered to Greyp Bikes d.o.o. or an agreed dealer - postage prepaid and carefully packed and insured. When the warranty service is completed, any repaired or replacement product or part will be returned to the customer postage prepaid. -
Page 40: Disposal
Ask your authorized Greyp retailer for information on how to dispose of a battery or charger and any applicable take-back program. -
Page 41: Ec - Declaration Of Conformity
(EPAC - ELECTRIC POWER ASSISTED CYCLE) DESCRIPTION OF PRODUCT GREYP G6.2 – PEDELEC (EPAC - ELECTRIC POWER ASSISTED CYCLE) GREYP G6.3 – OFF-ROAD VEHICLE NAME AND ADDRESS OF THE ZVONIMIR SUČIĆ, LJUBLJANSKA 7, PERSON AUTHORISED TO COMPILE 10431 SVETA NEDELJA, CROATIA... - Page 43 ENGLISH ENGLISH MOBILE APPLICATION...
- Page 44 Greyp G6 with a 3G-module and eSIM is permanently connected to the internet in over 140 countries (you can find a list of all the countries on www.greyp.com). Just plug the mobile phone into the CIM and pair the bike with the mobile device.
-
Page 45: Introduction
First, you need to go through the on boarding process and set up your account. Connect to GVC You are able to create your account via Facebook, Google and Greyp Vehicle Cloud. If you already have an account, login with your existing email and password. -
Page 46: Bike Pairing
Bike pairing After you have successfully created an account, follow these steps: Turn on your bike and wait for it to show the driving screen Turn on your mobile app and select “Pair a bike” INTRODUCTION... - Page 47 Plug the USB connector into the bike and the corresponding end into the mobile phone and let the two of them do their thing pull plugin POSSIBLE OUTCOMES SUCCESS YOU CAN NOW USE YOUR BIKE WITH YOUR MOBILE PHONE FAIL SOMETHING WENT WRONG MAKE SURE NOBODY ELSE IS ALREADY PAIRED TO THE BIKE MAKE SURE THAT THE BIKE HAS CONNECTIVITY...
-
Page 48: Remote Control
Remote control This section allows you to control your bike remotely, see its current status and give you insight into the data generated by your bike. It is divided into the following sections Remote control » Notifications » Activity » Feed »... -
Page 49: Notifications Section
ACQUIRE PHOTO Acquire a photo from the bike’s front or rear camera so you can see it’s surroundings KILL SWITCH Disable the bike remotely so whoever is using it thinks it is turned off. Anybody using your bike will be presented with a message that the bike is disabled and to return it to the owner To enable the bike again, just plug your mobile phone into the USB and wait for the bike and mobile to do their stuff TURN OFF BIKE... -
Page 50: Activity Section
ACTIVITY SECTION In this section, you have an overview of your current data ag- gregated by your rides on the bike. Every time you reset your ride, session data is aggregated in our cloud and presented to you so you can track your activity. The first section shows the following data »... -
Page 51: Settings Section
SETTINGS SECTION Allows you to view personal information and info related to the bike. View allows you to view and adjust: 1. Personal settings,.2. Bike settings if you have not previously paired the bike, you can NOTE do this in this application section. 1.PERSONAL SETTINGS Allows you to update the information you previously entered during account creation. -
Page 52: Dashboard
Dashboard In order to use the application during the bike ride, it is important to have your mobile connect- ed to the CIM (Central Intelligence Module). The dashboard has five sections. You navigate through the screens with the CBC, using the joystick: Ride session, Fitness session, Camera (a joystick button that can be activated regardless of which section you are in), Potato and Navigation. -
Page 53: Fitness Session
Additional information: FITNESS SESSION In its standard bike equipment, the Greyp G6 bike has a heart rate monitor. This can be used during a bike ride. Using the heart rate monitor is simple and involves the following: Turn the heart rate monitor on; the light must be green... -
Page 54: Camera
If paring the bike with the heart rate monitor is set correctly, you will see your heart beat on the display. If the paring is not set correctly, you will get a notification to repeat the paring process. Heart rate options: If the heart rate is being sent by the bike sensor, the bike will automatically adjust the assis- tance level. -
Page 55: Retro Video
RETRO VIDEO This system allows you to do a video stream on both cameras lasting 12 minutes. The re- cording is in a loop. The bike user can access the videos at any time. There is a button on the CBC, joystick, that launches the action retro video. It can also be started from any DASHBOARD section. -
Page 56: Navigation
NAVIGATION You can start/end navigation on the bike using the CBC joystick. The current location is al- ways available on the map and navigation offers the following: » Select / Choose Destination » When the user starts typing the address, a drop-down list of returned address results should be displayed »... -
Page 57: Software Update
Software update Software Update is a free service for all Greyp users who want to keep their application up-to- date with new functions and better performance using OTA (Over-the-Air). It’s a very efficient way to upgrade software, fix bugs, update or change interface etc. wire- lessly for mobile phones and bike components. - Page 58 Before you start a software update, there is something you need to do in order to get started. » Connect the bike to the charger » Connect the bike to network Once all these conditions are met, the bike will confirm and enable the next step. If the network hasn’t been set up earlier, if the login credentials have been changed or if you want to choose a different access point, please do so now otherwise you won’t be able to proceed.
- Page 59 SINCE WE ARE CONSTANTLY WORKING ON IMPROVING USER EXPERIENCE YOU CAN EXPECT FREQUENTLY MOBILE APP UPDATES. YOU CAN FIND THE LATEST VERSION OF THE MANUAL ON OUR WEBSITE...
- Page 60 Greyp Bikes d.o.o. Ljubljanska 7 10431 Sveta Nedelja Croatia Tel: +385 1 409 3377 Fax: +385 1 333 6698 info@greyp.com...
Need help?
Do you have a question about the G6 Series and is the answer not in the manual?
Questions and answers