Table of Contents
Advertisement
Advertisement
Table of Contents

Subscribe to Our Youtube Channel
Related Manuals for Waveshare Alphabot2


Summary of Contents for Waveshare Alphabot2
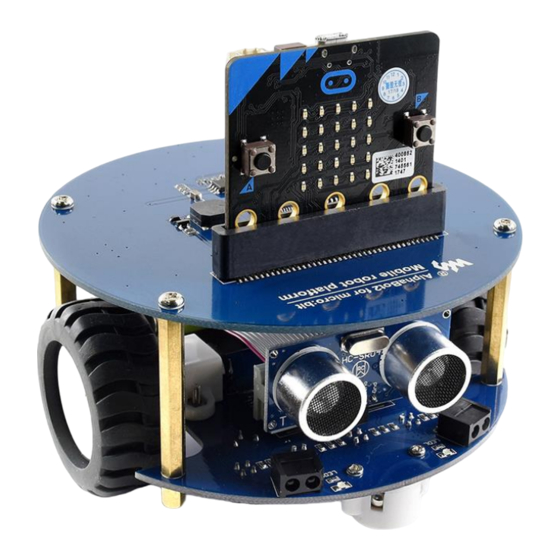
- Page 1 Alphabot2 for micro:bit User Manual Alphabot2 for micro:bit User Manual 1 / 76...
-
Page 2: Table Of Contents
Alphabot2 for micro:bit User Manual CONTENT Preface ................................5 micro:bit ............................... 5 Notes ..............................6 Chapter 1 LED lights ..........................8 JavaScript Blocks editor ........................8 Blocks ............................9 Lighting LEDs ........................... 10 Heart Beating ........................... 13 Display Text ............................14 Chapter 2 Buttons ........................... - Page 3 Alphabot2 for micro:bit User Manual Play Piano ............................27 Play melody 2 ........................... 28 Chapter 5 RGB LED ..........................29 Add package ............................. 30 Lighting .............................. 31 Display different Colors ........................ 32 Blinky LEDs ............................33 Rainbow ............................. 34 Chapter 6 Moving, Robot ........................35 Add Pakcage .............................
- Page 4 Alphabot2 for micro:bit User Manual Bluetooth Connecting 2 ....................... 51 D-Pad controller ..........................53 D-PAD Controller 2 ........................55 Chapter 9 2.4g Radio ..........................56 Add Package ............................. 56 radio communicating ........................56 Joystick for micro:bit ........................58 Joystick for micro:bit 2 ........................62 Posture control ..........................
-
Page 5: Preface
Alphabot2 for micro:bit User Manual PREFACE This Alphabot2 robot kit uses the BBC micro: bit as the host controller, combined with several functional modules, it is easy for the kids to experience robotic tricks such as line tracking, obstacle avoiding, ultrasonic ranging, servo operation, Bluetooth remote control, etc. -
Page 6: Notes
There may be mistakes in this guide due to the limit of time. If you find them, please kindly contact Waveshare Team. To avoid of destroying the Alphabot2, we recommend you read this manual and following it if you are the first time receive your parcel. - Page 7 You must turn on the power switch and make sure the battery supplies power normally before you connect USB cable to micro:bit for programming. You cannot power Alphabot2 by micro:bit, otherwise the power LED's light is very slight and Alphabot2 will work improperly.
-
Page 8: Chapter 1 Led Lights
Alphabot2 for micro:bit User Manual CHAPTER 1 LED LIGHTS The micro:bit has 25 (5x5) individually-programmable LEDs, allowing you to display text, numbers and images, here we will learn about coding these LEDs. JAVASCRIPT BLOCKS E DITOR The link of online JavaScript Block Editor of BBC: https://makecode.microbit.org/#... -
Page 9: Blocks
Alphabot2 for micro:bit User Manual BLOCKS Blocks in Basic are mainly used for basic operation like LEDs controlling. : Run the code at the beginning : Repeat the code forever at the background 9 / 76... -
Page 10: Lighting Leds
Alphabot2 for micro:bit User Manual : Draw an image on the LED screen (LEDs) : Scroll a number on the LEDs : Display text on the LEDs, display one character at a time. : Draw selected icon on the LEDs... - Page 11 Alphabot2 for micro:bit User Manual Click the LED to make them light on, you can see that the LEDs of simulated micro:bit light on as the codes. Click Download to download the code to the drive of micro:bit. You can also save the HEX file to another place, and then copy to micro:bit instead of directly download to micro:bit.
- Page 12 Alphabot2 for micro:bit User Manual 12 / 76...
-
Page 13: Heart Beating
Alphabot2 for micro:bit User Manual HEART BEATING This code, we use block show icon, first display big heart icon then the small heart. Repeat the code and it looks like heart beating. Let’s do it. 13 / 76... -
Page 14: Display Text
Alphabot2 for micro:bit User Manual DISPLAY TEXT Here we use show string block to display text “Hello!” on LEDs. The text will scroll on LEDs character by character. 【Tips】 To delete the blocks, you can right click and delete it or just drag it to the left side. -
Page 15: Chapter 2 Buttons
Alphabot2 for micro:bit User Manual CHAPTER 2 BUTTONS There are two programmable buttons on the front of the micro:bit, which are labelled A and B. In this chapter, we will code with these buttons. PRESSING Blocks we use in this section are included in Input package. -
Page 16: Pressing 2
Alphabot2 for micro:bit User Manual Place show string block in on button pressed block to display string on LEDs display. Duplicate and complete the script to as below: Connect your micro:bit to PC, click Download to flash the code to your board. - Page 17 Alphabot2 for micro:bit User Manual if then block is in Logic package, button is pressed block is in Input package. 1. Place if then block on forever, then put button is pressed block on it. ⊕ 2. Place show string...
-
Page 18: Chapter 3 Sensors
Alphabot2 for micro:bit User Manual CHAPTER 3 SENSORS Micro:bit integrates Temperature sensor, Accelerometer, Compass and so on. In this chapter, we learn to use these sensors. TEMPERATURE SENSOR This sensor allows the micro:bit to detect the current ambient temperature in degree Celsius. -
Page 19: Accelerometer
Alphabot2 for micro:bit User Manual 3. Add one pause (ms) for delay. 4. Download the code to your micro:bit, touch the CPU ( the main chip) for a moment, you will find the temperature became higher. ACCELEROMETER The accelerometer MMA8652 is integrated on the left bottom of micro:bit Acceleration is a trend to move. - Page 20 Alphabot2 for micro:bit User Manual feet, we will free-fall. It is that we have a trend to falling, which is called the acceleration of gravity written as g in formulas. We measure coordinate of x, y and z directions. With these three values, we could get the direction of accelerations.
-
Page 21: Magnetometer
Alphabot2 for micro:bit User Manual 3. Duplicate and complete the script 4. Download the code to your micro:bit, shake your micro:bit to see if arrows change. MAGNETOMETER The compass chip is MAG3110, marked by red frame. The compass can detect the earth’s magnetic field by measuring x, y and z coordinates as well. - Page 22 Alphabot2 for micro:bit User Manual Magnetic Force: We create a script to show the intensity of magnetic force by bar graph (LEDs) 1. Place plot bar graph of block to forever, which is in package 2. Place magnetic force (uT) block on the bar block, which can be found on Input->More, than set the max value to 255...
-
Page 23: Light Sensor
Alphabot2 for micro:bit User Manual geomagnetism always points to north of geomagnetism. Combine with accelerometer and magnetometer, we can get the direction of North. 【Note】 we you use compass, you should keep your micro:bit be static and cannot be influenced by other magnetic fields. - Page 24 Alphabot2 for micro:bit User Manual 2. Drag light level block to bar block, set max value to 255 3. Download the script to your micro:bit and try 4. Open the flashlight of your mobile phone and try to light the LEDs with it.
-
Page 25: Chapter 4 Music
There is a buzzer on Alphabot2-for-micro:bit expansion board, you can insert the micro:bit to it. 【Note】 Before you read this chapter, you’d better to assemble the Alphabot2 for mciro:bit. You can also connect a buzzer/speaker to micro:bit through P0 as below:... -
Page 26: Play A Melody
Alphabot2 for micro:bit User Manual PLAY A MELODY Blocks for music can be found on Music package. 1. Place start melody repeat block to on start forever 2. Choose one melody like birthday and set it to repeat once. 3. Download the script to your micro:bit and test if the melody is played. -
Page 27: Play Piano
Alphabot2 for micro:bit User Manual PLAY PIANO Let’s use blocks to simulate piano. 1. Place play tone for block to forever, set the tone to Middle C and 1 beat 2. Duplicate and complete the script as below 3. Download the script to your micro:bit, speaker connected will repeat tones “do”, “re”, “mi”, “fa”, “sol”, “la”, “si”. -
Page 28: Play Melody 2
Alphabot2 for micro:bit User Manual PLAY MELODY 2 We create a new project, to play different melody when buttons are pressed. 1. Place on button pressed block and set the start melody repeating on it 2. Duplicate and complete the script as below 3. -
Page 29: Chapter 5 Rgb Led
Alphabot2 for micro:bit User Manual CHAPTER 5 RGB LED Alphabot2 has four full color RGB LEDs, which are programmable for colorful effect. In this chapter, we code the RGB LED. 29 / 76... -
Page 30: Add Package
Alphabot2 for micro:bit User Manual ADD PACKAGE Before coding, we should add Neopixel package, click More… icon on top right, choose Add package (Extensions), then click neopixel. After adding, a blocks package Neopixel will be added 30 / 76... -
Page 31: Lighting
Alphabot2 for micro:bit User Manual LIGHTING We create a new project, and code to light all the RGB LED 1. Place Set item to NeoPixel at pin P8 with 4 leds as (GRB format) block to on start -Variable item can be renamed -Pin P8 is selectable and P8 is the default pin of Alpahbot2’s RGB LED... -
Page 32: Display Different Colors
Alphabot2 for micro:bit User Manual DISPLAY DIFFERENT COLORS We modify the last script to make four RGB LEDs to display different colors, for example, red, yellow, green and blue 1. Delete block item show color red by dragging it to the left side 2. -
Page 33: Blinky Leds
Alphabot2 for micro:bit User Manual BLINKY LEDS We modify the last script to cycling RGB LED display. 1. Place item rotate pixels by 1 block in forever -This block can transfer the color of current pixel to next one 2. Place... -
Page 34: Rainbow
Alphabot2 for micro:bit User Manual RAINBOW We create a new project, coding four RGB LEDs for rainbow effect. 1. Place Set item to NeoPixel at pin P8 with 4 leds as (GRB format) block in on start 2. Create a variable hue, place... -
Page 35: Chapter 6 Moving, Robot
Alphabot2 for micro:bit User Manual CHAPTER 6 MOVING, ROBOT We have learned how to control LEDs and buzzer. In this chapter, let’s control the Alphabot2 and let it move. 35 / 76... -
Page 36: Add Pakcage
Alphabot2 for micro:bit User Manual ADD PAKCAGE Adding a package like what we do in last chapter. Input the address on box: https://github.com/waveshare/pxt-AlphaBot2 , Click AlphaBot2. 36 / 76... -
Page 37: Motors
Alphabot2 for micro:bit User Manual MOTORS We create a new project to control the motors of Alphabot2 by buttons. 1. Place If then button is pressed blocks in forever 2. Place Motor speed block after then - This block is used to control one motor, the range of speed is -255 to 255, bigger the number, fast the speed. -
Page 38: Moving
Alphabot2 for micro:bit User Manual MOVING We create a new project. Let Alphabot2 moves forward, backward, turns left and turns right by coding. 1. Place Motor speed block in on start - If both motors move forward, robot will move forward... - Page 39 Alphabot2 for micro:bit User Manual 3. Duplicate and complete the script as below 4. Download the script to micro:bit and test 39 / 76...
-
Page 40: Moving 2
Alphabot2 for micro:bit User Manual MOVING 2 There is another block can also be used to control motor. 1. Place Forward speed 0 block in on start - This block can directly control the robot to move in all directions 2. -
Page 41: Moving 3
Alphabot2 for micro:bit User Manual MOVING 3 There is another block which can control robot to move for a certain time. 1. Place Forward speed 150 for 2 sec block in on start - With this block, robot will move forward in speed 100 for 2 seconds then stop if there is not another setting 2. -
Page 42: Chapter 7 Infrared Obstacle Avoiding
Alphabot2 for micro:bit User Manual CHAPTER 7 INFRARED OBSTACLE AVOIDING Two infrared sensors are integrated in the front of the Alphabot2-Base board, if you have assembled the Alphabot2, they are under the Ultrasonic sensor. Every infrared sensor has one sender and one receiver, infrared lights are sent from the sender, if there is obstacle in the front, some of them will be reflected and received by the receiver. -
Page 43: Infared Sensor Status
Alphabot2 for micro:bit User Manual INFARED SENSOR STATUS 1. Place if then block in forever 2. Replace true with block 3. Put Infrared block to both sides of 4. Place show string block 5. Duplicate and complete the scrip 6. Download the script to micro:bit and test it. -
Page 44: Obstacle Avoiding
Alphabot2 for micro:bit User Manual OBSTACLE AVOIDING We modify the last script to make robot to avoid obstacle. 1. Place show string block with speed block to make robot turn right when obstacle is detected. 2. Place pause (ms) block 3. -
Page 45: Chapter 8 Bluetooth
Alphabot2 for micro:bit User Manual CHAPTER 8 BLUETOOTH Nrf51822 is a BLE (Bluetooth Low Energy) module allows micro:bit to send and receive Bluetooth signals. With this feature, we can control robot by our mobile phones via Bluetooth. ADD PACKAGE To use Bluetooth, we need to first add the supports package. Note that the Bluetooth package is incompatible with extensions ws2812b, neopixel and radio. -
Page 46: Bluetooth Connetion
Alphabot2 for micro:bit User Manual BLUETOOTH CONNETION Before programming, you need to install the Bluetooth APP to your phone. (This app only support Android) Bluetooth App for Android ⚫ 1. Place bluetooth *** service blocks in on start - This there are several services can be used 2. - Page 47 Alphabot2 for micro:bit User Manual 6. Open Bluetooth service of your phone, scanning and find the BBC micro:bit device, pair with it and connect. After paring, icon “√” is displayed. Note that you should delete paired micro:bit device before a new pairing.
- Page 48 Alphabot2 for micro:bit User Manual 8. Click BBC micro:bit (BOUNDED) to connect. Note that only the device with (BOUNDED) suffix can be connected. 9. After connecting, control options are listed as below, and LEDs matrix shows “C” 10. Then you can try to control micro:bit by Bluetooth. Click Accelerometer, tilt your micro:bit, and the micro:bit image in APP tilt as well.
- Page 49 Alphabot2 for micro:bit User Manual 11. Click button option. Press buttons of your micro:bit. The buttons icon in APP react the button event. 12. Click LEDs option, edit the LEDs matrix then clock SET DISPLAY, or send a text 49 / 76...
- Page 50 Alphabot2 for micro:bit User Manual 13. Click Temperature option, the current temperature is showed in APP 【Note】We only start four services in the code, so some of the services showed in APP are unavailable. 50 / 76...
-
Page 51: Bluetooth Connecting 2
Alphabot2 for micro:bit User Manual BLUETOOTH CONNECTING 2 To connect with micro:bit, we should first pair then connect, there are two much steps. Here we modify the last script to make it simpler. 1. Click the icon on the top right: More… ->Project Setting, check the first option “No Pairing Required: Anyone can connect via Bluetooth”... - Page 52 Alphabot2 for micro:bit User Manual 4. After setting, scanning devices again. BBC micro:bit[tozug] is listed, then you can clock it to connect with micro:bit. Don’t forget to delete the paired device (the device with (BOUNDED) suffix) [tozug] this information is different for every micro:bit...
-
Page 53: D-Pad Controller
Alphabot2 for micro:bit User Manual D-PAD CONTROLLER In the App, you can find an option named Dual D-Pad Controller. Click it to enter a control page with dual D-pad (eight buttons). Click the top right three-dots icon you can change the settings. Every time virtual buttons are pressed, related signals are sent to micro:bit via Bluetooth. - Page 54 Alphabot2 for micro:bit User Manual 1. The whole script is as blow: on event from … with value block can be found in Control package MES_DPAD_CONTROLLER_ID is signal (the event) from APP MICROBIT_EVT_ANT is the value of the event MES_DPAD_CONTROLLER_ID...
-
Page 55: D-Pad Controller 2
Alphabot2 for micro:bit User Manual D-PAD CONTROLLER 2 In the Last script, we only use fours buttons, however, as we know, there is dual D-Pad controller in APP, which has eight buttons. We modify the last script, make micro:bit show different icon when the less four buttons are press. -
Page 56: Chapter 9 2.4G Radio
Alphabot2 for micro:bit User Manual CHAPTER 9 2.4G RADIO 2.GHz radio is a wireless communication, popularly used for remote communication like intercom. To do this project, you need at least two micro:bit and one Joystick for micro:bit. ADD PACKAGE Add radio package first. - Page 57 Alphabot2 for micro:bit User Manual 3. User radio received block to receive string. 4. Download the script to both micro:bit and test 5. Expected result it that, if the buttons of one micro:bit are pressed, A or B is showed on another micro:bit.
-
Page 58: Joystick For Micro:bit
Alphabot2 for micro:bit User Manual JOYSTICK FOR MICRO:BIT Joystick for micro:bit is a little module with one joystick and four buttons. Here we use it to control Robot via Radio. 1. Add package We provide a package for joystick for micro:bit, you can add it with this address: https://github.com/waveshare/JoyStick... - Page 59 Alphabot2 for micro:bit User Manual module. 59 / 76...
- Page 60 Alphabot2 for micro:bit User Manual 2. The script for sender: - Download this script to one micro:bit as sender, which insert to joystick module 3. The script for receiver -As we say, you must set the receiver and sender in the same group -Blocks “U”, “D”, “L”, “R”, “N”...
- Page 61 Alphabot2 for micro:bit User Manual -Download this script to another micro:bit as receiver, which insert to Alphabot2 61 / 76...
-
Page 62: Joystick For Micro:bit 2
Alphabot2 for micro:bit User Manual JOYSTICK FOR MICRO:BIT 2 Modify the last two scripts, make LEDs matrix show emoticons when four color buttons of joystick module are pressed 1. The script for sender: 62 / 76... - Page 63 Alphabot2 for micro:bit User Manual 2. Script for receiver: 63 / 76...
-
Page 64: Posture Control
Alphabot2 for micro:bit User Manual POSTURE CONTROL In chapter 3, we have described sensors, accelerometer can be used to detect status of micro:bit, so we add the posture control part to last scripts. 64 / 76... - Page 65 Alphabot2 for micro:bit User Manual Script for sender: 2. Download the script to sender and test. Robot will move when you tilt micro:bit. 65 / 76...
-
Page 66: Chapter 10 Ultrasonic Obstacle Avoidancing
Alphabot2 for micro:bit User Manual CHAPTER 10 ULTRASONIC OBSTACLE AVOIDANCING The eyes of the Alphabot2 is ultrasonic sensor, we can use it to do obstacle avoidance. 66 / 76... -
Page 67: Ultrasonic Sensor
Alphabot2 for micro:bit User Manual ULTRASONIC SENSOR It is similar to the infrared sensor, ultrasonic sensor has one sender and one receiver as well. Ultrasonic sensor can detect the distances of front obstacles. Let’s create a new project to read value from ultrasonic sensor. -
Page 68: Obstacle Avoiding
Alphabot2 for micro:bit User Manual OBSTACLE AVOIDING With the ultrasonic sensor, we can make Robot stop if there is obstacle in the front Robot keeps forward if the distance of obstacle in the front is longer than 15cm at the beginning. -
Page 69: Chapter 11 Line Tracking
Alphabot2 for micro:bit User Manual CHAPTER 11 LINE TRACKING In the bottom side of Alphabot2-base board, tracker sensor is integrated for tracking function. 69 / 76... -
Page 70: Tracker Sensor
Alphabot2 for micro:bit User Manual TRACKER SENSOR The tracker sensor helps the robot move along the black line on the ground. There are five detectors at the bottom of the sensor, and the infrared LED light is used to project infrared light to the ground to detect the deviation of the module relative to the black line. -
Page 71: Original Data
Alphabot2 for micro:bit User Manual ORIGINAL DATA We create a new project, to read the five value (there are five detectors) and print it to -set item to block can be founded in Variable -serial write number serial write string blocks can be founded in Advanced->Serial... - Page 72 115200, 8N1. Data of sensors are printed to serial as below: - If you put the Alphabot2 on the air, the output values are small, about 0~10 - If you put the robot to white ground, the data will rise to 500~700 - If you put it on black line, the output are about 100.
- Page 73 Alphabot2 for micro:bit User Manual 3. We modify the script to output the position of black line -Download the code to micro:bit. When black line is under the tracker sensor, data are smaller to 80~100. The extreme right data is the position of black line. Note that these data are not be calibrated.
-
Page 74: Calibrated Data
Alphabot2 for micro:bit User Manual CALIBRATED DATA We modify the last script to get calibrated data. -Download the script to micro:bit 74 / 76... - Page 75 Alphabot2 for micro:bit User Manual -Put the robot on ground, and make sure the black line is on the center of ground. After 3s (run the code), robot begin to calibrate, turn left first, then turn right, finally turn back to original place. Calibration is done for accurate tacking data...
-
Page 76: Tracking
Alphabot2 for micro:bit User Manual TRACKING We have learned how the tracker sensor work, now let’s create a new project to do the line tracking. -P is the tolerance of position. positive: robot deviation to right; negative: robot deviation to left.
Need help?
Do you have a question about the Alphabot2 and is the answer not in the manual?
Questions and answers