
Related Manuals for Olympus EVIS LUCERA TJF 260V


Summary of Contents for Olympus EVIS LUCERA TJF 260V
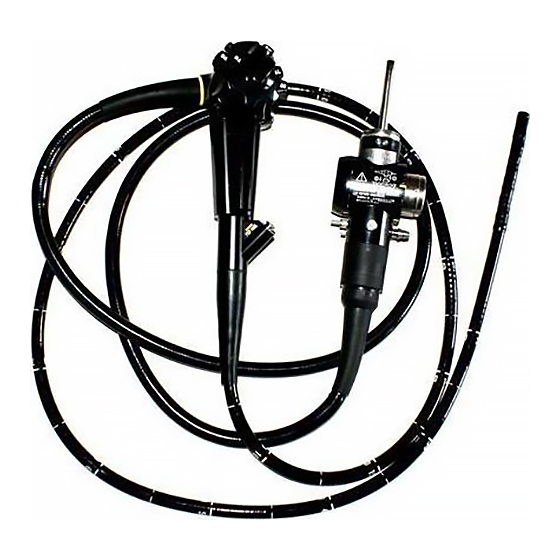
- Page 1 INSTRUCTIONS EVIS LUCERA DUODENOVIDEOSCOPE OLYMPUS JF TYPE 260V OLYMPUS TJF TYPE 260V Refer to the endoscope’s companion manual, the “OPERATION MANUAL” whose cover lists the model of your endoscope, for operation information.
-
Page 3: Table Of Contents
Contents Contents Symbols..................Chapter 1 General Policy ............Instructions..................Importance of cleaning, disinfection and sterilization...... Signal words ................... Precautions ..................Reprocessing before the first use and reprocessing and storage after use ................Chapter 2 Compatible Reprocessing Methods and Chemical Agents ..............Compatibility summary.............. - Page 4 Contents Chapter 5 Storage and Disposal ..........Storage of the endoscope ............... Storage of reusable parts and reprocessing equipment ....Disposal ..................EVIS LUCERA JF/TJF TYPE 260V REPROCESSING MANUAL...
-
Page 5: Symbols
Symbols Symbols The meaning(s) of the symbol(s) shown on the back cover of this instruction manual are as follows: Manufacturer Authorized representative in the European Community EVIS LUCERA JF/TJF TYPE 260V REPROCESSING MANUAL... -
Page 6: Chapter 1 General Policy
Chapter 1 General Policy Instructions • This manual contains the cleaning, disinfection and sterilization methods recommended by Olympus for the endoscopes listed on the front cover. • This instruction manual contains essential information on reprocessing these instruments safely and effectively. -
Page 7: Signal Words
Chapter 1 General Policy Signal words The following signal words are used throughout this manual: Indicates a potentially hazardous situation which, if not avoided, could result in death or serious injury. Indicates a potentially hazardous situation which, if not avoided, may result in minor or moderate injury. It may also be used to alert against unsafe practices or potential equipment damage. - Page 8 • Olympus confirms validation of the endoscope reprocessors recommended by Olympus only. If using endoscope reprocessor that are not recommended by Olympus, the endoscope reprocessor manufacturers are responsible for validation of the endoscope reprocessor with the endoscope models listed in its intended use statement. If using an endoscope reprocessor, confirm that it is capable of reprocessing endoscope including all channels.
- Page 9 For information on the durability against each method, please contact Olympus. If cleaning, disinfection and sterilization methods not stated in this instruction manual are performed, Olympus cannot guarantee the effectiveness, safety and durability of this instrument.
-
Page 10: Reprocessing Before The First Use And Reprocessing And Storage After Use
Chapter 1 General Policy • When reprocessing an endoscope, confirm that the water-resistant cap is securely attached to the endoscope connector before immersion in reprocessing fluids. If the water-resistant cap is not securely attached, water, detergent and/or disinfectant solution could enter the endoscope and damage the equipment. -
Page 11: Chapter 2 Compatible Reprocessing Methods And Chemical Agents
Methods and Chemical Agents Compatibility summary Olympus endoscopic equipment is compatible with several methods of reprocessing. Certain components and accessories, however, are not compatible with some methods, which can cause equipment damage. For appropriate reprocessing methods, refer to Table 2.1 below, the recommendations of your infection control committee and all national and local hospital guidelines and policies. - Page 12 Chapter 2 Compatible Reprocessing Methods and Chemical Agents Steam sterilization (autoclaving) ETO gas sterilization ACECIDE 6% disinfectant solution (use OER-A) 2 – 3.5% glutaraldehyde 70% ethyl or isopropyl alcohol Detergent solution Ultrasonic cleaning Endoscope Water-resistant cap (MH-553) Chain for water-resistant cap (MAJ-1119) Channel cleaning brush (BW-20T)
-
Page 13: Detergent Solution
Use a medical-grade, low-foaming, neutral pH detergent or enzymatic detergent and follow the manufacturer’s dilution and temperature recommendations. Contact Olympus for the names of specific brands that have been tested for compatibility with the endoscope. Do not reuse detergent solutions. -
Page 14: Rinsing Water
Chapter 2 Compatible Reprocessing Methods and Chemical Agents Rinsing water Once removed from disinfectant solution, the instrument must be thoroughly rinsed with sterile water to remove any disinfectant residue. If sterile water is not available, clean potable tap water or water which has been processed (e.g. filtered) to improve its microbiological quality may be used. -
Page 15: Steam Sterilization (Autoclaving) Of Accessories
Chapter 2 Compatible Reprocessing Methods and Chemical Agents ETO gas exposure parameters Process Parameters Temperature 57°C (135°F) Pressure 0.1 – 0.17 MPa (1 – 1.7 kgf/cm (16 – 24 psig) ETO gas sterilization Humidity Exposure time 1.75 hours ETO gas 0.6 –... - Page 16 Chapter 2 Compatible Reprocessing Methods and Chemical Agents • Exceeding the recommended parameters may cause equipment damage (see Table 2.3). Process Parameters 132 – 134°C Temperature (270 – 274°F) Prevacuum Exposure time 5 minutes Table 2.3 Steam sterilization (autoclaving) exposure parameters EVIS LUCERA JF/TJF TYPE 260V REPROCESSING MANUAL...
-
Page 17: Chapter 3 Cleaning, Disinfection And Sterilization Procedures
Chapter 3 Cleaning, Disinfection and Sterilization Procedures Chapter 3 Cleaning, Disinfection and Sterilization Procedures ALL channels of the endoscope, including the elevator wire channel where existing, MUST be cleaned and high-level disinfected or sterilized during EVERY reprocessing cycle, even if the channels were not used during the previous patient procedure. -
Page 18: Required Reprocessing Equipment
Chapter 3 Cleaning, Disinfection and Sterilization Procedures Required reprocessing equipment Preparation of the equipment Prior to cleaning, disinfection or sterilization, prepare the equipment shown in Figure 3.1. Use basins which are at least 40 cm by 40 cm (16” by 16”) in size and deep enough to allow the endoscope to be completely immersed. - Page 19 Chapter 3 Cleaning, Disinfection and Sterilization Procedures Reprocessing equipment parts and functions For inspection of other equipment than that mentioned below, refer to the instruction manual for the equipment being used. Water-resistant cap (MH-553) The water-resistant cap is attached to the electrical connector on the endoscope to protect the connector from water penetration during reprocessing.
- Page 20 Chapter 3 Cleaning, Disinfection and Sterilization Procedures Injection tube (MH-946) The injection tube is used to inject detergent solution, disinfectant solution, water and alcohol into the air/water and suction channels and to flush air through the channels to expel fluids (see Figure 3.4). Suction channel tube Notice card...
- Page 21 Chapter 3 Cleaning, Disinfection and Sterilization Procedures Channel-opening cleaning brush (MH-507) The channel-opening cleaning brush is used to brush the external surfaces of the distal end of the endoscope, the suction cylinder and the instrument channel port (see Figure 3.6). Brush Brush handle Shaft...
- Page 22 Chapter 3 Cleaning, Disinfection and Sterilization Procedures Suction cleaning adapter (MH-856) The suction cleaning adapter is used to aspirate reprocessing fluids from the distal end of the endoscope through the instrument channel (see Figure 3.8). Connecting end Weighted end Figure 3.8 ...
- Page 23 Chapter 3 Cleaning, Disinfection and Sterilization Procedures Inspection of equipment For inspection of other equipment than that mentioned below, refer to the instruction manual for the equipment being used. All equipment mentioned below are consumable items. Should the slightest irregularity be suspected, use a spare instead.
- Page 24 Chapter 3 Cleaning, Disinfection and Sterilization Procedures Attach the 30 cm (30 ml) syringe to the suction channel port. With the filter mesh immersed in rinsing water, withdraw the syringe plunger and confirm that rinsing water is drawn into the syringe. Depress the plunger and confirm that rinsing water is emitted from the distal end of the suction channel tube.
-
Page 25: Cleaning, Disinfection And Sterilization Procedures
Chapter 3 Cleaning, Disinfection and Sterilization Procedures Cleaning, disinfection and sterilization procedures After each procedure, clean, disinfect and sterilize the endoscope according to the procedure described below. Endoscope reprocessing summary chart Withdrawal of the endoscope Precleaning (Section 3.3) Leakage testing (Section 3.4) Manual cleaning (Section 3.5) High-level disinfection (Section 3.6) -
Page 26: Precleaning
Chapter 3 Cleaning, Disinfection and Sterilization Procedures Precleaning If the endoscope is not immediately cleaned after each procedure, residual organic debris will begin to solidify and it may be difficult to effectively reprocess the endoscope. Preclean the endoscope at the bedside in the procedure room immediately after each procedure. - Page 27 Chapter 3 Cleaning, Disinfection and Sterilization Procedures Aspirate detergent solution Monitor the suction bottle on the suction pump carefully to ensure that it does not overflow. Otherwise, suction pump damage could result. Turn the suction pump ON. Attach the biopsy valve cap. Immerse the distal end of the insertion tube in detergent solution.
- Page 28 Chapter 3 Cleaning, Disinfection and Sterilization Procedures Flush water and air into the air/water channel Do not use the AW channel cleaning adapter for patient examinations. It will cause continuous insufflation and could result in patient injury. • To prevent clogging of the air/water nozzle, always use the AW channel cleaning adapter to clean the air/water channel after each use.
- Page 29 Chapter 3 Cleaning, Disinfection and Sterilization Procedures Immerse the distal end of the insertion tube in the clean water (see Figure 3.12). Switch the airflow regulator to maximum output (“HIGH” or “3”). Depress the AW channel cleaning adapter to feed water through the channels for 30 seconds.
- Page 30 Chapter 3 Cleaning, Disinfection and Sterilization Procedures Using the 5 cm (5 ml) syringe, slowly flush detergent solution through the elevator wire channel via the washing tube several times until no air bubbles exit the distal end (see Figure 3.14). Using the 5 cm (5 ml) syringe, slowly flush water through the elevator wire channel via the washing tube several times.
- Page 31 Chapter 3 Cleaning, Disinfection and Sterilization Procedures Detach the AW channel cleaning adapter, washing tube, suction valve and biopsy valve from the endoscope and place them in a container of detergent solution. Detach the distal cover • When detaching the distal cover, forcefully grasping other parts of the bending section can result in damage to the bending mechanism of the bending section or deform its covering.
- Page 32 Chapter 3 Cleaning, Disinfection and Sterilization Procedures Push the distal cover as far as possible toward the endoscope (see Figure 3.16). Turn it counterclockwise until it stops (see Figure 3.16). Pull the distal cover off the endoscope slowly and straightly (see Figure 3.16).
-
Page 33: Leakage Testing
If the exterior of the electrical connector is scratched, the connector may no longer be waterproof and the seal inside the water-resistant cap may be scratched. If the electrical connector is scratched, send it immediately to Olympus for repairs. •... - Page 34 This means that water will be able to penetrate the inside of the endoscope. If you locate a leak, remove the endoscope from the water and contact Olympus. • Never connect or disconnect the water-resistant cap or the leakage tester’s connector cap while immersed.
- Page 35 Chapter 3 Cleaning, Disinfection and Sterilization Procedures • When connecting the leakage tester’s connector cap to the water-resistant cap’s venting connector, make sure that the inside of the leakage tester’s connector cap and the outside of the water-resistant cap’s venting connector are thoroughly dry.
- Page 36 Chapter 3 Cleaning, Disinfection and Sterilization Procedures With the leakage tester connected, immerse the endoscope in the water and observe for approximately 30 seconds while angulating the bending section. Confirm that there is no location on the endoscope from which a continuous series of air bubbles emerges.
-
Page 37: Manual Cleaning
Chapter 3 Cleaning, Disinfection and Sterilization Procedures Manual cleaning To prevent a water leak, do not apply excessive force when washing the endoscope. After completing the leakage test, perform manual cleaning according to the procedures described below. In case of excessive bleeding and/or delayed reprocessing, first follow the procedure described in “Presoak for excessive bleeding and/or delayed reprocessing after each procedure”... - Page 38 Chapter 3 Cleaning, Disinfection and Sterilization Procedures To prevent damage to the endoscope, never immerse it together with objects other than the equipment listed above. Preparation Fill a basin with detergent solution at the temperature and concentration recommended by the detergent manufacturer. Use a basin which is at least 40 cm by 40 cm (16”...
- Page 39 Chapter 3 Cleaning, Disinfection and Sterilization Procedures Brushing around the forceps elevator and instrument channel outlet Using a stiff brush or excessive force when brushing may scratch the distal end and result in water leakage; cause the elevator wire to come off the distal end, bend or kink the elevator wire so that the forceps elevator will no longer work.
- Page 40 Chapter 3 Cleaning, Disinfection and Sterilization Procedures Groove Figure 3.21 Channel-opening cleaning brush Figure 3.22 Guidewire-locking groove Figure 3.23 EVIS LUCERA JF/TJF TYPE 260V REPROCESSING MANUAL...
- Page 41 Depending on the location, the missing part may not be recoverable by passing a new brush or other endo-therapy accessory through the channel. In this case, contact Olympus. • Withdraw the channel cleaning brush from the suction channel gently, ensuring that its shaft does not rub against the external opening of the suction cylinder.
- Page 42 Chapter 3 Cleaning, Disinfection and Sterilization Procedures While the endoscope is submerged, brush the instrument and suction channels, suction cylinder and instrument channel port according to the following procedures (see Figure 3.24). Suction cylinder Instrument channel port Suction connector Figure 3.24 ...
- Page 43 Chapter 3 Cleaning, Disinfection and Sterilization Procedures Brushing the suction channel in the universal cord (location B) Grip the channel cleaning brush at a point 3 cm from the bristles. Insert the channel cleaning brush straight into the opening of the suction cylinder as illustrated by B in Figure 3.24.
- Page 44 Chapter 3 Cleaning, Disinfection and Sterilization Procedures Reprocess the cleaning brushes as described in Section 3.9, “Cleaning, disinfection and sterilization procedures for reusable parts and reprocessing equipment”. Remove the endoscope from the detergent solution. Aspirating detergent solution into the instrument channel and the suction channels Attach the suction cleaning adapter to the instrument channel port (see Figures 3.25 and 3.26).
- Page 45 Chapter 3 Cleaning, Disinfection and Sterilization Procedures Instrument Weighted end channel port Suction channel Suction cleaning adapter Instrument Insertion tube Suction channel cylinder Universal cord Suction connector Endoscope connector Suction tube Suction bottle Suction pump Figure 3.26 Flushing the interior of the forceps elevator Immerse the distal end in detergent solution, and operate the elevator control lever to raise and lower the forceps elevator 3 times.
- Page 46 Chapter 3 Cleaning, Disinfection and Sterilization Procedures Flushing detergent solution into the air/water channels Attach the channel plug’s biopsy valve cap to the instrument channel port (see Figure 3.28). Lower the channel plug’s cylinder plug onto the air/water and suction cylinders (see Figure 3.28).
- Page 47 Chapter 3 Cleaning, Disinfection and Sterilization Procedures Syringe Air/water channel tube Suction channel tube Suction port Air pipe port Basin Detergent solution Connector plug Figure 3.29 Channel plug Biopsy valve cap Air channel Air/water cylinder Water channel Air/water nozzle Suction cylinder Connector plug Water supply connector Air supply connector...
- Page 48 Chapter 3 Cleaning, Disinfection and Sterilization Procedures Flushing detergent solution into the elevator wire channel Connect the washing tube to the elevator channel plug (see Figure 3.31). Elevator channel plug Washing tube Figure 3.31 Using the 5 cm (5 ml) syringe, inject 15 cm (15 ml) of detergent solution into the elevator wire channel via the washing tube (see Figure 3.32).
- Page 49 Chapter 3 Cleaning, Disinfection and Sterilization Procedures Soaking the endoscope and all reprocessing equipment in detergent solution Using a lint-free cloth, wipe all debris from the endoscope’s external surfaces while the endoscope is immersed in the detergent solution. Cover the basin with a tight fitting lid to minimize the diffusion of detergent vapors.
- Page 50 Chapter 3 Cleaning, Disinfection and Sterilization Procedures Using the 30 cm (30 ml) syringe, flush the air/water and suction channels with 90 cm (90 ml) of air, respectively, via the injection tube (see Figures 3.30 and 3.33). Using the 5 cm (5 ml) syringe, flush the elevator wire channel with 10 cm (10 ml) of air via the washing tube (see Figures 3.31 and 3.32).
- Page 51 Chapter 3 Cleaning, Disinfection and Sterilization Procedures Presoak for excessive bleeding and/or delayed reprocessing after each procedure Follow the steps below only in cases of excessive bleeding and/or delayed reprocessing; unnecessary immersions should be avoided. Consecutive extended immersions may damage the endoscope. Fill a basin with detergent solution at the temperature and concentration recommended by the detergent manufacturer.
-
Page 52: High-Level Disinfection
Chapter 3 Cleaning, Disinfection and Sterilization Procedures High-level disinfection All disinfection steps should be performed with the endoscope and all equipment completely immersed in disinfectant solution. If the equipment is connected to the endoscope while they are immersed, or any part of them is not immersed completely, disinfectant solution may not adequately contact all surfaces of the equipment. - Page 53 Chapter 3 Cleaning, Disinfection and Sterilization Procedures Flushing disinfectant solution into all channels Completely remove all air bubbles from all channels. Disinfection effects cannot be obtained if air bubbles remain in the channels. Air bubbles removal can be facilitated by injecting disinfectant solution into the channels with strong force.
- Page 54 Chapter 3 Cleaning, Disinfection and Sterilization Procedures Soak the endoscope and all equipment in disinfectant solution for the amount of time and at the temperature and concentration recommended by the disinfectant manufacturer. Removing the endoscope and all equipment from disinfectant solution Before removing the endoscope from the disinfectant solution, connect the channel plug and injection tube to the endoscope.
-
Page 55: Rinsing After High-Level Disinfection
Chapter 3 Cleaning, Disinfection and Sterilization Procedures Rinsing after high-level disinfection After reprocessing, purge the channels of the endoscope to thoroughly dry them. Otherwise, bacteria may proliferate in the channels and pose an infection-control risk to the patient and/or operators performing the next procedure with the endoscope. - Page 56 Chapter 3 Cleaning, Disinfection and Sterilization Procedures Sterile water rinse Fill a basin with sterile water. Use a basin which is at least 40 cm by 40 cm (16” by 16”) in size and deep enough to allow the endoscope to be completely immersed.
- Page 57 Chapter 3 Cleaning, Disinfection and Sterilization Procedures Flushing the channels with 70% ethyl or isopropyl alcohol after rinsing them with sterile water facilitates drying inside the channels. Non-sterile water rinse and alcohol flush Inject non-sterile water and air following the procedures given in “Sterile water rinse”...
-
Page 58: Sterilization
Chapter 3 Cleaning, Disinfection and Sterilization Procedures Sterilization ETO gas sterilization As an alternative to high-level disinfection, the endoscope can be sterilized by ethylene oxide (ETO) gas. After performing manual cleaning and drying as described in Section 3.3, “Precleaning” and Section 3.5, “Manual cleaning”, follow the procedures given below. - Page 59 Chapter 3 Cleaning, Disinfection and Sterilization Procedures Sterilize the package according to the recommended ETO gas exposure parameters described in Section 2.5, “ETO gas sterilization” and the sterilizer manufacturer’s instructions. Aerate the components following the minimum aeration parameters specified in Section 2.5, “ETO gas sterilization”. Store the components following the instructions given in Chapter 5, “Storage and Disposal”.
-
Page 60: Cleaning, Disinfection And Sterilization Procedures For Reusable Parts And Reprocessing Equipment
Chapter 3 Cleaning, Disinfection and Sterilization Procedures Cleaning, disinfection and sterilization procedures for reusable parts and reprocessing equipment This section includes the cleaning, disinfection and sterilization procedures for the reusable parts and reprocessing equipment listed below. • Air/water valve (MH-438) •... - Page 61 Chapter 3 Cleaning, Disinfection and Sterilization Procedures Manual cleaning • Make sure that the items immersed in detergent solution do not contact one another. • Make sure not to scratch the seals on the air/water valve and AW channel cleaning adapter with brushes, etc. Fill a small basin with clean water.
- Page 62 Chapter 3 Cleaning, Disinfection and Sterilization Procedures Using the 30 cm (30 ml) syringe, flush the interior and openings of all equipment until no air bubbles can be seen. While immersed, depress and release the pistons of the air/water valves, suction valves and AW channel cleaning adapter.
- Page 63 Chapter 3 Cleaning, Disinfection and Sterilization Procedures High-level disinfection • Completely remove air bubbles from all equipment. Disinfection effects cannot be obtained if air bubbles remain on the equipment. • All disinfection steps should be performed with all equipment completely immersed. If any part of the equipment is not immersed completely, disinfectant solution may not adequately contact all surfaces.
- Page 64 Chapter 3 Cleaning, Disinfection and Sterilization Procedures Rinsing after high-level disinfection After high-level disinfection, rinse all equipment according to the procedures described below. Use water of appropriate microbiological quality. Once removed from disinfectant solution, the instrument must be thoroughly rinsed with sterile water to remove any disinfectant residue.
- Page 65 Chapter 3 Cleaning, Disinfection and Sterilization Procedures Dry all equipment thoroughly. Store the components following the instructions given in Chapter 5, “Storage and Disposal”. Flushing the channels with 70% ethyl or isopropyl alcohol after rinsing them with sterile water facilitates drying inside the channels.
- Page 66 Chapter 3 Cleaning, Disinfection and Sterilization Procedures Sterilization Some components are compatible with several sterilization methods. Certain components, however, are not compatible with some methods, which can cause equipment damage. In this section, the sterilization methods for equipment compatible with ETO gas sterilization or steam sterilization (autoclaving), listed in Table 2.1, are described below.
-
Page 67: Cleaning, Disinfection And Sterilization Procedures For Distal Cover
Chapter 3 Cleaning, Disinfection and Sterilization Procedures Seal the individual parts or equipment separately in packages appropriate for steam sterilization (autoclaving) according to your hospital’s protocol. Steam sterilize the packages according to the recommended steam sterilization (autoclaving) exposure parameters given in Section 2.6, “Steam sterilization (autoclaving) of accessories”... - Page 68 Chapter 3 Cleaning, Disinfection and Sterilization Procedures Manual cleaning To prevent damage, make sure that the items immersed in detergent solution do not contact one another. Fill a small basin with clean water. Use a basin which is deep enough to allow the distal cover to be completely immersed.
- Page 69 Chapter 3 Cleaning, Disinfection and Sterilization Procedures High-level disinfection Fill a small basin with disinfectant solution at the temperature and concentration recommended by the disinfectant manufacturer. Use a basin which is deep enough to allow the distal cover to be completely immersed. Immerse the distal cover in the disinfectant solution.
- Page 70 Chapter 3 Cleaning, Disinfection and Sterilization Procedures Non-sterile water rinse and alcohol flush Prepare a small basin with clean water. Immerse the distal cover in clean water and follow the procedures given in “Sterile water rinse” on page 65. Fill a small basin with 70% ethyl or isopropyl alcohol.
- Page 71 Chapter 3 Cleaning, Disinfection and Sterilization Procedures Seal the distal cover separately in packages appropriate for steam sterilization (autoclaving) according to your hospital’s protocol. Steam sterilize the packages according to the recommended steam sterilization (autoclaving) exposure parameters as described in Section 2.6, “Steam sterilization (autoclaving) of accessories”...
-
Page 72: Chapter 4 Cleaning And Disinfection Equipment
Chapter 4 Cleaning and Disinfection Equipment The endoscope is compatible with some endoscope reprocessors recommended by Olympus. Refer to the instruction manual of the endoscope reprocessor for details on operation. • Thoroughly clean the endoscope as described in Chapter 3, “Cleaning, Disinfection and Sterilization Procedures”... - Page 73 Chapter 4 Cleaning and Disinfection Equipment • Before using an endoscope reprocessor, confirm that it is capable of reprocessing the endoscope including all channels. If there are channels and/or other parts of the endoscope that cannot be cleaned and/or high-level disinfected by the endoscope reprocessor, manual cleaning and high-level disinfection or sterilization must be performed as described in Chapter 3, “Cleaning, Disinfection and...
- Page 74 Chapter 4 Cleaning and Disinfection Equipment • The elevator wire channel may not be properly high-level disinfected by all reprocessors. If using a reprocessor, please contact the manufacturer of the reprocessor for certification that the elevator wire channel can be efficaciously high-level disinfected in their unit.
-
Page 75: Chapter 5 Storage And Disposal
Chapter 5 Storage and Disposal Chapter 5 Storage and Disposal • Keep the reprocessed endoscope and accessories away from the contaminated equipment after cleaning and disinfection or sterilization. If the clean endoscope and accessories become contaminated between procedures, they could present an infection control risk to the patient and/or operators in the subsequent procedure. -
Page 76: Storage Of Reusable Parts And Reprocessing Equipment
Chapter 5 Storage and Disposal Storage of reusable parts and reprocessing equipment Confirm that all reusable parts and reprocessing equipment are dry. Store all reusable parts in the storage cabinet. Make sure that the parts do not touch each other during storage. Store all reprocessing equipment in a container, then place the container in the storage cabinet. - Page 79 ©2005 OLYMPUS MEDICAL SYSTEMS CORP. All rights reserved. No part of this publication may be reproduced or distributed without the express written permission of OLYMPUS MEDICAL SYSTEMS CORP. OLYMPUS is a registered trademark of OLYMPUS CORPORATION. Trademarks, product names, logos, or trade names used in this document are generally registered trademarks or trademarks of each company.
- Page 80 A8F, Ping An International Financial Center, No. 1-3, Xinyuan South Road, Chaoyang District, Beijing, 100027 P.R.C. Fax: (86)10-5976-1299 Telephone: (86)10-5819-9000 Olympus Tower 9F, 446, Bongeunsa-ro, Gangnam-gu, Seoul, Korea 135-509 Fax: (02)6255-3494 Telephone: (02)6255-3210 491B, River Valley Road #12-01/04, Valley Point Office Tower, Singapore 248373...
Need help?
Do you have a question about the EVIS LUCERA TJF 260V and is the answer not in the manual?
Questions and answers