
Related Manuals for Frigomat TAYLOR C153


Summary of Contents for Frigomat TAYLOR C153
- Page 1 MANUALE D’USO E MANUTENZIONE OPERATING INSTRUCTION AND MAINTENANCE MANUAL DE USO Y MANTENIMIENTO Serie C154 C153 C151...
-
Page 2: Appendixes A
IMPORTANT We recommend that you read this manual fully and carefully before using your appliance. It is in your interest to pay special attention to the warnings marked as follows: Failure to comply with this signal causes very serious risks for health, death, and medium and long term permanent damage. -
Page 3: C154
The following pages carry all of the indications required to perform installation, operation, adjustments and routine maintenance correctly. FRIGOMAT S.r.l. reserves the right to carry out the modifications it deems necessary to improve its product or the technical manual without prior warning, inserting the variations in the subsequent editions. -
Page 4: Table Of Contents
1. TRANSPORTATION, HANDLING AND STORAGE ........4 Preliminary inspection and storage ........4 Dimensions and weights of packaged machines ....4 Indications for decommissioning .......... 4 2. MARKING AND GRAPHIC SIGNS ............5 3. GENERAL SAFETY STANDARDS ............7 4. INSTALLATION ..................8 Use .................. -
Page 5: Transportation, Handling And Storage
1 TRANSPORTATION, HANDLING AND STORAGE. 1.1 PRELIMINARY INSPECTION AND STORAGE The machine is transported at the risk and peril of the customer. If you notice any damage to the packaging, inform the carrier immediately. Inform the carrier immediately after opening the package if the machine is damaged even if a few days after delivery. -
Page 6: Marking And Graphic Signs
2. MARKING AND GRAPHICAL SIGNS The machine is provided with an identification plate and several pictograms. They must be known along with the manual to guarantee safe use. Machine data plate The adhesive plate applied on the rear enables to identify the model. - Page 7 Attention! High voltage inside; electrocution hazard. This plate is applied on the cover of the electrical box and warns the operator that it must not be removed for any reason whatsoever, thus avoiding the danger of electrocution which could be fatal. In this case also, maintenance of internal components is reserved for qualified personnel.
-
Page 8: General Safety Standards
Use only FRIGOMAT original spare parts when performing maintenance. The manufacturer will not be held liable for damage caused by use of non-original spare parts. Use of non-original spare parts entails automatic termination of the warranty. -
Page 9: Installation
< = 72 dB (A) C153 < = 70 dB (A) C151 < = 70 dB (A) 4.4 SUPPLIED WITH MACHINE Ice cream extraction spatula Use and maintenance manual Brush Declaration of conformity Gasket extractor Warranty certificate O-ring kit FRIGOMAT lubricant ENGLISH - 8... -
Page 10: Activation
4.5 ACTIVATION FRIGOMAT declines all and any liability for damage caused by failure to comply with the following indications. This lack of compliance causes the warranty to terminate. Connection of the machine to the water mains must be performed in compliance with national regulations of the Country where the machine is installed. - Page 11 • If needed, carry out an equipotential bonding, using the screw placed on the rear of the machine below the frame and marked with the symbol shown to the left. • Make sure that the cold water supply line intended for condensation has pressure values between 1 and 3 BAR (between 100 kPa and 300 kPa) and temperature between 13°...
- Page 12 • Operating temperature should be between 15° and 35°C. • Humidity should be between 30 and 60%. FRIGOMAT s.r.l. will not be held liable for personal harm and/or damage to objects deriving from incorrect installation and/or by failure to comply with work accident- prevention standards.
-
Page 13: Safety Devices
5. SAFETY DEVICES Shearing-prevention safety device: Implemented by means of a safety circuit compliant with the European directive, it intervenes when the lid is opened and/or when the door is removed, temporarily switching the machine to STOP mode. Beater motor overheating safety device: Implemented by means of an automatic integrated circuit breaker;... -
Page 14: Operation
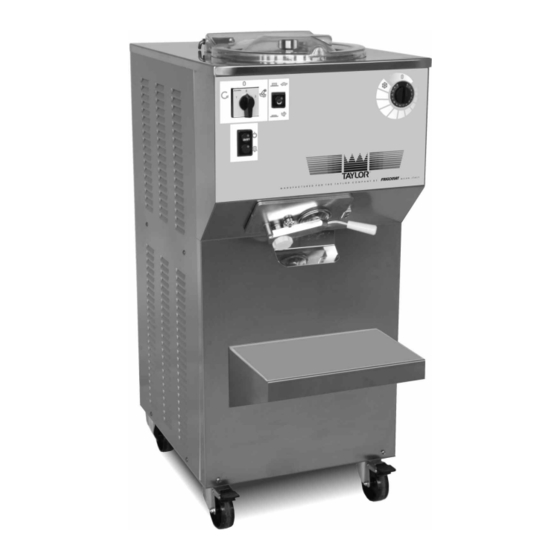
6. OPERATION 6.1 MACHINE 2. Lid Made in transparent material, it allows to follow the work phases in total safety. 2. Safety magnets They intervene when the lid is opened or the door is removed by switching the machine to Stop. -
Page 15: Control Panel
6.2 CONTROL PANEL 1. ON/OFF key With grey LED, by pressing the ON/OFF key it switches the machine to ON and the LED turns green. With green LED, by pressing the ON/OFF key it switches the machine to OFF and the LED turns grey. 2. -
Page 16: Slush And Ice Cream Production
6.3 ICE CREAM AND SLUSH PRODUCTION After having installed the machine in compliance with the instructions of chapter 3 and having accurately washed and sanitized it, according to the instructions contained in chapter 7, proceed as follows to start ice cream making: - Make sure that the gate valve of cold water for condensation is open (water models only). - Page 17 - Turn the batch freezing timer knob to the desired time. This operation enables compressor functioning and starts production. Always remember to start the batch freezing time otherwise the production cycle cannot start. - If the acoustic warning is to be given when the batch freezing time has expired, press the BUZZER key and make sure that the key LED is green.
-
Page 18: Extraction
6.4 EXTRACTION To extract the product at the end of a productive cycle, refer to the following instructions: - Position a cold and clean tub of adequate capacity on the front shelf of the machine. - Check that the production cycle has ended and the timer is at position 0 for at least 30”. -
Page 19: Maintenance
However this is not enough to prevent the formation of mould and bacteria caused by insufficient or incorrect cleaning. FRIGOMAT recommends thoroughly washing and sanitizing the parts in direct contact with the product after each work shift and in compliance with hygienic standards in force in the Country where the machine is installed. - Page 20 • Pour the maximum admitted load of cold drinking water into the machine to rinse the surfaces which were just treated with the sanitizer. • Drain the rinse water and turn the machine off. • When pre-washing is over, all the removable parts in contact with the product must be disassembled and sanitized in a separate tub.
- Page 21 REMOVING AND CLEANING THE DOOR • Turn the dispenser disk to maximum opening position. • Loosen the steel knob that fixes the door to the front panel of the machine. Handle the door with great care, supporting it with a hand while loosening the knob: because of its great weight, should it fall, it could cause injuries to staff and damages to objects.
- Page 22 REMOVING AND CLEANING BEATER • Loosen the knob and remove the OR gasket. • Slide the beater upwards and remove the scrapers. • Remove the bush positioned in the lower part of the beater. • Immerse previously disassembled components into the tub with the sanitizer and brush the surfaces with care.
- Page 23 SANITIZING FIXED PARTS While the removable parts soak in the sanitizer inside the tub, proceed sanitizing the fixed parts of the machine: SANITIZING THE CYLINDER • Immerse a disposable paper cloth in the sanitizing liquid. • Pass the cloth over all the batch freezing cylinder surfaces.
- Page 24 RINSING AND DRYING • Wash your hands well and/or wear disposable latex gloves. • Remove all the components which were previously disassembled, brushed and immersed from the sanitizing tank. • Rinse them with plenty of cold drinking water, making sure to remove all possible leftover sanitizing solution. •...
-
Page 25: Troubleshooting
8 TROUBLESHOOTING PROBLEM PROBABLE CAUSES REMEDIES Master switch open. Close the switch. The machine does not Lower the lid and/or check that it is Lid raised or not assembled. start assembled correctly. (ON/OFF button active No door. Assemble the door on the machine. with green LED). - Page 26 9 APPENDICI / APPENDICES / ANNEXES / ANHANG / APENDICES 9.1 1 Dati tecnici / Machine specifications / Caractéristiques techniques / Technische Daten / Datos Tecnicos Modello Alimentazione Condensazione Potenza Altezza Largh. Profondità Peso Model Current Cooling Power R404 Height Width Dept Weight...
- Page 27 C154-C153 C151 APPENDICI - 2...
- Page 28 9.2 Schema circuito frigorifero Refrigerant circuit diagram / Schéma du circuit frigorifique / Kühlnetzplan / Esquema circuito frigorifico 3 - APPENDICI...
- Page 29 9.3 IMPIANTO ELETTRICO / ELECTRIC SYSTEM / GROUPE ELECTRIQUE / ELEKTRISCHE ANLAGE / INSTALACION ELECTRICA Lo schema elettrico funzionale ed il lay-out del box elettrico, specifico per ogni modello, è collocato sulla parte esterna del coperchio del box stesso. The functional wiring diagram and the electric box lay-out, different for each model are located on the box cover.
-
Page 30: Technical Data
In case it is necessary to replace a component, always ask a distributor or an authorized retailer for ORIGINAL spare parts. FRIGOMAT declines any liability for damages to people and/or things due to employment of non-original spare parts. - Page 31 APPENDICI - 6...
- Page 32 C154-C153 s02 Tav.1 VII -...
- Page 33 C154-C153 s02 Tav.1 COD. Mod. DESCRIZIONE DESCRIPTION DESCRIPTION BESCHREIBUNG DESCRIPTION A01.39790 Telaio Frame Châssis Gestell Armazón C153-C154 A02.39825 Pannello laterale Side panel Panneau latéral Seitenpaneel Panel lateral. C153-C154 A02.39795 Pannello anteriore Front panel Panneau antérieur Vorderpaneel Panel anterior C153-C154 E07.41194 Commutatore Switch Basculer...
- Page 34 C151 s02 Tav.2 IX - APPENDICI...
- Page 35 C151 s02 Tav.2 COD. DESCRIZIONE DESCRIPTION DESCRIPTION BESCHREIBUNG DESCRIPTION A01.40052 Telaio Frame Châssis Gestell Armazón A02.40069 Panel lateral. Pannello laterale Side panel Panneau latéral Seitenpaneel A02.40066 Pannello anteriore Front panel Panneau antérieur Vorderpaneel Panel anterior E07.41210 Pulsante Pushbuttons Tasten Boutons Pulsadores E07.41192 Commutatore...
- Page 36 C154 A s02 Tav.3 XI - APPENDICI...
- Page 37 C154 A s02 Tav.3 COD. DESCRIZIONE DESCRIPTION DESCRIPTION BESCHREIBUNG DESCRIPTION A07.032 Filtro Filter Filtre Filter Filtro Compressore Compressor Compresseur Kompressor Compresor B01.37142 400/50/3 400/50/3 400/50/3 400/50/3 400/50/3 Compressore Compressor Compresseur Kompressor Compresor A01.236 220/60/1 220/60/1 220/60/1 220/60/1 220/60/1 A02.140 Pressostato Pressure switch Pressostat Druckwächter...
- Page 38 C153 A s02 Tav.4 XIII -...
- Page 39 C153 A s02 Tav.4 COD. DESCRIZIONE DESCRIPTION DESCRIPTION BESCHREIBUNG DESCRIPTION A07.032 Filtro Filter Filtre Filter Filtro Compressore Compressor Compresseur Kompressor Compresor B01.39086 400/50/3 400/50/3 400/50/3 400/50/3 400/50/3 Compressore Compressor Compresseur Kompressor Compresor B01.39922 220/60/3 220/60/3 220/60/3 220/60/3 220/60/3 Compressore Compressor Compresseur Kompressor Compresor...
- Page 40 C153 W s02 Tav.5 XV -...
- Page 41 C153 W s02 Tav.5 COD. DESCRIZIONE DESCRIPTION DESCRIPTION BESCHREIBUNG DESCRIPTION A07.032 Filtro Filter Filtre Filter Filtro Compressore Compressor Compresseur Kompressor Compresor B01.39086 400/50/3 400/50/3 400/50/3 400/50/3 400/50/3 Compressore Compressor Compresseur Kompressor Compresor B01.39922 220/60/3 220/60/3 220/60/3 220/60/3 220/60/3 Compressore Compressor Compresseur Kompressor Compresor...
- Page 42 C151 A s02 Tav.6 XVII -...
- Page 43 C151 A s02 Tav.6 COD. DESCRIZIONE DESCRIPTION DESCRIPTION BESCHREIBUNG DESCRIPTION B04.35032 Filtro Filter Filtre Filter Filtro Schwingungs- R09.001.02 Antivibrante Vibration damper Antivibratoire Antivibrante dämpfer Compressore Compressor Compresseur Kompressor Compresor B01.39010 400/50/3 400/50/3 400/50/3 400/50/3 400/50/3 Compressore Compressor Compresseur Kompressor Compresor B01.39009 220/60/3 220/60/3...
- Page 44 C151 W s02 Tav.7 XIX -...
- Page 45 C151 W s02 Tav.7 COD. DESCRIZIONE DESCRIPTION DESCRIPTION BESCHREIBUNG DESCRIPTION B04.35032 Filtro Filter Filtre Filter Filtro Condensatore ad Condensateur á Condensador de A03.091 Water condenser Wasserkondensator acqua agua A02.140 Pressostato Pressure switch Pressostat Druckwächter Presóstato Capillare valvola Capillary tube for Capillaire soupape Kapillares Capilar válvula...
- Page 46 C154-C153 s02 Tav.8 XXI -...
- Page 47 C154-C153 s02 Tav.8 COD. MOD. DESCRIZIONE DESCRIPTION DESCRIPTION BESCHREIBUNG DESCRIPTION P11.39974 Boccola Bushing Douille Buchse Anillo-Hebilla C153-C154 Canotto Tube de Tubo de L21.39800 Transmission tube Rohr C153-C154 trasmissione transmission transmisión P02.38065 OR 2125 OR 2125 OR 2125 OR 2125 OR 2125 C153-C154 Supporto Support de...
- Page 48 C151 s02 Tav.9 XXIII -...
- Page 49 C151 s02 Tav.9 COD. DESCRIZIONE DESCRIPTION DESCRIPTION BESCHREIBUNG DESCRIPTION P11.40101 Boccola Bushing Douille Buchse Anillo-Hebilla Canotto Transmission Tube de Tubo de L21.40065 Rohr trasmissione tube transmission transmisión P10.134 OR 2150 OR 2150 OR 2150 OR 2150 OR 2150 Supporto Support de suporte A04.40060 Drive bearing...
- Page 50 C154 s02 Tav.10 XXV -...
- Page 51 C154 s02 Tav.10 COD. DESCRIZIONE DESCRIPTION DESCRIPTION BESCHREIBUNG DESCRIPTION B65.38564 Coperchio Cover Deckel Couvercle Tapa L18.40088 Terminale pomolo Knob terminal Knauf-Endteil Terminale Bague Terminal pomo L18.39909 Pomolo agitatore Knob agitator Rührwerkknauf Bague agitateur Pomo agitador P10.045 OR 3100 OR 3100 OR 3100 OR 3100 OR 3100...
- Page 52 C153 s02 Tav.11 XXVII -...
- Page 53 C153 s02 Tav.11 COD. DESCRIZIONE DESCRIPTION DESCRIPTION BESCHREIBUNG DESCRIPTION B65.38563 Coperchio Cover Deckel Couvercle Tapa L18.40087 Terminale pomolo Knob terminal Knauf-Endteil Terminale Bague Terminal pomo L18.39909 Pomolo agitatore Knob agitator Rührwerkknauf Bague agitateur Pomo agitador P10.045 OR 3100 OR 3100 OR 3100 OR 3100 OR 3100...
- Page 54 C151 s02 Tav.12 XXIX -...
- Page 55 C151 s02 Tav.12 COD. DESCRIZIONE DESCRIPTION DESCRIPTION BESCHREIBUNG DESCRIPTION B65.38563 Coperchio Cover Deckel Couvercle Tapa L18.39909 Pomolo agitatore Knob agitator Rührwerkknauf Bague agitateur Pomo agitador P10.045 OR 3100 OR 3100 OR 3100 OR 3100 OR 3100 B61.40080 Agitatore Agitator Rührwerk Agitateur Agitador Pattino raschiante...
- Page 56 C154-C153-C151 s02 Tav.13 XXXI -...
- Page 57 C154-C153-C151 s02 Tav.13 COD. Mod. DESCRIZIONE DESCRIPTION DESCRIPTION BESCHREIBUNG DESCRIPTION Étiquette M02.39977 Etichetta anteriore Lower label Vorderes Etikett Etiqueta delantera C153-C154 antérieure Étiquette M02.40284 C151 Etichetta anteriore Lower label Vorderes Etikett Etiqueta delantera antérieure Z85.39889 Assieme portello Door assy Porte compl. Kompl.
- Page 58 C154-C153 s02 Tav.14 XXXIII -...
- Page 59 C154-C153 s02 Tav.14 400/50/3 COD. DESCRIZIONE DESCRIPTION DESCRIPTION BESCHREIBUNG DESCRIPTION E08.39839 Trasformatore Transformer Transformateur Transformator Transformador E08.39130 Fusibile 50 mA Fuse 50 mA Fusible 50 mA Sicherung 50 mA Fusibile 50 mA E08.39277 Fusibile 2,5 A Fuse 2,5 A Fusible 2,5 A Sicherung 2,5 A Fusibile 2,5 A E08.37283...
- Page 60 C151 s02 Tav.15 XXXV -...
- Page 61 C151 s02 Tav.15 400/50/3 COD. DESCRIZIONE DESCRIPTION DESCRIPTION BESCHREIBUNG DESCRIPTION E08.39839 Trasformatore Transformer Transformateur Transformator Transformador E08.39130 Fusibile 50 mA Fuse 50 mA Fusible 50 mA Sicherung 50 mA Fusibile 50 mA E08.39277 Fusibile 2,5 A Fuse 2,5 A Fusible 2,5 A Sicherung 2,5 A Fusibile 2,5 A E08.37283...
- Page 62 NOTE / NOTES / NOTES / BEMERKUNG / NOTA...
- Page 64 FRIGOMAT s.r.l., via 1° Maggio 26862 GUARDAMIGLIO (LO) – ITALIA tel. 0377.415011 – Fax. 0377.451079 www.frigomat.com info@frigomat.com 2018 cod. M04.39833...
Need help?
Do you have a question about the TAYLOR C153 and is the answer not in the manual?
Questions and answers