Nordmann Engineering AT4 D Operating Instructions Manual
Hide thumbs
Also See for AT4 D:
- Installation and operation manual (32 pages) ,
- Installation and operating instructions manual (76 pages) ,
- Service manual (36 pages)

Related Manuals for Nordmann Engineering AT4 D


Summary of Contents for Nordmann Engineering AT4 D
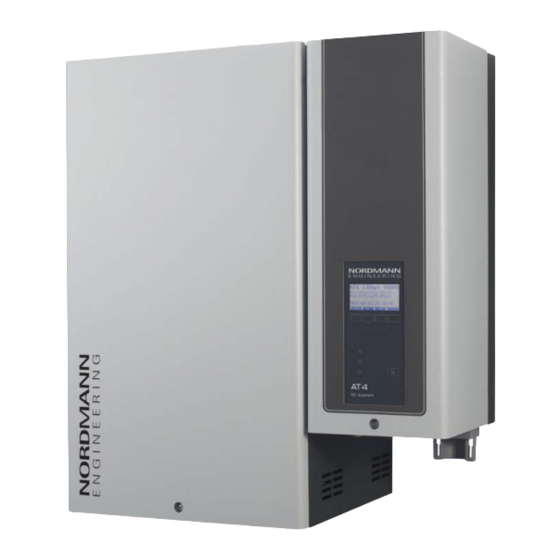
- Page 1 NORDMANN E N G I N E E R I N G Nordmann AT4 D Steam generator OPERATING INSTRUCTIONS 2559432 EN 1412...
-
Page 3: Table Of Contents
Contents Introduction Modbus settings 5.4.1 Settings for Modbus networks To the very beginning 5.4.2 Settings for the communication with the Notes on the operating instructions optional remote terminal For your safety 5.5 Diagnostic functions 5.5.1 Interrogation of the error history Product Overview 5.5.2 Interrogation of unit information Models overview 5.5.3 Performing remote steam bath tests 3.2 Identification of the unit 5.5.4 Performing remote relay tests Steam generator construction 5.5.5 Performing Module tests Functional description... -
Page 4: Introduction
The steam generator Nordmann AT4 D incorporates the latest technical ad van ces and meets all recognized safety standards. Nevertheless, improper use of the Nordmann AT4 D may result in danger to the user or third parties and/or impairment of material assets. - Page 5 Explanation of the symbols used in this manual CAUTION! The catchword “CAUTION” designates notes in this documentation that, if neglected, may cause damage and/or malfunction of the unit or other material assets. WARNING! The catchword “WARNING” used in conjunction with the general caution symbol designates safety and danger notes in this documentation that, if neglected, may cause to injury to persons.
-
Page 6: For Your Safety
It is assumed that all persons working with the Nordmann AT4 D are fa miliar and comply with the appropriate regulations on work safety and the prevention of accidents. - Page 7 Danger that may arise from the unit DANGER! Danger of electric hazard! The Nordmann AT4 D is mains powered. One may get in touch with live parts when the unit is open. Touching live parts may cause se- vere injury or danger to life.
-
Page 8: Product Overview
Product Overview Models overview Steam generators Nordmann AT4 D are available with different heating voltages and steam capacities ranging from 5 kg/h up to a maximum of 65 kg/h. Heating voltage ** Max. steam capacity Model Unit size in kg/h... -
Page 9: Identification Of The Unit
Identification of the unit The identification of the unit is found on the type plate: Type designation Serial number (7 digits) Month/Year Nordmann Engineering AG, CH-3562 Pfäffikon Heating voltage Type: AT4 D 4564 Ser.Nr.: XXXXXXX 02.10 Heating voltage: 400V / 3~ / 50...60Hz Power: 33.8 kW... -
Page 10: Steam Generator Construction
Steam generator construction figure shows medium unit Steam cylinder compartment (small, medium, large) Water cup Control compartment Filling and draining hose Water supply hose Power board Main contactor Overflow hose Transformer Inlet valve Steam bath board Drain pump Connecting terminals Drain cup Type plate Steam cylinder receptacle... -
Page 11: Functional Description
Functional description The steam generator Nordmann AT4 D is a pressureless steam generator that utilizes an electrode heating. The steam generator Nordmann AT4 D is designed for steam generation for steam baths. Steam hose Steam distributor Water cup Current sensor... - Page 12 Upon reaching the requested steam capacity, the inlet valve closes. If the steam generation decreases below a certain percentage of the required capacity, due to lowering of the water level (e.g. because of the evapora tion process or drainage), the inlet valve opens until the required capacity is available again.
-
Page 13: Humidification System Overview
Humidification system overview DS22 DS35 Z261 125...1250 µS/cm 1...10 bar 1...40 °C Steam generator Funnel with siphon (building side) Steam connector Water drain hose (included in the delivery) Water drain connector Service switch heating voltage supply (building side) Water supply connector Service switch control voltage supply (building side) Water connection hose G 3/4"... -
Page 14: Operation
12:00:00 Menu Light Start operating status and on the configuration of the Nordmann AT4 D and can differ from the opposite display. Depending on the selected operating mode of the Nordmann AT4 D, the AT4D 65kg/h 400V3 steam generator must manually be started via the Start/Stop button of the... -
Page 15: Notes On Operation
Note: If the Nordmann AT4 D is operated with water of low conductivity it may happen that the maximum steam capacity is not reached in the first few hours of operation. This is normal. As soon as the conductivity has reached a sufficient level (due to the vaporisation process) the steam generator will reach the maximum steam capacity. -
Page 16: Remote Operating And Fault Indication
Notes on the operation at ambient temperatures ≤ 0°C If during operation ambient temperatures ≤ 0°C must be expected (opera tion of the Nordmann AT4 D in a protective housing outside the building), the standby draining function must be set to “Full” and the period of time in standby operation after which an automatic cylinder draining takes place must be set to 1 hour (see chapter 5.3.7.3). -
Page 17: Carrying Out Manual Draining
7. If ambient temperatures ≤ 0°C must be expected when the unit is out of operation (operation of the Nordmann AT4 D in a protective housing outside the building): drain the water supply pipe and the water filter (filter valve). -
Page 18: Working With The Unit Control
Working with the unit control Note: if you are working with the optional remote terminal read chapter 5.6 “Working with the remote terminal” first. The operation of the remote terminal deviates in some points from the operation at the steam generator and some adjustments are blocked via the remote terminal for safety reasons. - Page 19 Menu overview Indication level Display steam bath operation Display caldarium operation AT4D 65kg/h 400V3 AT4D 65kg/h 400V3 Steam Bath :Standby Steam Bath :Standby Temperature :34°C Humidity :44.7%rH Setpoint :48°C Setpoint :45%rH 2011-08-31 12:00:00 2011-08-31 12:00:00 Menu Light Start Menu Licht Start Menu level Modifying temperature setpoint (steam bath operation) or humidity setpoint...
-
Page 20: Basic Steam Bath Settings
Basic steam bath settings 5.2.1 Setting the temperature setpoint (steam bath operation) or humidity setpoint (caldarium operation) Select “Setpoint” in the main menu, then press the <Set> key. AT4D 65kg/h 400V3 Main Menu Setpoint Setpoint :48°C 48 °C Steam Bath :Standby Operat.Mode :Manual 48 °C... -
Page 21: Setting The Steam Bath Time
5.2.3 Setting the steam bath time Note: this menu item is available only if the operating mode in the steam bath control settings (see chapter 5.3.3.1) is set to “Panel” and the control mode is set to “Manual” (see chapter 5.2.2). Select “Duration”... -
Page 22: Switching The Effect Light (Light-2) On And Off
5.2.5 Switching the effect light (Light-2) on and off Select “Light-2” in the main menu, then press the <Set> key. AT4D 65kg/h 400V3 Main Menu Light-2 Duration :45min Steam Bath :Standby Fragrance :Set Temperature :34°C Light-2 :Off Setpoint :48°C User :Set 2011-08-31 12:00:00 Engineering :Set... -
Page 23: Unit Settings In The User Settings Menu
Unit settings in the user settings menu 5.3.1 Launching the user settings menu Select the user settings menu: Path: Main Menu > User > Password entry: 3562 > Settings Main Menu User Settings AT4D 65kg/h 400V3 Fragrance :Set Maintenance :Set Language :English Steam Bath... -
Page 24: Setting The Operation Mode
5.3.3.1 Setting the operation mode Select “Operation” in the steam bath settings menu, then press the <Set> key. Settings BathSettings Opertion Language :English Operation :Panel Panel BathSettings:Set :Set Panel Cylinder :4564 Fragrance :Set WeekTime SC-System :Set Light :Set Power Limit :100% Sensor :Set In the upcoming modification dialogue you determine, whether the bathing operation shall be started... -
Page 25: Setting The Maximum Heating Time For Week Timer Operation
– Activating and configuring the Week Timer : Select “Week Timer” in the steam bath settings menu, then press the <Set> key. Settings BathSettings Week Timer Timer Language :English Operation :WeekTime Timer :Off BathSettings:Set Week Timer :Set Cylinder :4564 Max Heating :24h SC-System :Set :Set... -
Page 26: Fan Control Settings
Adjust the settings for the operation without fan as follows: • “Mode”: Note: use this setting if no fan is connected to the Nordmann AT4 D (e.g. for steam baths with flap actuators). In the bathing operation without fan the drying phase is omitted. –... - Page 27 • “Fan Out”: Settings for the control of the exhaust fan. • “Drying Time”: Time in minutes the exhaust fan continues to run after the steam bath time has elapsed to dry the steam bath cabin (Factory setting: 20 min utes, Setting range: 1...60 minutes).
- Page 28 Operation with supply and exhaust fan In this operation mode a supply and an exhaust fan is connected to the Nordmann AT4 D. Select “Fan” in the steam bath settings menu, then press the <Set> key. In the following display select “Mode”, then press the <Set>...
- Page 29 Adjust the settings for the operation with a supply and an exhaust fan as follows: • “Mode”: 2-Fan • “WhileBathing”: Activation mode of the fans in bathing operation “Off” (both fans remain switched off during bathing operation) “Supply” (only the supply air fan is running during bathing operation) “Exhaust”...
-
Page 30: Fragrance Pump Control Settings
5.3.3.6 Light control settings At the Nordmann AT4 D control a cabin light (Light1) or effect light (Light2) can be connected. Both lights can be switched on independently either manually automatically. Select “Light” in the steam bath settings menu, then press the <Set> key. In the upcoming display, select the desired light whose operating mode you want to modify, then press the <Set>... -
Page 31: Sensor Signal Settings
5.3.3.7 Sensor signal settings With the parameters in the submenu “Sensor” you can configure the sensor signal settings. – Temperature signal input from analogue temperature sensor (KTY, PT100, PT1000) connected to the steam bath print. Select “Sensor” in the steam bath settings menu, then press the <Set> key. Settings BathSettings Sensor... - Page 32 Linearised 0-10V temperature signal from a temperature sensor or a building management system connected to the control signal input on the power board of the Nordmann AT4 D. Select “Sensor” in the steam bath settings menu, then press the <Set> key.
- Page 33 – Humidity signal input from analogue humidity sensor connected to the signal input on the power board of the steam generator (caldarium operation). Select “Sensor” in the steam bath settings menu, then press the <Set> key. Sensor SignalSource Settings BathSettings SignalSource:Analog Analog Language...
- Page 34 – Control signal (temperature or humidity signal) input via Modbus Select “Sensor” in the steam bath settings menu, then press the <Set> key. Settings BathSettings Sensor SignalSource Language :English Fragrance :Set SignalSource:Analog Modbus BathSettings:Set Light :Set Mode :Temp. Analog Cylinder :4564 Sensor :Set...
-
Page 35: Setting The Controller Type
5.3.3.8 Setting the controller type Select “Control” in the steam bath settings menu, then press the <Set>. Settings BathSettings Control Language :English Light :Set Int.(P) BathSettings:Set Sensor :Set Int.(P) Cylinder :4564 Control :Int.(P) Int.(PI) SC-System :Set P-Band :4°C Power Limit :100% Operat.Range:Set In the upcoming modification dialogue select the desired controller type. -
Page 36: 5.3.3.11 Configuring The Quasi On/Off Control
5.3.3.11 Configuring the Quasi On/Off control With the parameters in the submenu “Operat.Range” you can control the operation of Nordmann AT4 D in such a way that the steam production is started only from a certain request and stopped again, if the request has dropped by a certain percentage. -
Page 37: Selecting The Cylinder Type
5.3.4 Selecting the cylinder type Note: this function is not available via the optional remote terminal. Select “Cylinder” in the user settings menu, then press the <Set> key. Settings Cylinder Language :English 6564 BathSettings:Set 3262 Cylinder :4564 3264 SC-System :Set 4564 Power Limit :100% 6564... -
Page 38: Setting The Operation Time Of The Sc-Pump
5.3.5.2 Setting the operation time of the SC-Pump Select “On-Time” in the SCSystem settings menu, then press the <Set> key. Settings SC-System OnTime BathSettings:Set SC-Pump 20 min Cylinder :4564 OnTime :20min 20 min SC-System :Set Power Limit :100% Water Manag.:Set In the upcoming modification dialogue set the operating time of the SC-Pump per hour in minutes. -
Page 39: Water Management Settings
5.3.7 Water management settings Select “Water Manag.” in the user settings menu, then press the <Set> key. Settings Water Manag. SC-System :Set Conductivity:>125µS Power Limit :100% Drain Factor:1.0 Water Manag.:Set Idle Operat.:Set Date :11-08-31 Force Drain :On Time :12:00 Force Delay :72h The water management settings appear. -
Page 40: Setting The Operating Mode For Standby Operation
5.3.7.3 Setting the operating mode for standby operation – Idle only operation In this operating mode the cylinder is not emptied in standby operation. Select “Idle Operat.” in the water management settings submenu, then press the <Set> key. In the upcoming submenu select “Idle Mode”, then press the <Set>... - Page 41 Standby operation with keep warm or keep humidity function In this operating mode the Nordmann AT4 D produces that much steam that the set temperature or the set humidity (caldarium operation) in the steam bath cabin can be held. After the set period of time in standby operation has elapsed the keep warm or keep humidity function is switched off.
-
Page 42: Activating/Deactivating The Forced Draining
– Standby operation with anti freeze function In this operating mode the water in the cylinder is warmed up so far in standby operation that the water in the cylinder cannot freeze. Note: the keep warm function works only, if the external safety chain is closed. Therefore this func tion may not be used for outdoor operation. -
Page 43: Setting The Time Of Operation After Which A Forced Draining Takes Place
5.3.7.5 Setting the time of operation after which a forced draining takes place Select “Force Delay” in the water management settings submenu, then press the <Set> key. Settings Water Manag. Force Delay SC-System :Set Conductivity:>125µS 72 h Power Limit :100% Drain Factor:1.0 72 h Water Manag.:Set... -
Page 44: Modbus Settings
Modbus settings Select the Modbus menu: Path: Main Menu > User > Password entry: 3562 > Modbus AT4D 65kg/h 400V3 Main Menu User Modbus Fragrance :Set Maintenance :Set Networking :Set Steam Bath :Standby Light-2 :Off Settings :Set Remote :Set Temperature :34°C User :Set Modbus... -
Page 45: Settings For The Communication With The Optional Remote Terminal
5.4.2 Settings for the communication with the optional remote terminal Select “Remote” in the Modbus submenu, then press the <Set> key. – Data upload Modbus Remote Settings Networking :Set Settings :Remote Upload Remote :Set Modbus Addr.:1 Upload Baudrate :9600 Remote Parity :None1 Remote... -
Page 46: Diagnostic Functions
Interrogation of the error history The error messages generated by the last 20 malfunctions that occurred are saved in the error history list of the Nordmann AT4 D and can be interrogated. Select the error history list: Path: Main Menu > Diagnostic > ErrorHistory... -
Page 47: Interrogation Of Unit Information
5.5.2 Interrogation of unit information Select the list with the unit information: Path: Main Menu > Diagnostic > Unit Status Press < > and < > keys, in order to select the unit information available in the list: Main Menu Diagnostic Unit Status: AT4D 65kg/h 400V3... -
Page 48: Performing Remote Steam Bath Tests
16 Actual status steam bath door switch 17 Total operating hours since the initial commissioning 18 Actual operating status inlet valve 19 Actual operating status drain pump 20 Actual operating status main contactor 21 Actual operating status SC pump 22 Actual operating status light 1 23 Actual operating status light 2 24 Actual operating status fragrance pump 1 25 Actual operating status fragrance pump 2... -
Page 49: Performing Remote Relay Tests
5.5.4 Performing remote relay tests Select the remote test: Path: Main Menu > Diagnostic > Remote Test Main Menu Diagnostic AT4D 65kg/h 400V3 Remote Test Fragrance :Set ErrorHistory:Set Steam Bath :Standby Remote Steam Light-2 :Off Unit Status::Set Temperature :34°C User :Set Bath Test :Set... -
Page 50: Working With The Remote Terminal
Working with the remote terminal 5.6.1 Menu overview remote terminal Indication level remote terminal Standard display Standard display with active malfunction AT4D Terminal Warning Warning 17 Remote Units:8 Unit missing Unit missing Software :1.00LA00 No Connection with humidifier Remote Units:8 Menu Local Menu... -
Page 51: Remote Terminal Settings
5.6.2 Remote terminal settings 5.6.2.1 Selecting the dialogue language Select “Language” in the main menu, then press the <Set> key. Main Menu Language Language :English English RemoteUnits :8 English ErrorHistory:Set German HistoryReset:Set French Baudrate :9600 Italian In the upcoming modification dialogue select the desired dialogue language. After confirmation, the unit automatically switches to the selected dialogue language. -
Page 52: Resetting The Error History List Of The Remote Terminal
Press the <Esc> key several times to quit the error history list and to return to the standard operating display. 5.6.2.4 Resetting the error history list of the remote terminal Select “HistoryReset” in the main menu, then press the <Set> key. Main Menu HistoryReset RemoteUnits :8... -
Page 53: Maintenance
Prevention: Before carrying out any maintenance work set the Nordmann AT4 D out of operation as described in chapter 4.4 (switch off the unit, disconnect it from the mains and stop the water supply) and secure the unit against inadvertent powerup. -
Page 54: Maintenance List
Maintenance list To maintain operational safety the Nordmann AT4 D steam generator must be maintained at regular intervals. This is differentiated between the first maintenance after approx. 500 operating hours (I), steam cylinder re- placement after the yellow LED lights (II) and annual maintenance (III). -
Page 55: Removing And Installing Parts For Maintenance
Removing and installing parts for maintenance 6.3.1 Removal and installation of the steam cylinder 1. Undo the screw fixing the front panel to the unit using a screwdriver, then remove the front panel. 2. Release the hose clamp on the steam hose using a screwdriver, then detach the steam hose from the steam outlet connection of the steam cylinder. - Page 56 5. Carefully lift steam cylinder away from the cylinder receptacle, then remove it to the front. CAUTION! Put steam cylinder down carefully to avoid damage to the lower con nection piece! 6. Carefully pull the drain screen out of the drain outlet of the steam cylinder. Note: this step must only be carried out if the drain screen is clogged (see chapter 7.2.2 “Unit faults”) and the steam cylinder can still be used.
-
Page 57: Steam Cylinder
Installation of the steam cylinder follows the reverse sequence. Observe the following: – Before installing the steam cylinder in the unit, check the Oring of the cylinder receptacle for damage and replace if necessary. – Moisten the Oring of the cylinder receptacle with water (do not use grease or oil), then insert steam cylinder into the socket and push it down to the stop. -
Page 58: Removal And Installation Of The Drain Cup
6.3.2 Removal and installation of the drain cup 1. Remove overflow hose from the connector on the water cup. 2. Remove grounding cable from the grounding lance. 3. Release the hose clamp, then remove water drain hose from the con nector on the water cup. -
Page 59: Removal And Installation Of The Water Cup And The Water Hoses
6.3.3 Removal and installation of the water cup and the water hoses For removing the water cup and the water hoses the steam cylinder must be removed first (see chapter 6.3.1). 1. Release hose clamps, then disconnect all hoses from the corresponding connectors and remove the hoses. -
Page 60: Removal And Installation Of The Drain Pump
6.3.4 Removal and installation of the drain pump For removing the drain pump the steam cylinder must be removed first (see chapter 6.3.1). 1. Detach electric cables (polarity of the cables must not be observed). 2. Release hose clamps and remove the hoses from the connectors. 3. -
Page 61: Removal And Installation Of The Inlet Valve
6.3.5 Removal and installation of the inlet valve For removing the inlet valve the steam cylinder must be removed first (see chapter 6.3.1). 1. Detach electric cables (polarity of the cables must not be observed). 2. Release hose clamp and remove the hose from the connector. 3. -
Page 62: Removal And Installation Of The Cylinder Receptacle
6.3.6 Removal and installation of the cylinder receptacle For removing the cylinder receptacle the steam cylinder must be removed first (see chapter 6.3.1). 1. Release hose clamps and remove hoses from the connectors. 2. Remove hose from SC pump together with the check valve from the corresponding connector on the cylinder receptacle. -
Page 63: Notes On Cleaning The Unit Components
Notes on cleaning the unit components Unit component What to clean and how to clean Water hoses • Remove any limescale by slightly knocking on the tubes using a rubber hammer. Then, rinse the tubes well with hot tap water. Inlet valve •... -
Page 64: Drain Cup
Unit component What to clean and how to clean Drain screen of the steam cylinder • Remove any limescale from the drain screen using a brush (do not use a wire brush) and remove loose limes cale inside the drain connector of the steam cylinder. If the drain screen is heavily calcified, place it in an 8% formic acid solution (observe safety notes in chap- ter 6.5), until the limescale comes off. -
Page 65: Notes On Cleaning Agents
Enter Number Are you sure? Confirm with Set AT4 D STARTUP: Init Module 2. Select “Cyl. Reset”, then press the <Set> key. 3. The reset dialogue appears in the display. Press the <Yes> key to reset the maintenance counter or the maintenance indication respectively. -
Page 66: Fault Elimination
Electrodes spent Menu The control of the Nordmann AT4 D checks whether there is a temporary problem (e.g. water supply interrupted for a short time) or whether it can resolve the problem by taking necessary measures. If the cause of the malfunction disappears of its own accord or if the control can repair the malfunction, the alarm message will automatically switch off. -
Page 67: Malfunction Lists
Malfunction lists Important! Most operational malfunctions are not caused by faulty equipment but rather by improper installation or disregarding of planning guidelines. Therefore, a complete fault diagnosis always involves a thorough examina tion of the entire system. Often, the steam hose connection has not been properly executed, or the fault lies with the humidity control system. -
Page 68: Unit Faults
Warning Error Cause Remedy Display Display Humidifier missing ––– ––– ––– The optional remote terminal does not Check connecting cable. Check/correctly set Warning have connection to one or more units. Modbus settings (modbus address, interface W17: Unit Missing parameters). Note: This warning is shown only on the remote terminal. - Page 69 Warning Error Cause Remedy Display Display No electrode current for more than No electrode current for more than 20 minutes 4 hours ––– Phase failure heating voltage. Inspect/turn on service switch of the mains Warning Error lights supply line. Inspect the fuses of the mains W23: No Current E23: No Current supply, replace if necessary.
-
Page 70: Notes On Fault Elimination
Warning Error Cause Remedy Display Display Temperature or humidity sensor Temperature or humidity sensor signal missing signal missing for more than 1 minute ––– No sensor signal present at signal input. Check sensor , replace if necessary. Inspect Warning Error lights wiring. -
Page 71: Replacing The Backup Battery On The Control Board
Replacing the backup battery on the control board 1. Set the Nordmann AT4 D out of operation as described in chapter 4.4, disconnect it from the mains and secure the unit against in- advertent power-up. 2. Undo the screw of the front cover of the control compartment, then remove the front cover. -
Page 72: Taking Out Of Service/Disposal
Taking out of service/Disposal Taking out of service If the Nordmann AT4 D must be replaced or if the humidification system is not needed any more, proceed as follows: 1. Take the unit out of operation as described in chapter 4.4. -
Page 73: Product Specifications
1x MCVI 1x LCVI @Link AT4 D @Link AT4 D Accessories Filter valve 1x Z261 Nordmann AT4 D Remote Terminal Nordmann AT4 D Touch Screen Panel Temperature sensor KTY Steam distributor 1xW22 1xW35 2xW35 Fragrance pump 1xFP 240V Tpiece for fragrance injection... -
Page 74: Wiring Diagram Nordmann At4 D
Wiring diagram Nordmann AT4 D... - Page 75 © Nordmann Engineering Ltd., Printed in Switzerland Technical modifications reserved...
- Page 76 Reg.No. 40002-2 NORDMANN Manufacturer: Nordmann Engineering Ltd. E N G I N E E R I N G www.nordmann-engineering.com, info@nordmann-engineering.com...
Need help?
Do you have a question about the AT4 D and is the answer not in the manual?
Questions and answers