Table of Contents
Advertisement
Advertisement
Table of Contents
Troubleshooting

Related Manuals for Ametek Drexelbrook ThePoint Series


Summary of Contents for Ametek Drexelbrook ThePoint Series
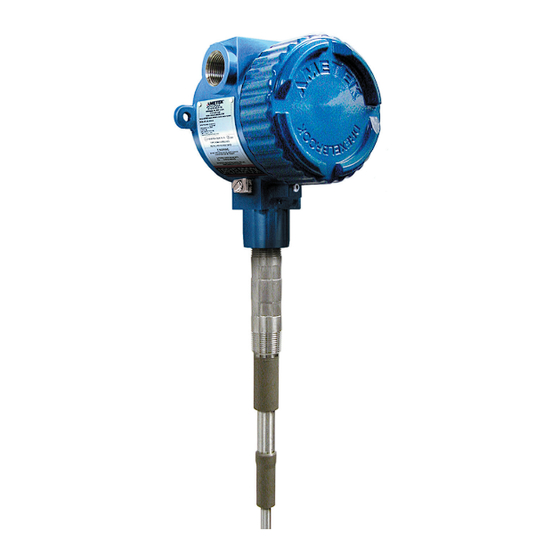
- Page 1 Leader in Level Measurement Installation and Operating Instructions ThePoint™ Series Point Level Switch Auto Calibration or Manual Calibration Selectable Telephone: +1 215-674-1234 Fax: +1 215-674-2731 E-mail: drexelbrook.service@ametek.com Website: www.drexelbrook.com...
- Page 2 AMETEK Drexelbrook makes no warranty of any kind with regard to the material contained in this manual, including, but not limited to, implied warranties or fitness for a particular purpose. Drexelbrook shall not be liable for errors contained herein or for incidental or consequential damages in connection with the performance or use of material.
- Page 3 EDO # 05-19-110 PML1-LM Issue # 16 ThePoint Series Point Level Switch Auto Calibration or Manual Calibration Selectable...
- Page 4 Contents...
-
Page 5: Table Of Contents
Contents Section 1: Introduction ....................1 System Description ..................1 Technology ....................1 Model Number ....................2 Housing Dimensions ...................4 Section 2: Installation ....................5 Unpacking ....................5 Mounting and Installation Guidelines ............5 Installation of Flush-Mounted Sensing Elements ........7 Input Wiring ....................8 Output Wiring – Relay Version ..............8 Output and LED Status ................9 Electronic Unit .....................10 Spark Protection ..................11... - Page 6 Section 1...
-
Page 7: Section 1: Introduction
Introduction Section 1: Introduction System Description The AMETEK Drexelbrook ThePoint™ Series uses No-Cal™ technology to detect the presence or absence of material without calibration or initiation via setpoint adjustments, push-buttons or magnets. Installation is simple and easy. Simply apply power and... -
Page 8: Model Number
ThePoint Series Model Number Technology RF Admittance Measurement Type All Calibration modes are built into the standard unit. Std Auto Cal Hi Sense .5 pF Auto Cal Std 2 pF Fixed Hi Sense .5 pF Fixed Modes can be changed in the field as required... - Page 9 with high bulk density (1) High Integrity Seal for 700-0002-360 int/rem 34.5 bar @ 149°C (500 PSI @ 300°F) Hazardous Materials Introduction Sanitary (3) Non 3A LP 700-0202-029 int/rem 3.4 bar @ 149°C (50 PSI @ 300°F) 316SS and TFE Corrosive material, 700-0001-022 int/rem 69 bar @ 38°C (1000 PSI @ 100°F) higher pressure with...
-
Page 10: Housing Dimensions
ThePoint Series Housing Dimensions 4.5" (114mm) 6.5" (165mm) 4.75" (121mm) Equipotential Terminal (CENELEC Systems) Figure 1-3 Compartment Housing Detail... -
Page 11: Section 2: Installation
Figure 2-1. After system is installed and level is below sensing element, apply power. ThePoint series instrument does not require any calibration or setpoint adjustments and is ready to detect change in level. - Page 12 ThePoint Series Mounting and Installation Guidelines (continued) WARNING: ThePoint equipment is rated explosion proof. When installing in explosion hazardous areas [rated “potentially hazardous” (EU) or “hazardous classified” (USA)] observe all national and local regulations as well as specifications in the certificate.
-
Page 13: Installation Of Flush-Mounted Sensing Elements
Installation Mounting and Installation Guidelines (continued) • Do not mount a Cote-Shield sensing element through a nozzle that exceeds length of first insulator. • Ensure that there are no obstructions or agitator blades to interfere with sensing element. • Rigid sensing elements can be mounted at any angle. Installation of Flush-Mounted Sensing Elements These instructions apply to all flush on/off sensing elements, models 700-0207-001, 700-0207-002, 700-0207-003, 700-0207-... -
Page 14: Input Wiring
Input Wiring IMPORTANT Ground Must be Provided for Proper Operation and Safety. Output Wiring – Relay Version ThePoint series instrument is supplied with two sets of contacts using one 5A DPDT alarm relay. See Figure 2-4. Figure 2-4 Relay Wiring... -
Page 15: Output And Led Status
Installation Output and LED Status There are two status LEDs located on top of Electronic Unit. The green LED is used to indicate that unit has power. The red LED is used to indicate condition of the relay. See Figure 2-6. Tank Condition Relay Status Power... -
Page 16: Electronic Unit
ThePoint Series Electronic Unit Remove housing lid to access status LEDs, time delay adjustment, and configuration jumpers. See Figure 2-6. Time Delay Adjustment - 0-60 Seconds Green LED = Power Red LED = Alarm Failsafe Jumper = High Level Down = Low Level... -
Page 17: Spark Protection
Installation 2.7.3 Failsafe Failsafe describes the level condition that causes the output relay to de-energize, and also the state of the relay upon loss of power. • High Level Failsafe (hlfs). The relay will de-energize when level is high, indicating high level upon loss of power. (N.O. contacts open and N.C. -
Page 18: Sensing Element Connection
ThePoint Series Sensing Element Connection (Integral Sensing Elements) Sensing element connects to the rear side of the circuit board and is factory-installed. The sensing element is sealed to the housing and cannot be removed without permanent damage. Figure 2-7 Sensing Element Connection... - Page 19 Installation Sensing Element Connection (continued) For ThePoint instruments mounted remotely from sensing element, cable connections from sensing element to Electronic Unit are made to terminals beneath the Electronic Unit. See Figure 2-8. 3 TERMINAL PROBE (TYP) COTE-SHIELD EQUIPOTENTIAL (RED) TERMINAL GROUND CENTER WIRE (GREEN)
-
Page 20: Calibration
ThePoint Series 2.10 Calibration ThePoint™ level measurement switch features both Auto-Cal and manual calibration. The standard Auto-Calibration mode is applicable to most liquid and slurry point level measurements. If preferred, the manual calibration can be used and is recommended for some application. ThePoint electronic unit... - Page 21 Installation 2.10.1 Selecting the Calibration Mode for your application (Continued) Application Guide (For instructions on how to access alternate modes see 2.10.4) Application Calibration Mode Liquids and Slurries Auto-Cal Mode #2 Granular /Solids with Bulk Density Manual Cal Mode #7 greater than 20#’s per cubic foot Granular/Solids with Bulk Density Manual Cal Mode #8 (high...
- Page 22 ThePoint Series 2.10.3 Using ThePoint with Manual Calibration modes #7, and 8 Warning! Before removing the explosion-proof housing cover in a potentially hazardous area, make certain that the area is safe. When calibration is complete, the cover must be replaced.
- Page 23 Installation 2.10.3 Manual Calibration modes #7, and 8 (Continued) Manual Calibration When material level can be moved Make certain that ThePoint is in manual calibration mode #7 or 8 See Section 2.10.4 Configuration Adjustment RED LED Notes Settings Potentiometer Fail Safe = High Level Turn counter clockwise RED LED ON Material being measured...
- Page 24 ThePoint Series 2.10.3 Manual Calibration modes #7, and 8 (Continued) Manual Calibration When material level can not be moved Make certain that ThePoint is in manual calibration mode #7 or 8 See Section 2.10.4 Configuration Adjustment RED LED Notes Settings...
- Page 25 Installation 2.10.3 Manual Calibration modes #7, and 8 (Continued) Note 1: Most water based materials can be considered conductive, such as acids, bases, salt solutions, water based slurries, and very wet granular materials. Carbon black and powdered metals conduct even without water.
- Page 26 ThePoint Series 2.10.4 Accessing the Calibration Modes 1. On the top side of ThePoint, temporarily remove the shunt from the “Time Delay Selection Jumper” (see Fig. 2) and place it on pins 1 & 2 of the 3-pin connector. Pin 1 is closet to the LEDS.
- Page 27 Installation 2.10.4 Accessing the Calibration Modes (Continued) Code Designation - Definition of Modes Mode 2: Fixed Cal 2pF: 2pF differential, set point locked 2pF above starting capacitance Mode 7: Manual calibration standard sensitivity – pots adjusts from 0 to 65pF Mode 8: Manual calibration High sensitivity –...
- Page 28 ThePoint Series Section 3...
-
Page 29: Section 3: Troubleshooting
Troubleshooting Section 3: Troubleshooting WARNING If ThePoint instrument is located in a hazardous environment, do not open enclosure cover or make/break any electrical connections without first disconnecting electrical power at the source. Ensure that wiring, electrical fittings and conduit connections conform to electrical codes for the specific location and hazard level. -
Page 30: Testing Electronic Unit
ThePoint Series Testing Electronic Unit Use the following steps to test the electronic unit: 1. Be sure environment is safe before removing lid from housing. 2. Observe failsafe jumper on circuit board on top of electronic unit (shown in Figure 2-6). Move jumper from current setting to alternate setting [hlfs to llfs or vice versa]. -
Page 31: Testing Relay Circuits
Troubleshooting Testing Relay Circuits Use the following steps to check out the relay circuits: 1. Relay connections consist of a double-pole double-throw (DPDT) relay. 2. The relay contacts are brought out to terminal strips for external switching. See Figure 3-2. 3. -
Page 32: Testing Integral Cable
ThePoint Series Testing Integral Cable Ohmmeter CAP & ELECTRONIC UNIT REMOVED FOR ACCESS TO EXPOSE INTEGRAL CABLE REMOVE CABLE TO EXPOSE TOP OF SENSING ELEMENT Shield Center Wire Center Wire Shield Ohmmeter Shield Shield Center Wire Center Wire Ohmmeter Shield... -
Page 33: Factory Assistance
Troubleshooting Factory Assistance AMETEK Drexelbrook can answer any questions about ThePoint series instrument. Call Customer Service at +1 215 674-1234. If you require assistance and attempts to locate the problem have failed: Contact your local Drexelbrook representative, Telephone the Service department toll-free: •... -
Page 34: Equipment Return
ThePoint Series 3.11 Equipment Return In order to provide the best service, any equipment being returned for repair or credit must be pre-approved by the factory. In many applications, sensing elements are exposed to hazardous materials. • OSHA mandates that our employees be informed and protected from hazardous chemicals. -
Page 35: Rf Point Level Troubleshooting Guide
Troubleshooting 3.12 RF Point Level Troubleshooting Guide Symptom Possible Cause Solution See Section Switch is in alarm and will not Sensor is coated by a conductive material and the Need a sensor with a longer Cote-Shield Section 2.2 clear Cote-Shield™ element does not extend far enough element. - Page 36 Section 4...
-
Page 37: Section 4: Specifications
Specifications Section 4: Specifications RF/ Capacitance Technology: None Calibration: High and Low level Modes of Operation: 2 mm (0.08 inch) conductive liquids Repeatability: less than 1 second Response Time: 0 to 60 seconds forward and reverse acting Time Delay: 40 to 70°C (-40 to 158°F) Ambient Electronics: -40 to 85°... -
Page 38: Approvals Available
ThePoint Series Approvals Available Remote: Explosion-proof for Class I, Division 1, Groups A, B, C, and D; Dust-Ignition proof for Class II, III, Division 1, Groups E, F, and G; Non-incendiary for Class I, Division 2, Groups A, B, C, & D;... -
Page 39: Section 5: Control Drawings
Control Drawings Section 5: Control Drawings FM / FMc Control Drawings... - Page 40 ThePoint Series FM / FMc Control Drawings (Continued)
- Page 41 Control Drawings FM / FMc Control Drawings (Continued)
- Page 42 ThePoint Series FM / FMc Control Drawings (Continued)
- Page 43 Control Drawings FM / FMc Control Drawings (Continued)
- Page 44 ThePoint Series FM / FMc Control Drawings (Continued)
- Page 45 Control Drawings FM / FMc Control Drawings (Continued)
- Page 46 ThePoint Series FM / FMc Control Drawings (Continued)
- Page 47 Control Drawings FM / FMc Control Drawings (Continued)
- Page 48 ThePoint Series FM / FMc Control Drawings (Continued)
- Page 49 Control Drawings FM / FMc Control Drawings (Continued)
-
Page 50: Atex Control Drawings
ThePoint Series ATEX Control Drawings... - Page 51 Control Drawings ATEX Control Drawings (Continued)
- Page 52 ThePoint Series ATEX Control Drawings (Continued)
- Page 53 Control Drawings ATEX Control Drawings (Continued) ATEX APPROVED, REMOTE MORE ON PAGE 5 9-14-119 UPDATE SENSING ELEMENT OPTIONS SEE TITLE BLOCK APP'D DATE ZONE EDO # DESCRIPTION REVISION HISTORY DREXELBROOK 420-0004-186-CD...
- Page 54 ThePoint Series ATEX Control Drawings (Continued) ATEX APPROVED, REMOTE 9-14-119 UPDATE SENSING ELEMENT OPTIONS SEE TITLE BLOCK APP'D DATE ZONE EDO # DESCRIPTION REVISION HISTORY DREXELBROOK 420-0004-186-CD...
- Page 55 Control Drawings ATEX Control Drawings (Continued)
-
Page 56: Heavy Duty Spark Protection
ThePoint Series Heavy Duty Spark Protection... - Page 57 Control Drawings Heavy Duty Spark Protection (Continued)
-
Page 58: Adding A Padded Capacitor
ThePoint Series Adding a Padded Capacitor... - Page 59 Control Drawings Adding a Padded Capacitor (Continued)
- Page 60 ThePoint Series Adding a Padded Capacitor (Continued)
-
Page 61: Dual Seal Assembly For 700 Series Sensing Elements
Control Drawings Dual Seal Assembly for 700 Series Sensing Elements... - Page 62 ThePoint Series Dual Seal Assembly (Continued)
- Page 63 Control Drawings Dual Seal Assembly (Continued)
- Page 64 Appendix A...
-
Page 65: Shortening Or Lengthening Sensing Element
Appendix A Shortening or Lengthening Sensing Element The Need Sometimes your application calls for probe lengths CAUTION: other than the standard 18-inch or longer insertion The length of either lengths supplied. Shortening the sensing element is Flush Sensing quite simple and can be done in the field. Lengthening Elements or Insulated the sensing element, however, is more difficult because Sensing Elements can... - Page 66 2-16-102 2-1-16 11-17-100 11-3-17 ThePoint Series EMC Installation Supplement CE Installation Supplement Purpose: To provide additional information that is required to be in compliance with the CE mark of conformity and 2014/30/EU Directive. Definitions: 1. I/O Sensor/Measurement/Control Port -- Any port which provides level measurement, control, and/or DC power.
-
Page 67: Ce Installation Supplement
Sht. ISSUE Appendix A 440-0018-731 CE Installation Supplement 3. Remote Installations Sensor port must be connected to the transmitter port by one of the following means: 401-16 Probe Filter • • Coaxial cable run in conduit. Triaxial cable. • 4. - Page 68 Seller’s intellectual property rights or applicable other party is authorized to bind the AMETEK DREXELBROOK Division of AMETEK, Inc. law, or for any purposes other than that for which the items were furnished.
- Page 70 205 Keith Valley Road, Horsham, PA 19044 Telephone: +1 215-674-1234 Fax: +1 215-674-2731 An ISO 9001 Certified Company E-mail: drexelbrook.info@ametek.com Website: www.drexelbrook.com...
Need help?
Do you have a question about the ThePoint Series and is the answer not in the manual?
Questions and answers