D-Link DWR-720/PW User Manual
Wcdma/3g wifi fixed flla phone
Hide thumbs
Also See for DWR-720/PW:
- User manual (59 pages) ,
- User manual (19 pages) ,
- Basic user setup manual (2 pages)
Table of Contents
Advertisement
Quick Links
WCDMA / 3G WIFI Fixed FLLA Phone
Version 1.00 ǀ2018/09
User Manual
DWR-720/PW
Preface......................................................................... 3
Trademarks . ................................................................. 3
1. Basic Overview . ........................................................ 4
1.1 Package Contents . .............................................. 4
1.2 System Requirements ........................................ 4
1.3 Safety and Maintenance .................................... 4
1.3.1 Using the Phone . ......................................... 4
1.3.2 Using the Battery ........................................ 5
1.3.3 Using the Battery Charger ........................... 5
Please observe the following points: ....................... 5
2. Instructions before Use . ........................................... 6
2.1 Power ON . .......................................................... 7
2.2 Power OFF . ......................................................... 8
2.3 Phone Security ................................................... 8
2.4 PIN code . ............................................................ 8
2.5 PUK code . ........................................................... 8
3. Basic Functions ........................................................ 9
3.1 Direct dial . .......................................................... 9
3.2 Quick dial from dialled list . ............................... 10
3.3 Receive a call . ................................................... 10
3.4 Operations during a call ................................... 10
3.5 Terminate call .................................................. 11
3.6 Make Emergency call ....................................... 11
3.7 Make International long-distance call .............. 11
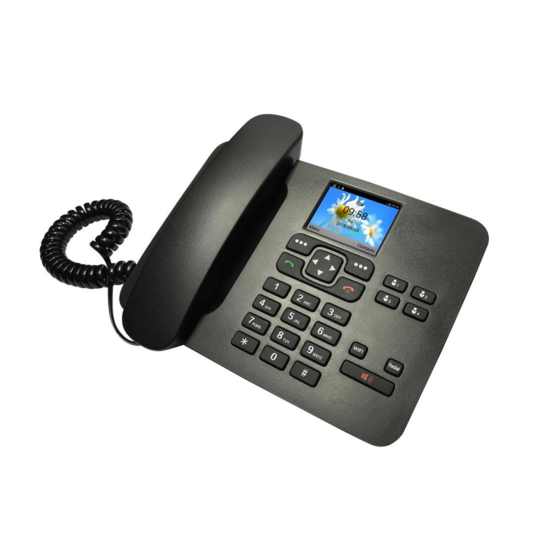
4. Hardware Overview ............................................... 12
4.1 Front ................................................................ 12
4.2 Back ................................................................. 12
4.3 Key Descriptions .............................................. 13
4.4 Status Icons . .................................................. 14
Back to Table of Contents
1
Table of Contents
4.5 Menu Icons ...................................................... 15
5. Contacts . ................................................................ 16
6. SMS ....................................................................... 17
7. Call log ................................................................... 18
8. Calendar ................................................................ 19
9. Tool box . ................................................................ 19
10. Settings . ............................................................... 20
10.1 Display ........................................................... 21
10.2 Sound . ............................................................ 22
10.3 Language ....................................................... 22
10.4 Call settings . ................................................... 22
Wi-Fi tethering (Wi-Fi hotspot): . ....................... 25
Mobile Networks (APN) .................................... 26
10.6 Quick number ................................................ 27
10.7 Security . ......................................................... 27
10.8 Fast dialling . ................................................... 27
10.9 Bluetooth . ...................................................... 27
10.10 Factory Data Reset . ...................................... 28
10.11 Phone Info ................................................... 28
11. FM Radio ............................................................. 28
12. Browser ............................................................... 29
13. Wi-Fi .................................................................... 30
14. File Manager . ....................................................... 31
15. Music ................................................................... 33
16. Frequently Asked Questions ................................ 33
Technical Specifications . ............................................ 35
2
Advertisement
Table of Contents

Related Manuals for D-Link DWR-720/PW


Summary of Contents for D-Link DWR-720/PW
-
Page 1: Table Of Contents
3.4 Operations during a call ........ 10 11. FM Radio ............. 28 3.5 Terminate call .......... 11 12. Browser ............... 29 3.6 Make Emergency call ........ 11 13. Wi‐Fi .............. 30 3.7 Make International long‐distance call .... 11 14. File Manager ............ 31 WCDMA / 3G WIFI Fixed FLLA Phone 4. Hardware Overview .......... 12 15. Music .............. 33 4.1 Front .............. 12 16. Frequently Asked Questions ........ 33 DWR-720/PW 4.2 Back .............. 12 Technical Specifications .......... 35 4.3 Key Descriptions .......... 13 4.4 Status Icons ........... 14 Version 1.00 ǀ2018/09 ... -
Page 2: Preface
1. Basic Overview Preface 1.1 Package Contents D‐Link reserves the right to revise this publication and to make changes in the content hereof D‐Link DWR‐720PW WCDMA / 3G WI‐FI Fixed FLLA Phone without obligation to notify any person or organization of such revisions or changes. Battery Handset Cord Handset Receiver Antenna Trademarks Power Supply Note: Using a power supply with a different voltage rating than the one included with the DWR‐720PW will cause D‐Link and the D‐Link logo are trademarks or registered trademarks of D‐Link Corporation or its damage and void the warranty for this product. subsidiaries in the United States or other countries. All other company or product names mentioned herein are trademarks or registered trademarks of their respective companies. 1.2 System Requirements Copyright ⓒ 2018 by D‐Link Systems, Inc. All rights reserved. This publication may not be reproduced, in whole or in part, without prior A compatible (U)SIM card with service expressed written permission from D‐Link Systems, Inc. 1.3 Safety and Maintenance For More Information, visit www.d‐link.co.za ... -
Page 3: Using The Battery
Do not touch the charger with wet hands. If the charger connects with water or other liquid, immediately cut 1.3.2 Using the Battery off the power supply. Please observe the following points: Do not short connect the charger and keep it away from mechanical vibration or shaking and direct sun shine. Do not use it in damp environments, such as a bathroom. Before use, please read instructions for use as well as label on the surface of the battery. The battery charger is not waterproof; keep it away from rain and moisture. Please charge the battery in a cool and well‐ventilated room as high temperatures may lead to overheating. Keep the charger out of reach of children to avoid danger as components may pose choking hazard. Do not attempt open the battery as it may lead to short circuit or electrolyte leakage. If electrolytes get in contact with your eyes, there is danger of blindness. In such case, immediately wash your eyes with clean water and seek medical attention immediately (Do not 2. Instructions before Use rub your eyes) Keep the battery away from mechanical vibration and shaking. Do not short connect the battery as this may Before using the phone, make sure the USB jack, power adapter or battery is correctly connected damage the battery and components connected to it. and the SIM card has been inserted correctly. Follow the instructions below: Keep the metal contact points and battery clean. Do not use damaged or depleted batteries. ... -
Page 4: Power On
2.2 Power OFF To power off, press and hold the [Red Power key] until power off screen appears. Note: In this state, all alarms will still sound if set. Power off the phone and disconnect the external power whenever inserting the battery or SIM card. 2.3 Phone Security You can set an SIM password to avoid unauthorized use of your phone SIM. This can be done under section 10.7 Settings > Security > SIM Lock Set up SIM card lock: Set SIM PIN lock to on or off, or modify SIM PIN. Note that the SIM PIN number is issued by your network provider and is shown on your Complete SIM card. If a SIM PIN is set, it will be indicated with a tick. 2.4 PIN code PIN code is used to prevent illegal use of user’s SIM card. If your SIM has PIN code protection enabled, you will be prompted to enter your PIN code on start‐up. Warning: Before pulling out the SIM card, the phone should be powered off. Inserting or pulling out SIM cards is If the wrong PIN code is entered three times consecutively the SIM card will be automatically soft locked. not permitted when the external power is connected as it can damage the SIM card. You will be required to enter the PUK code to unlock it. Note: The PIN code is related to SIM card, not the telephone and is provided by your Network Service Provider. Please contact your service provider if you do not know your SIM PIN code. 2.1 Power ON ... -
Page 5: Microsd Card Format & Specification
Press [Right soft key] to delete the last digit or long press it to clear all if you entered the number incorrectly. 2.6 microSD Card format & specification Pick up the handset or press [Hands Free] for the dialling tone. Installation If the phone number being dialled out is recognized by the phonebook, the name of contact person will be Step 1: Slide the clip to the right carefully. You will hear a small click and the clip will now be loose. displayed on the dialling screen as well as the calling screen. To end the call, press the [End Call/Red Power key] or press the [Hands Free key] or simply hang up. Step 2: Flip open the clip by softly lifting it to the right and place the microSD Card down flat into the groove with the pins facing down to the right. Quick dial from contacts list: Step 3: Close the clip by flipping the cover left and softly press down and slide the clip to the left to lock. You will hear a small click and the clip is now locked. In Home Screen, press the [Right soft key] to enter [Contacts]. Compatible microSD Card Format & Types Scroll down to select a contact and press the [Green Dial key] to initiate the call on hands free loudspeaker. The DWR‐720PW is compatible with most microSD Cards with the following specifications: To switch over to handset calling, pick up the handset. microSD card format type: FAT32 Memory Capacity: Up to 32GB (Gigabytes) 3.2 Quick dial from dialled list ... -
Page 6: Terminate Call
Mute: Press the left soft key [OK] for the mute option. This will cut off the microphone on the phone. 4. Hardware Overview Add a call: Press the left soft key [OK] for the Add a call option. You can phone another caller while you are busy on a call. This will place the first call on hold. To swap between the 2 calls, press [OK] then [Swap]. 4.1 Front 3.5 Terminate call When there is an incoming call, press the [Red Power key] to reject the call. During the call, press the [Red Power key] to terminate current call. Or hang up the handset. If hands free calling, press the [Hands Free] key to end the current call. A number that has just been dialled can be cancelled by pressing [Red Power key]. 3.6 Make Emergency call As long as you are within coverage of network, you can make an emergency call even if you have not registered to the local network or do not have SIM card or have not yet unlocked the SIM. Enter the local emergency number and then press [Green Dial key] to make an emergency call. 3.7 Make International long‐distance call 4.2 Back Press and hold the [0] key until the “+” sign appear before international phone number can be dialled. “+” sign tells the network that you are making an international call. Enter the country code, area code (without the 0) and phone number Press [Green Dial key] to initiate the call. Note: Some networks do not allow “+” for dialling international numbers. ... -
Page 7: Key Descriptions
0 Key When dialling, press to enter 0 or hold to enter + 4.3 Key Descriptions Answer Key Enter the phone number and press Dial key; Press to see last dialled numbers Star Key In Home screen, press to enter ✲; In SMS editing screen press to enter the special symbol mode, i.e. ? ! : ; . , ’ # $ % etc Hash Key In idle screen, press to enter #; In SMS editing screen, press to switch input method, i.e. ABC, abc, 123 4.4 Status Icons Icons on the screen: Signal strength indicator 3G Network Service available 2G Network Service available No Network Service available Network Roaming AC adapter Plugged in and Powered Left Soft Key Press to go into the Menu from Home screen; Select/Ok in submenus Battery Life Indicator Direction Keys Handset is picked up Up Key Used to scroll through the menu; Shortcut to File Manager Down Key Used to scroll through the menu, Shortcut to Settings New Message Received Left Key ... -
Page 8: Menu Icons
5. Contacts Bluetooth enabled icon FM Radio enabled icon In the home screen, select [Menu] [Contacts] [OK] Hands Free icon Note: When referring to [OK], it is generally the left soft key located above the Message Received icon green dial key USB connected icon Press the left soft key [OK] to access the Options Press the right soft key [Delete] to clear errors made during entry SD Card icon New: Add New Contacts. Storage available: Shows the amount of storage available on Phone and SIM SD Card format error icon card Quit Menu: Exit back to home screen 4.5 Menu Icons To add a new contact: ‐ Press the left soft key [OK] and select [New] ‐ You will be prompted to select where to store the contact, SIM card or Phone, [OK] to continue ‐ Fill in the Name and Phone number of the contact, once done press [OK] [Save] ‐ You have the following fields available to personalise the new entry: Name and Phone Number ‐ Once all desired fields have been updated, select [OK] [Save] ‐ Note: You can change the input method by pressing the # key ... -
Page 9: Sms
To Edit the details of an existing contact, Messages not sent or pending are located in the Outbox ‐ Select the desired contact and press [OK] [Detail] ‐ From the SMS menu, select [Outbox] ‐ Select [Edit] ‐ To view, select [Into the message details]. Here you press [OK] [Retry ‐ Press [OK] [Save] once complete sending] to resend the message ‐ Note: You can change the input method by pressing the # key ‐ To delete, select [Delete the selected Message] ‐ To delete all messages, select [Delete all Message] To Delete a contact, you can do it 2 ways: Under settings 1) Scroll and select the contact which you wish to delete and select [Detail] ‐ Request delivery report: Enable this to receive a report when message is sent [OK] [Delete] [OK] ‐ Edit quick text: Here you can change / customize your quick text templates. 2) To delete multiple contacts: From Contacts, select [Delete], then [Select] ‐ SMS Service: Here you can see/edit your SMS service number the desired contacts which needs to be deleted (shown with tick), press ‐ SMS storage location: Here you can select if you want to save your SMS to [OK] select [OK] SIM Card or Phone Memory ‐ Current storage usage: This displays the current storage space of your SMS inbox 6. SMS 7. Call log In the home screen, select [Menu] [SMS] [OK] In the home screen, select [Menu] [Call log] [OK] ... -
Page 10: Calendar
Press [OK] to view the following options 8. Calendar ‐ On/Off: Enable or disable the selected alarm. If the alarm is on, the displayed option is off and vice versa In the home screen, select [Menu] [Calendar] [OK] ‐ Edit: Here you can make changes to the current alarm ‐ Add: Here you can add a new alarm ‐ Delete: Here you can choose to delete the alarm Note: When referring to [OK], it is generally the left soft key located above the To add a new alarm or edit an alarm, Press [OK] [Add] [OK] or [Edit] green dial key [OK] ‐ Here you can set the time of the alarm. Press [Select] on the selected field and Press [OK] to view the following options set the time by pressing the up or down key. Note that the numpad does not ‐ To the current date: You will be taken to today’s date work in this section. Press [OK] again to confirm. ‐ To the specified date: You can choose this to go to a specific date ‐ Press the navigation key to move to different settings in this section and [Select] to enable/disable ‐ Press the right soft key [Save] and then left soft key to [Save] the alarm, or [Cancel] to discard the alarm ‐ Up arrow: Addition ‐ Down arrow: Subtraction ‐ Left arrow: Multiplication ‐ Right arrow: Division To select a specific date ‐ Left soft key: Equal ‐ Right soft key: Back/Delete ‐ Select [To the specified date] [OK] ‐ Star key: point ‐ For negative number, insert the ... -
Page 11: Display
‐ Security: Configuration settings for Set up SIM card lock and Screen lock To Disable: ‐ Fast dialling: Used to configure fast dial keys when you press and hold a 1. Select Display Dim and set the time in which you wish for the display to dim, and press the left soft number key on the home screen key to confirm. ‐ Bluetooth: Enable/Disable Bluetooth feature, Scan & Pair other Bluetooth 2. A pop‐up message will be displayed. Confirm by selecting [OK] and the left soft key to confirm devices to Phone 3. Choose [Disable] and press the left soft key to confirm. ‐ Factory data reset: Here you can reset and erase all data on the phone. ‐ Phone Info: Here you can view Status, Model, Versions and Build number for the Phone 10.2 Sound 10.1 Display Under the Sound setting, you have the option to: Under the Display setting, you have the option to: ‐ Volume: Adjust the volume for Music, Ringtone & Notifications, Alarms. Press ‐ Brightness: You can adjust the light intensity for the background light that left or right to adjust the volume and up or down to change the selection. Once illuminates the screen. Use the left or right key to adjust the brightness level done, scroll down to the bottom and select [OK] from dim to bright ‐ Phone ringtone: You can change the ringtone here, press the [left soft key] to ‐ Display Dim: If no key is pressed with a set period, the background light will confirm dim automatically. This is to protect the LCD screen and save battery life. The ‐ Default notification sound: You can change the notification sound for alerts default time is set to 5 minutes. here Additional Feature “Return to Home Page” can be enabled to return the screen ... -
Page 12: Date & Time
Call forwarding: You can set to divert incoming calls to another phone number. This is normally set to Change PIN2: You can change your current SIM PIN2. You will be required to enter your current PIN2 the voicemail number or another phone number. before you can set a new PIN2. Always forward: This setting redirects all incoming calls to another phone number. Press [OK] to enter a phone FDN list: When FDN is enabled, only numbers or prefixes listed here can be called to. Press [OK] and select [Add number and enable this function. Once complete, press down and select [Enable] to save or [Cancel] to exit. To contact]. Enter the Name and Number of the contact which can receive outgoing calls. disable this function, press [OK] and select [Disable] to save. 10.4 Date & time Forward when busy: This setting redirects all incoming calls to another phone number if the phone line is busy. Phone line can be busy if the number is calling out, you’re not in a service area or you’re using Call waiting and Under the Date & time settings, you have the option to: already have two callers on the line. Press [OK] to enter a phone number and enable this function. Once ‐ Automatic date & time: By default, this option is enabled. The date & time is complete, press down and select [Enable] to save or [Cancel] to exit. To disable this function, press [OK] and set to network‐provided time select [Disable] to save. ‐ Automatic time zone: Enable to automatically update the time zone set by Forward when unanswered: This setting redirects all incoming calls to another phone number if the call isn’t the service provider answered within a specified number of rings. Press [OK] to enter a phone number and enable this function. ‐ Set date/time/time zone: These options will be greyed out if Automatic date Once complete, press down and select [Enable] to save or [Cancel] to exit. To disable this function, press [OK] & time/time zone is enabled. You must disable the Automatic options in order and select [Disable] to save. to manually set the date/time/time zone ‐ Use 24‐hour format: Enable to display time in 24‐hour format. Disable for 12‐ Forward when unreachable: This setting redirects all incoming calls to another phone number if the phone hour format ever loses registration for any reason. Press [OK] to enter a phone number and enable this function. Once ‐ Choose date format: Select between Regional; MM/DD/YYYY; DD/MM/YYYY; complete, press down and select [Enable] to save or [Cancel] to exit. To disable this function, press [OK] and YYYY/MM/DD date format select [Disable] to save. 10.5 Wireless & network Call barring: Call barring lets you stop certain types of calls being made from the phone. This feature is network independent. Please contact your network operator for setup of this feature. The default ... -
Page 13: Wi-Fi Tethering (Wi-Fi Hotspot)
‐ If your router supports WPS function, you can use [OK] [WPS Push Button] ‐ The phone comes pre‐set with default Network SSID and Password for the Wi‐ function to connect Fi hotspot. You can modify these settings by scrolling with the [Up/Down] Key ‐ To disconnect from the wireless network, you can either turn off the Wi‐Fi or to the field which needs to be reconfigured [Forget network] ‐ Wireless password must have at least 8 characters ‐ If your wireless network is hidden, you will need to use the [Add network] ‐ You can view the Password set by marking the [Show password] function function ‐ It will also make setting a Password easier if you mark the [Show password] function before configuring the password. This way you can see what you are typing. To change the input method, press the # key to switch between en/ EN/ Num. To input special characters, press the ✲ key Advanced settings ‐ You can change the Security method between None or WPA2 PSK ‐ Should you wish to reset network SSID, security and password back to default, To access advance settings, press [OK] [Advanced]. You can view your details such as MAC address / IPv4 select [Reset OOB] address here. ‐ Once complete, scroll all the way down to the bottom and select [Save] or discard all changes with [Cancel] Network notification: Enable this feature for the phone to display the Wi‐Fi Network available Icon and send out a notification tone when there are available wireless networks in the area. ‐ You can view all connected users as well as blocked users below Keep Wi‐Fi on during sleep: This can be set to Always / Only when plugged in / Never ‐ You can see the connected users MAC and IP address ‐ To block a user, select the user from the connected users list and press the Wi‐Fi optimization: Enable this feature to minimize battery usage when Wi‐Fi is on. [Left soft key]. Their MAC will be moved over to blocked users ‐ To unblock a user, select the user from the blocked users list and press the You can also view your wireless information such as MAC address / IPv4 address [Left soft key]. Their MAC will be moved over to connected users ... -
Page 14: Quick Number
‐ If the device paired doesn’t have a screen, there won’t be a pairing code to 10.6 Quick number confirm ‐ To end the connection, select from Paired Devices [OK][Unpair][OK] You can set the M1 – M4 quick dial keys (located on the face of the phone) by: To Edit, select the M# and press [OK]. Input the number and select [Save][Save]. If you have a SD Card inserted in the Phone, you can transfer files between the Phone and another device. Make If you have the number saved in your Contacts, press [Save][From contact]Choose the sure the Phone is paired successfully with the device which you wish to transfer to/from and there is sufficient number[OK][Save][Save]. memory on the SD card. To delete, select the M# and press [OK]Clear all numbers[Save][Save]. 10.10 Factory Data Reset 10.7 Security Use this function if you wish to restore the phone back to factory settings. All personal information, data stored will Set up SIM card lock: Set SIM PIN lock to on or off, or modify SIM PIN. Note that the SIM PIN number is issued by be erased and you cannot reverse this action. your network provider and is shown on your Complete SIM card. If a SIM PIN is set, it will be indicated with a tick. To do this navigate [Menu][Settings][Factory data reset][Erase everything][OK] The phone will now proceed to erase and restore the phone back to factory settings, during this process the phone will reboot a few times. This process should take about 1‐2 min. 10.8 Fast dialling 10.11 Phone Info You can set Numbers or Contacts to have speed dial functions here. This allows you to dial a number by pressing and holding down the corresponding numeric key in the Home Screen. To set this, select the number position of Here you can view the Phone’s information such as Status, Model number, Android version, Baseband version, where you wish to set the speed dial and press [OK] Input the number then [Save] [Save]. Kernel version and Build number If you have the number saved in your Contacts, press [Save][From contact]Choose the number[OK][Save][Save]. ... -
Page 15: Browser
After the search option is selected, the full list of searched stations will be To save a webpage to bookmarks: available on this screen [Options][Save to bookmarks] If you think there are other channels in the area, try using [Search] again ‐ You can save the current webpage to your Bookmarks You can also fine tune the station with the ✲star or #hash key ‐ To change the volume level, use the Left and Right directional keys ‐ To change the radio channel level, use the Up and Down directional keys How to Navigate, Click and Enter Text: ‐ You can navigate the screen by using the directional keys. This will scroll the Important Note: In order to completely turn OFF the Radio, you must navigate to the Radio feature and page up, down, left or right. use [Exit] to close the Radio. By pressing [Back] or the [Red Hang Up Key] will only minimize the Radio to the background. The Radio will pause when you pick up the handset to dial or when receiving a call. The ‐ To type text into a textbox, press the M1 quick dial key to bring up the mouse cursor. You will now see a cursor on screen. To navigate the cursor, Radio will return when the call ends. use the directional keys to move the cursor up, down, left or right. To select what the cursor is pointing to, press the left soft key . Select the textbox which you want to type unto and press the left soft key. The top right corner 12. Browser will now show “abc” to indicate that the input method is now activated. Press the # key to change input from abc, ABC or 123. To input special characters, In the home screen, select [Menu] [Browser] [OK] press the ✲ key. You can delete what was entered by pressing [Back]. To exit the mouse cursor, press the M1 key again. This will now return you back to the scroll function. You must repeat this process for all textboxes if you wish to ... -
Page 16: File Manager
How to connect to a wireless network If you have inserted a microSD card, and it is detected by the phone, you will ‐ Once Wi‐Fi has been turned on, you will see a list of available wireless see SD card. networks in your area Press [OK] to see: ‐ To connect to a wireless network, scroll up or down and highlight the name of ‐ Open: Select to view the files/folders on the microSD Card the network you want to connect to, select [OK] [Connect to network] ‐ Search: Used to search for files on the microSD Card ‐ To make entering the password easier, first scroll down to [Show password] and press the [Left Soft key]. This will display the password as you type ‐ Press up and enter the wireless password into the password field. You can The phone will pre‐configure the microSD card with default folders for easy change the input method by pressing the # key or input special characters with reference the ✲ key ‐ Once the password is entered correctly, scroll down to [Connect] and press the [Left Soft key] ‐ You can enable [Show advanced options] if you have settings for Proxy or IPv4 ‐ Once successfully connected, the selected wireless network will show Connected and a wireless icon will be displayed on the top bar ‐ If your router supports WPS function, you can use [OK] [WPS Push Button] To see more options for the selected folder or file, Press [OK] when the item is function to connect highlighted ‐ To disconnect from the wireless network, you can either turn off the Wi‐Fi or ‐ Open: Select to open the folder [Forget network] ‐ Search: Used to search for files on the microSD Card ‐ If your wireless network is hidden, you will need to use the [Add network] ‐ Create folder: Add a new folder onto the microSD Card function ‐ Cut: Cut an item will remove it from the folder and temporary hold the file to ... -
Page 17: Music
Q. “Insert SIM card" appears on the screen. 15. Music A. Make sure the SIM card is correctly installed. Check if the SIM card works properly in another device where possible. SIM card may be defective or faulty. Please contact you Network Provider for a SIM swop if faulty. Important Note: In order to completely turn OFF the Music Player, you must navigate to the Music feature and use Q. Poor sound quality, echo or noise makes communication difficult. [Quit] under the player to close the Music Player. By pressing [Quit] under the Library or the [Red Hang Up Key] will A. Hang‐up your phone and dial again. The Network may connect the phone to a line with better communication only minimize the Music Player to the background. The Music Player will pause when you pick up the handset to quality. If the problem persists, please contact you Network Provider. dial or when receiving a call. The Music Player will return when the call ends. In the home screen, select [Menu] [Music] [OK] Q. “Not in‐service area. Network failure.” is displayed. Music Library A. Check the signal indicator. If there is no signal, you may be in the basement or network blind area in a building. If you have audio files loaded onto the SD Card, the phone will auto detect the Please move to other locations to receive signal. Or potentially you are not in a coverage area. If so, please contact files and list it in the Library. your Network Provider for assistance. Press [Play] to start playing the selected music Or press [Quit] exit back to the Menu Screen Q. Battery Life Short/Decreases. A. Signal at your location is weak so that the phone has to search signal for a long time. When you don’t want to answer any calls, please power off. It is also possible that the battery has been used for a long time and approaches Once the music plays, you can press [Option] for selections such as: its life‐span. In this case, please replace the battery. ‐ Pause: Pause the current playing music ‐ Library: List of music available, press to take you back to the previous screen Q. My phone screen keeps returning to the Home Page by itself ‐ Use as ringtone: Set the current playing audio as the ringtone A. Check that the Return to Home Page feature is not enabled. If you don’t want this feature, disable it. ‐ Shuffle: Enable to play songs in a randomized order. When enabled, the ... -
Page 18: Technical Specifications
Q. Cannot make calls A. Check that you have a positive voice airtime balance to make calls. To check, dial *188# on Telkom. To purchase airtime through the Telkom USSD function, dial *180# and follow the on screen instructions. Q. Cannot select some functions A. The service is not available or the location network does not support this service. Please contact your Operator. Technical Specifications UMTS/HSPA+(WCDMA) Band Support Structure 850/1900MHz Size: 227 x 157 x 70mm / 0.4 kg GSM Quad‐Bands Power adapter 850/900/1800/1900MHz Power adapter: DC 5V / 500mA Battery: 3.7V / 800mA LCD Package Content 240x320 dots, 2.4 inch colour screen with backlight Phone Unit x 1pc function Handset Receiver x 1 pc Handset Cord x 1 pc Li+ Battery x 1pc Compatible file types ...
Need help?
Do you have a question about the DWR-720/PW and is the answer not in the manual?
Questions and answers