Table of Contents
Advertisement
Quick Links
Advertisement
Table of Contents

Related Manuals for Arcteq AQ 200 Series


Summary of Contents for Arcteq AQ 200 Series
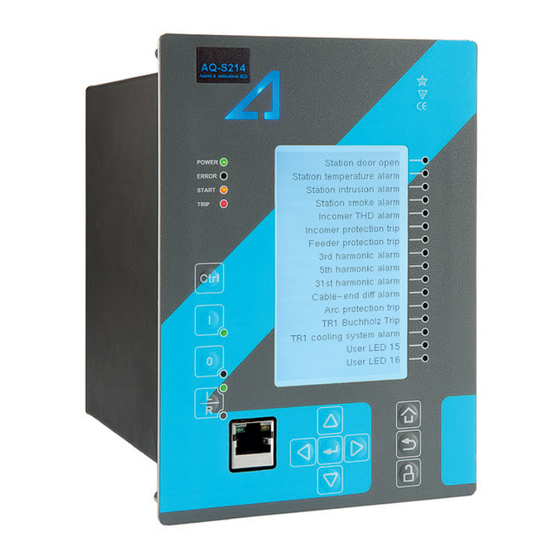
- Page 1 AQ-S214 Alarm and Indication IED Instruction manual ...
-
Page 2: Table Of Contents
4.1.1. AQ 200 series local panel structure ........ - Page 3 11. Contact and reference information ..........© Arcteq Relays Ltd...
- Page 4 Nothing contained in this document shall increase the liability or extend the warranty obligations of the manufacturer Arcteq Relays Ltd. The manufacturer expressly disclaims any and all liability for any damages and/or losses caused due to a failure to comply with the instructions contained herein or caused by persons who do not ful l the aforementioned requirements.
- Page 5 AQ-S214 Instruction manual Version: 2.00 Copyright Copyright © Arcteq Relays Ltd. 2018. All rights reserved. © Arcteq Relays Ltd...
-
Page 6: Manual Revision Notes
- Alarming function description revised. CTRL-button now clears all alarms. Revision 1.07 Date 20.12.2017 - Event lists revised on several functions - RTD&mA card description improvements Changes - Ring-lug CT card option description added - Order code revised © Arcteq Relays Ltd... - Page 7 AQ-S214 Instruction manual Version: 2.00 Revision 1.08 Date 18.1.2019 Changes - Added HMI display technical data © Arcteq Relays Ltd...
-
Page 8: Abbreviations
RMS – Root mean square SF – System failure TMS – Time multiplier setting TRMS – True root mean square VAC – Voltage alternating current VDC – Voltage direct current SW – Software uP - Microprocessor © Arcteq Relays Ltd... -
Page 9: General
LED display and event list. AQ-S214 can be connected to substation automation system using various standard protocols including IEC 61850 substation communication standard. AQ-S214 can be programmed using easy to use AQtivate 200 setting and con guration software. © Arcteq Relays Ltd... -
Page 10: Ied User Interface
4.1.1. AQ 200 series local panel structure AQ 200 series IED have multiple LEDs, control buttons and local RJ-45 Ethernet port for con guration on front as a default. On rear each unit is equipped with RS-485 serial interface and RJ-45 Ethernet interface options as a standard. -
Page 11: Mimic And Main Menu
4.2.2. Navigation in main con guration menus All the settings in this IED type have been divided into main con guration menus. Main con guration menus are presented below. Available menus may vary according to IED type. © Arcteq Relays Ltd... -
Page 12: General Menu
Enable stage forcing (disabled / enabled). When forcing is disabled after using every forced output will restore. Forcing is done individually in info menu of each stage. Language selection, all available languages here (English as default). Clear devices events. © Arcteq Relays Ltd... -
Page 13: Control Menu
Activation of different control functions is done in Controls Enabled –sub menu. Each control function is disabled as standard. Active functions will appear below Control Functions –sub menu. Activated objects will appear below Objects –sub menu. Each object is disabled as standard. © Arcteq Relays Ltd... - Page 14 Setting group 1 has the highest and group 8 the lowest priority. Setting groups can be controlled with steady signal or pulses. Figure. 4.4. - 9. Group changing with pulse control only or with pulses and static signal. © Arcteq Relays Ltd...
- Page 15 Each activated object is visible in Objects -menu. As default all objects are disabled. Each active object has four setting menus, settings, application control, registers and events. Figure. 4.4. - 11. Info menu indicates all the details listed below certain protection stage or function. © Arcteq Relays Ltd...
- Page 16 To control MIMIC the terms of user access level (password) has to be ful lled. As default the access level is set to Con gurator. For object local and remote controlling digital inputs can be used. Remote controlling via bus is con gured in protocol level. © Arcteq Relays Ltd...
- Page 17 LED. Connection to outputs can be either latched |x| or non-latched x. Object blocking is done in Blocking Input Control menu. Blocking can be done by using digital inputs, logical inputs or outputs, stage start- trip- or blocked information or by using object status information. © Arcteq Relays Ltd...
- Page 18 Control functions Figure. 4.4. - 14. Stage navigation and modi cation. Each enabled control function is listed below Control Functions menu. Every function includes same sub-menus as protections stages including Info, Settings, Registers, IO and Events. © Arcteq Relays Ltd...
- Page 19 (normal open or normal closed), activation (16…200 , step 0.1V) and release (10…200 V , step 0.1V) threshold voltage for each available input AC/DC AC/DC and activation delay (0…1800 s, step 1ms). Binary input statuses can be check from corresponding menu. © Arcteq Relays Ltd...
- Page 20 IED via setting le. NOTE! Normal closed signal goes to default position (normal open) in case the relay loses the auxiliary voltage or during System full reset. Normally closed output signal does not open during Communication- or protections reset. © Arcteq Relays Ltd...
- Page 21 Description Settings menu the label text of the LED can be modi ed. This label is visible in LEDs quick displays and matrixes. LED color can be chosen between green and yellow in LED Color Settings menu. As default the color is green. © Arcteq Relays Ltd...
- Page 22 Programmable control switches (PCS) are switches that can be used to control signals in mimic view. These signals can be used in various situations (controlling logic program, function blocking etc.) You can give each switch a name and set access level to determine who can control the switch. © Arcteq Relays Ltd...
-
Page 23: Communication Menu
Connections menu. IEDs support following communication protocols: SNTP, IEC61850, ModbusTCP, ModbusRTU, IEC103, IEC101/104, SPA and ModbusIO as a standard. It is also possible to have additional protocols with special extra communication interface modules. © Arcteq Relays Ltd... - Page 24 ModbusTCP can be used at the same time with other Ethernet based protocols like SNTP and IEC61850. ModbusRTU / IEC103 / ModbusIO con guration menus. ModbusRTU like other serial protocols can be used only one at the time over one physical serial communication interface. © Arcteq Relays Ltd...
-
Page 25: Monitoring Menu
Figure. 4.6. - 25. IED Monitors Enabled sub- menu. Activation of different monitor functions is done in Monitors Enabled sub-menu. Each Monitoring function is disabled as standard. Activated menus will appear in the Monitor functions sub-menu. MONITOR FUNCTIONS © Arcteq Relays Ltd... - Page 26 AQ-S214 Instruction manual Version: 2.00 Figure. 4.6. - 26. IED function modi cation. Con guring monitor functions is very similar to con guring protection stages. DISTURBANCE REC © Arcteq Relays Ltd...
- Page 27 Recording mode is either First in First out or Keep Olds. Sample rate of analogue channels is 8/16/32/62 samples per cycle. Digital channel sample rate is xed 5 ms. Pre triggering time is selectable between 5…95%. © Arcteq Relays Ltd...
- Page 28 Device Diagnostics gives detailed feedback of the IED condition generally and whether option cards are installed correctly without problems. In case anything abnormal is noticed in Device diagnostics menu and it cannot be reset please contact closest representative or manufacturer. © Arcteq Relays Ltd...
-
Page 29: User Level Password Con Guration
Con gurator: Can change most settings like basic protection pick-up levels or time delays, breaker control functions, signal descriptions etc. Can operate breakers or other equipment. Super user: Access to change any setting and can operate breakers or other equipment. © Arcteq Relays Ltd... -
Page 30: Functions
1:Fixed screen screen screen Table. 5.1. - 2. General-menu indications Name Description Serial number Unique serial number identi cation of the unit. SW version Units rmware software version. HW conf. Units order code identi cation. © Arcteq Relays Ltd... -
Page 31: Alarming Function
Setting of alarms is divided into four tabs in groups of 16. User can assign a digital input or a logic output into each of the alarms. When any of the alarms have been activated by the assigned signal the alarm will appear in the Alarms-menu in the relay HMI. © Arcteq Relays Ltd... - Page 32 Alarms can be also cleared by using “Clear all alarms” signal. In the example below physical push button is activating digital input 4 which is connected to Clear all alarms. After this is done in the logic editor click Export and then update logic ( Commands → Update logic ). © Arcteq Relays Ltd...
- Page 33 1 text and LED. Alarm text 2 and LED are not affected because digital input 2 is not yet deactivated. By the time CTRL-button is pushed again digital input 2 is deactivated and alarm text 2 is also cleared. © Arcteq Relays Ltd...
- Page 34 If latched signals are connected to alarms the relay requires the user to push the back button in the relays front port before it can be cleared. Using latched signals is generally not advised to keep the clearing of the alarms simple. © Arcteq Relays Ltd...
- Page 35 ALARM1 Alarm 13 Off ALARM1 Alarm 14 On ALARM1 Alarm 14 Off ALARM1 Alarm 15 On ALARM1 Alarm 15 Off ALARM1 Alarm 16 On ALARM1 Alarm 16 Off ALARM1 Alarm 17 On ALARM1 Alarm 17 Off © Arcteq Relays Ltd...
- Page 36 ALARM2 Alarm 34 On ALARM2 Alarm 34 Off ALARM2 Alarm 35 On ALARM2 Alarm 35 Off ALARM2 Alarm 36 On ALARM2 Alarm 36 Off ALARM2 Alarm 37 On ALARM2 Alarm 37 Off ALARM2 Alarm 38 On © Arcteq Relays Ltd...
- Page 37 ALARM2 Alarm 54 Off ALARM2 Alarm 55 On ALARM2 Alarm 55 Off ALARM2 Alarm 56 On ALARM2 Alarm 56 Off ALARM2 Alarm 57 On ALARM2 Alarm 57 Off ALARM2 Alarm 58 On ALARM2 Alarm 58 Off © Arcteq Relays Ltd...
-
Page 38: Control Functions
SGS an event of failed setting group change is issued. In the following gure is presented the simpli ed function block diagram of the SGS function. Figure. 5.3.1. - 34. Simpli ed function block diagram of the SGS function. © Arcteq Relays Ltd... - Page 39 Table. 5.3.1. - 5. Settings of the SGS function. Name Range Step Default Description © Arcteq Relays Ltd...
- Page 40 SG selection function block generates events from its controlling status and applied input signals as well as unsuccessful control changes and enabled setting groups. For this function is no register available. Table. 5.3.1. - 7. Event codes of SGS function. Event Number Event channel Event block name Event Code Description © Arcteq Relays Ltd...
- Page 41 SG Req. Fail Not con gured SG On 4197 SG Req. Fail Not con gured SG On 4198 Force Req. Fail Force not On 4199 Force Req. Fail Off 4200 SG Req. Fail Lower priority Req. On © Arcteq Relays Ltd...
- Page 42 Varmetric and Wattmetric based on if the Petersen coil is connected when the network is compensated or is it open when the network is unearthed. Figure. 5.3.1. - 37. Setting group control with 1 wire connection from Petersen coil status. © Arcteq Relays Ltd...
- Page 43 Figure. 5.3.1. - 39. Setting group control with 2 wire connection from Petersen coil status and additional logic. Application controlled setting group change can be applied also completely from the relays internal logics. One example can be setting group change based on cold load pick up function. © Arcteq Relays Ltd...
-
Page 44: Object Control And Monitoring (Obj)
Outputs of the function are Object open and Object close control signals. In addition to these output controls the function will report the monitored object status and applied operations. Setting parameters are static inputs for the function which are changed only by user input in the setup phase of the function. © Arcteq Relays Ltd... - Page 45 Position indication can be done among binary inputs and Ready protection stage signals by using IEC-61850, GOOSE or logical signals. Ready status can be set (SWx) by application either “1” or “0”. © Arcteq Relays Ltd...
- Page 46 Table. 5.3.2. - 10. Control digital signal outputs used by the OBJ function. Signal Range Description Close command OUT1…OUTx Physical close command pulse to output relay of the IED. Open command OUT1…OUTx Physical open command pulse to output relay of the IED © Arcteq Relays Ltd...
- Page 47 If the object ready is not received during this set time the close command Obj Ready 0.000… 0.02s 0.2s will be rejected with error message. (visible only if Use Object is either wait timeout 500.00s “High” or “Low”) © Arcteq Relays Ltd...
- Page 48 For example, interlocking can be set for object close based on earthing disconnector position. Figure. 5.3.2. - 43. Example of interlock application. Closed earthing switch interlocks CB close. Blocking signal has to reach the function 5 ms before control command in order it is received in time. © Arcteq Relays Ltd...
-
Page 49: Indicator Object Monitoring (Cin)
Inputs for the function are binary status indications. The function generates general time stamped ON/OFF events to the common event buffer from each of the open, close, bad and intermediate event signals. Time stamp resolution is 1ms. © Arcteq Relays Ltd... - Page 50 Close 6723 CIN2 6784 CIN3 Intermediate 6785 CIN3 Open 6786 CIN3 Close 6787 CIN3 6848 CIN4 Intermediate 6849 CIN4 Open 6850 CIN4 Close 6851 CIN4 6912 CIN5 Intermediate 6913 CIN5 Open 6914 CIN5 Close 6915 CIN5 © Arcteq Relays Ltd...
-
Page 51: Ma Output Control
Enable mA Out Channels 3&4 Enable mA Out Channels 5&6 0:Disabled mA option card 2 0:Disabled Enables mA output cards outputs. 1:Enabled Enable mA Out Channels 7&8 Figure. 5.3.4. - 45. Example of the effects mA output Channel settings have. © Arcteq Relays Ltd... - Page 52 Up to two independent milliamp option cards are supported. Each card has 4 milliamp -outputs and one mA -input. If the IED has milliamp option card, enable mA-input by selecting: Measurements → AI(mA, DI volt) scaling : © Arcteq Relays Ltd...
- Page 53 The signal can be assigned directly to output relay or LED in IO matrix. Out of range signal is activated when measured mA signal falls below the set input minimum or exceeds the input maximum limit. Out of range signal is valuable when for example 4…20mA input signal is used. © Arcteq Relays Ltd...
- Page 54 To where measured milliamp signal should be scaled at point 2. ...10 value 1 Add curvepoint 0:Not used 0:Not Instead of using linear curve between two points, create your own 3...20 1:Used used curve with up to 20 curve points. © Arcteq Relays Ltd...
-
Page 55: Programmable Control Switch
Table. 5.3.5. - 22. Event codes of the PCS function Event Number Event channel Event block name Event Code Description Switch1 On Switch1 Off Switch2 On Switch2 Off Switch3 On Switch3 Off Switch4 On Switch4 Off Switch5 On Switch5 Off © Arcteq Relays Ltd... -
Page 56: Monitoring Functions
If the measurements are recorder into the relay you just need to set the recording interval and start the recording. AQtivate estimates the max recording time which depends on the recording interval. When measurement recorder is running in the relay the measurements can be then viewed in graph form with AQtivate PRO software. © Arcteq Relays Ltd... - Page 57 L2 Exp.React.Ind.E.kvarh Sec.Res.Curr.I01 U2Volt Pri TRMS L2 Imp.React.Ind.E.Mvarh Sec.Res.Curr.I02 U3Volt Pri TRMS L2 Imp.React.Ind.E.kvarh Sec.Calc.I0 U4Volt Pri TRMS L2 Exp/Imp React.Ind.E.bal.Mvarh Pha.Curr.IL1 TRMS Sec Pos.Seq.Volt.Pri L2 Exp/Imp React.Ind.E.bal.kvarh Pha.Curr.IL2 TRMS Sec Neg.Seq.Volt.Pri L3 Exp.Active Energy MWh © Arcteq Relays Ltd...
- Page 58 TM> Time to 100% T Res.Curr.angle I01 System Volt UL2 mag TM> Reference T curr. Res.Curr.angle I02 System Volt UL2 mag (kV) TM> Active meas curr. Calc.I0.angle System Volt UL3 mag TM> T est.with act. curr. © Arcteq Relays Ltd...
- Page 59 Pha.Curr.I”L1 TRMS L3 Cos(phi) L3 Diff current Pha.Curr.I”L2 TRMS 3PH Apparent Power (S) L3 Char current Pha.Curr.I”L3 TRMS 3PH Active Power (P) HV I0d> Bias current I” Pos.Seq.Curr. 3PH Reactive Power (Q) HV I0d> Diff current © Arcteq Relays Ltd...
-
Page 60: Measurement Value Recorder
The same applies if only voltage is available. Currents Description Fundamental frequency current measurement values of phase currents and residual IL1ff, IL2ff, IL3ff, I01ff, I02ff currents IL1TRMS, IL2TRMS, IL3TRMS, TRMS current measurement values of phase currents and residual currents I01TRMS, I02TRMS © Arcteq Relays Ltd... - Page 61 M thermal T Motor thermal temperature F thermal T Feeder thermal temperature T thermal T Transformer thermal temperature RTD meas 1…16 RTD measurement channels 1…16 Ext RTD meas 1…8 External RTD measurement channels 1…8 (ADAM module) © Arcteq Relays Ltd...
- Page 62 VREC function generates events from function triggering. To main event buffer it is possible to select “On” or “Off” status messages. Table. 5.4.2. - 25. Event codes of the VREC function. Event Number Event channel Event block name Event Code Description 9984 VREC1 Recorder triggered On 9985 VREC1 Recorder triggered Off © Arcteq Relays Ltd...
-
Page 63: System Integration
Following Modbus function types are supported: Read Holding Register, 3 Write Single Register, 6 Write Multiple Registers, 16 Read/Write Multiple Registers, 23 Following data can be accessed using both Modbus TCP and Modbus RTU Device measurements Device I/O Commands Events Time © Arcteq Relays Ltd... -
Page 64: Modbusio
Channel selection for the module. For each of the 8 channels of the IO module connected thermocouple can be selected. T.C. type [+-20mA,Type J, Type K, Type T, Type E, Type R, Type S] Thermocouple type setting. © Arcteq Relays Ltd... -
Page 65: Iec 61850
Time synchronization Currently used 61850 setup of the device can be viewed in the IEC61850 tool ( Tools → IEC61850 ). For a list of available Logical Nodes in the Arcteq implementation browse the 61850 tree. See following picture: Figure. 6.1.4. - 51. IEC 61850 tool buttons. - Page 66 BRCB’s. All of these datasets can be edited. By un-checking both of the GOOSE publisher datasets GOOSE publisher service will be disabled. See following picture. Figure. 6.1.4. - 53. DataSets window for adding/removing and editing datasets. © Arcteq Relays Ltd...
-
Page 67: Goose
Enable setting for GOOSE subscriber. 6.1.5. GOOSE Both GOOSE publisher and subscriber are supported by the Arcteq implementation. GOOSE subscriber is enabled by parameter setting ( Communication → Protocols → IEC61850 → GOOSE subscriber enable ) and GOOSE inputs are con gured using HMI or Aqtivate tool. For each of the Goose inputs there is also an input quality signal which can also be used in the internal logic. - Page 68 GOOSE input signals on the receiving side together with the quality information for that binary signal. The quality information in the incoming frame will be ORed with GOOSE reception timeout supervision information so that quality information for each GOOSE input can be used in relay logic. © Arcteq Relays Ltd...
-
Page 69: Iec 103
(slave). The IEC 103 protocol can be selected for the available serial ports of the device. A master or primary station can communicate with the Arcteq device and receive information by polling from the slave device. Disturbance recordings transfer is not supported. -
Page 70: Spa Protocol
, harmonic 9 , harmonic 11 , harmonic 13 , harmonic h., 15 h., 17 h., 19 , harmonic 17 , harmonic 19 harmonic current. I1,I2,I0Z Positive sequence current, negative sequence current and zero sequence current © Arcteq Relays Ltd... - Page 71 System f. Used tracking frequency at the moment Ref f1 Reference frequency 1 Ref f2 Reference frequency 1 M thermal T Motor thermal temperature F thermal T Feeder thermal temperature T thermal T Transformer thermal temperature © Arcteq Relays Ltd...
- Page 72 Scale current values to primary 1:Yes values 0:Currents; 1:Voltages; 2:Powers; Slot 1…8 Magnitude selection Selection of slots measured magnitude category 3:Imp.(ZRX).Adm. (YGB); 4:Others; Described in table Selection of the magnitude in the previously selected Slot 1…8 Magnitude (x) above category © Arcteq Relays Ltd...
-
Page 73: Applications And Connection Examples
AQ-S214 Instruction manual Version: 2.00 7. Applications and connection examples 7.1. Connections AQ-S214 Figure. 7.1. - 56. AQ-S214 variant without add-on modules. © Arcteq Relays Ltd... - Page 74 AQ-S214 Instruction manual Version: 2.00 Figure. 7.1. - 57. AQ-S214 variant with binary input and output modules. © Arcteq Relays Ltd...
- Page 75 AQ-S214 Instruction manual Version: 2.00 Figure. 7.1. - 58. AQ-S214 application example. © Arcteq Relays Ltd...
-
Page 76: Construction And Installation
For a eld upgrade this means that the add-on module has to be ordered from Arcteq Ltd. or representative who shall provide the add-on module with corresponding unlocking code in order the device to be operating correctly after upgrading the hardware con guration. - Page 77 Comm. port 3 etc. since in the CPU-module already exist Comm. ports 1 and 2. After communication port is detected it is added into the communication space in the IED and corresponding settings are enabled for the IED. © Arcteq Relays Ltd...
-
Page 78: Cpu, Io And Power Supply Module
Digital inputs 1, 2 and 3 common ground. Digital input 2 ground. X 5:6 Output relay 1, Normally open contact X 7:8 Output relay 2, Normally open contact X 9:10 Output relay 3, Normally open contact © Arcteq Relays Ltd... - Page 79 In case the binary input is connected directly to binary output (T1…Tx) it takes additional third 5 millisecond round. When binary input is controlling internally binary output it takes 0…15 milliseconds in theory and 2…13 milliseconds in practice. This delay excludes the mechanical delay of the relay. © Arcteq Relays Ltd...
-
Page 80: Binary Input Module (Di8) (Option)
NO/NC (normally open/-closed) selection. Naming convention of the binary inputs provided by this module is presented in the chapter 6 Construction and installation. For technical details refer to the “Technical data” section of this document © Arcteq Relays Ltd... - Page 81 User settable normal state (normally open/normally closed) de nes if the digital input is considered activated when the digital input channel is energized. Figure. 8.3. - 62. Digital input state when energizing and de-energizing the digital input channels. © Arcteq Relays Ltd...
-
Page 82: Binary Output Module (Do5) (Option)
All output contacts are mechanical type. Rated voltage of the NO/CO outputs is 250VAC/DC. Naming convention of the binary outputs provided by this module is presented in the chapter Construction and installation. For further details refer to the “Technical data” section of this document. © Arcteq Relays Ltd... -
Page 83: Rtd & Ma Input Module (Option)
Supported Thermocouple: Type K, Type J, Type T and Type S Two mA-input channels are also available in the option card. If mA-input channels are used only the four rst channels are available for RTD and TC measurements. © Arcteq Relays Ltd... -
Page 84: Serial Rs232 Communication Module (Option)
AQ-S214 Instruction manual Version: 2.00 Figure. 8.5. - 65. Connection of different sensor types. 8.6. Serial RS232 communication module (option) Figure. 8.6. - 66. AQ-2xx Serial RS232-card connectors © Arcteq Relays Ltd... - Page 85 Option card includes two serial communication interfaces. COM E is a serial ber interface with glass/plastic option. COM F is a RS-232 interface. To use COM F IRIG-B time sync Time sync source should be set to IRIG-B in General menu. © Arcteq Relays Ltd...
-
Page 86: Lc100 Ethernet Communication Module (Option)
When installing to rack, the device will take ¼ of the rack width and total of four devices can be installed to same rack in parallel. Device panel installation and cut-outs are described below. © Arcteq Relays Ltd... - Page 87 AQ-S214 Instruction manual Version: 2.00 Figure. 8.8. - 68. Dimensions of the IED. Figure. 8.8. - 69. Installation of the IED © Arcteq Relays Ltd...
- Page 88 AQ-S214 Instruction manual Version: 2.00 Figure. 8.8. - 70. Panel cut-out and spacing of the IED. © Arcteq Relays Ltd...
-
Page 89: Technical Data
Number of ports 1pcs Port protocols PC-protocols, FTP, Telnet Features Data transfer rate 100 MB System integration Cannot be used for system protocols, only for local programming Table. 9.1.1.2. - 38. Rear panel system communication port A Port © Arcteq Relays Ltd... -
Page 90: Cpu Binary Inputs
Scanning rate 5 ms Settings Pick-up delay Software settable: 0…1800s Polarity Software settable: Normally On / Normally Off Current drain 2 mA Terminal block connection Solid or stranded wire Maximum wire diameter: Phoenix Contact MSTB2,5-5,08 2.5mm © Arcteq Relays Ltd... -
Page 91: Cpu Binary Outputs
Phoenix Contact MSTB2,5-5,08 2.5mm 9.1.2. Option cards 9.1.2.1. Binary input module Table. 9.1.2.1. - 43. Binary input module technical data Rated values Rated auxiliary voltage 5…265V(AC/DC) Current drain 2 mA Scanning rate 5 ms Activation/release delay 5...11 ms Settings © Arcteq Relays Ltd... -
Page 92: Binary Output Module
Channels 7 & 8 support mA measurement Measurement range mA input range 0-33mA 9.1.2.4. RS232 & Serial ber communication module Table. 9.1.2.4. - 46. RS232 & Serial ber communication module technical data Ports RS232 Serial ber (GG/PP/GP/PG) Serial port wavelength 660nm © Arcteq Relays Ltd... -
Page 93: Double Lc100Mb Ethernet Module (Redundant)
Force change overrule of local controls either from setting tool, HMI or SCADA Operation time Reaction time <5 ms from receiving the control signal 9.2.1.2. Object control (OBJ) Table. 9.2.1.2. - 50. Object control (OBJ) technical data Signals © Arcteq Relays Ltd... -
Page 94: Monitoring Functions
= 150 kHz….80 MHz 10V EN 60255-26, IEC 61000-4-6 Table. 9.3. - 52. Voltage tests Dielectric voltage test EN 60255-27, IEC 60255-5, EN 60255-1 2 kV, 50Hz, 1min Impulse voltage test: EN 60255-27, IEC 60255-5 5 kV, 1.2/50us, 0.5J © Arcteq Relays Ltd... - Page 95 Device dimensions (W x H x D mm) Casing height 4U, width ¼ rack, depth 210 mm Device weight 1.5kg With package Package dimensions (W x H x D mm) 245(w) x 170(h) x 223(d) mm Weight © Arcteq Relays Ltd...
-
Page 96: Ordering Information
AQ-S214 Instruction manual Version: 2.00 10. Ordering information Accessories Order code Description Note Manufacturer AQ-ACC-ADAM4016 ADAM-4016 RTD 6 ch RTD module with Modbus Requires external Advanced Co. Ltd. © Arcteq Relays Ltd... - Page 97 AQ-S214 Instruction manual Version: 2.00 (Pt100/1000, Balco500, Ni) power module © Arcteq Relays Ltd...
-
Page 98: Contact And Reference Information
Wolf ntie 36 F 12 65200 Vaasa, Finland Contacts Phone: +358 10 3221 370 Fax: +358 10 3221 389 URL: url: www.arcteq. email sales: sales@arcteq. Technical support site: https://arcteq. /support-landing/ Technical support: +358 10 3221 388 (EET 8:00 – 16:00) © Arcteq Relays Ltd...
Need help?
Do you have a question about the AQ 200 Series and is the answer not in the manual?
Questions and answers