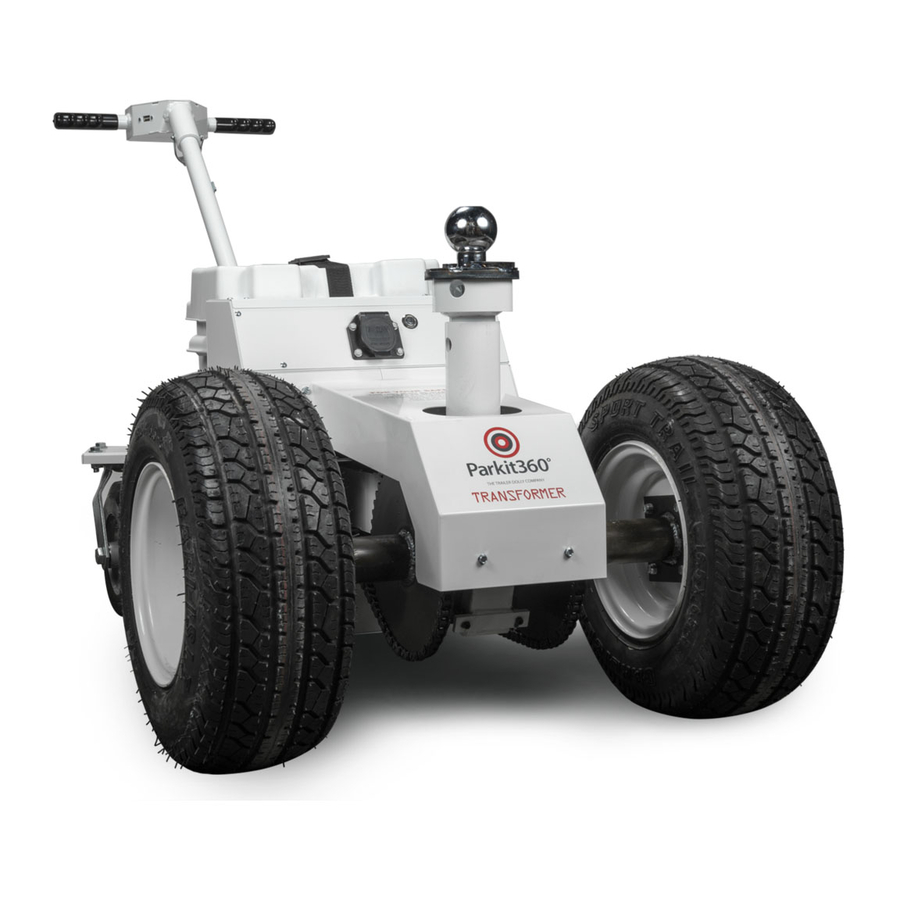
PARKIT360 TRANSFORMER 15K Instruction Manual
Hide thumbs
Also See for TRANSFORMER 15K:
- Instruction manual (19 pages) ,
- Instruction manual (22 pages) ,
- Instruction manual (27 pages)

Subscribe to Our Youtube Channel
Related Manuals for PARKIT360 TRANSFORMER 15K


Summary of Contents for PARKIT360 TRANSFORMER 15K
- Page 1 TRANSFORMER 15K INSTRUCTION MANUAL VERSION 3.8 READ CAREFULLY BEFORE OPERATION IMPROPER USE OF THIS DOLLY CAN CAUSE DAMAGE TO YOUR TRAILER, DANGER PERSONAL INJURY OR EVEN DEATH.
-
Page 2: Package Includes
IN THE BOX TRANSFORMER PACKAGES INCLUDE: Transformer Dolly Body Two 6.5” Wide Tires Handle Shaft & Tightening Bar Battery Box (Battery NOT Included) Wireless Controller & USB Cable Hardware Kit: • 2 Handle Spring Clips • Allen Key BALL MOUNT ADAPTER PACKAGE INCLUDES: Ball Mount &... - Page 3 FIFTH WHEEL ADAPTER PACKAGE INCLUDES: Kingpin Adapter U Shaped Locking Pin with D-Clip 2 Set Screws with Allen Key STABILIZER BARS KINGPIN BOX PACKAGE: 2 Telescoping Stabilizer Bars 2 Outer and Inner Pivot Tubes 1 Mounting Ring Tube Hardware: • 6 Square D-Clips •...
-
Page 4: Battery Connection
ASSEMBLY 6.5” WIDE TIRES Install both tires using the supplied 1/2” bolts. Set Torque Wrench to 40 ft-lbf or ensure bolts are very tight. Recommended Tire Pressure: 90 PSI. HANDLE & TIGHTENING BAR Insert the Handle and secure with D-Clip. Install the Spring Clips onto the Handle to store the Tightening Bar. - Page 5 FEATURES DUAL MOTORS The Transformer wheels are powered independently by Two 1.5hp Motors. FREEWHEEL KNOBS Engage or Disengage Both Motors to move the Dolly With or Without Power. (See page 8) BATTERY CHARGER Activates when the Dolly is plugged into a Wall Socket. Stops charging automatically when charger is full.
-
Page 6: Module Features
MODULE FEATURES CIRCUIT BREAKERS POWER ON/OFF Prevents both Motors and Smart Brake Press and Hold for 2 seconds from overheating. If a breaker trips, to turn ON or OFF. the Reset Button will extend up to 1/2” from the panel. SMART BRAKE Allow 30 seconds for the system 7-Way Power Plug that Controls... -
Page 7: Wireless Controller
WIRELESS CONTROLLER SET UP Remove the 4 cover screws. Plug the Battery and Charger cables into the circuit board to activate. BATTERY USB CHARGER Battery Cable: Charger Cable: White Connector, 2 wires. There is Black Connector, 5 wires. Align the a notch on the top to ensure proper Red wire with the Red label written polarity. -
Page 8: Controller Operation
CONTROLLER OPERATION All directional terms are from the user’s point of view from behind the dolly, facing the trailer. REVERSE FORWARD (TOWARDS USER) (BACK UP TRAILER) WIRELESS SYNC FORWARD FORWARD REVERSE REVERSE BATTERY CHARGE LEFT WHEEL RIGHT WHEEL The Transformer wheels are controlled independently by two, three-position rocker switches. - Page 9 DRIVE MODES: FREEWHEEL KNOBS FREEWHEEL NEUTRAL. MOVE THE DOLLY WITHOUT POWER WHILE IT IS NOT UNDER LOAD. If you are in Engaged Mode, the wheels will be locked in the drive position. Without power, the Dolly will only move an inch forwards or backwards before stopping.
- Page 10 BALL MOUNT: SPACER PLATE WHAT IS IT FOR? COMES PRE-INSTALLED IN BALL MOUNT ONLY The Spacer Plate is only used with the Ball Mount Connection. It locks TRANSFORMER PACKAGE. the Receiver Tube in place to prevent Ball Mount movement while the dolly is in motion.
- Page 11 DANGER DO NOT EXCEED DOLLY’S MAX. WEIGHT CAPACITY CAN CAUSE DAMAGE TO YOUR TRAILER, SERIOUS INJURY, OR EVEN DEATH. BALL MOUNT FIFTH WHEEL / KINGPIN UP TO 10,000 LBS GROSS UP TO 15,000 LBS GROSS (1,000 LBS TONGUE) (2,200 LBS TONGUE) RE-TIGHTEN BALL MOUNT BEFORE OPERATION USE JACK POST CONNECTION OR TELESCOPIC...
- Page 12 CONNECTING TO YOUR TRAILER: BALL MOUNT ADAPTER With both motors in Freewheel Mode, move the Dolly and all required Accessories to the Trailer: Ball Mount, Hitch Ball, and Torsion Loop. ENSURE SPACER PLATE IS INSTALLED BEFORE OPERATING! BALL MOUNT ASSEMBLY HITCH BALL Thread desired Hitch Ball into the Ball Mount.
- Page 13 HITCH BALL PLACEMENT WELD SPOTS Insert the assembled Ball Mount into the Hitch and lock as normal. Make sure the Weld Spots on the Hitch Ball are pointed towards the rear left side of your trailer at about 10 o’clock. The hitch may not lock if they are not positioned properly! HITCH CONNECTION...
-
Page 14: Thrust Washer
CONNECTION GAP? THRUST WASHER Remove the Hitch Ball and place the Thrust Washer on top of the Ball Mount with the open section facing the trailer. Reinstall the Hitch Ball and continue Hitch Connection as normal. While tightening, hold the Thrust Washer in place to prevent it from spinning. - Page 15 ENGAGE MOTORS INTO DRIVE TURN ON THE DOLLY Press and Hold the Power Button to turn on the Dolly. Connect the Trailer’s 7 Pin Brake Cable to the Smart Brake Plug. FREEWHEEL KNOBS Ensure the Dolly is in parking position and ready to connect to the Hitch, then Engage both Motors.
- Page 16 ALIGN THE DOLLY Using the Handle Toggle Switches, Drive the Dolly underneath the hitch. Align the Adapter with the top of the Dolly’s Receiver Tube. INSERT ADAPTER Ensure that the Trailer is Level and the Dolly is in the Drive Position. Use the Trailer Jack Stand to fully lower the Ball Mount into the Receiver Tube.
-
Page 17: Secure Connection
RE-TIGHTEN BALL MOUNT Using the Toggle Switch, move the Dolly back & forth slightly. Re-tighten Ball Mount. Repeat 2-3 times until you can’t tighten anymore. SECURE CONNECTION RATCHET STRAPS Once the Ball Mount is tightened, hook the Ratchet Strap to the Torsion Loop. Attach the opposite end to a secure point around the center of the Trailer, then... - Page 18 CONNECTING TO YOUR TRAILER: FIFTH WHEEL ADAPTER With both motors in Freewheel Mode, move the Dolly, Accessories and required Tools to the Trailer: Kingpin Adapter, Stabilizer Bars (Kingpin or Landing Leg), Hardware, Socket Wrench and Drill with 13/32” drill bit. REMOVE BALL MOUNT SPACER PLATE BEFORE OPERATING! (SEE PAGE 9) KINGPIN ADAPTER...
-
Page 19: Stabilizer Bar Installation
KINGPIN ADAPTER SET-UP MEASUREMENTS Kingpin measurements should be between 48”-52” from the Ground to the Bottom of the Kingpin Box. If your measurements are not within this range, contact us before operating this machine! The Adapter must be straight, and the trailer level. No part of the Adapter should be touching the ground when hooked up. - Page 20 KINGPIN BOX STABILIZERS MOUNTING RING TUBE With the wings of the Mounting Ring Tube parallel with the front of the trailer, slide it onto the Kingpin Adapter. The bottom edge must be flush with the base of the adapter. Tighten the set screws to secure it. PIVOT TUBES Install both 1 1/2”...
- Page 21 Secure these with D-Pins. We recommend a 13/32” drill bit. TIGHTEN BOLTS Tighten the 4 Bolts on the top and bottom pivot tubes to complete the setup. PLEASE REFER TO INSTALLATION VIDEOS: YOUTUBE.COM/PARKIT360 READY TO CONNECT TO TRANSFORMER! SEE INSTRUCTIONS ON PAGE 22...
- Page 22 LANDING LEG STABILIZERS MOUNTING RING TUBES Install both Mounting Ring Tubes. Secure the Support Ring onto the base of the adapter with the supplied set screws. STABILIZER BARS Install the Landing Leg Stabilizer Bars into the adapter’s Ring Tubes, ensuring that the ends will attach to the Outside of the Trailer Legs.
- Page 23 ALIGN THE DOLLY Freewheel the Dolly underneath the hitch, then align the Adapter with the top of the Dolly’s Receiver Tube. Ensure that the Stabilizer Bars are installed properly. LANDING LEG STABILIZER BARS ENGAGE MOTORS INTO DRIVE TURN ON THE DOLLY Press and Hold the Power Button to turn on the Dolly.
- Page 24 INSERT ADAPTER Ensure that the Trailer is Level, the Adapter is straight, and the Dolly is in the Drive Position. Re-adjust the Dolly with the Wireless Controller if needed. Use the Trailer Jack Stand to fully lower the Adapter into the Receiver Tube. KINGPIN BOX READY! STABILIZER BARS...
-
Page 25: Maintenance
PARKING YOUR TRAILER Use the Forward and Reverse Toggle Switches to steer into tight spaces that are nearly impossible for vehicles. The Wireless Controller can be used while attached to the Dolly, or from a distance for more precise parking. DISCONNECTING THE HITCH Chock Trailer Wheels to prevent a runaway trailer. - Page 26 Lower the Telescoping Pipe into the Dolly, following the standard connection process. Slide the Adapter’s locking pin into place. CALL TOLL-FREE: OFFICE HOURS (WEEKDAYS) 1-888-926-5517 8AM-6PM EST Ext. 1 - Sales sales@parkit360.com Ext. 2 - Administration admin@parkit360.com Ext. 4 - Technical Support support@parkit360.com...
-
Page 27: 30 Day Return Policy
2 -Year Warranty, whichever is later. 30 DAY RETURN POLICY If a material defect is found or if the Parkit360 has failed to perform to your expectations, return it within 30 days of the date of sale for a refund, less the flat shipping cost of $250 and 20% restocking fee. - Page 28 DANGER DO NOT EXCEED DOLLY’S MAX. WEIGHT CAPACITY RE-TIGHTEN BALL MOUNT BEFORE OPERATION DO NOT OPERATE ON MORE THAN A 4% GRADE PARKIT360 INC. 130 Industrial Ave, Unit 600 Carleton Place, ON K7C 3T2 Canada 1-888-926-5517 or PARKIT360.com...
Need help?
Do you have a question about the TRANSFORMER 15K and is the answer not in the manual?
Questions and answers