Table of Contents
Advertisement
Available languages
Available languages
Advertisement
Table of Contents

Related Manuals for Pulsar AXION KEY X?22


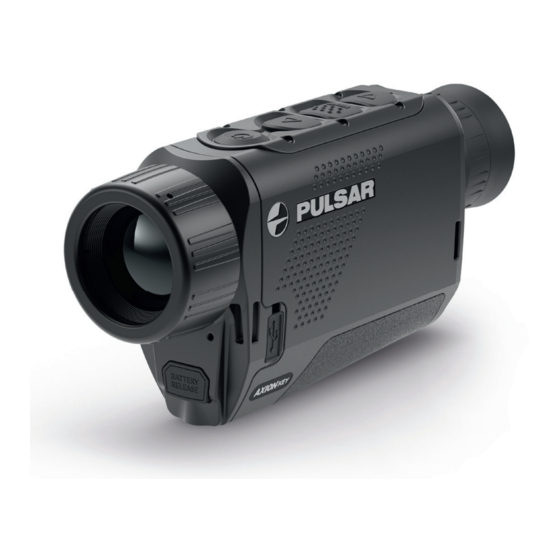
Summary of Contents for Pulsar AXION KEY X?22
- Page 1 Quick Start Guide AXION KEY Thermal Imaging Scope...
- Page 2 For detailed information about the device, please download the complete user manual: For detailed information about the device, please download the http://www.pulsar-nv.com/products/thermal-imaging-scopes/ complete user manual: http://www.pulsar-nv.com/products/thermal-imaging-scopes/ Pour des informations détaillées sur la lunette, prière de télécharger le manuel complet d'utilisation: Pour des informations détaillées sur la lunette, prière de...
- Page 3 AXION KEY Quick Start Guide ENGLISH Thermal Imaging Scope AXION FRANÇAIS ENGLISH Lunette d'imagerie thermique AXION Thermal Imaging Scope AXION ENGLISH Thermal Imaging Scope AXION KEY DEUTSCH FRANÇAIS Wärmebildgerät AXION 9-12 Lunette d'imagerie thermique AXION FRANÇAIS Lunette d’imagerie thermique AXION KEY 6-10 ESPAÑOL DEUTSCH...
-
Page 4: Beginning Operation
ENGLISH Beginning operation Switching on and adjusting the image. • Remove the lens cover (7). Secure the cover to the strap using the magnet built into the cover. • Turn the unit on with a short press of the ON/OFF button (5). •... -
Page 5: Operation Of Buttons
Operation of buttons Control Condition / 1 short press Next short Long press mechanism Operating Mode press ON button Device is Power on the Device Power on the powered off device calibration device Display off Turn on display Device Power off the calibration device Device turned... - Page 6 А Option 2 (Fig. Battery Pack • Insert the battery (10) fully along the guide rail into the APS* charger А slot (11). Fig. • Point A on the battery and Point B on the charger should be aligned. • Two batteries can be charged at the same time –...
-
Page 7: Installing The Battery
Installing the battery • Insert the battery (10) into the assigned slot on the instrument’s casing (14) Fig. 4), aligning the images to form a ‘dot’ on the instrument and the (see battery. • When properly installed, the battery is locked into the slot with a special clip. •... -
Page 8: Optical Specifications
Weight without batteries, kg (oz) 0.25 (8.82) 0.25 (8.82) Improvements may be made to the design and software of this product to enhance its user features. The current version of the User’s Manual may be found on the website www.pulsar-nv.com ENGLISH... -
Page 9: Mise En Route
FRANÇAIS Mise en route Allumage de l’appareil et réglage de l’image • Retirez le couvercle de la lentille (7). Fixez le couvercle sur la sangle à l’aide de l’aimant intégré dans le couvercle. • Allumez la lunette en appuyant rapidement sur le bouton ON/OFF (5). •... -
Page 10: Fonctionnement Des Boutons
Fonctionnement des boutons Mécanisme Mode de 1 appui court Appui court Appui long de com- fonctionnement suivant mande /état ON bouton L'appareil est Allumez Calibration de Marche éteint. l'appareil la lunette l'appareil Extinction de Allumez l'écran Calibration de Eteignez l'affichage la lunette l'appareil Appareil... -
Page 11: Recharge De La Batterie
Recharge de la batterie Les imageurs thermiques AXION sont livrés avec un bloc batterie ion-lithium APS3 rechargeable permettant d’utiliser l’imageur thermique pendant 4 heures. La batterie doit être chargée avant la première utilisation Recharge de la batterie Option 1 (Fig. •... - Page 12 Témoin LED** État de charge de la batterie Charge de la batterie de 0 à 10 % ; Chargeur non raccordé à l’alimentation secteur. Charge de la batterie de 0 à 10 % ; Chargeur raccordé à l'alimentation secteur. Batterie défectueuse. La batterie ne doit pas être utilisée. Charge de la batterie entre 10% et 20% Charge de la batterie entre 20% et 60% Charge de la batterie entre 60% et 95%...
- Page 13 Des améliorations peuvent être apportées à la conception et au logiciel de ce produit pour améliorer ses fonctionnalités pour l’utilisateur. La version actuelle du Manuel d’utilisation se trouve sur le site web www.pulsar-nv.com Compatibilité électromagnétique Ce produit est conforme aux exigences de la norme européenne EN 55032 : 2015, Classe A.
- Page 14 DEUTSCH Inbetriebnahme Einschalten und Einstellen des Bilds • Nehmen Sie den Objektivschutz (7) ab. Befestigen Sie den Schutz mit dem im Schutz eingebauten Magneten an der Schlaufe. • Gerät durch kurzes Drücken auf die Taste ON (EIN)/OFF (AUS) (5) einschalten. •...
-
Page 15: Bedienung Der Tasten
Bedienung der Tasten Steuer- Zustand/ 1 kurzer Druck Nächstes Langes Drücken mechanis- Betriebsmodus kurzes Drücken Taste Gerät ist aus- Einschalten des Gerätekalibrie- Gerät Ein- geschaltet Geräts rung schalten „On“ Display aus Display ein- Gerätekalibrie- Gerät aus- schalten rung schalten Gerät ein- Gerätekalibrierung Display ausge- geschaltet,... -
Page 16: Aufladen Des Akkus
Aufladen des Akkus AXION Wärmebildkameras werden mit einem wiederaufladbaren APS3 Lithium-Io- nen-Akkupack geliefert, mit dem die Wärmebildkamera bis zu 4 Stunden verwen- det werden kann. Der Akku sollte vor dem ersten Gebrauch aufgeladen werden. Aufladen des Akkus Option 1 (Abb. •... -
Page 17: Einsetzen Des Akkus
LED-Anzeige** Akkuladezustand Akkuladung beträgt 0 % bis 10 %. Ladegerät ist nicht am Stromnetz angeschlossen. Akkuladung beträgt 0 % bis 10 %. Ladegerät ist am Stromnetz angeschlossen. Akku ist defekt. Akku sollte nicht verwendet werden. Akkuladung beträgt 10% bis 20%. Akkuladung beträgt 20 % bis 60 %. -
Page 18: Technische Daten
Es können Optimierungen am Design und an der Software dieses Produkts vorgenommen werden, um die Benutzerfunktionen zu verbessern. Die aktuelle Version des Benutzerhandbuchs finden Sie auf der Website www.pulsar-nv.com Elektromagnetische Kompatibilität Dieses Produkt entspricht den Anforderungen des Europäischen Standards EN 55032: 2015, Klasse A. -
Page 19: Puesta En Funcionamiento
ESPAÑOL Puesta en funcionamiento Encendido y ajuste de la imagen Retire la tapa de la lente (7). Fije la tapa a la correa con el imán integrado en la tapa. Encienda la unidad pulsando brevemente el botón de ON/OFF (ENCENDIDO/ APAGADO) (5). - Page 20 Funcionamiento de botones Mecanismo Estado / Una pulsación Siguiente Pulsación de control Modo de breve pulsación prolongada funcionamiento breve Botón ON El dispositivo Encender el Calibración del Apagar el está apagado dispositivo dispositivo apagada Pantalla Encender la Calibración del Apagar el apagada pantalla dispositivo...
-
Page 21: Carga De La Batería
Carga de la batería Los generadores de imágenes térmicos AXION se suministran con un paquete de pilas de ion de litio recargables APS3 que permite utilizar el generador de imágenes hasta 4 horas. La batería debe estar cargada antes del primer uso. Carga de la batería Opción 1 (Fig. -
Page 22: Instalación De La Batería
Indicador LED** Estado de carga de la batería Carga de la batería entre 0% y 10% Cargador no conectado a la alimentación eléctrica de la red. Carga de la batería entre 0% y 10% Cargador conectado a la alimentación eléctrica de la red. Batería defectuosa. -
Page 23: Especificaciones
Pueden realizarse mejoras al diseño y software de este producto para mejorar sus funciones del usuario. La versión actual del Manual de usuario puede encontrarse en el sitio web www.pulsar-nv.com Compatibilidad electromagnética Este producto cumple los requisitos de la norma europea EN 55032: 2015, Clase A. - Page 24 ITALIANO Inizio del funzionamento • Accendere e regolare l’immagine • Rimuovere il coperchio della lente (7). Fissare il coperchio alla cinghia utilizzando la calamita incorporata nel coperchio. • Accendere l’unità con una pressione breve del tasto ON/OFF (5). • Regolare la risoluzione delle icone sul display ruotando la ghiera di regolazione diottrica sull’oculare (1).
-
Page 25: Uso Dei Tasti
Uso dei tasti Mecca- Condizione/ 1 pressione Successiva Pressione nismo di Modalità di breve pressione prolungata comando funzionamento breve Tasto Il dispositivo è Accendere il Calibrazione del Spegnere il spento. dispositivo dispositivo accesa Display spento Accendere il Calibrazione del Spegnere il display dispositivo dispositivo... -
Page 26: Ricarica Della Batteria
Ricarica della batteria I termovisori AXION sono dotati di un pacco batteria agli ioni di litio APS3 ricaricabile che consente l’uso del termovisore fino a 4 ore. La batteria deve essere caricata prima del primo utilizzo. Ricarica della batteria Opzione 1 (fig. - Page 27 Indicatore LED** Stato di carica della batteria La ricarica della batteria è compresa tra 0 e 10%; Caricatore non collegato all'alimentazione di rete. La ricarica della batteria è compresa tra 0 e 10%; Caricatore collegato all'alimentazione di rete. La batteria è difettosa. La batteria non deve essere usata. La ricarica della batteria è...
-
Page 28: Specifiche Funzionali
È possibile effettuare miglioramenti relativi a design e software di questo prodotto per aumentare le sue proprietà di utilizzo. La versione aggiornata del Manuale d’uso è disponibile sul sito web www.pulsar-nv.com Compatibilità elettromagnetica Questo prodotto è conforme ai requisiti della norma europea EN 55032: 2015, Classe A. -
Page 29: Начало Работы
РУССКИЙ Начало работы ВКЛЮЧЕНИЕ И НАСТРОЙКА ИЗОБРАЖЕНИЯ • Откройте крышку (7) объектива. Зафиксируйте крышку на ремешке с помощью встроенного в крышку магнита. • Включите прибор кратким нажатием кнопки ON/OFF (5). • Настройте резкое изображение символов на дисплее вращением кольца диоптрийной настройки окуляра (1). •... - Page 30 Работа кнопок Орган Условие/ 1 короткое Следующие Длительное управления Режим нажатие короткие нажатие работы нажатия Кнопка ON Прибор Включение Калибровка Включение выключен прибора прибора прибора Дисплей Включение Калибровка Выключение выключен дисплея прибора прибора Прибор Калибровка прибора Выключение включен, дисплея / быстрое...
-
Page 31: Зарядка Аккумуляторной Батареи
Зарядка аккумуляторной батареи Тепловизоры AXION KEY поставляются с перезаряжаемой литий-ионной батареей Battery Pack АPS3, которая позволяет использовать тепловизор до 4 часов. Перед первым использованием батарею следует зарядить. Зарядка батареи Вариант 1 (рис.2): Установите батарею (10) в предназначенный для нее слот на Сетевое... -
Page 32: Установка Аккумуляторной Батареи
Индикация** LED Статус аккумуляторной батареи Заряд батареи составляет от 0 до 10%; Зарядное устройство не подключено к сети питания. Заряд батареи составляет от 0 до 10%; Зарядное устройство подключено к сети питания. Батарея неисправна. Использовать батарею запрещается. Заряд батареи составляет от 10 до 20% Заряд... -
Page 33: Технические Характеристики
0,25 Для улучшения потребительских свойств изделия в его конструкцию могут вноситься усовершенствования. Актуальную версию инструкции по эксплуатации Вы можете найти на сайте www.pulsar-nv.com Электромагнитная совместимость Данный продукт соответствует требованиям европейского стандарта EN 55032:2015, Класс А. Внимание: эксплуатация данного продукта в жилой зоне может создавать радиопомехи. - Page 34 NOTES...
- Page 35 NOTES...
- Page 36 pulsar-vision.com...
Need help?
Do you have a question about the AXION KEY X?22 and is the answer not in the manual?
Questions and answers