Table of Contents
Advertisement
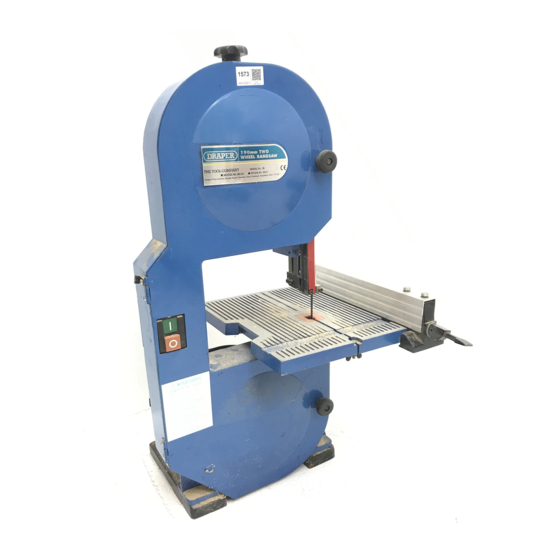
TWO WHEEL
BANDSAW
STOCK No.39271
PART No.BS190
• INSTRUCTIONS •
IMPORTANT: PLEASE READ THESE INSTRUCTIONS CAREFULLY TO
ENSURE THE SAFE AND EFFECTIVE USE OF THIS TOOL.
10/2001
GENERAL INFORMATION
This manual has been compiled by Draper Tools and is an integrated part of the power tool equipment, and
should be kept with the machine.
This manual describes the purpose for which this tool has been designed and contains all the necessary
information to ensure its correct and safe use.We recommend that this manual is read before any operation of
the machine, before performing any kind of adjustment to the machine, and prior to any maintenance tasks. By
following all the general safety instructions contained in this manual, it will ensure both machine and operator
safety, together with longer life of the tool itself.
All photographs and drawings in this manual are supplied by Draper Tools to help illustrate the operation of the
machine.
Whilst every effort has been made to ensure accuracy of information contained in this manual, the Draper Tool
policy of continuous improvement determines the right to make modifications without prior warning.
Advertisement
Table of Contents

Subscribe to Our Youtube Channel
Related Manuals for Draper BS190


Summary of Contents for Draper BS190
- Page 1 10/2001 GENERAL INFORMATION This manual has been compiled by Draper Tools and is an integrated part of the power tool equipment, and should be kept with the machine. This manual describes the purpose for which this tool has been designed and contains all the necessary information to ensure its correct and safe use.We recommend that this manual is read before any operation of...
-
Page 2: Table Of Contents
Maintenance............................18 Optional Accessories ......................... 18 Troubleshooting ..........................19 DECLARATION OF CONFORMITY We Draper Tools Ltd. Hursley Road, Chandler’s Ford, Eastleigh, Hampshire. SO53 1YF. England. Declare under our sole responsibility that the product: Part No. BS190. Stock No. 39271. Description:- Bandsaw 190mm Testing Authority:- SGS United Kingdom Ltd. -
Page 3: Specification/Guarantee
This guarantee applies in lieu of any other guarantee expressed or implied and variations of its terms are not authorised. Your Draper guarantee is not effective unless you can produce upon request a dated receipt or invoice to verify your proof of purchase within the 12 month period. -
Page 4: Power Supply
(i.e. red). Fuse covers are available from your Draper Tools stockist. If the fitted plug is not suitable, it should be cut off and destroyed. *The end of the cable should now be suitably prepared and the correct type of plug fitted. -
Page 5: Safety Warning
IMPORTANT Draper Tools Limited recommends that this machine should not be modified or used for any application other than that for which it Draper Tools Limited recommends that this machine should not be modified or used for any application other than that for which it was designed. -
Page 6: Additional Safety Instructions For Bandsaws
ADDITIONAL SAFETY RULES FOR BANDSAWS 1. Lower the blade guard to within approximately 13. Do not saw any material that does not have a 3mm ( ⁄ ") above the material being cut. flat surface, unless a suitable support is used. 2. -
Page 7: Glossary Of Terms For Woodworking
GLOSSARY OF TERMS FOR WOODWORKING 1. KERF The material which is removed by the blade in a through cut or the slot produced by the blade in a non-through or partial cut. 2. LEADING EDGE The edge of the workpiece which is pushed into the blade first. 3. -
Page 8: Unpacking And Checking Contents
Referring to Fig.1. Check that all the parts are present. Fig.1. If any parts are missing or damaged please contact the stockist where your purchase was made or call the Draper Helpline on (023) 8049 4344. - 8 -... -
Page 9: Getting To Know Your Bandsaw
GETTING TO KNOW YOUR BANDSAW 1. Blade guides. 2. Upper slide locking knob. ✖✌ 3. Work table locking knobs. ✛✌ 4. Bevel scale. 5. Bevel indicator. 6. Table bracket. ✕✌ 7. Tracking adjustment knob. 8. Table. ✜✌ 9. Tension adjustment knob. ✚✌... - Page 10 GETTING TO KNOW YOUR BANDSAW cont’d 2. UPPER SLIDE LOCK KNOB Fig.3. The upper blade guide/guard assembly should be adjusted so that it just clears the workpiece whilst cutting. Always adjust the upper blade guide assembly to suit the workpiece before each operation, this is done by loosening the upper slide lock knob, adjusting the height of the guide and retightening.
- Page 11 GETTING TO KNOW YOUR BANDSAW cont’d 7. SAWDUST EXTRACTION OUTLET Fig.8. Draper Tools recommends the bandsaw is connected to a dust extractor which will provide fast and efficient removal of sawdust from your machine. The dust extractor maybe used continuously or intermittently depending upon your requirements.
-
Page 12: Tools Required For Assembly
TOOLS REQUIRED FOR ASSEMBLY Your new bandsaw can be assembled and adjusted using a few hand tools including: Engineers/Combination Square, No.2 Cross Slot Screwdriver, Medium Plain Slot Screwdriver, ASSEMBLY INSTALLING THE TABLE: Fig.14. 1. Remove the bolt, washer and wing nut from the table slot. - Page 13 ASSEMBLY cont’d To adjust the height, loosen the upper slide lock Fig.18. knob ✲✌ Fig.18. and slide the guide assembly into position. When correctly positioned, re-tighten the ✲✌ lock knob ✲✌. INSTALLING A BLADE NOTE: Turn the saw off and disconnect from the power supply before removing or installing a blade.
- Page 14 ASSEMBLY cont’d TENSIONING THE BLADE Fig.22. Turn the blade tensioning knob ✹✌ Fig.22. clockwise until the blade is tensioned. The blade tension can be checked by pushing sideways on the ✹✌ blade midway between the two wheels. When the tension is correct the blade should move slightly from side to side with firm finger pressure.
- Page 15 ASSEMBLY cont’d 5. Using a hexagon wrench turn the 90˚ position ✼✌ Fig.27. stop ✼✌ Fig.27. until the set screw just touches the frame. 6. Re-check squareness of the blade to the table and re-adjust as necessary. 7. Now set the table tilt scale pointer ✽✌ Fig.28. to line up with the zero mark on the tilt scale.
-
Page 16: Use Of Accessories - Mitre Guide/Rip Fence
USE OF ACCESSORIES MITRE GUIDE Fig.32. Most cross cut work, especially with small pieces of material are more easily controlled with the use of the mitre guide. The mitre guide is also used for accurate mitre and compound cuts. The guide is graduated to 45˚... -
Page 17: Tips On Using Your Bandsaw
TIPS ON USING YOUR BANDSAW When cutting a bevel rip, with the table For all cutting operations the upper blade guard should be adjusted to just clear the tilted at any angle up to 45˚, set the rip work being cut (approx. 3mm or ⁄... -
Page 18: Maintenance
NOTE: Bandsaw blade should stop within 10 seconds of the machine being switched off as per original set up. OPTIONAL ACCESSORIES The following accessories are available from your local Draper Stockist: BANDSAW BLADES PART No.BB1425 STOCK No. -
Page 19: Troubleshooting
4. Tighten mounting screws Blade runout - 1. Blade guides not aligned 1. Check blade guide settings as per manual IMPORTANT Please note all repairs/service should be carried out by a qualified person. DRAPER TOOLS HELPLINE: (023) 8049 4344 - 19 -... - Page 20 ©Published by Draper Tools Ltd. No part of this publication may be reproduced, stored in a retrieval system or transmitted in any form or by any means, electronic, mechanical photocopying, recording or otherwise without prior permission in writing from Draper Tools Ltd.
Need help?
Do you have a question about the BS190 and is the answer not in the manual?
Questions and answers