Table of Contents
Advertisement
Quick Links
INSTRUCTIONS FOR
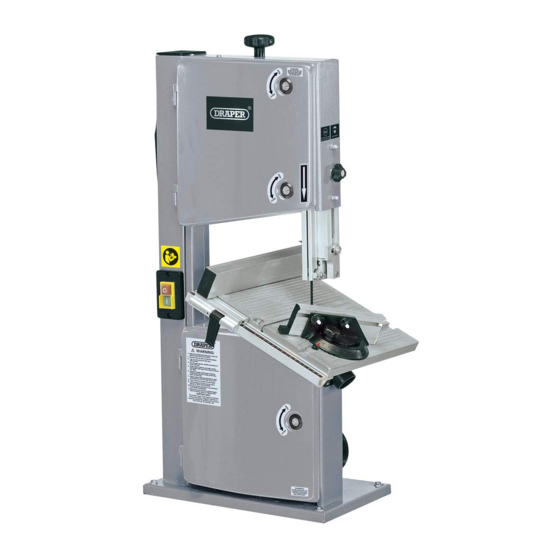
250mm 420W 230V
Wood Bandsaw
Stock No.84713
Part No.BS250B
IMPORTANT: PLEASE READ THESE INSTRUCTIONS CAREFULLY TO ENSURE THE SAFE AND
EFFECTIVE USE OF THIS PRODUCT.
*Bandsaw Stand - Stock No.84717 sold separately
GENERAL INFORMATION
These instructions accompanying the product are the original instructions. This document is part of the product, keep it
for the life of the product passing it on to any subsequent holder of the product. Read all these instructions before
assembling, operating or maintaining this product.
This manual has been compiled by Draper Tools describing the purpose for which the product has been designed, and
contains all the necessary information to ensure its correct and safe use. By following all the general safety instructions
contained in this manual, it will ensure both product and operator safety, together with longer life of the product itself.
AlI photographs and drawings in this manual are supplied by Draper Tools to help illustrate the operation of the product.
Whilst every effort has been made to ensure the accuracy of information contained in this manual, the Draper Tools
policy of continuous improvement determines the right to make modifications without prior warning.
Advertisement
Table of Contents

Subscribe to Our Youtube Channel
Related Manuals for Draper BS250B


Summary of Contents for Draper BS250B
-
Page 1: General Information
AlI photographs and drawings in this manual are supplied by Draper Tools to help illustrate the operation of the product. -
Page 2: Title Page
Commercial copying, redistribution, hiring or lending is prohibited. No part of this publication may be stored in a retrieval system or transmitted in any other form or means without written permission from Draper Tools Limited. In all cases this copyright notice must remain intact. -
Page 3: Table Of Contents
CONTENTS 2.1 CONTENTS Page content Page TITLE PAGE INTRODUCTION ....................2 REVISION HISTORY................... 2 UNDERSTANDING THIS MANUAL ..............2 COPYRIGHT NOTICE ..................2 CONTENTS CONTENTS ......................3 GUARANTEE GUARANTEE ..................... 4 INTRODUCTION SCOPE ....................... 5 SPECIFICATION ....................5 HANDLING & STORAGE ................... 5 HEALTH &... -
Page 4: Guarantee
This guarantee applies in lieu of any other guarantee expressed or implied and variations of its terms are not authorised. Your Draper guarantee is not effective unless you can produce upon request a dated receipt or invoice to verify your proof of purchase within the 12 month period. -
Page 5: Introduction
The work piece is manual fed on to the saw band. Any other application is considered mis-use. 4.2 SPECIFICATION Stock no ..........................84713 Part no ..........................BS250B Motor: Rated voltage ....................... 230V~ Rated frequency ....................50Hz Rated input ...................... -
Page 6: Health & Safety Information
HEALTH & SAFETY INFORMATION 5.1 GENERAL SAFETY INSTRUCTIONS FOR POWER TOOL USE When using any type of power tool there are steps that should be taken to make sure that you, as the user, remain safe. Common sense and a respect for the tool will help reduce the risk of injury. Read the instruction manual fully. -
Page 7: Specific Safety Instructions For Bandsaw Use
HEALTH & SAFETY INFORMATION Move the machine as instructed. Do not carry it by the power supply cable. If the product is heavy; employ a second or third person to help move it safely or use a mechanical device. Always refer to the instructions for the correct method. Do not overreach. - Page 8 HEALTH & SAFETY INFORMATION – Always keep hands and fingers away from the saw band, especially when coming to the end of a cut. – Use a push stick or piece of scrap wood to do the pushing and guiding when sawing small pieces which require the fingers to be close to the saw band.
-
Page 9: Connection To The Power Supply
HEALTH & SAFETY INFORMATION 5.3 CONNECTION TO THE POWER SUPPLY Make sure the power supply information on the machine’s rating plate are compatible with the power supply you intend to connect it to. This bandsaw comes supplied with a non-rewireable UK standard 3 pin plug fitted. It is designed for connection to a domestic power supply rated at 230V AC. -
Page 10: Technical Description
TECHNICAL DESCRIPTION 6.1 IDENTIFICATION Upper door. Lower saw band wheel. Lower door. Drive belt. Tensioner for saw band. Saw band tracking knob. Upper saw band wheel. Table tilt [bevel] adjustment. Upper door latch. Motor. Blade guard adjustment. Base. Blade guard. Dust extraction port. -
Page 11: Unpacking & Checking 7.1 Packaging
Lay the contents out and check them against the parts shown below. If any part is damaged or missing; please contact the Draper Helpline (the telephone number appears on the Title page) and do not attempt to use the bandsaw. -
Page 12: Preparing The Bandsaw 8.1 Installing The Table
PREPARING THE BANDSAW NOTE: Remove the plug from the socket before carrying out adjustment, servicing or maintenance. 8.1 INSTALLING THE TABLE– FIG.1 Place the table on to the cradle and align the hole underneath to line up with cradle. Secure using the plastic wing nut provided FIG.1 8.2 LEVELLING THE TABLE –... -
Page 13: Assembling The Stand
PREPARING THE BANDSAW 8.5 ASSEMBLING THE STAND (STOCK NO.84717 SOLD SEPARATELY) – FIGS.5-7 The Bandsaw Stand (Stock No.84717 sold separately) should be used if not securing directly to a workbench. Using fastenings , assemble the stand legs and support as shown in FIG.5 and FIG.6, press on FIG.5 rubber feet The stand can now be secured to the bandsaw with... -
Page 14: Dust Extraction Outlets
PREPARING THE BANDSAW 8.6 DUST EXTRACTION OUTLETS – FIGS.8 & 9 First, attach small dust port and finger protector FIG.8 FIG.7 with fastenings NOTE: Inhalation of dust particles can be detremental to your health. The dust outlet must be connected with a dust extraction machine. -
Page 15: Operating The Bandsaw
OPERATING THE BANDSAW NOTE: Removing the plug from the socket before carrying out adjustment, servicing or maintenance. 9.1 NO-VOLT ON/OFF SWITCH – FIG. 10 FIG.10 The bandsaw is fitted with a no-volt switch To switch the bandsaw on, push the green button marked ‘I’. -
Page 16: Upper And Lower Doors
OPERATING THE BANDSAW 9.3 UPPER AND LOWER DOORS – FIG. 12 FIG.12 To open the doors insert screwdriver into slots and rotate the latch as indicated on label until the door is released. To lock the door insert screwdriver back into slot and rotate the latch in the opposite direction. -
Page 17: Tensioning The Blade
OPERATING THE BANDSAW 9.5 TENSIONING THE BLADE – FIG. 14 FIG.14 Turn the blade tensioner clockwise until the blade is tensioned. The blade tension can be checked by pushing down on the blade midway between the two wheels. When the tension is correct the blade should move slightly with firm finger pressure. -
Page 18: Tracking The Blade
OPERATING THE BANDSAW 9.7 TRACKING THE BLADE – FIGS. 17–18 NOTE: The blade tension must be correctly adjusted before tracking the blade. Slowly turn the upper wheel clockwise by hand and watch the blade on the tyre. If the blade does not stay central on the tyre the tracking will have to be adjusted. -
Page 19: Adjusting The Lower Blade Guides
OPERATING THE BANDSAW 9.9 ADJUSTING THE LOWER BLADE FIG.21 GUIDES – FIG.21 First open the lower door to make any adjustments to the lower blade guide The two side bearings must be adjusted by loosening socket hex. bolt .The rear bearing guide can be adjusted by loosening the hex. -
Page 20: Tips On Using Your Bandsaw
10. TIPS ON USING YOUR BANDSAW For all cutting operations the upper blade guard should be adjusted to just clear the work being cut (3mm). Not only does this provide the best operator safety, but it also brings the blade guides closer to the work giving more accurate results and easier control. Use both hands to feed the workpiece to the blade. -
Page 21: Maintenance
11. MAINTENANCE 11.1 MAINTENANCE WARNING For your own safety turn switch off and remove plug from power supply before attempting any adjustment or repairs. Changing tyres Eventually the rubber tyres on the bandsaw wheels will wear due to the constant contact of the sharp teeth of the blade. -
Page 22: Optional Accessories
12. OPTIONAL ACCESSORIES The following accessories are available from your local Draper Stockist: 12.1 BANDSAW BLADES: Stock No. Part No. Length Width 25766 BB1785 1785mm " 25767 BB1785 1785mm " 25768 BB1785 1785mm "... -
Page 23: Troubleshooting
13. TROUBLESHOOTING WARNING: For your own safety, turn the switch off and remove the plug from the power supply socket. 13.1 TROUBLESHOOTING GUIDE Symptom Possible causes Corrective action • • • Breaking blades. Wrong tension. Adjust blade tension. • • Over working blade. -
Page 24: Explanation Of Symbols
14. EXPLANATION OF SYMBOLS 14.1 EXPLANATION OF SYMBOLS Warning! Ejection hazards. Wear safety goggles WEEE Do not dispose of Waste Electrical & Electronic Equipment in with domestic rubbish... -
Page 25: Disposal
15. DISPOSAL 15.1 DISPOSAL - At the end of the machine’s working life, or when it can no longer be repaired, ensure that it is disposed of according to national regulations. - Contact your local authority for details of collection schemes in your area. In all circumstances: •... -
Page 26: Notes
16. NOTES... - Page 27 16. NOTES...
- Page 28 - Sales Desk: (023) 8049 4333 - General Enquiries: (023) 8026 6355 - Service/Warranty Repair Agent For aftersales servicing or warranty repairs, please contact the Draper Tools Helpline for details of an agent in your local area. YOUR DRAPER STOCKIST DKDH1215...
Need help?
Do you have a question about the BS250B and is the answer not in the manual?
Questions and answers