Table of Contents
Advertisement
Advertisement
Table of Contents

Related Manuals for DStv HD PVR


Summary of Contents for DStv HD PVR
- Page 2 Now, on all High Definition content viewed with the HD PVR, you can enjoy colours so rich and a picture so sharp, you can see every face in the crowd. You’ll be wowed! Welcome to the world of High Definition with DStv.
-
Page 3: Table Of Contents
Connecting the HD PVR to the Satellite Dish ......................9 Set-up 1 : HD PVR and 1 HD TV .......................... 10 Set-up 2 : HD PVR, 1 HD TV and a Home Theatre System .................. 10 Set-up 3 : HD PVR and a Standard Definition TV ....................11 THE HD PVR REMOTE CONTROL .......................... - Page 4 The HD PVR Viewer’s Guide supplements the information supplied with the packaging of the HD PVR. Due to software upgrades, the features and functionalities in this HD PVR Viewer’s Guide may differ from those on your HD PVR. UEC Version 2 (Dec 2008) e&oe HD PVR Viewer’s Guide –...
-
Page 5: Getting Started
ETTING TARTED The following items are included when you purchase the HD PVR : 1 x DStv HD PVR Decoder 1 x Smartcard 1 x Remote Control 1 x Remote Control 2 x AA Batteries 1 x HDMI Cable Quick Guide 1 x Audio / Video Cable 1 x HD PVR Viewer’s Guide... -
Page 6: Front Panel
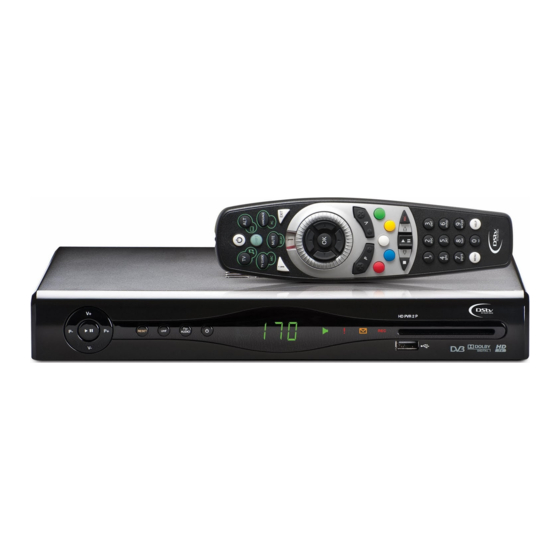
RONT ANEL LED / front panel Displays the state of the HD PVR : display when the decoder is in standby – displays the current time. when tuned to TV or Audio channels – displays the channel number. Activity indicator Displays activity of HD PVR, example : recording. -
Page 7: Back Panel
TV must be HDCP digital coaxial audio connection of the HD compliant. outputs and is not PVR, visit the forums at available via HDMI. www.dstv.com HD PVR Viewer’s Guide – UEC Page 6 of 62... -
Page 8: Important Safety Information
This decoder operates within the range 85 – 288 V AC 47 – 63 Hz power supply only. Do not connect to DC mains. Connect the power cable to the decoder before connecting the other end to the power outlet. Disconnect the decoder from the power outlet before connecting or disconnecting the HD PVR from any other equipment. -
Page 9: Install & Connect The Hd Pvr
Due to the many potential configurations in each home and the variety of equipment available, it is not possible to cover every potential installation scenario. This guide offers information on connecting the HD PVR to the satellite dish as well as 3 basic set-up options : Set-up 1 : HD PVR and 1 HD TV... -
Page 10: Connecting The Hd Pvr To The Satellite Dish
ONNECT USING A WIRE 2 : C ) LNB PTION ONNECT USING A WIRE WITH A WAY MULTISWITCH 3 : C CR LNB (U LNB) PTION ONNECT USING A NICABLE HD PVR Viewer’s Guide – UEC Page 9 of 62... - Page 11 1 : HD PVR 1 HD TV ➊ Connect the four satellite feeds to the four LNB inputs (#2) on the HD PVR. If using a SatCR LNB feed, connect to LNB input 2 (#3). ➋ Connect the HDMI cable to the HDMI input on the HD TV and to the HDMI connector (#6) on the HD PVR.
- Page 12 3 : HD PVR TANDARD EFINITION ➊ Connect the four satellite feeds to the four LNB inputs (#2) on the HD PVR. If using a SatCR LNB feed, connect to LNB input 2 (#3). ➋ Option A : AV Connectors Connect the Audio / Video cable to the video (#11) and audio (#12) outputs on the HD PVR and then to the audio and video inputs on the TV.
-
Page 13: The Hd Pvr Remote Control
HD PVR R EMOTE ONTROL EMOTE ONTROL BASICS HD PVR Viewer’s Guide – UEC Page 12 of 62... -
Page 14: Remote Control Basics
(Note : a valid PG PIN code is required to enter the Parental Control Menu). SHIFT MUTE : currently disabled. The dial should be set to TV1 for use with the HD PVR. sent The “window” in the dial (where you see TV1) lights up when any button is pressed, confirming that the remote control is active and that the command has been transmitted to the decoder. -
Page 15: Colour Buttons
Fast Forwards recorded programme. See page 38 Schedules a recording (see page 28). Button disabled. IMPORTANT PVR functionality (including Pause Live TV, scheduling and viewing recordings) requires a PVR subscription. HD PVR Viewer’s Guide – UEC Page 14 of 62... -
Page 16: The Basics
Go to #5 (Display Timeout). A purple header indicates that you Follow the onscreen instructions. are in FAVOURITE CHANNELS. An aqua blue header indicates that you are viewing a recording. HD PVR Viewer’s Guide – UEC Page 15 of 62... -
Page 17: The I-Plate When "Banner Browsing
If you want to see what’s on other channels, press i (to display the i-Plate) and then use the left and right arrows to view the programming information for other channels. This is called “banner browsing”. HD PVR Viewer’s Guide – UEC Page 16 of 62... -
Page 18: The I-Plate : Extended Mode
Starting times of programmes. Press the DOWN arrow to access programming information for the next 24 hours on this channel. PVR Icons (see page 26). Programme titles. PG Lock & PG Rating. HD PVR Viewer’s Guide – UEC Page 17 of 62... -
Page 19: Viewing Modes
HANNEL RIDS There are two channel grids on the HD PVR - the All Channels Grid and the Favourite Channels Grid (one for each viewing mode). The channel grid is a quick way to tune between channels or to quickly access programming info for another channel. -
Page 20: Reminders
This screen lists all current reminders that have been set. To go to the Reminders screen, press RED to go to the Playlist, then press the RIGHT arrow twice. You can delete scheduled reminders (by pressing RED). HD PVR Viewer’s Guide – UEC Page 19 of 62... -
Page 21: Interactive Services And Dstv Touch
ARENTAL ONTROL The HD PVR has a Parental Control feature to control viewing in your home. Access to this feature is controlled by the PG PIN code. For full details on this feature, including how to set Parental Control and change the PG PIN Code, see page 45. -
Page 22: The Tv Guide
Once you have selected your Favourite Channels, a personalised TV Guide is displayed. You can update your selection of Favourite Channels at any time. Press TV Guide. Select Favourite Channels. Press WHITE. Follow the onscreen instructions. HD PVR Viewer’s Guide – UEC Page 21 of 62... -
Page 23: All Channels
The mini i-Plate at the bottom of the screen gives more information on the highlighted programme. To view full information for the programme press i. View by Time View by Channel HD PVR Viewer’s Guide – UEC Page 22 of 62... -
Page 24: Pvr Basics
The buffer is the part of the hard disk that temporarily records Live TV and allows you to pause or rewind Live TV. On the HD PVR, the buffer always stores the last 120 minutes or up to the last time you changed channels (if within the last 120 minutes). -
Page 25: The Status Bar
…. Indicates what is still to be viewed Red Line …. Indicates the position of Live TV Transparent Bar …. Indicates available space in the buffer Timer …. Indicates time behind Live TV HD PVR Viewer’s Guide – UEC Page 24 of 62... - Page 26 As you do this, the blue line in the Status Bar moves, allowing For more information on you to easily and quickly bookmarks, see page 37. “jump” within a programme. HD PVR Viewer’s Guide – UEC Page 25 of 62...
-
Page 27: Pvr Icons
(to catch up to Live TV). PVR Playback Fast Forward icon Indicates fast forwarding of a recording. Different speeds are indicated by the number of arrows. HD PVR Viewer’s Guide – UEC Page 26 of 62... - Page 28 Remember to delete This icon appears recordings once you have onscreen when you have viewed them to ensure you less than 10% hard disk always have space for new space remaining. recordings. HD PVR Viewer’s Guide – UEC Page 27 of 62...
-
Page 29: Setting Recordings And The Scheduled Recordings Screen
Record a programme using the i-Plate. When you schedule a Record a programme using a Channel Grid. recording, the HD PVR adds 3 Record a programme using the TV Guide. minutes to the beginning and 10 Record a specific time slot : minutes to the end of the •... - Page 30 If the maximum number of scheduled recordings has been reached, a pop-up will indicate that the recording cannot be scheduled. You will need to delete some scheduled PVR Recording Error Icon recordings first. HD PVR Viewer’s Guide – UEC Page 29 of 62...
- Page 31 If the maximum number of scheduled recordings has been reached, a pop-up will indicate that the recording cannot be scheduled. You will need to delete some scheduled PVR Recording Error Icon recordings first. HD PVR Viewer’s Guide – UEC Page 30 of 62...
- Page 32 If the maximum number of scheduled recordings has been reached, a pop-up will indicate that the recording cannot be scheduled. You will need to delete some scheduled recordings first. HD PVR Viewer’s Guide – UEC Page 31 of 62...
- Page 33 + 1 hour. Note : the time must be entered in the 24 hour format, 3pm = 15:00. Lock / Unlock Locking the scheduled recording ensures that nobody can delete your programme. HD PVR Viewer’s Guide – UEC Page 32 of 62...
-
Page 34: The Scheduled Recordings Screen
Recurring time based to do not apply to time recordings will keep based recordings. For recording indefinitely until more info on safety net you cancel them. settings, see page 38. HD PVR Viewer’s Guide – UEC Page 33 of 62... - Page 35 RED = delete a scheduled recording. (If you have a recurring recording, you will need to select to delete one or all). BLUE = set up a time based recording (see page 32). WHITE = sort scheduled recordings according to date or alphabetically. HD PVR Viewer’s Guide – UEC Page 34 of 62...
-
Page 36: Viewing Your Recordings
PG Rating. Colour buttons : RED = delete a recording. WHITE = Options. You can rename, lock or sort the recordings in the Playlist. HD PVR Viewer’s Guide – UEC Page 35 of 62... - Page 37 For more info on the safety net, see page 38. HD PVR Viewer’s Guide – UEC Page 36 of 62...
-
Page 38: Other Features
Press WHITE to view the action in slow motion. o Press WHITE again to view at an even slower pace. o Press WHITE a third time to resume viewing at the normal speed. HD PVR Viewer’s Guide – UEC Page 37 of 62... -
Page 39: The Safety Net
AFETY When you schedule a recording, the HD PVR automatically adds 3 minutes to the beginning and 10 minutes to the end of the recording (so long as the safety net does not clash with other existing recordings). To change the default settings for the safety net, see page 49. -
Page 40: Rewinding
Play/Pause button. When in Live TV or Playback, the option of “instant replay” is also available. Press the Play/Pause button once to the left and the programme rewinds 10 seconds. HD PVR Viewer’s Guide – UEC Page 39 of 62... -
Page 41: The Decoder Menu
ECODER The Decoder Menu is your access point for all the settings that control the HD PVR. To access the Decoder Menu, press MENU. The Decoder Menu has 4 sections : Information Central Quick access to status and information for the decoder hardware and software. -
Page 42: The Decoder Menu - Information Central (#1)
– I (#1) ECODER NFORMATION ENTRAL The information screens in the Decoder Menu provide technical information about your HD PVR. This information will be relevant should you need to contact the MultiChoice Call Centre. NFORMATION ENTRAL NFORMATION ENTRAL This screen shows high level information. -
Page 43: Hardware Status
• The value on the 3rd line, after Load Ver/Var The MultiChoice Call Centre has the latest software details and will be able to advise if your HD PVR has the latest software. For easy reference, the latest software values are also available on our website (www.dstv.com). -
Page 44: Tuner Status
Tuner 1 – used for normal viewing Tuner 2 – used for recording 1 Tuner 2 – used for recording 2 Tuner 4 – used for EPG data and control messages HD PVR Viewer’s Guide – UEC Page 43 of 62... -
Page 45: Signal Status
We also suggest you check the signal strength by tuning to M-Net, Animal Planet, KYKNet and M-Net HD. If the signal strength is fine on these channels, the decoder should work correctly. HD PVR Viewer’s Guide – UEC Page 44 of 62... -
Page 46: The Decoder Menu - Parenal Control (#2)
ECODER ARENTAL ONTROL The HD PVR has a Parental Control feature to control viewing in your home. Access to this feature is controlled by the PG PIN code. The default PG PIN code is 1234. The PG PIN code is blocked if entered incorrectly multiple times. -
Page 47: Channel Blocking
Press BLUE (from the Parental Control Menu). o Enter the new PG PIN code twice (the PG PIN code can be any 4 digits). o Press OK to confirm the new PG PIN code. HD PVR Viewer’s Guide – UEC Page 46 of 62... -
Page 48: The Decoder Menu - Personalise (#3)
– P (#3) ECODER ERSONALISE This menu allows you to personalise certain settings on the HD PVR. The default settings are : Aspect Ratio = 16:9 Language Options = English – Family Surround Sound = Manual Safety Net Settings = 3 min / 10 min... -
Page 49: Language Options
Manual : if surround sound is available when viewing Live TV, you need to activate it by pressing LANGUAGE and selecting Surround Sound on the Language / Soundtrack pop-up. Auto : if surround sound is available, it will automatically be detected and used when available. HD PVR Viewer’s Guide – UEC Page 48 of 62... -
Page 50: Safety Net Settings
TANDBY To extend the lifespan of the HD PVR, you have the option to disable the hard disk during periods when the decoder is not in use. When the HD PVR is in standby, the hard disk goes to “sleep”. Recordings scheduled for when the HD PVR is in standby are not impacted and will take place. -
Page 51: The Decoder Menu - Advanced Options (#4)
FEC = 5/6 Polarisation = Vertical Satellite Options : DStv IS7, DStv IS10, DStv W4, Other. As you scroll these options, the values for options 2 – 9 change and are sometime greyed out (indicating that the option is not selectable). -
Page 52: Equipment Set-Up
Options : Composite, S-Video, RGB Local Time If the time displayed on the front panel of the HD PVR or on the i-Plate does not correspond with the actual time, change this setting to the local time. HD PVR Viewer’s Guide – UEC... -
Page 53: Xtraview Set-Up
The default settings are : Communication Port = RF Out Remote mode = TV1 Relay Remote Commands = Off Accept Relayed Commands = Off If the HD PVR is being linked to another XtraView decoder, visit www.dstv.com for full XtraView info (including detailed installation options and a guide to installation prices). -
Page 54: Dsd Upgrade
If the RED button is displayed and you initiate a download, DO NOT interrupt the process and wait for full video and audio to resume. HD PVR Viewer’s Guide – UEC Page 53 of 62... -
Page 55: Factory Defaults
Relay Remote Commands Accept Relayed Commands PIN Defaults PG PIN code 1234 Advanced Options PIN code 9949 Scheduled Recordings Edit and Lock PIN code 1234 (same as PG PIN code) HD PVR Viewer’s Guide – UEC Page 54 of 62... -
Page 56: Specifications
MPEG-2 and MPEG-4 MP@ML and AVC (H.264) Line Output PAL I / PAL B / 625 MPEG-2 MP@HL and all lower levels MPEG Profiles & Levels H.264 (MPEG-4 part 10) MP@L4.1 and all lower levels HD PVR Viewer’s Guide – UEC Page 55 of 62... - Page 57 Behind the door Front Panel Smartcard reader Behind the door HD PVR Viewer’s Guide UEC Version 2 (Dec 2008) e&oe For the latest version of the HD PVR Viewer’s Guide, go www.dstv.com HD PVR Viewer’s Guide – UEC Page 56 of 62...
-
Page 58: Legal Matters
For the DStv HD PVR Decoder to operate, it is required to correctly install and align a satellite dish and a Low Noise Block (LNB) converter. - Page 59 All rights are reserved. All intellectual property rights in the DStv HD PVR Decoder as well as in the content received using this DStv HD PVR Decoder are owned by or licensed by MultiChoice. The subscriber shall acquire no right, title or interest in the intellectual property.
-
Page 60: Product Warranty
The manufacturer and MultiChoice warrant that the DStv HD PVR Decoder will be free from defects in design, materials and workmanship for a period of 12 months from the date of sale of the new DStv HD PVR Decoder to the consumer. This warranty will not apply in the event of : the DStv HD PVR Decoder being tampered with or being opened, worked on, repaired or modified, save by an authorised MultiChoice Agent or Branch;... - Page 61 Did you know you can insure your HD PVR Decoder? Visit www.dstv.com for more information on the Decoder Care Contract which covers the HD PVR in the event of loss or damage. Terms & Conditions apply. HD PVR Viewer’s Guide – UEC Page 60 of 62...
-
Page 62: Troubleshooting / Hotlines
MultiChoice Africa (Sub-Sahara) www.dstvafrica.com Manufacturer (Altech UEC) www.uec.co.za If you have comments, suggestions or want to chat to other HD PVR customers about the product, visit the DStv Forums at www.dstv.com HD PVR Viewer’s Guide – UEC Page 61 of 62...
Need help?
Do you have a question about the HD PVR and is the answer not in the manual?
Questions and answers