Table of Contents
Advertisement
Advertisement
Table of Contents

Subscribe to Our Youtube Channel
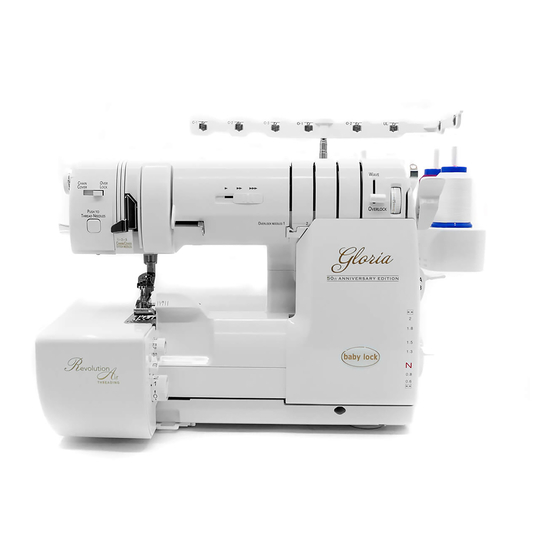
Related Manuals for Baby Lock Triumph BLETS8


Summary of Contents for Baby Lock Triumph BLETS8
- Page 1 SERVICE MANUAL MODEL BLETS8 Ver.1.2 AUG.2017...
-
Page 2: Table Of Contents
INDEX 1. Needle ..................2. Adjusting chart ................3. Construction covers ..............4. Lower Looper Adjustment ............5. Needle Guard Adjustment ............6. Upper Looper Adjustment ............7. Chain Looper Adjustment ............8. Feed Dog Adjustment ..............9. Differential Feed Adjustment ............ 10. -
Page 3: Needle
1.NEEDLE NOTE: Before all adjustment, you are required to change all needles to new and correct ones. Needle System : ELx705CF ORGAN, (SCHMETZ) Model: BLETS8, BLES8, BLE8W-2, BLE8W, BLE8, BLE5-3, BLE5-2 BLE5, BLCS2, BLCS Plating : Chrome Front Groove Back Groove Needle System : HAx1SP/CR ORGAN, (SCHMETZ) Model : BLE3ATW-2, BLE3ATW, BLE1AT-2, BLE1EX, BLE1DX-2, BLE1, BLE1SX,DX,LX,AT, BL101... -
Page 5: Construction Covers
Contruction Covers... -
Page 6: Lower Looper Adjustment
4. LOWER LOOPER ADJUSTMENT NOTE: After adjusting loower looper, you are required to check JET AIR THREADING. a) Replacement of lower looper Lower looper fixing screw Slide the pipe rubber, and loosen the screw. Replace new lower looper, and slightly tighten the screw. Adjust the radius 55.9mm 0.1, and firmly tighten the screw. -
Page 7: Upper Looper Adjustment
0.5-0.8 +0.3 Clearance 0〜0.1... -
Page 8: Chain Looper Adjustment
7. CHAIN LOOPER ADJUSTMENT NOTE: After adjusting loower looper, you are required to check JET AIR THREADING. a) Chain Looper Position Chain needle take-up Lowest position +0.1 Chain looper thread take-up hight position Chain looper thread take-up position timing b) Adjusting chain needle guards Overlock Chain Overlock... -
Page 9: Feed Dog Adjustment
8. FEED DOG ADJUSTMENT a) FEED DOG HEIGHT ADJUSTMENT Loosen two screws "A" , rotate adjusting screw clockwise or counter-clockwise. Clockwise-----------------------Raise feed dog Counter-clockwise------------Lower feed dog Presser foot Pressure Clockwise Raise Screw A Counter-clockwise Lower Adjusting screw b) FEED DOG POSITION ADJUSTMENT Condition : Stitch Length 4 Differencial Feed N The minimum distance between needle plate and main/sub... -
Page 10: Differential Feed Adjustment
9. Differential feed adjustment Correct positon : On condition diff.lever "N" position and stitch length dial "4", main feed dog(rear) and sub feed dog (front) move same length. How to adjust a) Set differential feed adjuating lever at “N” position. b) Loosen two screws of A. -
Page 11: Replacing Chaining Tongue
Cover plate Cheining tongue 10. REPLACEMENT OF CHAINING TONGUE a) Remove needle plate. Steel ball b) Remove cover plate. Spring c) Watching carefully not to jump out steel ball, remove chaining tongue and replace it. d) You are required to check the fixing position of the chaining tongue after replacing it. -
Page 12: Cutting Width Adjustment
13 . CUTTING WIDTH ADJUSTMENT 3.5 0.1mm a) Cut 1 layar cotton fabric and make a cutting width 3.5 0.1mm between the eye of needle hole and the edge of the fabric. Machine Settings Needle : Right Needle(O2) Thread : No Use Stitch Width Stitch Length : 2.5... -
Page 13: Searching Failes
14-1. SEARCHING FAILES NOTE: In case that the looper threader does not work properly, please check and confirm the following points. Search the spot that has a problem Check whether end of the joint pipes are in the center of the joint pipe receivers or not. -
Page 14: Adjusting Movement Of Pipes
14-2. ADJUSTMENT OF MOVEMENT OF PIPES NOTE: In case that adjusting JET AIR THREADING, do not lay down the machine body on the side. ) In case that the joint pipes do not move smoothly. UPPER LOOPER or LOWER LOOPER Loosen the screw "A"... -
Page 15: Adjusting Positioning Of Pipes
14-3. ADJUSTMENT OF POSITION OF PIPES NOTE: In case that adjusting JET AIR THREADING, do not lay down the machine body on the side. a) In case that the end of joint pipe is not in the center of joint pipe receiver. 1) Adjustment of upward and downward direction Check and confirm whether upper, lower and chain looper are in the standard position (See P4 , P5 ,P6and the service manual.) -
Page 16: Replacing Pipes
Thread inlet plate. Thread inlet plate Thread inlet plate. Thread inlet plate. Thread inlet plate Thread inlet plate. Thread inlet plate. Thread inlet plate Thread inlet plate. Fixing screws Thread inlet plate Pipe holder (1) Pipe holder (2) - Page 17 15. How to remove the exterior covers Remove the two screws of the spool stand. Remove the two screws of the belt cover. Remove the two screws of the arm cover. Lower threading lever down and remove the cover.
-
Page 18: How To Remove The Exterior Covers
15.How to remove the exterior covers 15. How to remove the exterior covers Remove the five screws of the rear cover. Remove the screw of the bed cover. Remove the E ring of the front cover hinge shaft and remove the front cover. Remove the thread take-up cover. - Page 19 15. How to remove the exterior covers Remove the screw of the thread take-up guide. Remove thread take-up guide. Remove the screw of the wave selector knob. Be careful to remove cable. Remove rubber cushions.
- Page 20 15. How to remove the exterior covers Pull out of fine tuning knob. Remove screws. Remove bed cover. Be careful, there is a safety cable on the back side of the arm cover. Remove front cover safety cable.
- Page 21 15. How to remove the exterior covers Remove two screws of knife cover hinge. Remove screw of knife holder cover.
-
Page 22: Attach Exterior Covers
16. Attach exterior covers Attach the knife holder cover. Attach the each part and screws. Attach the knife cover hinge. Make sure there is no gaps. Stitch width is minmum. - Page 23 16. Attach exterior covers Make sure through safety code position. Safety device connector. *There is no problem even if the three connectors of the safety switch are replaced. Attach base plate until each protrude fits. Attach the four rubber cushions.
- Page 24 16. Attach exterior covers Attach the speed controller cable. Be careful to attach the face cover. Be careful to take-up cover. Attach the wave selector knob.
- Page 25 16. Attach exterior covers Attach the rear cover and 4-screws. Attach the set screw on the rear cover from the front.. Be careful to attach the belt cover. Be careful to attach the belt cover.
- Page 26 16. Attach exterior covers Attach the spool stand set. Attach the front cover and E ring. First attach the pressure adjusting dial. Be careful muting direction. Threading lever down and attach the arm cover.
-
Page 27: Electrical Components
17. ELECTRICAL COMPONENTS Sewing motor Power PCB Air threading motor To switching power supply To Power PCB To right LED To sewing speed controller To thread loopers button Control PCB To foot control *To front cover *To side cover *To presser foot Note: *Since series connection, the three connectors can be in any position.
Need help?
Do you have a question about the Triumph BLETS8 and is the answer not in the manual?
Questions and answers
How do I determine thread count or hours of operation?