Table of Contents
Advertisement
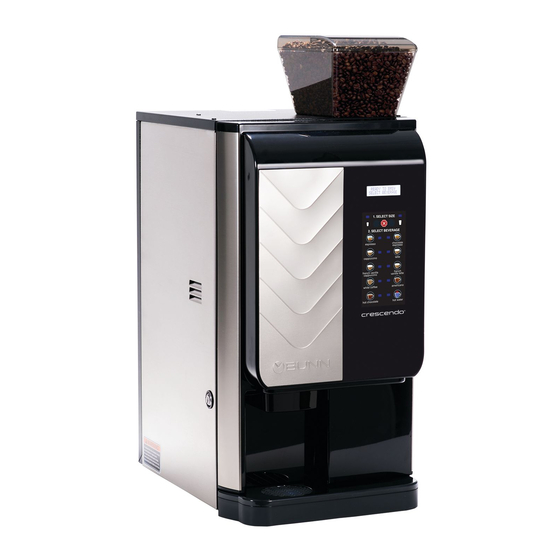
Crescendo
®
Bean to Cup Espresso System
INSTALLATION & OPERATING GUIDE
To ensure you have the latest revision of the Operating Manual, Illustrated Parts Catalog, Programming Manual, or Service Manual,
please visit the Bunn-O-Matic website, at www.bunn.com. This is absolutely FREE, and the quickest way to obtain the latest catalog
and manual updates. For Technical Service, contact Bunn-O-Matic Corporation at 1-800-286-6070.
Bunn-O-Matic Corporation
Post Office Box 3227, Springfield, Illinois 62708-3227
Phone (217) 529-6601 | Fax (217) 529-6644
www.bunn.com
52384.0001 D 04/19 © 2016 Bunn-O-Matic Corporation
Advertisement
Table of Contents

Related Manuals for Bunn Crescendo Series


Summary of Contents for Bunn Crescendo Series
- Page 1 To ensure you have the latest revision of the Operating Manual, Illustrated Parts Catalog, Programming Manual, or Service Manual, please visit the Bunn-O-Matic website, at www.bunn.com. This is absolutely FREE, and the quickest way to obtain the latest catalog and manual updates. For Technical Service, contact Bunn-O-Matic Corporation at 1-800-286-6070.
-
Page 2: Warranty
This war- ranty is conditioned on the Buyer 1) giving BUNN prompt notice of any claim to be made under this warranty by telephone at (217) 529-6601 or by writing to Post Office Box 3227, Springfield, Illinois 62708-3227;... -
Page 3: Table Of Contents
Preventive Maintenance ....................25 Adjustments ......................... 26 Door Safety Interlock ....................30 Wiring Schematic ......................31 Tip: For advanced programming information, please visit the Bunn-O-Matic website, at www.bunn.com. This is absolutely FREE, and the quickest way to obtain the latest information. -
Page 4: User Notices
DAMAGE, FIRE OR SHOCK HAZARD. READ THE ENTIRE OPERATING MANUAL BEFORE USING THIS PRODUCT WARNING 00986.0000M 10/14 ©1994 Bunn-O-Matic Corporation 00986.0000 To reduce the risk of electric shock, do not remove or open cover. No user-serviceable parts inside. Authorized service personnel only. -
Page 5: North America Requirements
CE REQUIREMENTS • This appliance must be installed in locations where it can be overseen by trained personnel. • For proper operation, this appliance must be installed where the temperature is between 5°C to 35°C. • Appliance shall not be tilted more than 10° for safe operation. •... -
Page 6: Initial Setup
INITIAL SET-UP 1. Remove drip tray and cover from the parts box. Assemble the cover to the drip tray, then slide under the front door of the machine, engaging the rear of the drip tray into the opening in the lower front of the machine. - Page 7 INITIAL SET-UP - continued 6. Rotate the top of group head toward rear of machine until it snaps into place as shown in Figure 3. P4377 Figure 3 7. Slide red lock to the right until it snaps into place as shown in Figure 4.
-
Page 8: Electrical Hookup
INITIAL SET-UP - continued 9. Remove the bean hopper from the parts box. Align the bean hopper so that the collar on the bottom of the bean hopper will engage the opening in the grinder as shown in Figure 6. Figure 6 10. -
Page 9: Plumbing Requirements
The tank temperatures have been preset at the factory to 80°C (180°F) for the soluble tank, and 102°C (215°F) for the espresso tank. Bunn recommends that to provide the best quality beverage, the installer adjust the tank temperature to the powder product manufacturers recommended temperature for the hot powder product being used. -
Page 10: Filling Soluble Hoppers
Filling Soluble Hoppers 1. Remove packing material from on top of the powder hoppers. 2. Remove powder hoppers by lifting the front of the powder hopper until the peg on the bottom of the hopper clears the hole in the mounting plate (see Figure 1). Then pull the hopper forward to remove. -
Page 11: Operating Controls And Interface
OPERATING CONTROLS AND INTERFACE 1. Cup Size Buttons: Momentarily pushed to select beverage size to dispense. 2. Dispense Buttons: Momentarily pushed to dispense selected beverage 3. LED indicators: Illuminates when the adjoining button has been selected. 4. Stop button: Pressing the stop button during dispensing will stop the dispense sequence. OPERATING THE DISPENSER The NORMAL/PROGRAM/RINSE switch must be in the NORMAL position 1. -
Page 12: Creating "Custom" Beverage
To dispense a beverage, press only the dispense button of the beverage desired. The option to select which beverage size is used can be done when creating a custom recipe or espresso dispense. Tip: A display graphic for single cup dispensing is availble for purchase from BUNN. CREATING A “CUSTOM” BEVERAGE A “CUSTOM”... - Page 13 LG ESP GRIND TIME SM BREW VOLUME SM DWELL TIME #.# sec #.# sec 1. SELECT SIZE 1. SELECT SIZE 1. SELECT SIZE Use to Use to Use to Use to Use to Use to Use to Use to Use to decrease increase Navigate...
- Page 14 ESPRESSO SHOT? SW 1 LARGE TIME SW 1 SMALL TIME #.# sec #.# sec 1. SELECT SIZE 1. SELECT SIZE 1. SELECT SIZE Use to Use to Use to Use to Use to Use to Use to Use to Use to decrease increase Navigate...
- Page 15 CREATING A “CUSTOM” BEVERAGE Strength Adjustment The sub-menus for strength adjustment are located under this option. STRENGTH ADJUST PROGRAM MODE EXIT YES PRESS TO ENTER 1. SELECT SIZE 1. SELECT SIZE Use to Navigate Use to Select STEP 1 STEP 2 STEP 3 •...
-
Page 16: Through Counter Option
Service Key The switch may be overridden by a qualified service technician by inserting the service key, (BUNN PN 51953.0001) into the opening of the mixing chamber panel, then turn about 15 degrees to position, as shown in Figure 2. - Page 17 Software Setup for Through Counter Option: 1. Power the machine. 2. In the PROGRAM mode, use the LARGE cup, (button “A”), to navigate to the “LOCKS/DISABLES” menu. 3. Press the button under “YES” (button “B”) and then the LARGE cup size, (button “A”), until the screen displays the “PUCK BIN”...
-
Page 18: General Cleaning
2. Remove the powder mixing chambers, steam traps, frothers and mixing chamber bases. 3. Remove the dispense hoses from the dispense nozzle assembly. 4. Clean all parts removed in warm soapy water. Use Bunn P/N 26367.0000 or 49827.0000 cleaning brush provided to clean bores and orifices. Rinse in cold water. - Page 19 NOTA: Las instrucciones de limpieza descritas anteriormente excluyen productos lacteos azucarados. La limpieza de las camaras de mezcla y de los codos de salida de cada tolva deberá realizarse diariamente. 52564.0000A 12/15 © 2015 BUNN-O-MATIC CORPORATION 042319...
- Page 20 CLEANING - continued Every 1000 cycles or weekly: ESPRESSO BREW CHAMBER 1. Remove espresso brew group head, and clean with a brush and warm water. 2. Remove Sieve Head & Cake Pusher. 3. Clean Sieve Head & Cake Pusher with lukewarm water only, paying special attention to the channels. 4.
- Page 21 CLEANING - continued Every 1000 cycles or weekly: ESPRESSO BREW CHAMBER 5. Re-assemble the brewer, making sure the gear wheels are aligned (open) for sieve head insertion. 6. Re-attach the water inlet hose and place the brewer back in the drive unit. 7.
- Page 22 CLEANING - continued RINSE CYCLE (Required Daily) 1. Open the door and place the NORMAL/PROGRAM/RINSE switch in the RINSE position. 2. Close door and place a minimum 400ml container under the dispense nozzles. 3. Press the button under RINSE on the screen. SELECT MODE RINSE CLEAN...
- Page 23 CLEANING - continued CLEAN CYCLE - WEEKLY 1. Open the door and place the NORMAL/PROGRAM/RINSE switch in the RINSE position. 2. Press the button under CLEAN on the screen. SELECT MODE RINSE CLEAN 1. SELECT SIZE 2. SELECT BEVERAGE 3. When the screen prompts ADD CLEANING TABLET, open ADD CLEANING the dispenser door, and drop a cleaning table into the opening of the espresso brew chamber as shown.
- Page 24 CLEANING - CLEAN CYCLE continued 4. Close dispenser door and place a minimum 500ml container under the dispense nozzles. 5. Press the button under NEXT. 6. When screen displays PRESS DISPENSE TO START, press any beverage dispense button to begin cleaning cycle. PRESS DISPENSE TO START 7.
- Page 25 Weekly: Parts Washing and Sanitizing STEP 3 STEP 1 STEP 2 Rotate tab at bottom of mixing Remove elbows from all hoppers. Remove elbows from right & left chamber bases counter clock mixing chambers, twisting slightly wise to release base. to help release.
-
Page 26: Preventive Maintenance
Corporation recommends that preventive maintenance be performed at regular intervals. ® Maintenance should be performed by a qualified service technician. For Technical Service, contact Bunn-O-Matic Corporation at 1-800-286-6070. NOTE: Replacement parts or service caused by failure to perform required maintenance is not covered by warranty. -
Page 27: Adjustments
ADJUSTMENTS Adjustable Variables Used to Create A Perfect Shot of Espresso Topped with Crema: The primary 2 variables that you mostly will adjust to achieve your ideal double shot espresso pour time will be the coffee particle size and the dosage targets. Variables 1. - Page 28 The particle size of the ground coffee can be adjusted for optimal brewing of the espresso. NOTE: BUNN recommends to rotate knob in 1 click increments to achieve desired coarseness. 1. Turn knob counterclockwise to increase the particle size (coarse) of the ground coffee (see Figure 1.)
- Page 29 ADJUSTMENTS - continued GRINDER THROW WEIGHT ADJUSTMENT: 1. Open the door, and slide the espresso brew group lock to the left to unlock the brew group. 2. Tip the top of the brew group head towards the front of the machine to disengage from the espresso drive, then remove brew group from the drive.
- Page 30 DRAINING THE HOT WATER TANKS – to be performed by qualified service personnel only! 1. Open the door and place the NORMAL/PROGRAM/RINSE switch in the PROGRAM position. 2. Close the door and place a minimum two liter container under the dispense nozzles. 3.
- Page 31 220-240 VOL TS AC-2WIRE ESPRESSO CSW-1 Drawn: KJO GROUP HEAD SINGLE PHASE, 50/60HZ CAPACITIVE Date: 09/10/18 TOUCH SWITCH Colors: 54323.0000 B 08/24/2018 © BUNN-O-Matic Corporation LCD-1 LCD DISPLAY 15 16 CRESCENDO SCHEMATIC 120 VOL TS AC-2WIRE SINGLE PHASE, 60HZ Artwork for P/N BG-1...
- Page 32 Drawn: KJO WHT/BLK GROUP HEAD CAPACITIVE Date: 08/24/18 TOUCH SWITCH RIGHT WHIPPER MOTOR ESP TANK Colors: WHT/RED GRAY 0001 A 08/24/2018 © BUNN-O-Matic Corporation WHT/BLK WHT/BLK POWDER TANK LCD-1 LCD DISPLAY 15 16 CRESCENDO SCHEMATIC 120/208 - 240 VOL TS AC-3WIRE...
Need help?
Do you have a question about the Crescendo Series and is the answer not in the manual?
Questions and answers