Table of Contents
Advertisement
Quick Links
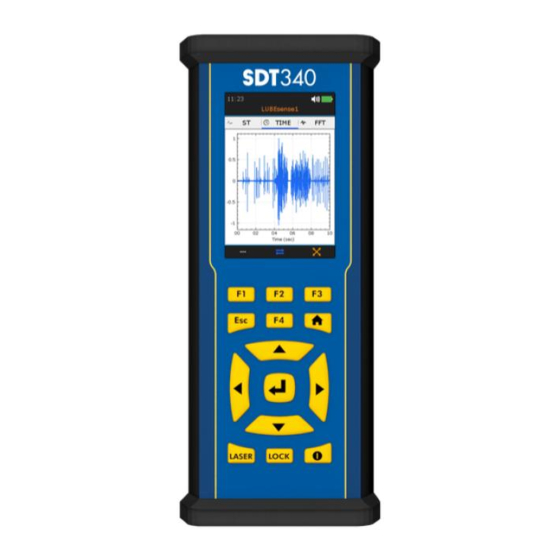
Asset Health Evaluation Meter
USER MANUAL
December 2018. Version 1
© SDT International. All rights reserved. Specifications are subject to change without notice.
SDT International sa-nv • Bd de l'Humanité 415 • B-1190 Brussels (Belgium) • Tel: +32(0)2 332 32 25 • email: info@sdtultrasound.com
SDT North America • 1532 Ontario Street, Cobourg, ON • Phone: 1-800-667-5325 | 1-905-377-1313 • email: hearmore@sdtultrasound.com
www.sdtultrasound.com
Advertisement
Table of Contents

Subscribe to Our Youtube Channel
Related Manuals for SDT International SDT340


Summary of Contents for SDT International SDT340
- Page 1 © SDT International. All rights reserved. Specifications are subject to change without notice. SDT International sa-nv • Bd de l’Humanité 415 • B-1190 Brussels (Belgium) • Tel: +32(0)2 332 32 25 • email: info@sdtultrasound.com SDT North America • 1532 Ontario Street, Cobourg, ON • Phone: 1-800-667-5325 | 1-905-377-1313 • email: hearmore@sdtultrasound.com...
-
Page 2: Table Of Contents
MAN.340.EN--01--SDT340-user-manual-Eng.docx 1. Safety ......................4 2. Caution ......................4 3. Introduction ....................5 4. Unpack ......................5 5. Battery ......................5 6. Controls and connections ................7 6.1. Power on ........................7 6.2. Sleep Mode ........................7 6.3. Power Off ........................8 6.4. Driver ........................... 8 6.5. - Page 3 MAN.340.EN--01--SDT340-user-manual-Eng.docx 18.1.7. Database ........................25 18.1.8. Certifications ......................... 25 18.1.9. Manufacturer info ......................25 18.2. Language ........................ 26 18.3. Bluetooth ....................... 26 18.4. Date and hour ......................27 18.5. Brightness ......................27 18.6. Network ......................... 28 18.7. Theme ........................28 Recommended calibration intervals ............
-
Page 4: Safety
Lifetime Warranty. Contact SDT Ultrasound Solutions or an SDT Authorized Service Provider. The permissible ambient temperature range for the operation of the SDT340 is -15 °C to +60 °C (14 °F to 140 °F). Relative humidity must be less than 90%, non-condensing. -
Page 5: Introduction
• and spectrum Bluetooth for wireless audio • Signal play back streaming 4. Unpack The items that follow are included in your purchase of the SDT340 kit. Unpack and inspect them. • • SDT340 Battery pack • • Wired headset Battery charger, power cord, EU, US •... - Page 6 The LED flashes red – the docking station detect an abnormal current consumption or an abnormal temperature. Disconnect and then reconnect the power supply from the main to reset the docking station. The SDT340 autonomy is typically 8 hours for a fully charged battery pack and the recharge time is about 7 hours. 6/30...
-
Page 7: Controls And Connections
MAN.340.EN--01--SDT340-user-manual-Eng.docx 6. Controls and connections ❶ Display ❷ F1 to F4. Their respective function is indicated in the bottom of the display ❶ ❸ Escape for stopping a signal acquisition and going back to the previous menu through setting screens ❹... -
Page 8: Power Off
Caution Install first the driver before connecting the SDT340 to your computer. The driver installation file is on the USB stick provided with your SDT340 kit. You can download it from https://ftp.sdt.be/pub/Software/. The file name is SDT2xxDriverInstaller. For Ultranalysis Suite 4.0 (UAS) Private Network and Cloud versions, the driver must be installed individually on each computer you will use. -
Page 9: Home Screen
On top left, date and time are scrolling ❾. On the top right, laser (when activated), USB (when the SDT340 is connected to a computer), wireless headset (when paired), wired headset (when connected) and battery remaining charge icons are displayed ❿. -
Page 10: Proceed With Ultrasound Signal Acquisition In Free Mode
MAN.340.EN--01--SDT340-user-manual-Eng.docx 9. Proceed with ultrasound signal acquisition in Free Mode ❶ Sensor in use ❶ ❷ Amplification ❸ Amplification adjustment indicator ❹ Running RMS ❾ ❸ ❷ ❺ Running Max RMS ❻ Running Peak ❼ Running Crest Factor ❹ ❽... - Page 11 MAN.340.EN--01--SDT340-user-manual-Eng.docx ❶ Sample rate ❷ Acquisition time ❸ Filter ❹ Mixer ❺ Selected field surrounded by a blue line ❷ ❻ FFT or FFT Envelope ❺ ❶ ❸ ❹ ❻ Figure 9-2 Ultrasound Measurement Settings Press Enter to trigger the acquisition or F3 to first modify the measurement settings as the sample rate ❶...
-
Page 12: St Tab For Ultrasound Readings
MAN.340.EN--01--SDT340-user-manual-Eng.docx 10. ST tab for ultrasound readings At the end of the acquisition, the device displays the ultrasound condition indicator tab ST. There, the final RMS ❶, final Max RMS ❷, final Peak ❸ and Crest factor ❹ are calculated from the samples collected during the signal acquisition. - Page 13 MAN.340.EN--01--SDT340-user-manual-Eng.docx ① Sensor in use and bandwidth ① ② Running Velocity RMS ③ Running Acceleration RMS ④ Running Peak Acceleration ⑦ ⑤ Running Acceleration Crest Factor ⑥ F3 for entering the settings menu ⑦ Acquisition time ② ⑤ ③ ④...
-
Page 14: St Tab For Vibration Readings
MAN.340.EN--01--SDT340-user-manual-Eng.docx At the end of the acquisition time, you have access to the 4 condition indicators from the tab ST ❶, the time signal from the tab TIME ❷ and the spectrum from the tab FFT ❸. The active tab is blue underlined ❹. -
Page 15: Display Ultrasound And Vibration Time Signal
MAN.340.EN--01--SDT340-user-manual-Eng.docx 13. Display Ultrasound and Vibration Time Signal At the end of the signal acquisition and from the ST tab, press F2 to display the time signal. The TIME ① is now active. With Up and Down navigation keys zoom in and out a portion of the signal from a time scale of 10 seconds ②... -
Page 16: Display Ultrasound And Vibration Spectrum
MAN.340.EN--01--SDT340-user-manual-Eng.docx 14. Display ultrasound and vibration spectrum From the TIME tab, press F2 to display the spectrum. The FFT tab ❶ is now active. With Up and Down navigation keys zoom in and out a portion of the signal. With Left and Right navigation keys, navigate between the different portions of the spectrum. -
Page 17: Proceed With Temperature Measurement In Free Mode
MAN.340.EN--01--SDT340-user-manual-Eng.docx 15. Proceed with temperature measurement in Free Mode Note than from the settings menu, you can choose to display temperature in degrees Celsius or Fahrenheit. From the Home screen, select the temperature icon and press Enter. The running temperature screen is displayed (Figure 18). -
Page 18: Tree Navigation And Data Storage In Free Mode
10 Hz and 1 kHz). Figure 20: example of tree structure The SDT340 features an intuitive and quick way to navigate, going up and going down, by hierarchical levels of the tree structure. The list of the nodes of the selected level is placed in the upper section. Use the Right key to go up the higher level, the parent (if exists). - Page 19 MAN.340.EN--01--SDT340-user-manual-Eng.docx ❶ ❸ ❺ ❹ ❷ ❸ After freezing the measurement and pressing Enter, My Factory is selected in the upper section ❶. The lower section ❷ contains the lower-level nodes of My Factory, Unit 1, Unit 2 and Unit 3.
-
Page 20: Rotational Speed
MAN.340.EN--01--SDT340-user-manual-Eng.docx 17. Rotational speed ❶ Running RPM ❷ ❷ Laser Icon activated ❶ Figure 25: Rotational speed From the Home screen, select the RPM icon and press Enter. The running RPM screen is displayed (Figure 25). The value ❶is refreshed twice per seconds. Press the Laser hold-on key to activate it. The laser icon ❷... -
Page 21: General Settings
MAN.340.EN--01--SDT340-user-manual-Eng.docx 18. General Settings From the Home screen, select the General settings icon and press Enter. With the Up and Down navigation keys highlight the desired settings and confirm your choice with Enter. ❶ System info setting ❷ Language setting ❸... -
Page 22: System Info
MAN.340.EN--01--SDT340-user-manual-Eng.docx From System info screen press Enter 18.1. System info ❶ Device info ❷ License info ❸ Calibration info ❶ ❹ Battery info ❺ Hardware info ❷ ❻ Software info ❸ ❼ Database info ❽ Certifications info ❹ ❾ Manufacturer Info ❺... -
Page 23: License Info
MAN.340.EN--01--SDT340-user-manual-Eng.docx 18.1.2. License info ❶ ❷ ❶ ❷ Figure 29: system Info With the Up and Down navigation keys highlight the desired settings and confirm your choice with Enter. Press the Button ESC to display the previous screen. 18.1.3. Last calibration date ❶... -
Page 24: Hardware Info
MAN.340.EN--01--SDT340-user-manual-Eng.docx With the Up and Down navigation keys highlight the desired settings and confirm your choice with Enter. Press the Button ESC to display the previous screen. 18.1.5. Hardware info ❶ CPU frequency ❷ RAM capacity (in MB). ❸ Internal memory (in MB) ❶... -
Page 25: Database
MAN.340.EN--01--SDT340-user-manual-Eng.docx Figure 33: Software info With the Up and Down navigation keys highlight the desired settings and confirm your choice with Enter. Press the Button ESC to display the previous screen. 18.1.7. Database ❶ SQLite version ❷ Database ❶ ❷... -
Page 26: Language
MAN.340.EN--01--SDT340-user-manual-Eng.docx 18.2. Language With the Up and Down navigation keys highlight the desired settings and confirm your choice with Enter. Press the Button ESC to display the previous screen. Figure 37: Language 18.3. Bluetooth ❶ Bottom blue line indicates that headset is selected ❷... -
Page 27: Date And Hour
❷ to enable the Bluetooth headset module. Switch on the Peltor headset MT53H7AWS5. The headset must emit a blue flashing light .Press F3 to pair ❻ the SDT340 with the Peltor headset MT53H7AWS5. 18.4. Date and hour ❶ Time clock ❷... -
Page 28: Network
❷ Network settings. The selected option is confirmed with a black bullet. Once you connect the SDT340 to a computer, the network settings information will be automatically listed on the SDT340 screen if automatic has been selected and if not, enter the settings information must be selected manually. -
Page 29: Recommended Calibration Intervals
SDT International. In the event of a defect, contact your local SDT representative or SDT International. This document is part of SDT’s quality management system (ISO-9001 certified). -
Page 30: Responsibility Limits
SDT340 unit or its accessories, bodily harm, loss of time, financial or material loss or any other indirect or consequential loss arising out of the use, or inability to use this product, even when it has been warned of possible damages.
Need help?
Do you have a question about the SDT340 and is the answer not in the manual?
Questions and answers