Table of Contents
Advertisement
Quick Links
USER MANUAL
Version 04 - 2020
SDT International sa-nv • Bd de l'Humanité 415 • B-1190 Brussels (Belgium) • Tel: +32(0)2 332 32 25 • info@sdtultrasound.com
SDT North America • 7677 County Road 2, Cobourg, ON K9A 4J7 (Canada) • Phone:
1-800-667-5325 | 1-905-377-1313
• hearmore@sdtultrasound.com
www.sdtultrasound.com
Advertisement
Table of Contents

Subscribe to Our Youtube Channel
Related Manuals for SDT International LUBExpert


Summary of Contents for SDT International LUBExpert
- Page 1 USER MANUAL Version 04 - 2020 SDT International sa-nv • Bd de l’Humanité 415 • B-1190 Brussels (Belgium) • Tel: +32(0)2 332 32 25 • info@sdtultrasound.com SDT North America • 7677 County Road 2, Cobourg, ON K9A 4J7 (Canada) • Phone: 1-800-667-5325 | 1-905-377-1313 •...
-
Page 2: Table Of Contents
4.1. LUBExpert is available in two forms..................8 4.2. LUBExpert Kit ..........................8 4.3. LUBExpert Base Kit Contents ..................... 9 4.4. LUBExpert Upgrade for SDT270SU or SDT270DU (MK2 Only) ..........10 4.5. Upgrade Kit Contents ......................11 4.6. Charging the Battery ........................ 11 4.7. -
Page 3: Before You Begin
“LITE”. For instructions using UAS3, refer to the UAS3 user manual. • LUBExpert App runs on an SDT270SU or SDT270DU. If you are using the LUBExpert App on one of these devices and need device specific instructions, refer to your SDT270 User Manual. -
Page 4: Warranty
LUBExpert or SDT270 unit or its accessories, bodily harm, loss of time, financial or material loss or any other indirect or consequential loss arising out of the use, or inability to use this product, even when it has been warned of possible damages. -
Page 5: Use Of Ip
You are free to use, duplicate, share, display, and perform our IP under the following conditions: Attribution: You must give SDT International credit by identifying it as the copyright owner and, where appropriate and possible, adding a web link (URL) that directs people to http://www.sdtultrasound.com. -
Page 6: Welcome Message
LUBExpert User Manual 2. Welcome Message Congratulations and thank you for your purchase of LUBExpert. Get ready to explore the world of ultrasound assisted machinery lubrication. Whether you grease bearings on a time-based or calendar-based schedule, LUBExpert’s onboard lubrication and greasing assistant is ready to guide you to a perfect and precise result every time. -
Page 7: Introduction
& greasing assistant. Intelligent algorithms guide lube-techs before, during, and after re-greasing resulting in optimal lubrication parameters on all assets. Given only a few machine parameters, LUBExpert monitors each stroke of grease and its effect on bearing friction and temperature. Before and after bearing conditions are reported with a “Lubrication success”, “Lubrication failure”, “Overlubrication”, “Shorten interval”... -
Page 8: Description
LUBExpert Dynamic Kit – A standard LUBExpert Kit with ability of collecting and storing Dynamic data. Note that any LUBExpert kit can be upgraded to LUBExpert Dynamic Kit with an Upgrade Key. LUBExpert Upgrade –... -
Page 9: Lubexpert Base Kit Contents
• LUBEsense1 contact sensor, flat & curved magnetic bases, acoustic lube adaptor, sensor cable • Custom swivel cradle mounts LUBExpert to any standard grease gun • Headphones with 25dB noise reduction rating (neckband style) • Universal voltage battery charger (110-240V AC 50/60Hz) •... -
Page 10: Lubexpert Upgrade For Sdt270Su Or Sdt270Du (Mk2 Only)
Article Code Description FAUPGRKEYLBXD Upgraded key code LBX D – Option Dynamic Any LUBExpert can be upgraded to Dynamic by using key, there are no specific criteria. 4.5. LUBExpert Upgrade for SDT270SU or SDT270DU (MK2 Only) 4.5.1. LUBExpert Firmware Features •... -
Page 11: Upgrade Kit Contents
– in fact, it very slowly tops the charge up a little more. Expect up to 8 hours of continuous use from your LUBExpert when the battery is fully charged. This will vary depending on your need to use the backlight and the TEMP1 internal temperature sensor. -
Page 12: Turning The Lubexpert "On" And "Off
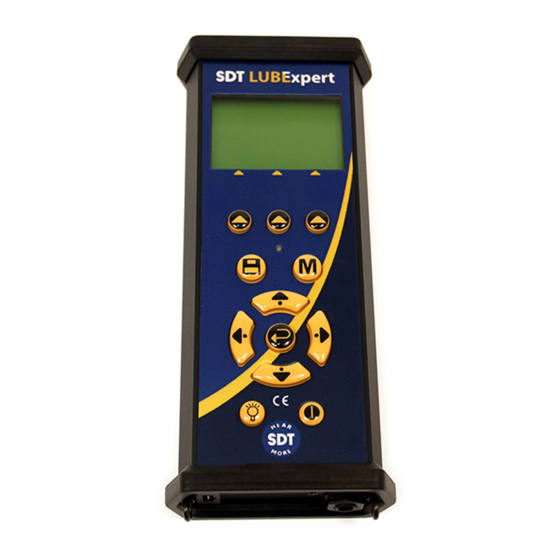
LUBExpert User Manual 4.8. Turning the LUBExpert “ON” and “OFF” To turn the LUBExpert device ON, Press the Power Button ① on the bottom right of the keypad. The status LED ② will shine dark blue. Then, a few seconds later the SDT logo and a “loading”... -
Page 13: Getting Started
If you have not already installed UAS3 and the SDT device driver on your PC, you will need to do that first. Everything you need resides on the USB drive delivered with your LUBExpert kit. The installation process is simple enough however should you require installation assistance contact your SDT authorized representative (or support@sdtultrasound.com). -
Page 14: System Settings Edits
UAS3 and LUBExpert want to ensure you always use the right grease and the right amount. To accomplish this, you need a tool to manage your grease guns. To manage multiple grease guns in... -
Page 15: Lubricant Management
LUBExpert User Manual UAS3 choose OPTIONS in the main menu and then select SYSTEM SETTINGS. Look for the Grease Guns management tab all the way to the right and select it with a single left mouse click. Here you will see all the grease guns currently identified in the database. To add more grease guns, enter the gun ID in the Grease gun ID window. -
Page 16: Sensor Options - Lubexpert Mode
LUBExpert, there are only two (LUBEsense1 and TEMP2). To help eliminate confusion we created “LUBExpert Mode” in UAS3 to hide all the sensors that do not apply to LUBExpert. To enter LUBExpert Mode, select “Options” from the main menu and then “System Settings”. The System Settings dialogue box appears with several selector tabs oriented horizontally across the top. -
Page 17: Lubexpert Databases In Uas3
To create new Data Folder, click on Create New ①, in Data Folder area ① In new window: Choose SDT2xx (as folders for SDT270 and LUBExpert are separate from folders for SDT340), add folder name and Tree Structure name and click on Save. To view details of selected folder, click on Info ②. - Page 18 LUBExpert User Manual SDT270 & LUBExpert SDT340 To create a new Tree Structure: ⑧ ① ② ③ ⑤ ④ ⑥ ⑦ Choose a Data Folder (click on arrow next to Data Folder name to open a drop-down menu) and click on Create New ⑤, enter Tree Structure Name and click on Save, as shown below:...
-
Page 19: Modifying A Database
Adding LUBExpert measurements to your data tree is no different than adding other measurements. The only difference is that for a LUBExpert measurement, you only have two sensor choices (LUBEsense1 and TEMP2). - Page 20 However, if you are using an SDT270DU with the LUBExpert App installed or LUBExpert Dynamic, choosing Dynamic here will instruct your instrument to collect both Dynamic and Static data simultaneously. 7.2.4. Setting Data Collection Interval, Acquisition Time, and Temperature Emissivity...
- Page 21 LUBExpert User Manual Setting Grease Gun Earlier we described how to manage your inventory of grease guns under “Grease Gun Management”. In that section, you named your grease gun and entered its grease injection quantity per stroke. Now, as you create measurement collection points in UAS3, it is important to assign the correct grease gun to the correct asset.
- Page 22 LUBExpert User Manual Manual input of grease quantity If you want to manually add calculated grease quantity, chose “Edit” in field ⑦ and enter the quantity. In this case, all pre-calculations will be done based on your input. Manually edited quantity will be shown in Italic.
- Page 23 LUBExpert instrument. No further settings need to be done (nor can be done) in LUBExpert once in the field. This enables your grease technician to have comfortable, fast, and safe work in the field, as well as tight work control and dependable data for the Lubrication Manager.
-
Page 24: Working With Work Orders/Surveys
LUBExpert User Manual 8. Working with Work Orders/Surveys Working with work orders/surveys in UAS3 for LUBExpert should be familiar to UAS3 users. For more detailed explanations, reference your UAS3 user manual. A general description is provided below. 8.1. Create a New Work Order/Survey NOTE: LUBExpert functionality is activated only when working in WORK ORDER/SURVEY mode. -
Page 25: Before Going To The Field
LUBExpert User Manual • After a successful transfer, a status report provides relevant transfer statistics • Click OK. You’re ready to go! 8.3. Before going to the field You might want to be sure that you have all needed tools and Lubricants with you, in the right quantities. -
Page 26: In The Field
LUBEsense1. 9.2. Starting to work – LUBExpert Once you connect your sensor and transfer the data from UAS3 to your LUBExpert, you are ready to start. If you are working with LUBExpert you will see following screen:... - Page 27 In case you did not print or send the “Things You Need” report (Shopping List) from UAS3 directly, you can still find it in your LUBExpert. Now visit the LUBE room to get all the items needed for the task(s). Selecting any of them and pressing the right arrow opens a SHOPPING LIST report for that particular WORK ORDER.
- Page 28 Note that LUBExpert prevents you from collecting incorrect data. You MAY NOT proceed until instrument amplification is set correctly. Press ENTER to take a reading.
- Page 29 LUBExpert User Manual Once the reading has been taken, LUBExpert provides a screen with measurement results, representing RMS, maxRMS, PEAK and Crest Factor: By pressing either F3 or ENTER, the reading is saved and processed. Depending on the result and...
- Page 30 LUBExpert User Manual ① ALARM NOT ASSIGNED In case there is no alarm assigned to Lube position, initial reading will be followed by a screen that offers you all choices. • In case you decide not to take any action, press F1 (EXIT) and you will be directed to the next asset in your WORK ORDER •...
- Page 31 LUBExpert User Manual Now, slowly add grease as instructed on the screen and press enter (press enter after you add grease) Note! In case you feel backpressure (possible grease fitting or line blockage), abort the process at any time by pressing F1 and add “Defective Fitting/Line” message (or other appropriate message)
- Page 32 LUBExpert User Manual Instructions will not be the same at first, second and all following steps, so please follow them carefully. Status on the screen is a temporary status and may (and probably will) change during the process, but instructions should be followed.
- Page 33 • Inject grease and press ENTER, the following screen appears; • At this point, you need to tell LUBExpert the number of shots you injected into the bearing. Do this by using the ARROW UP on the instrument. If you mistakenly add too many shots simply delete them with the DOWN arrow.
- Page 34 LUBExpert User Manual • In case you decide to ignore alarm recommendations, you must then assign a message in order to see the menu that lets you continue to ADD GREASE. In that case, press M, select a message and press ENTER. Your message is now added to the asset and marked as a manually added message.
- Page 35 9.3. Collecting dynamic data with LUBExpert app (SDT270DU & LUBExpert Dynamic only) If you are using LUBExpert Dynamic or SDT270DU with LUBExpert App, there is an additional opportunity to collect Dynamic data (TWF, FFT) while performing your lubrication task through LUBExpert procedures.
- Page 36 When transferred to your instrument and selected, you are ready to start. If Dynamic measurement is chosen, your SDT270DU LUBExpert will automatically collect Dynamic data from your initial and final reading. The process is entirely the same as described before with difference that you will be providing additional highly valuable data for bearing Condition Monitoring.
- Page 37 LUBExpert User Manual Depending on assigned alarm and reading values, you will be instructed on screen Depending on your choice, follow instructions (GUIDED MODE) or perform lubrication in FREE MODE. Once you finish this your lubrication task, summary screen will inform you about the details. To confirm, press Enter.
- Page 38 Alarm status (if assigned) will be refreshed with every step in the process. 9.4. Transfer Results to PC Upon completion of the lubrication survey connect your LUBExpert or SDT270SU/DU to your PC’s USB port to download the results. Follow these steps:...
- Page 39 LUBExpert User Manual • Connect device to PC with the supplied USB cable (article code SICABUSBAUSBBM). • From the Device menu choose “SDT270/LUBExpert” and the “Download from SDT270/LUBExpert to PC” • Verify the SDT270/LUBExpert is connected and ready, then select “Transfer”...
-
Page 40: Viewing Results In Uas3
LUBExpert User Manual 10. Viewing Results in UAS3 If you already use Ultranalysis Suite (UAS3), the LUBExpert interface will seem familiar. For LUBExpert, new features include Added Grease Trend Curves, Grease Consumption Reports, Lube Status Indication, Messages marked by origin (auto/manual), Trend of all initial readings, Trend of all final readings (baseline), Summary graph of all Lubrication activities for each asset. -
Page 41: Selecting, Viewing Trends, Analytics, And Measurement Details
LUBExpert User Manual 10.1. Selecting, Viewing Trends, Analytics, and Measurement Details Viewing your lubrication data has never been more important and easier. The standard Dashboard view brings essential information into focus. UAS3 uses four powerful widgets that report, in a single view, operational and condition changes to your assets. -
Page 42: Reports
LUBExpert User Manual 11. Reports 11.1. Tree View Tree view provides information on alarm status and Lube status of each asset/Lubrication point. General alarm status is indicated with colored dot: red for danger, orange for warning and blue for alert level. Lube status is additional information is indicated next to each asset that contains LUBEsense1 data. -
Page 43: Dashboard View (Lubesense1 Only)
LUBExpert User Manual 11.2. Dashboard View (Lubesense1 only) • The Measurement Matrix Measurement matrix shows last 4 sets of measurements and includes RMS, maxRMS, Peak, Crest factor and added grease quantity. • The Static Trend Static trend is a strong source of information and great tool. In this view, we left only RMS and grease quantity displayed. -
Page 44: Bottom Pane Views
LUBExpert User Manual This chart gives you an overview of results of all lubrication activities in this particular asset. Call it a history overview. It helps understanding the success of your strategy. • The Initial line/Base line graph This graph shows you two different trend lines. - Page 45 LUBExpert User Manual Lubrication management. They can be automatically assigned by LUBExpert, or manually added by operator. Automatically added messages are result of the alarm status/recommendation after initial reading. Manually added messages represent operator´s actions opposite to alarms/recommendations or field observations. Messages are clearly marked as automatically added (A) or manually added (M).
- Page 46 Since the friction level was lowering, LUBExpert did not stop the process until minimum friction level was achieved, but high grease quantity suggests shortening the interval when operator visits this asset and takes readings.
- Page 47 In order to exit the menu after this kind of event, operator is obliged to assign a message explaining the reason, and that would most probably be “Defective line/fitting”. As an SDT270DU LUBExpert App or LUBExpert Dynamic user, additional data will be displayed in your UAS3 software: 47/52...
-
Page 48: Consumption Reports
Static point offers all data as described before. 11.4. Consumption Reports The LUBExpert integration in UAS3 includes two new reports dedicated to lubrication features. The first concerns the cumulative lubricant consumption sorted by grease name. The second is the comparison of lubricant consumption sorted by user selected greasing locations. - Page 49 LUBExpert User Manual • Select the Tree structures ① include in the report by ticking their ① check box ②. The tree structures ② ④ coming from a common Data Folder could be individually chosen. Two ③ shortcut buttons enable to select ④...
- Page 50 LUBExpert User Manual 11.4.2. Lube Consumption Comparison Select the Lube Consumption Comparison report, from the new window: • Select the Tree structures ① to include in the report by ticking their check box ②. The tree structures coming from a common Data Folder could be individually chosen. Two shortcut buttons enable to select ④...
- Page 51 LUBExpert User Manual Notes 51/52...
- Page 52 LUBExpert User Manual CGI 2/12/2020 UAS3 + LUBExpert Dynamic CGI 09/03/2020 Original version Revision Writer Nature of modification Approved 52/52...
Need help?
Do you have a question about the LUBExpert and is the answer not in the manual?
Questions and answers