National Instruments PXI-7830R Getting Started
How to install and configure
Hide thumbs
Also See for PXI-7830R:
- User manual (75 pages) ,
- Note to users (11 pages) ,
- User manual (72 pages)
Table of Contents
Advertisement
Quick Links
Getting Started with the NI 783x R
Introduction
Note
If you are using LabVIEW but not the LabVIEW FPGA Module, you can create VIs
that run in LabVIEW to control existing FPGA VIs, but you cannot create new FPGA VIs.
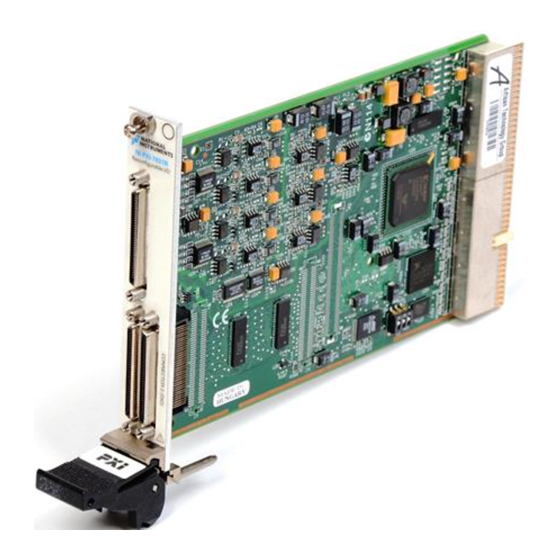
This document explains how to install and configure the
National Instruments 783xR.
The NI 783xR devices are R Series Reconfigurable I/O (RIO) devices with
16-bit analog input (AI) channels, 16-bit analog output (AO) channels, and
digital I/O (DIO) lines.
•
The NI PXI-7830R and NI PCI-7830R have four independent AI
channels, four independent AO channels, and 56 DIO lines.
•
The NI PXI-7831R/7833R and NI PCI-7831R/7833R have eight
independent AI channels, eight independent AO channels, and 96 DIO
lines.
Traditional I/O devices have a fixed functionality provided by an
application-specific integrated circuit (ASIC), but the NI 783xR has a
field-programmable gate array (FPGA) that allows you to define device
functionality and timing.
You can use the LabVIEW FPGA Module to graphically design the
NI 783xR timing and functionality without having to learn a low-level
programming language or a hardware description language (HDL)
traditionally used for FPGA design. With the LabVIEW FPGA Module,
you create or download a custom virtual instrument (VI) to the FPGA.
You can reconfigure the NI 783xR with a new VI at any time.
You can use the LabVIEW Real-Time Module to communicate with and
control the NI 783xR while performing additional tasks, such as real-time
floating-point processing and data logging.
The NI 783xR has Flash memory that you can use to store a startup VI.
You can configure the VI to load to the FPGA and to run when the device
powers up.
Advertisement
Table of Contents

Related Manuals for National Instruments PXI-7830R


Summary of Contents for National Instruments PXI-7830R
- Page 1 16-bit analog input (AI) channels, 16-bit analog output (AO) channels, and digital I/O (DIO) lines. • The NI PXI-7830R and NI PCI-7830R have four independent AI channels, four independent AO channels, and 56 DIO lines. • The NI PXI-7831R/7833R and NI PCI-7831R/7833R have eight independent AI channels, eight independent AO channels, and 96 DIO lines.
-
Page 2: Required Components
Required Components This section lists the items necessary for using the NI 783xR with Windows 2000/XP and the LabVIEW Real-Time Module. Documentation The NI 783xR User Manual describes the electrical and mechanical aspects of the NI 783xR and contains information about device operation and programming. -
Page 3: Pxi-783X R With The Labview Real-Time Module (Ets)
LabVIEW Real-Time Module for RTX: ❑ NI PXI-783xR. ❑ The following software packages: – LabVIEW 7.1 or later. – LabVIEW FPGA Module 1.1 or later—required to develop custom FPGA VIs. © National Instruments Corporation Getting Started with the NI 783xR... - Page 4 – LabVIEW Real-Time Module 7.1 or later. – NI-RIO 1.3 or later—included with the PXI-783xR. – Ardence (formerly Venturcom) RTX 5.5 or later. Note The PXI-7831R supports NI-RIO 1.1 or later. ❑ PXI/CompactPCI chassis and real-time embedded controller running Windows 2000/XP and RTX. ❑...
-
Page 5: Pci-783X R With The Labview Real-Time Module (Ets)
LabVIEW FPGA Module 1.1 or later—required to develop custom FPGA VIs. – LabVIEW Real-Time Module for RTX 7.1 or later. – NI-RIO 1.3 or later—included with the PCI-783xR. – Ardence (formerly Venturcom) RTX 5.5 or later. © National Instruments Corporation Getting Started with the NI 783xR... -
Page 6: Installing Software
The PCI-7831R supports NI-RIO 1.1 or later. Note ❑ Computer running Windows 2000/XP and RTX. RTX 5.5 does not support Hyper-Threading enabled processors. Refer to the RTX Note documentation for information about disabling multiprocessor access. ❑ At least one cable and device for connecting signals to the PCI-783xR. Installing Software Complete the following sets of steps in the order listed to successfully install LabVIEW, the LabVIEW Real-Time Module, the LabVIEW FPGA... -
Page 7: Labview Fpga Module Installation
In the Feature Tree window, select the components to install. You must install NI-VISA, NI-RIO, and NI Measurement & Automation Explorer (MAX). Follow the on-screen instructions to complete the driver installation. Restart the computer. © National Instruments Corporation Getting Started with the NI 783xR... -
Page 8: Installing Hardware
Installing Hardware This section describes how to unpack and install the PXI-783xR and PCI-783xR devices. You must install the NI-RIO device drivers before installing the NI 783xR. Note Unpacking The NI 783xR is shipped in an antistatic package to prevent electrostatic discharge from damaging device components. -
Page 9: Pci-783X R Installation
PCI-783xR straight down until it seats in the expansion slot. Reinstall the bracket-retaining screw to secure the PCI-783xR to the back panel rail. Visually verify the installation. Replace the computer cover, and plug the computer in. © National Instruments Corporation Getting Started with the NI 783xR... - Page 10 Using the NI 783x R with the LabVIEW Real-Time Module for RTX You can use the LabVIEW Real-Time Module for RTX with the NI 783xR. After you have installed RTX, the LabVIEW Real-Time Module for RTX, and RTX support from the NI-RIO Driver CD, complete the following steps: Note The NI-RIO device drivers and NI 783xR must be installed before adding RTX...
-
Page 11: Removing Rtx Support
Select the Hardware tab and click Device Manager. For Windows XP, expand RTX Drivers, right-click [device name] RTX Supported and select Update Driver. You have removed RTX support for the NI 783xR. © National Instruments Corporation Getting Started with the NI 783xR... -
Page 12: Connecting Signals
Connecting Signals Figure 1 shows the I/O connector locations for the NI PXI-783xR and the NI PCI-783xR. The NI PXI-7830R and NI PCI-7830R do not have Connector 2 (DIO). Figure 1. NI 783x R Connector Locations Getting Started with the NI 783xR... - Page 13 Refer to the NI 783xR User Manual for the maximum input ratings for each signal. For detailed information about connecting I/O signals, refer to the NI 783xR User Manual. © National Instruments Corporation Getting Started with the NI 783xR...
-
Page 14: Cabling Options
Cabling Options Accessing the signals on the I/O connectors requires at least one cable and one signal accessory. Table 1 summarizes the National Instruments cables available for use with the NI 783xR device. Table 1. Cabling Options Cable Connector Description... -
Page 15: Where To Go From Here
LabVIEW FPGA VIs and host VIs. This document also provides examples for verifying that your software and hardware are properly installed. To access this document, select Start»Programs» National Instruments»LabVIEW»Module Documents. © National Instruments Corporation Getting Started with the NI 783xR... - Page 16 Instruments trademarks. Other product and company names mentioned herein are trademarks or trade names of their respective companies. For patents covering National Instruments products, refer to the appropriate location: Help»Patents in your software, the patents.txt file on your CD, or ni.com/patents.
Need help?
Do you have a question about the PXI-7830R and is the answer not in the manual?
Questions and answers