
Related Manuals for National Instruments DAQCard-6533


Summary of Contents for National Instruments DAQCard-6533
- Page 1 (217) 352-9330 | Click HERE Find the National Instruments DAQCard-6533 at our website:...
- Page 2 NI 653X User Manual for Traditional NI-DAQ High-Speed Digital I/O Devices for PCI, PXI, CompactPCI, AT, EISA, and PCMCIA Bus Systems NI 653X User Manual February 2005 371464D-01...
- Page 3 For further support information, refer to the Technical Support and Professional Services appendix. To comment on National Instruments documentation, refer to the National Instruments Web site at ni.com/info and enter the info code feedback. © 1997–2005 National Instruments Corporation. All rights reserved.
- Page 4 The reader should consult National Instruments if errors are suspected. In no event shall National Instruments be liable for any damages arising out of or related to this document or the information contained in it.
- Page 5 These classes are known as Class A (for use in industrial-commercial locations only) or Class B (for use in residential or commercial locations). All National Instruments (NI) products are FCC Class A products. Depending on where it is operated, this Class A product could be subject to restrictions in the FCC rules. (In Canada, the Department of Communications (DOC), of Industry Canada, regulates wireless interference in much the same way.) Digital...
- Page 6 This font is also used for the proper names of functions, variables, and filenames and extensions. NI 6533 NI 6533 refers to the NI AT-DIO-32HS, NI DAQCard-6533 for PCMCIA, NI PCI-DIO-32HS, and NI PXI-6533 devices, unless otherwise noted. NI 6534 NI 6534 refers to the NI PCI-6534 and NI PXI-6534 devices, unless otherwise noted.
-
Page 7: Table Of Contents
Installing the NI PCI-DIO-32HS, NI PCI-6534, or NI PCI-7030/6533..1-7 Installing the NI PXI-6533, NI PXI-6534, or NI PXI-7030/6533....1-7 Installing the NI AT-DIO-32HS..............1-8 Installing the NI DAQCard-6533 for PCMCIA ..........1-9 Configuring the NI 653X ....................1-9 In Windows .....................1-9 In Mac OS......................1-10 Safety Information ......................1-10... - Page 8 Contents Starting and Stopping Data Transfer—Triggering.......... 2-8 Start and Stop Trigger............... 2-9 Choosing Continuous or Finite Data Transfer ..........2-11 Finite Transfers................. 2-11 Continuous Input ................2-11 Continuous Output................2-11 Choosing DMA or Interrupt Transfers ..........2-12 Monitoring Data Transfer ................2-12 Connecting Signals ..................
- Page 9 Specifications Appendix B Using PXI with CompactPCI Appendix C Connecting Signals with Accessories Appendix D Hardware Considerations Appendix E Optimizing Your Transfer Rates Appendix F Technical Support and Professional Services Glossary Index © National Instruments Corporation NI 653X User Manual...
-
Page 10: Getting Started With Your Ni 653X
The NI 653X User Manual describes installing, configuring, setting up, and programming applications for the NI 653X family of digital I/O (DIO) devices. The NI 653X family includes the NI AT-DIO-32HS, NI DAQCard-6533 for PCMCIA, NI PCI-6534, NI PCI-DIO-32HS, NI PXI-6533, NI PXI-6534, and NI PCI/PXI-7030/6533. NI 653X Overview... -
Page 11: Control Lines
What You Need to Get Started To begin using your NI 653X, you need the following items: ❑ One or more of the following devices: – NI AT-DIO-32HS – NI DAQCard-6533 for PCMCIA – NI PCI-6534 – NI PCI-DIO-32HS – NI PXI-6533 –... -
Page 12: Choosing Your Programming Software
Visual Basic, is a development suite that allows you to design test and measurement applications. For Visual Basic developers, Measurement Studio features a set of ActiveX controls for using National Instruments DAQ hardware. These ActiveX controls provide a high-level programming interface for building VIs. -
Page 13: Ni-Daq Driver Software
Chapter 1 Getting Started with Your NI 653X offers a set of Visual C++ classes and tools to integrate those classes into Visual C++ applications. The ActiveX controls and classes are available with Measurement Studio and the NI-DAQ software. Using LabVIEW, LabWindows/CVI, or Measurement Studio greatly reduces the development time for your data acquisition and control application. - Page 14 Version 6.1.0 or later NI AT-DIO-32HS Version 5.0 or later NI PXI-6533 Version 5.1 or later Version 6.1.3 or later NI DAQCard-6533 for PCMCIA Version 5.1 or later Version 6.1.0 or later NI PXI-6534 Version 6.9 or later © National Instruments Corporation...
-
Page 15: Installing Your Software
Chapter 1 Getting Started with Your NI 653X Table 1-1. NI 653X Devices and NI-DAQ Support (Continued) NI-DAQ Version Device Supported Windows NI PCI-6534 Version 6.9 or later NI PCI or PXI-7030/6533 Version 6.5.2 or later Installing Your Software Install application development software, such as LabVIEW or LabWindows/CVI, according to instructions on the CD and the release notes. -
Page 16: Installing Your Ni 653X
Your PXI device has connections to several reserved lines on the CompactPCI J2 Note connector. Before installing a PXI device in a CompactPCI system that uses J2 connector lines for purposes other than PXI, refer to Appendix C, Connecting Signals with Accessories. © National Instruments Corporation NI 653X User Manual... -
Page 17: Installing The Ni At-Dio-32Hs
Chapter 1 Getting Started with Your NI 653X Power off and unplug your PXI or CompactPCI chassis. Choose an unused PXI or CompactPCI 5 V peripheral slot. For maximum performance of your CompactPCI system, install the NI PXI-653X in a slot that supports bus arbitration or bus-master cards. The NI PXI-653X contains onboard bus-master direct memory access (DMA) logic that can operate only in such a slot. -
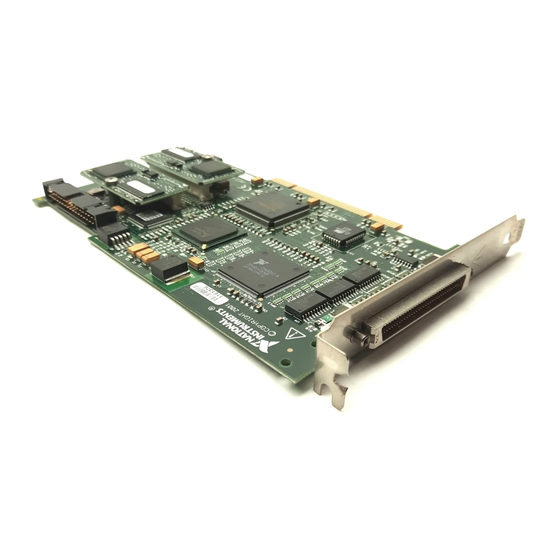
Page 18: Installing The Ni Daqcard-6533 For Pcmcia
You are now ready to configure your NI 653X. Installing the NI DAQCard-6533 for PCMCIA You can install your NI DAQCard-6533 for PCMCIA in any available CardBus-compatible Type II PCMCIA slot. Consult the computer manufacturer for information about slot compatibility. -
Page 19: In Mac Os
Misuse of the product can result in a hazard. You can compromise the safety protection built into the product if the product is damaged in any way. If the product is damaged, return it to National Instruments for repair. Do not substitute parts or modify the product except as described in this document. - Page 20 Working voltage is the highest rms value of an AC or DC voltage that can occur across any particular insulation. MAINS is defined as a hazardous live electrical supply system that powers equipment. Suitably rated measuring circuits may be connected to the MAINS for measuring purposes. © National Instruments Corporation 1-11 NI 653X User Manual...
- Page 21 Chapter 1 Getting Started with Your NI 653X include signal levels, special equipment, limited-energy parts of equipment, circuits powered by regulated low-voltage sources, and electronics. • Installation Category II is for measurements performed on circuits directly connected to the electrical distribution system. This category refers to local-level electrical distribution, such as that provided by a standard wall outlet (for example, 115 V for U.S.
-
Page 22: Using Your Ni 653X
I want the NI 653X to capture input data only when certain lines change Change Detection states. I want to monitor activity on input lines without continuously polling or Change Detection transferring unnecessary data during periods of inactivity. © National Instruments Corporation NI 653X User Manual... -
Page 23: Controlling And Monitoring Static Digital Lines-Unstrobed I/O
Chapter 2 Using Your NI 653X Controlling and Monitoring Static Digital Lines—Unstrobed I/O This section explains how to control and monitor static digital lines through software-timed reads and writes to and from the digital lines of your NI 653X. Configuring Digital Lines For unstrobed I/O, the direction of each of the 32 data lines is individually configurable. -
Page 24: Using Control Lines As Extra Unstrobed Data Lines
Port 4. When writing to Port 4, the output lines are affected; and when reading from Port 4, the input lines are read. Table 2-1 displays how Port 4 lines are organized. © National Instruments Corporation NI 653X User Manual... -
Page 25: Connecting Signals
Chapter 2 Using Your NI 653X Table 2-1. Port 4 Lines Direction Line I/O Pins Input STOPTRIG 1 STOPTRIG 2 REQ 1 REQ 2 Output (standard) PCLK 1 PCLK 2 ACK 1 ACK 2 Connecting Signals Connect digital input signals to the I/O connector using the pinout diagrams, Figure C-1, NI 653X I/O Connector 68-Pin Assignments, and... -
Page 26: Programming The Control/Timing Lines As Extra Unstrobed Data Lines
NI-DAQ C Interface—If both sets of control/timing lines are available, call and set Port Number to . If both DIG_In_Prt DIG_Out_Prt sets of control/timing lines are not available, use DIG_In_Line to individually read or write to the appropriate DIG_Out_Line control/timing lines. © National Instruments Corporation NI 653X User Manual... -
Page 27: Generating And Receiving Digital Patterns And Waveforms-Pattern I/O
Chapter 2 Using Your NI 653X • LabVIEW—Use the Easy Digital I/O VI from the following list that is appropriate for your task: – Read from Digital Line VI to read from a single line – Write to Digital Line VI to write to a single line –... -
Page 28: Deciding Transfer Direction
For more information on LabVIEW VIs and NI-DAQ functions, consult the Note LabVIEW Help and the NI-DAQ Function Reference Help. Refer to Table C-1, NI 653X I/O Connector 68-Pin Assignments, for an overview of all control/timing trigger lines. © National Instruments Corporation NI 653X User Manual... -
Page 29: Specifying The Transfer Rate
Chapter 2 Using Your NI 653X Specifying the Transfer Rate If you are internally generating the REQ signal, you must specify the data transfer rate. The transfer rate is specified in software by using two parameters, the timebase frequency and timebase divisor: timebase frequency transfer rate (Hz) --------------------------------------------- -... -
Page 30: Start And Stop Trigger
If the device receives a stop trigger before a start trigger, the stop trigger is ignored. If the stop trigger arrives before all the pretrigger data is acquired, NI-DAQ returns an error. © National Instruments Corporation NI 653X User Manual... - Page 31 Chapter 2 Using Your NI 653X ACK (STARTTRIG) STOPTRIG Pretrigger Data Posttrigger Data Figure 2-5. Using a Start and Stop Trigger Pattern-Matching Trigger (Input Only) Instead of using an external signal on the start/stop trigger pins on the I/O connector, you may start or stop (not both) an operation once a user-specified digital pattern is matched or not matched.
-
Page 32: Choosing Continuous Or Finite Data Transfer
DIG_DB_Config overwrite/regen. parameter in the Digital Buffer Control VI, which is called by the DIO Start VI. © National Instruments Corporation 2-11 NI 653X User Manual... -
Page 33: Choosing Dma Or Interrupt Transfers
Chapter 2 Using Your NI 653X ♦ NI 6534 With the NI 6534, if you want to repeatedly generate the same block of data, you can load a buffer of data into onboard memory and continuously loop through this data block. With this option, data is only transferred from computer memory to the device onboard memory once, and the device continuously generates the same block of data from its onboard memory. -
Page 34: Connecting Signals
If you are using an external source for your REQ signal, connect it to the appropriate REQ pin of the I/O connector. If you are using external start and/or stop triggers, connect to the appropriate pins—start trigger (ACK/STARTTRIG) and/or stop trigger (STOPTRIG). © National Instruments Corporation 2-13 NI 653X User Manual... -
Page 35: Creating A Program
Chapter 2 Using Your NI 653X Creating a Program Using the following flowcharts as a guide, create a program to perform pattern I/O. Figures 2-7 and 2-8 display flowcharts for C programming using NI-DAQ, while Figure 2-9 shows a LabVIEW programming flowchart. - Page 36 Using Your NI 653X DIG_Block_In Is the Read? next half buffer DIG_DB_HalfReady ready? DIG_Block_Out DIG_Grp_Config DIG_DB_Transfer DIG_Block_PG_Config Acquisition Complete? Trigger? DIG_DB_Config DIG_Block_Clear DIG_Trigger_Config Figure 2-8. Programming Pattern I/O (Continuous) in NI-DAQ C API © National Instruments Corporation 2-15 NI 653X User Manual...
- Page 37 Chapter 2 Using Your NI 653X DIO Clear VI DIO Config VI Digital Trigger Config VI Write? Trigger? DIO Write VI Trigger? Done? DIO Read/Write VI Digital Trigger Config VI DIO Start VI Figure 2-9. Programming Pattern I/O in NI-DAQ LabVIEW/LabVIEW RT API Notes If you are using an external clock for finite pattern input, the NI 653X requires an extra clock edge to move data from the DIO ASIC and into the computer memory after the...
-
Page 38: Transferring Data Between Two Devices-Handshaking I/O
Deciding Which Handshaking Protocol to Use The NI 653X supports several different handshaking protocols to communicate with your peripheral device. The protocol you select determines the timing of the ACK and REQ signals. © National Instruments Corporation 2-17 NI 653X User Manual... -
Page 39: Using The Burst Protocol
Chapter 2 Using Your NI 653X From the perspective of the NI 653X, the peripheral device requests the transfer of data by signaling on the REQ line. The NI 653X acknowledges it is ready to transfer data by signaling on the ACK line. Use Table 3-1, Handshaking Protocol Characteristics, to select a... -
Page 40: Selecting Ack/Req Signal Polarity
PCLK Period in ns PCLK Frequency in MHz 3.33 1.66 1.43 The state machine diagrams in Chapter 3, Timing Diagrams, show more precisely where this delay occurs in the handshaking sequence. © National Instruments Corporation 2-19 NI 653X User Manual... -
Page 41: Choosing Continuous Or Finite Data Transfer
Chapter 2 Using Your NI 653X Choosing Continuous or Finite Data Transfer You can transfer data indefinitely to/from computer memory or finitely by specifying the number of points you want to transfer. Finite Transfers For finite transfers, the NI 653X transfers the specified amount of data to/from a computer memory buffer and stops the operation. -
Page 42: Choosing Dma Or Interrupt Transfers
Connect the ACK pin of the NI 653X to the NI 653X-ready line of the peripheral device. Connect the REQ pin of the NI 653X to the peripheral-ready line of the peripheral device. © National Instruments Corporation 2-21 NI 653X User Manual... -
Page 43: Choosing The Startup Sequence
Chapter 2 Using Your NI 653X Confirm Ready 653 X Device Your Peripheral Device Figure 2-10. Connecting Signals If you are using the burst protocol, make the connection to the appropriate PCLK pin on the NI 653X. Choosing the Startup Sequence To avoid invalid or missing data when the ACK and REQ lines change polarity to either active high or active low, start a transfer using one of the following methods:... -
Page 44: Controlling Line Polarities
I/O. Figures 2-11 and 2-12 display flowcharts for C programming using NI-DAQ, and Figures 2-13 and 2-14 show LabVIEW programming flowcharts. The boxes represent function names for the appropriate software, and the diamonds represent decision points. © National Instruments Corporation 2-23 NI 653X User Manual... - Page 45 Chapter 2 Using Your NI 653X DIG_Grp_Config DIG_Block_In Is the Read? DIG_DB_HalfReady next half buffer ready? DIG_Grp_Mode DIG_Block_Out DIG_DB_Transfer Continuous? DIG_DB_Config Acquisition Complete? DIG_Block_In Read? DIG_Block_Check DIG_Block_Out Acquisition DIG_Block_Clear Complete? Figure 2-11. Programming Buffered Handshaking I/O in NI-DAQ C API NI 653X User Manual 2-24 ni.com...
- Page 46 Using Your NI 653X DIG_Grp_Config DIG_Grp_Mode Input? DIG_Grp_Status DIG_Out_Grp Ready? DIG_Grp_Status Ready? DIG_In_Grp DIG_In_Grp Done? Done? DIO_Grp_Config * DIO_Grp_Config *Clear Configuration Figure 2-12. Programming Unbuffered Handshaking I/O in NI-DAQ C API © National Instruments Corporation 2-25 NI 653X User Manual...
- Page 47 Chapter 2 Using Your NI 653X Buffered DIO Config VI Operation? Burst Digital Group DIO Start VI Config VI Mode? Digital Single Read VI Finite DIO Read VI Reverse Buffer? PCLK Digital Group Direction? Config VI Resets lines to DIO Read VI Done? default states.
- Page 48 By default, for output buffered transfers the NI 6534 preloads the onboard memory with data before starting the output operation. Preloading the memory eliminates or reduces the impact of the PCI bus bandwidth limitations and increases the overall transfer rate. © National Instruments Corporation 2-27 NI 653X User Manual...
-
Page 49: Monitoring Line State-Change Detection
Chapter 2 Using Your NI 653X The preloading process causes a small delay between the start command in software and the actual start of data transfer. If this delay is a concern, you may disable the preloading by calling the following function/VI before the software start command: •... -
Page 50: Deciding Which Lines You Want To Monitor
No change on specified bits. Data is not latched. Input Pattern 2 0 0 0 0 0 0 1 1 Change detected, latch entire port. Figure 2-15. Change Detection Example Settings © National Instruments Corporation 2-29 NI 653X User Manual... -
Page 51: Deciding How To Start And Stop Data Transfer-Triggering
Chapter 2 Using Your NI 653X Deciding How to Start and Stop Data Transfer—Triggering By default, data transfer starts upon a software command (the Digital Buffer Control VI called by the DIO Start VI in LabVIEW and the functions in NI-DAQ C interface). DIG_Block_In DIG_Block_Out However, you can use a hardware trigger to start, stop, or start and stop data... -
Page 52: Start And Stop Trigger
For example, if you want to start an acquisition when the two least significant bits of your data are 1 and 0, you would specify your trigger parameters to match those in Figure 2-19. © National Instruments Corporation 2-31 NI 653X User Manual... -
Page 53: Choosing Continuous Or Finite Data Transfer
Chapter 2 Using Your NI 653X Value to Detect Pattern Mask Polarity Postive: Search for Match Figure 2-19. Pattern-Detection Trigger Example To prevent a transient data value during line switching from falsely causing a match, set a valid pattern for at least 60 ns to guarantee detection. In addition, keep glitches to less than 20 ns to guarantee rejection. -
Page 54: Choosing Dma Or Interrupt Transfers
Figure 2-20 and Figure 2-21 display flowcharts for C programming using NI-DAQ, and Figure 2-22 shows a LabVIEW programming flowchart. The boxes represent function names for the appropriate software, and the diamonds represent decision points. © National Instruments Corporation 2-33 NI 653X User Manual... - Page 55 Chapter 2 Using Your NI 653X DIG_Grp_Config Is the DIG_Block_In DIG_DB_HalfReady next half buffer ready? DIG_Block_PG_Config DIG_DB_Transfer DIG_Trigger_Config DIG_DB_Config Specify Data Mask Here Acquisition Complete? DIG_Block_Clear Figure 2-20. Programming Change Detection (Continuous) in NI-DAQ C API DIG_Grp_Config DIG_Block_Clear DIG_Block_PG_Config Acquisition DIG_Trigger_Config DIG_Block_In DIG_Block_Check...
- Page 56 Using Your NI 653X DIO Config VI Trigger Config VI Specify Data Mask Here DIO Start VI DIO Read VI Done? DIO Clear VI Figure 2-22. Programming Change Detection for NI-DAQ LabVIEW/LabVIEW RT API © National Instruments Corporation 2-35 NI 653X User Manual...
-
Page 57: Timing Diagrams
1. The REQ pulse is then asserted for 20–30 ns. Note If you are using a version of NI-DAQ earlier than version 6.8, the minimum value for the interval parameter is 2. © National Instruments Corporation NI 653X User Manual... -
Page 58: External Req Signal Source
Chapter 3 Timing Diagrams Programmable: = Interval x Timebase Period dtp will remove bar Programmable: = One Timebase Period if Active Low if Active High Data Valid (Output Mode) 30 ns Data Valid (Input Mode) 30 ns 0 ns Parameter Description Cycle time Width of pulse... - Page 59 Data Valid (Input Mode) 10 ns 20 ns Parameter Description Cycle time Width of low pulse Propagation time to valid output data Setup time Hold time Figure 3-2. External Request Timing Diagram © National Instruments Corporation NI 653X User Manual...
-
Page 60: Handshaking I/O Timing Diagrams
Chapter 3 Timing Diagrams Handshaking I/O Timing Diagrams This section compares handshaking I/O protocols and includes timing diagrams for each: • Handshaking sequence for input operation • State machine for input operation • Timing specification for input operation • Handshaking sequence for output operation •... -
Page 61: Using The Burst Protocol
REQ signal indicating it is ready, a transfer occurs on the rising edge of the PCLK signal. Refer to Figures 3-3 and 3-4 for examples of burst protocol transfers. Dashed lines indicate when data is transferred. © National Instruments Corporation NI 653X User Manual... - Page 62 Chapter 3 Timing Diagrams PCLK Data In Valid = Data Transfer Occurs Figure 3-3. Burst Transfer Example (Input) PCLK Data Out Valid = Data Transfer Occurs Figure 3-4. Burst Transfer Example (Output) Note Data is transferred only when both the NI 653X and the peripheral device are ready (and thus ACK and REQ are asserted), so it is not reasonable to expect data to arrive at consistent intervals.
- Page 63 = programmable delay from 100 to 700 ns, or 50 ns if programmable delay is 0. Timebase stability for the onboard 20 MHz clock source is 50 ppm. All timing values are in nanoseconds. Figure 3-5. Burst Input Timing Diagram (Default) © National Instruments Corporation NI 653X User Manual...
- Page 64 Chapter 3 Timing Diagrams PCLK Data Out Valid Parameter Description Minimum Maximum Input Parameters PCLK cycle time — PCLK high pulse duration — PCLK low pulse duration — Setup time from REQ valid to PCLK — falling edge Hold time from PCLK to REQ invalid —...
- Page 65 Hold time from PCLK to input data valid Output Parameters — PCLK to ACK valid — Hold time from PCLK to ACK invalid All timing values are in nanoseconds. Figure 3-7. Burst Input Timing Diagram (PCLK Reversed) © National Instruments Corporation NI 653X User Manual...
- Page 66 Chapter 3 Timing Diagrams PCLK Data Out Valid Parameter Description Minimum Maximum Input Parameters Setup time from REQ valid to PCLK — Hold time from PCLK to REQ invalid — Output Parameters PCLK cycle time PCLK high pulse duration /2 – 5 /2 + 5 PCLK to ACK valid —...
-
Page 67: Using Asynchronous Protocols
Using the 8255-Emulation Protocol Your NI 653X can perform handshaking I/O with devices that contain the 8255 chip, including the National Instruments NI PC-DIO-24/PnP, NI 650X family, and NI PC-DIO-96/PnP. Performing the 8255-emulation protocol with your NI 653X is similar to 8255 or 82C55 Programmable Peripheral Interface (PPI). - Page 68 Chapter 3 Timing Diagrams NI 653X terminology differs from 8255 terminology. • Input—The REQ line carries the 8255 STB (Strobe) input signal, and the NI 653X ACK line carries the 8255 IBF (Input Buffer Full) output signal. • Output—The REQ line carries the 8255 ACK input signal, and the NI 653X ACK line carries the 8255 OBF (Output Buffer Full) output signal.
- Page 69 Wait Wait Programmable Delay Space When NI 6533 Device has space for data, input data. Clear Send Wait When REQ Asserted Initial State: ACK Set Figure 3-10. 8255-Emulation Input State Machine © National Instruments Corporation 3-13 NI 653X User Manual...
- Page 70 Chapter 3 Timing Diagrams ACK and REQ are shown as active low. Steps 1-6 are repeated for each transfer. Reference Point Action Steps When the NI 653X has data to output, it asserts the ACK signal, then waits for the peripheral device to assert REQ to indicate it is ready to accept data. The peripheral device asserts a REQ signal to accept the data.
- Page 71 Wait Wait Programmable Delay Data When 6533 Device has data to output, output data. Output Data, Clear ACK Then Send ACK Wait When REQ Asserted Figure 3-12. 8255-Emulation Output State Machine © National Instruments Corporation 3-15 NI 653X User Manual...
- Page 72 Chapter 3 Timing Diagrams Data In Valid doa* Data Out Valid ACK and REQ are shown as active low Parameter Description Minimum Maximum Input Parameters REQ low duration — REQ high duration — ACK falling edge to REQ rising edge —...
-
Page 73: Using The Level-Ack Protocol
The active-going REQ signal edge deasserts the ACK signal and causes the NI 653X to latch input data. To slow down the data transfer, you can insert a programmable delay before the ACK signal is asserted. Figure 3-14. Level-ACK Input Handshaking Sequence © National Instruments Corporation 3-17 NI 653X User Manual... - Page 74 Chapter 3 Timing Diagrams Initial State: ACK Cleared When REQ Asserted Wait Wait Programmable Delay Space Clear ACK When 6533 Device has space for data, input data.* Programmable Delay Send Wait When REQ Unasserted * With REQ-edge latching enabled, the data input is from the last active-going REQ edge.
- Page 75 Input data valid has to be held before the active-going REQ edge a minimum of ns. With REQ edge disabled, input data valid has to be held t after the next active-going ACK signal edge is asserted. © National Instruments Corporation 3-19 NI 653X User Manual...
- Page 76 Chapter 3 Timing Diagrams Initial State ACK and REQ are shown as active high. Steps 1-4 are repeated for each transfer. Reference Point Action Steps Initial State ACK is deasserted. When the NI 653X has data to output, it drives the data onto the data lines, and then asserts ACK.
- Page 77 With REQ-edge latching disabled (default), output data valid holds t ns after the REQ edge is asserted. With REQ-edge latching enabled, that data is held for at most t after the REQ edge deasserts. © National Instruments Corporation 3-21 NI 653X User Manual...
-
Page 78: Using Protocols Based On Signal Edges
Chapter 3 Timing Diagrams Using Protocols Based on Signal Edges The NI 653X can communicate using pulses on the ACK and REQ lines. The three edge protocols are: • Trailing-edge protocol—The trailing edge of the ACK or REQ pulse indicates that the NI 653X or peripheral device is ready for a transfer. •... - Page 79 Delay Clear Wait When REQ Asserted * With REQ-edge latching enabled, the data input is from the last inactive-going REQ edge. Initial State: ACK Cleared Figure 3-21. Trailing-Edge Input State Machine © National Instruments Corporation 3-23 NI 653X User Manual...
- Page 80 Chapter 3 Timing Diagrams a*r* r*di dir* Input Data Valid (REQ-edge Latching) Input Data Valid (REQ-edge Latching Disabled) ACK and REQ are shown as active high. Parameter Description Minimum Maximum Input Parameters REQ pulse width — REQ inactive duration — Input data setup to REQ inactive —...
- Page 81 REQ edge. § The programmable delay determines which ACK is cleared, ACK does not need to be cleared before REQ can be acknowledged. Figure 3-24. Trailing-Edge Output State Machine © National Instruments Corporation 3-25 NI 653X User Manual...
- Page 82 Chapter 3 Timing Diagrams a*r* r*do(1) Output Data Valid (REQ-edge Latching) r*do(2) Output Data Valid (REQ-edge Latching Disabled) ACK and REQ are shown as active high. Parameter Description Minimum Maximum Input Parameters REQ pulse width — REQ inactive duration — ACK inactive to next REQ inactive —...
- Page 83 To slow down the data transfer, you can insert a programmable delay before the ACK signal is asserted. The NI 653X sends another ACK when it is ready for another input. Figure 3-26. Leading-Edge Input Handshaking Sequence © National Instruments Corporation 3-27 NI 653X User Manual...
- Page 84 Chapter 3 Timing Diagrams Initial State: ACK Cleared When REQ Asserted Wait Wait Programmable Delay Space When 6533 Device has space for data, input data.* Programmable Delay Clear Send Pulse Pulse Wait When REQ Unasserted * With REQ-edge latching enabled, the data input is from the last active-going REQ edge.
- Page 85 Input data valid must be held before an active-going REQ edge for a minimum of ns. With REQ edge disabled, it must be held t after the next active-going ACK signal edge occurs. © National Instruments Corporation 3-29 NI 653X User Manual...
- Page 86 Chapter 3 Timing Diagrams Initial State ACK and REQ are shown as active high. Steps 1-3 are repeated for each transfer. Reference Point Action Steps Initial State ACK is deasserted. The NI 653X sends the ACK pulse after driving output data to indicate that it has new, valid output data.
- Page 87 With REQ-edge latching disabled (default), output data valid is held t ns after the Note REQ edge occurs. With REQ-edge latching enabled, that data is held for at most t after the REQ edge deasserts. © National Instruments Corporation 3-31 NI 653X User Manual...
- Page 88 Chapter 3 Timing Diagrams Using the Long-Pulse Protocol Initial State ACK and REQ are shown as active high. Steps 1-4 are repeated for each transfer. Reference Point Action Steps Initial State ACK is deasserted. The NI 653X waits for an active REQ to indicate that the peripheral device is ready.
- Page 89 Clear Programmable Delay Pulse Wait When REQ Unasserted * With REQ-edge latching enabled, the data input is from the last active-going REQ edge. Figure 3-33. Long-Pulse Input State Machine © National Instruments Corporation 3-33 NI 653X User Manual...
- Page 90 Chapter 3 Timing Diagrams r*a* dir(1) Input Data Valid (REQ-edge Latching) dir(2) Input Data Valid (REQ-edge Latching Disabled) ACK and REQ are shown as active high. Parameter Description Minimum Maximum Input Parameters REQ pulse width — REQ inactive duration — ACK to next REQ —...
- Page 91 Clear Programmable Delay Pulse Wait When REQ Unasserted * With REQ-edge latching enabled, the data output is delayed until the next inactive-going REQ edge. Figure 3-36. Long-Pulse Output State Machine © National Instruments Corporation 3-35 NI 653X User Manual...
- Page 92 Chapter 3 Timing Diagrams Output Data Valid (REQ-edge Latching Disabled) r*do Output Data Valid (REQ-edge Latching) ACK and REQ are shown as active high. Parameter Description Minimum Maximum Input Parameters — REQ pulse width — REQ inactive duration — ACK to next REQ Output Parameters —...
-
Page 93: Appendix A Specifications
= 2.4 V) 10 µA DPULL high — 40 µA DPULL low — Input low current for control lines = 0.4 V) CPULL high — –2.5 mA –200 µA CPULL low — © National Instruments Corporation NI 653X User Manual... - Page 94 DPULL (for data lines)....100 kΩ Data transfers (all devices except DAQCard)....Interrupt, DMA Memory NI AT-DIO-32HS........16 S NI DAQCard-6533 for PCMCIA ...16 S NI PCI/PXI-6534 ........64 MB, two 32 MB modules on each NI 6534 NI PCI/PXI-7030/6533......16 S NI PCI-DIO-32HS ........16 S NI PXI-6533 ...........16 S...
- Page 95 Trigger lines ........... 7 Bus Interfaces NI PCI-DIO-32HS/PXI-6533/ PCI-6534/PXI-6534/ AT-DIO-32HS type........ AT slave with dual DMA NI DAQCard-6533 for PCMCIA type... PCMCIA slave Small transfer size is the size of the FIFO. © National Instruments Corporation NI 653X User Manual...
- Page 96 NI PCI-DIO-32HS, NI PXI-6533, NI AT-DIO-32HS, NI PCI-6534, and NI PXI-6534....+4.65 to +5.25 VDC at 1 A NI DAQCard-6533 for PCMCIA ...+4.65 to +5.25 VDC at 250 mA Physical Dimensions, not including connectors NI DAQCard-6533 for PCMCIA ..8.6 by 5.3 cm (3.4 by 2.1 in.)
- Page 97 , 3 axes Note Random vibration profiles were developed in accordance with MIL-T-28800E and MIL-STD-810E Method 514. Test levels exceed those recommended in MIL-STD-810E for Category 1 (Basic Transportation, Figures 514.4-1 through 514.4-3). © National Instruments Corporation NI 653X User Manual...
- Page 98 RTSI Trigger (0..6) PXI Trigger (0..6) B16, A16, A17, A18, B18, C18, E18 Reserved PXI Star RTSI Clock PXI Trigger (7) Reserved LBR (7, 8, 10, 11, 12) A3, C3, E3, A2, B2 © National Instruments Corporation NI 653X User Manual...
- Page 99 Output Clocks the data transfer device is ready ACK<1..2> Output Acknowledge— Input Start trigger Indicates the STARTTRIG<1..2> NI 653X is ready STOPTRIG<1..2> Input Stop trigger PCLK<1..2> Input or Peripheral clock Output © National Instruments Corporation NI 653X User Manual...
- Page 100 Appendix C Connecting Signals with Accessories Making 68-Pin Signal Connections Do not make connections that exceed any of the maximum input or output ratings Caution on the NI 653X, listed in Appendix A, Specifications. This includes connecting any power signals to ground and vice versa. Doing so may damage your device and your computer. NI is not liable for any damages resulting from these types of signal connections.
- Page 101 Use Table C-3 to find the function for each signal, which is based on the mode and protocol you are using. All the signals on the NI 653X are referenced to the GND lines. © National Instruments Corporation NI 653X User Manual...
- Page 102 Appendix C Connecting Signals with Accessories Table C-3. Signal Descriptions Signal Pins Signal Name Type Signal Description Based on Mode Used 2, 9 REQ<1..2> Control Group 1 and group 2 request lines Handshaking I/O—Request. A control line that indicates whether the peripheral device is ready to transfer data.
- Page 103 These lines offer additional ground pins. If you are using an R6868 ribbon cable for example, these lines can be used as additional ground references. If you are using an SH68-68-D1, however, these signals are not connected. © National Instruments Corporation NI 653X User Manual...
- Page 104 Appendix C Connecting Signals with Accessories Making 50-Pin Signal Connections DIOD4 DIOD1 DIOD3 DIOD0 DIOD6 DIOD7 DIOD2 DIOD5 DIOC5 DIOC7 DIOC3 11 12 DIOC1 13 14 DIOC0 DIOC2 DIOC6 15 16 DIOC4 17 18 ACK2 19 20 STOPTRIG2 (IN2) 21 22 PCLK2 (OUT2) 23 24 REQ2...
- Page 105 RTDs, simultaneous sample and hold, relays, and optical isolation For more information about these products, refer to the NI catalog, ni.com, or call the office nearest you. © National Instruments Corporation NI 653X User Manual...
- Page 106 Lines (8) DMA/ Handshaking Plug and Play Interrupt DAQ-DIO Interface Requests Control Counters Clock Request Selection Processing Timers EEPROM 20 MHz RTSI Interface Oscillator RTSI Bus Figure D-1. NI AT-DIO-32HS Block Diagram © National Instruments Corporation NI 653X User Manual...
- Page 107 (32) Data Latches Internal Interface FIFOs Drivers Control PCMCIA Lines (8) DMA/ Handshaking Interface Interrupt DAQ-DIO Requests Control Counters Clock Request Selection Processing Timers 20 MHz Oscillator Figure D-2. NI DAQCard-6533 for PCMCIA Block Diagram NI 653X User Manual ni.com...
- Page 108 Handshaking Interface Interrupt DAQ-DIO Requests Control Counters Clock Request Selection Processing Timers EEPROM 20 MHz RTSI Interface Oscillator RTSI/PXI Trigger Bus Figure D-3. NI PCI-DIO-32HS, NI PCI/PXI-7030/6533, and NI PXI-6533 Block Diagram © National Instruments Corporation NI 653X User Manual...
- Page 109 Appendix D Hardware Considerations Figure D-4. NI PCI/PXI-6534 Block Diagram NI 653X User Manual ni.com...
- Page 110 Table D-1. NI 653X Power Ratings Device Power Rating NI PCI-DIO-32HS +4.65 to +5.25 VDC at 1 A NI PXI-6533 NI AT-DIO-32HS NI DAQCard-6533 for PCMCIA +4.65 to +5.25 VDC at 250 mA © National Instruments Corporation NI 653X User Manual...
- Page 111 Appendix D Hardware Considerations Table D-1. NI 653X Power Ratings (Continued) Device Power Rating NI PCI-6534 +4.65 to +5.25 VDC at 1 A NI PXI-6534 +4.65 to 5.25 VDC at 250 mA You can connect the +5 V pin to the CPULL and DPULL pins to control the bias of the NI 653X control and data lines, as described in the Power-On State...
- Page 112 32 diodes, suitable for terminating 16 lines. You do not need to add diodes to terminate the input signals. The NI 653X contains onboard Schottky diode termination. Figure D-5 illustrates transmission line terminations. © National Instruments Corporation NI 653X User Manual...
- Page 113 Appendix D Hardware Considerations 653 X Device Peripheral Device +5 V Data Control Line (Input) +5 V Data Control Line (Output) +5 V Data Control Line (Output) Figure D-5. Transmission Line Terminations Note Run the signal lines through special metal conduits to protect them from magnetic fields caused by electric motors, welding equipment, breakers, or transformers.
- Page 114 24 mA at 0.4 V –24 mA at 2.4 V Note If you are using the NI DAQCard-6533 for PCMCIA, your PCMCIA socket may not provide sufficient power to drive all outputs at 24 mA. © National Instruments Corporation NI 653X User Manual...
- Page 115 The NI PCI-6534, NI PCI-DIO-32HS and NI AT-DIO-32HS each contain a RTSI connector and an interface to the National Instruments RTSI bus. The RTSI bus provides seven trigger lines and a system clock line. All NI AT- and PCI-bus devices that have RTSI bus connectors can be cabled together inside a computer to share these signals.
- Page 116 If you configure a signal to be received from the RTSI bus, do not attach it to an external source. Also, do not configure the NI 653X to generate that signal internally. © National Instruments Corporation D-11 NI 653X User Manual...
- Page 117 Appendix D Hardware Considerations DAQ-DIO REQ<1..2> ACK<1..2> (STARTTRIG<1..2>) Trigger STOPTRIG<1..2> PCLK<1..2> 20 MHz Timebase Switch Figure D-7. RTSI Bus Signal Connection NI 653X User Manual D-12 ni.com...
- Page 118 • NI PCI/PXI-6533 • NI AT-DIO-32HS • NI DAQCard-6533 for PCMCIA ♦ NI 6534 With the NI 6534, if the data you are acquiring/generating fits in the onboard memory, the transfer rate is not limited by the bus bandwidth, only by the maximum transfer rate based on the protocol used. These rates are listed in Table E-1.
- Page 119 Appendix E Optimizing Your Transfer Rates Table E-1. Peak Transfer Rates Based on Mode and Protocol Used (Continued) Mode/Protocol Peak Rate (MS/s) Handshaking Long Pulse 2.86 Handshaking Trailing-Edge Pulse 1.67 Handshaking Burst Pattern I/O Obtaining the Fastest Transfer Rates To achieve the highest transfer rates possible, consider the following: •...
- Page 120 For example, 10 MS/s, where each sample is 16 bits (two bytes): 10MS 2 bytes 20MB × ------------- - ---------------- -------------- - The following applications were tested: • Finite (pattern I/O and burst protocol)—One buffer of data is transferred one time. © National Instruments Corporation NI 653X User Manual...
- Page 121 Appendix E Optimizing Your Transfer Rates • Continuous Retransmit Output (pattern I/O and burst protocol)—One buffer of data is loaded into memory one time, and output over and over again. • Continuous Input (pattern I/O and burst protocol)—New data is continually input into the application software.
- Page 122 19.5 19.1 Burst Protocol Output– 32 MB 19.6 18.7 16.6 Finite 64 MB 19.6 18.7 16.6 Burst Protocol Input– 1 GB 19.7 17.3 Continuous Burst Protocol Output– 1 GB 19.9 18.6 Continuous © National Instruments Corporation NI 653X User Manual...
- Page 123 Appendix E Optimizing Your Transfer Rates NI PXI-6533 The following benchmarks are results using an NI PXI-8170 controller with an 850 MHz processor, 256 MB RAM, Windows 2000, LabVIEW 6.0, and NI-DAQ 6.9.2. Table E-5. NI PXI-6533 Benchmark Results Benchmark Rate (MS/s) Buffer 8-Bit...
- Page 124 Appendix E Optimizing Your Transfer Rates NI DAQCard-6533 for PCMCIA The following benchmarks are results using an NI PXI-8170, 450 MHz PIII, and Windows 98. Table E-6. NI DAQCard-6533 for PCMCIA Benchmark Results Benchmark Rate (MS/s) 8-Bit 16-Bit 32-Bit Mode...
- Page 125 Appendix E Optimizing Your Transfer Rates NI PCI-6534 The following benchmarks are results using a Dell Optiplex GX150 with a 1 GHz processor, 256 MB RAM, Microsoft Windows 2000, LabVIEW 6.0, and NI-DAQ 6.9.2. Table E-7. NI PCI-6534 Benchmark Results Benchmark Rate (MS/s) Buffer...
- Page 126 19.1 Burst Protocol Output– 32 MB 19.6 18.7 16.5 Finite 64 MB 19.6 18.7 16.5 Burst Protocol Input– 1 GB 19.9 19.6 13.2 Continuous Burst Protocol Output– 1 GB 19.7 17.8 Continuous © National Instruments Corporation NI 653X User Manual...
- Page 127 Appendix E Optimizing Your Transfer Rates NI PCI-7030/6533 with LabVIEW RT The following benchmarks are results using a 133 MHz AMD 486DX5 class processor and the real-time operating system running on LabVIEW RT. Table E-9. NI PCI-7030/6533 Benchmark Results Benchmark Rate (MS/s) 8-Bit 16-Bit...
- Page 128 Table E-10. NI PCI-7030/6533 Benchmark Results (Continued) Benchmark Rate (MS/s) 8-Bit 16-Bit 32-Bit Mode Samples Samples Samples Pattern I/O– Output 2.50 1.25 1.25 Continuous Retransmit Burst Protocol– Input 19.98 19.97 19.97 Continuous Output 19.97 17.72 8.60 © National Instruments Corporation E-11 NI 653X User Manual...
- Page 129 Technical Support and Professional Services Visit the following sections of the National Instruments Web site at for technical support and professional services: ni.com • Support—Online technical support resources at ni.com/support include the following: – Self-Help Resources—For answers and solutions, visit the...
- Page 130 Appendix F Technical Support and Professional Services • Calibration Certificate—If your product supports calibration, you can obtain the calibration certificate for your product at ni.com/calibration If you searched and could not find the answers you need, contact ni.com your local office or NI corporate headquarters. Phone numbers for our worldwide offices are listed at the front of this manual.
- Page 131 ≤ less than or equal to ≥ greater than or equal to Ω ohms percent ± plus or minus positive of, or plus +5 V (signal) +5 VDC source signal © National Instruments Corporation NI 653X User Manual...
- Page 132 Glossary amps Acknowledge—handshaking signal driven by the NI 653X, indicating that it is ready to transfer data. Application Development Environment Application Programming Interface—a standardized set of subroutines or functions along with the parameters that a program can call. asynchronous For hardware, it is a property of an event that occurs at an arbitrary time, without synchronization to a reference clock.
- Page 133 A default parameter value recorded in the driver. In many cases, the default input of a control is a certain value (often 0) that means use the current default setting. © National Instruments Corporation NI 653X User Manual...
- Page 134 Glossary A plug-in data acquisition board, card, or pad that can contain multiple device channels and conversion devices. Plug-in boards, PCMCIA cards, and devices that connects to your computer parallel port, are all examples of DAQ devices. digital ground DGND digital trigger A TTL-level signal having two discrete levels—a high and a low level.
- Page 135 A controlled centralized configuration environment that allows you to Automation Explorer configure all of your NI devices. (MAX) MB/s A unit for data transfer that means one million or 10 bits per second. © National Instruments Corporation NI 653X User Manual...
- Page 136 Glossary mask The bits that are significant for pattern detection, also applies to change detection. most significant bit open collector Output driver that drives its output pin to 0 V for logic low, but puts the pin in the high-impedance state for logic high. pattern I/O Data-transfer mode in which NI 653X transfers data on the falling or rising edge of a TTL signal, typically at a constant rate.
- Page 137 All handshaking I/O, pattern I/O and buffered operations must be performed on groups. RTSI bus Real-Time System Integration Bus—the National Instruments timing bus that connects DAQ devices directly, by means of connectors on top of the devices, for precise synchronization of functions...
- Page 138 Glossary sample rate The number of samples a system takes over a given time period, usually expressed in samples per second. software trigger A programmed event that triggers an event such as data acquisition. static digital I/O See unstrobed digital I/O STOPTRIG control signals Strobed I/O...
- Page 139 Channel names that can be defined outside the application and used without having to perform scaling operations. wired-OR open collector. © National Instruments Corporation NI 653X User Manual...
- Page 140 (figure), 3-21 (figure), 3-14 long-pulse protocol output state machine (figure), 3-15 input handshaking sequence output timing diagram (figure), 3-16 (figure), 3-32 overview, 3-11 input state machine (figure), 3-33 © National Instruments Corporation NI 653X User Manual...
- Page 141 2-32 DMA or interrupt transfers, 2-33 benchmark results. See optimizing transfer finite, 2-32 rates overview, 2-28 block diagrams port and timing controller combinations AT-DIO-32HS, D-1 (table), 2-28 DAQCard-6533 for PCMCIA, D-2 NI 653X User Manual ni.com...
- Page 142 D-5 triggering data transfer pattern-matching trigger, 2-31 start and stop trigger, 2-31 start trigger, 2-30 DAQCard-6533 for PCMCIA stop trigger, 2-30 benchmark results (table), E-7 when to use (table), 2-1 block diagram, D-2 width of data to acquire, 2-28...
- Page 143 Index delay, programmable, handshaking protocol, 2-19 GND signal, description (table), C-5 diagnostic tools (NI resources), F-1 Group 1 and Group 2 digital I/O specifications, A-1 introduction, 1-2 digital lines. See static digital lines using control lines as extra unstrobed data digital patterns and waveforms.
- Page 144 PCLK reversed (figure), 3-10 hardware transfer example (figure), 3-6 block diagrams comparing different protocols (table), 3-4 AT-DIO-32HS, D-1 leading-edge protocol DAQCard-6533 for PCMCIA, D-2 input handshaking sequence PCI/PXI-6534, D-4 (figure), 3-27 PCI-DIO-32HS, input state machine (figure), 3-28 PCI/PXI-7030/6533, and input timing diagram (figure), 3-29...
- Page 145 (figure), 3-20 AT-DIO-32HS, 1-8 output state machine (figure), 3-20 category, 1-11 output timing diagram (figure), 3-21 DAQCard-6533 for PCMCIA, 1-9 line state, monitoring. See change detection PCI-DIO-32HS, PCI-6534, or long-pulse handshaking protocol PCI-7030/6533 devices, 1-7 comparison of protocols (table), 3-4...
- Page 146 See change detection port and timing controller combinations (table), 2-6 programming continuous, in NI-DAQ, 2-15 National Instruments support and services, F-1 LabVIEW/LabVIEW RT, 2-16 National Instruments, application single buffer, in NI-DAQ, 2-14 software, 1-3 REQ polarity, 2-7...
- Page 147 Index installation, 1-7 programming support for DMA transfers (table), E-3 See also software programming choices PCLK<1..2> signal change detection burst input timing diagrams continuous change detection in NI-DAQ (figure), 2-34 default input timing diagram (figure), 3-7 LabVIEW/LabVIEW RT (figure), 2-35 PCLK reversed (figure), 3-9 single buffer change detection in transfer example (figure), 3-6...
- Page 148 I/O and pattern I/O (figure), 3-22 (table), C-1 input state machine (figure), 3-23 leading-edge protocol input timing diagram (figure), 3-24 input handshaking sequence (figure), 3-27 output handshaking sequence (figure), 3-25 input state machine (figure), 3-28 © National Instruments Corporation NI 653X User Manual...
- Page 149 2-2 software (NI resources), F-1 Port 4 lines (table), 2-4 software installation, 1-6 programming unstrobed I/O software programming choices control/timing lines as extra National Instruments application unstrobed data lines, 2-5 software, 1-3 flowcharts, 2-5 NI 653X User Manual I-10 ni.com...
- Page 150 I/O trailing-edge protocol, 3-22 configuring digital lines pattern I/O open-collector output, 2-2 external REQ signal source, 3-2 standard output, 2-2 internal REQ signal source, 3-1 Port 4 lines (table), 2-4 © National Instruments Corporation I-11 NI 653X User Manual...
- Page 151 Index programming control/timing lines as extra voltage-controlled crystal oscillator unstrobed data lines, 2-5 (VCXO), D-11 flowcharts, 2-5 using control lines as extra unstrobed data lines, 2-3 when to use (table), 2-1 waveforms. See pattern I/O Web resources, F-1 NI 653X User Manual I-12 ni.com...
Need help?
Do you have a question about the DAQCard-6533 and is the answer not in the manual?
Questions and answers