
Subscribe to Our Youtube Channel
Related Manuals for Graco Duet Glide LX


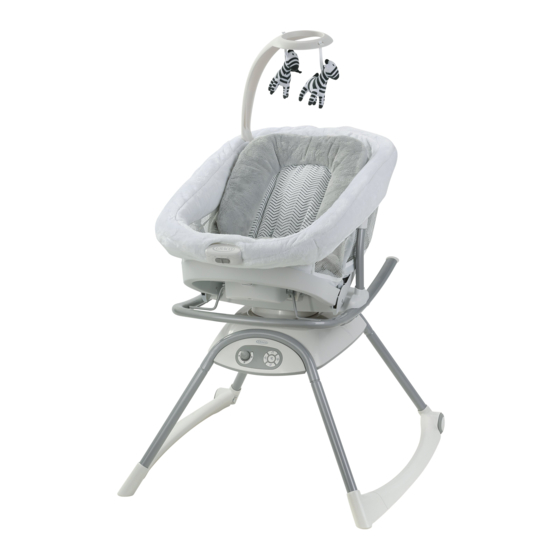
Summary of Contents for Graco Duet Glide LX
- Page 1 Duet Glide LX Gliding Swing ™ with Portable Sleeper • Moisés portátil con columpio deslizante Duet Glide ™ Owner’s Manual Manual del propietario • www.gracobaby.com ©2018 Graco NWL0000730470C 6/18...
- Page 2 3-10 1 WARNING • ADVERTENCIA Pages • Páginas 11-13 2 Features • Características Pages • Páginas Parts List • Lista de las piezas Features • Características Modes of Use • Modos de uso 14-20 3 Assembly • Ensamblaje Pages • Páginas To Assemble Seat •...
- Page 3 Prevent serious injury or death: Failure to follow these warnings and the assembly instructions could result in serious injury or death. READ ALL INSTRUCTIONS • Keep swing seat fully reclined BEFORE USE OF THE PRODUCT. until child is at least 4 months old AND can hold up head PLEASE SAVE OWNER’S without help.
- Page 4 ROCKER MODE/CARRIER MODE: • This product is not intended for unsupervised or prolonged READ ALL INSTRUCTIONS periods of sleep. BEFORE USE OF THE PRODUCT. • DO NOT place product near water and moisture. Do not use PLEASE SAVE OWNER’S the product near possible wet MANUAL FOR FUTURE USE.
- Page 5 SUFFOCATION HAZARD: Infants have suffocated: • On added pillows, blankets and extra padding. - ONLY use the pad provided by Graco. - NEVER place extra padding under or beside infant. FOR SAFE BATTERY USE: Keep the batteries out of children’s reach.
- Page 6 Changes or modifications to this unit not expressly approved by the party responsible for compliance could void the user authority to operate the equipment. This device complies with part 15 of the FCC Rules. Operation is subject to the following two conditions: (1) This device may not cause harmful interference, and (2) this device must accept any interference received, including interference that may cause undesired operation.
- Page 7 ADVERTENCIA Prevenga las lesiones serias o la muerte: No observar estas advertencias y las instrucciones de ensamblaje podría resultar en lesiones serias o la muerte. LEA TODAS LAS • Mantenga el asiento del INSTRUCCIONES ANTES DE columpio totalmente reclinado USAR EL PRODUCTO. hasta que el niño tenga por lo menos 4 meses Y pueda POR FAVOR, GUARDE EL...
- Page 8 ADVERTENCIA PELIGRO DE CAÍDAS: • Este producto no debe usarse • Use SIEMPRE el sistema de para dormir durante largos seguridad. Ajuste el cinturón períodos o sin supervisión. lo necesario para lograr un • NO ponga el producto cerca del calce apretado alrededor de agua o humedad.
- Page 9 - Use SOLAMENTE la - Nunca ponga el producto almohadilla provista por sobre camas, sofás, Graco. almohadones ni otras - NUNCA ponga acolchado superficies blandas. adicional debajo o al lado del bebé. • Ponga SIEMPRE al niño a dormir boca arriba.
- Page 10 ADVERTENCIA Los cambios o modificaciones no expresamente aprobados por la parte responsable del cumplimiento podrían anular la autoridad del usuario para operar el equipo. Este dispositivo cumple con la parte 15 de las Normas de la Comisión Federal de Comunicaciones (FCC por sus siglas en inglés). El funcionamiento está...
- Page 11 Parts List • Lista de las piezas Check that you have all the parts Verifique que tenga todas las for this model BEFORE assembling piezas de este modelo ANTES de your product. If any parts are armar su producto. Si falta alguna missing, call Customer Service.
- Page 12 Features • Características This model may not include some Este modelo podría no incluir features. DO NOT use any other algunas de las características accessories with this product. indicadas. NO use ningún otro accesorio con este producto. Crotch Pad • Almohadilla de la entrepierna Only use this crotch pad on this Styles may vary seat.
- Page 13 Modes of Use • Modos de uso Swing Mode: (4 Positions) 25 lb (11.3 kg) 30 inches (76.2 cm) • Modo columpio: (4 posiciones) 25 libras (11.3 kg), 30 pulgadas (76.2 cm) Rocker/Sleeper Mode: 18 lb (8.2 kg) 27 inches (68.2 cm) •...
- Page 14 To Assemble Seat • Cómo ensamblar el asiento 1. Insert foot end tube with button into hub tube until button on inside of tube snaps into place. CHECK that buttons are visible in openings. Repeat on other side of seat. 1.
- Page 15 3. Insert head end tube with button into hub tube until button on inside of tube snaps into place. CHECK that buttons are visible in openings. Repeat on other side of seat. 3. Inserte el tubo del extremo de la cabeza con el botón en el tubo del cubo hasta que el botón del interior del tubo se trabe en su...
- Page 16 To Assemble Toy bar • Para ensamblar la barra de juguetes Styles vary Los estilos varían 1. Insert toy bar into opening in seat. 1. Inserte la barra de juguetes en la abertura del asiento. CLICK! ¡CLIC! 2. CHECK that toy bar is securely attached by pulling up on it.
- Page 17 3. Attach toys as shown. Styles vary Los estilos varían 3. Sujete los juguetes como se indica. 4. To rotate toy bar. 4. Para girar la barra de juguetes. 5. To remove, press button on base of toy bar and lift away from seat.
- Page 18 3-C To Assemble Swing Base • Para armar la base del columpio WARNING All legs must be properly assembled before use. ADVERTENCIA Todas las patas deben estar correctamente armadas antes de usarlo. Wheels Ruedas Wheels 1. Insert 2 base legs with wheels Ruedas into tubes on back of base (opposite control panel) as...
- Page 19 2. Insert remaining 2 base legs into tubes on control panel end of base body as shown. CLICK! ¡CLIC! Note: Base leg with indent should be assembled to the tube with the indent. 2. Inserte las otras 2 patas de la base en los tubos del extremo del panel de control del cuerpo de la base como se indica.
- Page 20 3. Flip swing base onto legs. Attach the base leg braces with curve going outward on both sides as shown. 3. Coloque la base del columpio sobre sus patas, dándole vuelta. Sujete los soportes de de las CLICK! CLICK! patas de la base con la curva ¡CLIC! ¡CLIC! orientada hacia afuera en ambos...
- Page 21 To Attach Seat to Swing Base • Para sujetar el asiento a la base del columpio 1. Hold seat by handles on foot and head ends of seat to mount on swing base. 1. Agarre el asiento de las manijas de los extremos de los pies y la cabeza para sujetarlo a la base del columpio.
- Page 22 To Remove Seat • Para sacar el asiento 1. To use as seat, pick up seat to remove from swing. 1. Para usarlo como asiento, levante el asiento para sacarlo del columpio. 2. When carrying with a child, always hold seat by the handles.
- Page 23 To Secure Child • Sujetar al niño WARNING Falling Hazard: ALWAYS use the restraint system. ADVERTENCIA Peligro de caídas: Use SIEMPRE el sistema de seguridad. 1. To open, press button on buckle to release the waist straps. 1. Para abrirlo, oprima el botón de la hebilla para liberar las correas de la cintura.
- Page 24 To Recline Seat • Para reclinar el asiento 1. To recline, squeeze the recline handle and move into 1 of 3 positions. 1. Para reclinarla, apriete la manija de reclinación y póngala en 1 de las 3 posiciones.
- Page 25 To Use Wall Plug • Cómo usar un tomacorriente de la pared WARNING DO NOT place product near water or moisture. Do not use the product near possible wet areas, such as a bathtub, shower, wash basin, sink, laundry tub, swimming pool, wet basement, etc. DO NOT use the AC adapter if it has been exposed to liquids, has been dropped, or is damaged.
- Page 26 To Start Swing • Para encender el columpio WARNING Avoid serious injury from falling or sliding out. ALWAYS use restraint system. After fastening buckles, adjust belts to get a snug fit around your child. TO TURN SWING ON: Choose swing motion by pressing button. The LED light is illuminated when the swing is on, and not illuminated when the swing is off.
- Page 27 Swing Motion Movimiento del columpio Glide Motion Movimiento deslizante...
- Page 28 Swing and Glide Combo Motion Movimientos del columpio y deslizante combinados...
- Page 29 Swing Sounds • Sonidos del columpio Music Volume control Música Control del volumen Music/Nature Mute/Unmute Música/Naturaleza Silenciar/Activar Nature sounds Sonidos de la naturaleza MUSIC/NATURE MUTE/UNMUTE - Press to turn sounds off. Press again to turn sounds back on at previous sound and volume setting. MÚSICA/NATURALEZA SILENCIAR/ ACTIVAR SONIDO - Oprima el botón para apagar los sonidos.
- Page 30 NATURE SOUNDS - Push “Nature” button to turn on nature sound selection. Each press will change to the next nature sound. After the 5th sound is selected, it will return to the first track. SONIDOS DE LA NATURALEZA - Empuje el botón “naturaleza” (Nature) para activar la selección de sonidos de la naturaleza.
- Page 31 To Use Vibration • Cómo usar la vibración 1. Remove battery lid, found under foot end of seat, with a key and insert 1-D (LR20-1.5V) battery in module. Replace lid. 1. Saque la tapa de las pilas que se encuentra debajo del extremo de los pies del asiento con una llave e inserte 1 pila D (LR20-1.5V) en el módulo.
- Page 32 4-H Problem Solving • Solución de problemas SWING WON’T OPERATE: 1. Speed setting too low. Push swing to start. 2. Baby grabbing swing legs. (Discontinue use). 3. LED light blinking and swing not moving, check for obstacle blocking swing or that load is over 25 lb (11.3 kg). Press any motion button to turn swing off.
- Page 33 Care and Maintenance • Cuidado y mantenimiento Removing Seat Pad • Cómo sacar la almohadilla del asiento 1. To open, press button on buckle to release the waist straps. 1. Para abrirlo, oprima el botón de la hebilla para liberar las correas de la cintura.
- Page 34 • FROM TIME TO TIME CHECK YOUR SWING for loose screws, worn parts, torn material or stitching. Replace or repair the parts as needed. Use only Graco replacement parts. • TO CLEAN SEAT COVER, refer to your care tag on the seat pad for washing instructions.
- Page 35 Notes • Notas...
- Page 36 1-800-345-4109 5-C Product Registration (USA) •Registro del producto (EE.UU.) To register your Graco product from within the U.S.A. visit us online at www.gracobaby.com/productregistration or return registration card provided with your product. We currently do not accept product registrations from those living outside the United States of America.
Need help?
Do you have a question about the Duet Glide LX and is the answer not in the manual?
Questions and answers
I purchased this item used and it didn’t have the charging cord. Can I purchase just that from somewhere online?