Table of Contents
Advertisement
Advertisement
Table of Contents

Related Manuals for Euromaid GEGFS60


Summary of Contents for Euromaid GEGFS60
- Page 1 User Manual 60cm Upright Cooker GEGFS60 & GEGFW60...
- Page 2 Product / Installer details For future reference we suggest that you staple a copy of your purchase receipt here and complete the below so the information is always at hand. Product Details Model number: ________________________________________________________________________________________ Description: ___________________________________________________________________________________________ Serial number: _________________________________________________________________________________________ (Located on the product rating label) Purchase Details Date of purchase: ______________________________________________________________________________________...
- Page 3 Dear Customer, Congratulations on the purchase of your new product from Home Appliances Pty Ltd. We recommend you please take some time to read the instruction manual thoroughly to familiarise yourself with the functionality and operations to ensure optimum performance of your new appliance. After reading the manual, please store it in a safe and accessible location for future reference.
- Page 4 Explanation of symbols Throughout this user manual the following symbols are used: Important information or useful hints ,..-.� about usage . '..oj Warning of hazardous situations with regard to I ife and property. I A\ Warning of electric shock. Warning of risk of fire. 1 /4\ Warning of hot surfaces.
-
Page 5: Table Of Contents
First cleaning of the appliance ...... 19 Initial heating ..........19 Important instructions and warnings for safety and environment How to use the hob General safety ..........4 General information about cooking ....20 Safety when working with gas ......4 Using the hobs .......... -
Page 6: General Safety
This section contains safety installation, read the instructions instructions that will help protect from carefully. • Do not operate the product if it is risk of personal injury or property damage. Failure to follow these defective or has any visible instructions shall void any warranty. -
Page 7: Electrical Safety
natural ventilation holes open or button, door bell and etc.) Do not install a mechanical ventilation use fixed or mobile phones. Risk device (mechanical extractor of explosion and toxication ! hood). Prolonged intensive use of • Open doors and windows. the appliance may call for •... -
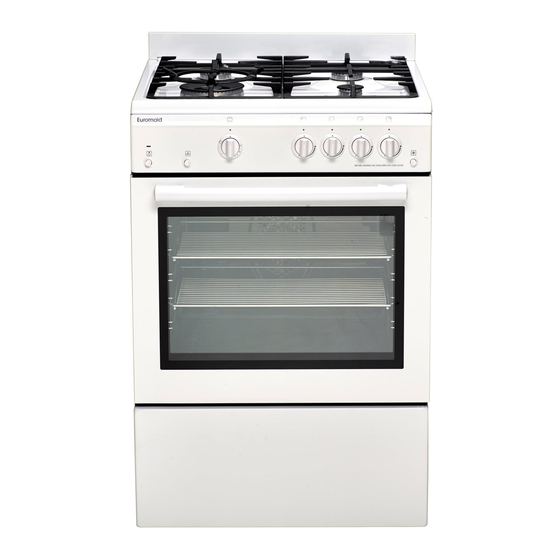
Page 13: Package Contents
shelf or tray between 2 rails and make sure that it is balanced before placing food on it ccessories supplied can vary depending on • Please see the followin fi ure . he product model. Not every accessory described in the user manual may exist on your product. -
Page 14: Technical Specifications
Splash back assembly Splash back Screw Splashback Burner plate Please take splashback and package of screws, nuts, fillers form warmer drawer If you don't want to install splashback on to Place splashback according to the drawing, your cooker, you can place fillers to the place nut inside splashback on to the hole, holes. -
Page 15: Injector Table
echnical specifications may be changed alues stated on the product labels or in the ithout prior notice to improve the quality of documentation accompanying it are 11111111-•Lhe product. 11111111-• , o btained in laboratory conditions in accordance with relevant standards. Figures in this manual are schematic and Depending on operational and may not exactly match your product. -
Page 17: Installation And Connection
Safety chain Do not install this appliance in a room below ground level unless it is open to ground level on The appliance must be secured against at least one side. overbalancing by using the supplied two safety chains on your oven. Fasten hook (1 )by using a proper peg to the kitchen wall (6) and connect safety chain (3) to the hook via the locking mechanism (2). - Page 18 Suitable for Flexible Hose Connection Connection hose must comply to AS1869 ff D ANGER: class B 10mm diameter & be AGA certified \Jhe power cable must not be clamped, lenght of hose is to be as short as possible bent or trapped or come into contact hose length must not exceed 1.2m the hose with hot parts of the product.
- Page 19 To ensure correct operation of the appliance it is Flame must be blue and have a regular necessary to set the correct pressure for the shape. If the flame is yellowish, check if the appliance 1.0kPa for Natural Gas. burner cap is seated securely or clean the burner.
-
Page 20: Future Transportation
Future Transportation • Keep the product's original carton and transport the product in it. Follow the instructions on the carton. If you do not have the original carton, pack the product in bubble wrap or thick cardboard and tape it securely. •... -
Page 21: Preparation
2. Wipe the surfaces of the appliance with a Tips for saving energy damp cloth or sponge and dry with a cloth. The following information will help you to use Initial heating your appliance in an ecological way, and to save Heat up the product for about 30 minutes and energy: then switch it off. -
Page 22: General Information About Cooking
the cooking zone you want instead of sliding General information about cooking Never fill the pan with oil more than Gas cooking one third of it. Do not leave the hob • Size of the vessel and the flame must match unattended when heating oil. - Page 23 Gas shut off safety system (in models with DANGER: thermic component) <Release the button if the burner is not ignited within 15 seconds. As a counter measure Wait at least 1 minute before trying again. against blow out due to fluid There is the risk of gas accumulation and overflows at burners, safety explosion!
-
Page 24: How To Operate The Oven
• Fish should be placed on the middle or lower rack in a heat-resistant plate. Tips for grilling When meat, fish and poultry are grilled, they quickly get brown, have a nice crust and do not Product may be hot when it is in use. Never get dry. -
Page 25: Cooking Times Table
Switch on the gas oven The gas oven is ignited with the ignition button. 1 There is the risk of gas compression 1 . Open oven door. IL-.L...Jand explosion! 2. Keep gas oven control knob pressed and turn Do not attempt to ignite the gas more that it counterclockwise. -
Page 26: How To Operate The Grill
How to operate the rill Close oven door during grilling. Hot surfaces may cause burns! Switching on the grill 1. Turn the Function knob clockwise to the Grill symbol. 2. If required, perform a preheating of about 5 minutes. » Temperature light turns on. IMPORTANT WARNING WHEN GRILLING Your freestanding cooker is fitted with an electric Do not attempt to turn the Function knob... -
Page 27: Maintenance And Care
General information Cleaning the hob Service life of the product will extend and the Gas hobs possibility of problems will decrease if the 1 . Remove and clean the saucepan carriers and roduct is cleaned at re ular intervals. burner caps. 2. -
Page 28: Removing The Oven Door
Clean oven door Steps carried out during removing process To clean the oven door, use warm water with should be performed in reverse order to install the door. Do not forget to close the washing liquid, a soft cloth or sponge to clean clips at the hinge housing when reinstalling the roduct and wi e it with a d cloth. -
Page 29: Troubleshooting
emmmmien 1111 11111!! . • It is normal that steam escapes during operation. >>> This is not a fault. IIHURleffll!i mBI I fflli!i� Bil HIiie an1m1n111� • When the metal parts are heated, they may expand and cause noise. >>> This is not a fault. - Page 32 For all product enquires (including warranty support), please contact our Customer Care team on 1800 444 357 or via email: customercare@hapl.com.au...
Need help?
Do you have a question about the GEGFS60 and is the answer not in the manual?
Questions and answers