
Subscribe to Our Youtube Channel
Related Manuals for BIRO 55


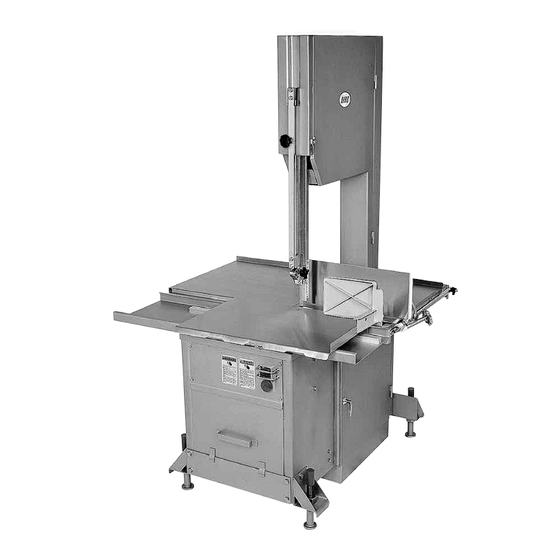
Summary of Contents for BIRO 55
- Page 1 IMPORTANT NOTICE This Manual contains important safety instructions which must be strictly followed when using PTCT Mod. 55 284-9-13-8 this equipment.
-
Page 2: Table Of Contents
TABLE OF CONTENTS Page NOTICE TO OWNER AND OPERATORS ......... . 1 SAFETY TIPS . -
Page 3: Notice To Owner And Operators
Manual. Warnings related to your personal safety are indicated by: Warnings related to possible damage are indicated by: BIRO also has provided a wall chart to be posted near the equipment. If any warning label, wall chart, or Manual becomes misplaced, damaged, or illegible, please contact your nearest Distribu- tor or BIRO directly for a replacement. -
Page 4: Safety Tips
Machine BEFORE Removing Shrouds, Removable Guards, Covers, Doors, Fences or Panels for Cleaning, Servicing or Any Other Reason. NEVER Leave Machine Unattended While Operating. PROMPTLY REPLACE Any Worn or Illegible Warning Labels. USE ONLY Genuine BIRO Parts and Accessories Properly Installed. -
Page 6: Installation
9. Check placement of all warning labels, wall chart and Manual. Machine is ready for trained operators to process product. 10. Contact your local Distributor or BIRO directly if you have any questions or problems with installation or operation of this machine. -
Page 7: Warning Labels
WARNING LABELS FOR BIRO POWER SAWS SEE PAGE 11 FOR LOCATIONS ON MACHINE... -
Page 8: Operation
OPERATION SHARP MOVING BAND TYPE SAW BLADE TO AVOID SERIOUS PERSONAL INJURY NEVER Touch This Machine Without Training and Authorization By Your Supervisor. ALWAYS Read Operating and Service Manual BEFORE Operating, Servicing or Cleaning. ALWAYS Keep Hands Clear of Band Type Saw Blade and Other Moving Parts. DO NOT Tamper With, Bypass, Alter, or Modify this Equipment in Any Way or Form. - Page 9 6. ALWAYS use the Safety End Cut Pusher Plate (Part No. 256P) for smaller products or the last cuts of product. The pusher plate is supplied as standard equipment on all BIRO power saws. 7. When finished cutting, push stop button. Perform lockout/tagout procedure.
-
Page 10: Cleaning
Electrical Components. ALWAYS Thoroughly Clean Equipment Daily. CLEANING THE BIRO POWER CUTTER: Disconnect the electrical power from the machine before cleaning. Parts to be removed have been made accessible and can be removed without tools. Notice the drawing below that all parts are numbered. Each part should be re- moved for cleaning in the numbered sequence shown. -
Page 11: Maintenance
ALWAYS Keep Hands Clear of Band Type Saw Blade and Other Moving Parts. PROMPTLY REPLACE Any Worn or Illegible Labels. USE ONLY GENUINE BIRO Parts and Accessories Properly Installed. A. GENERAL 1. Machine should be generally inspected every time it is cleaned (at least daily) to ensure that it is in good condition and has not been damaged or tampered with. -
Page 12: Lubrication
1. Remove the finger lift fastener knob (Item No. 211A-291Q) and the finger lift assembly (Item No. 55234). 2. Remove the finger lift fastener stud (Item No. 211D). 3. Unbolt and remove the outer saw guide bar (Item No. 55190) and the guide bar spacer blocks (Item No. -
Page 13: Warning Label Locations On Machine
Release tension on blade, turn tensioning handle counter-clockwise. Lift nylon filler. Remove blade. Install new blade by reversing procedure. Be sure tension mark is even with the bottom of the hinge plate for proper blade tension. WARNING LABELS LOCATIONS ON MODEL 55 POWER SAWS Item No. 653PC-E Warning label, Item No. 653PC-E Warning label,... - Page 16 Item No. Description Item No. Description A16112 55135 Head door latch assembly Right support angle HHS058S -18 ´ 55136 Hex head screw, , SS Left support angle HHS060S -18 ´ 1, SS 55138 Hex head screw, Hinge bracket, upper wheel LW15S 55153 Lock washer,...
- Page 17 Item No. Description Item No. Description AN15S 55170 Acorn nut, -20, SS Blade tension cap gauge HHS0481S -20 ´ 1 55171-1 Hex head screw, , SS Blade tension adjustment housing HHS124S -13 ´ 55172 Hex head screw, , SS Blade tension screw HN40S 55173 Hex nut,...
- Page 18 Blade Tension Screw INSTALLATION INSTRUCTIONS Disconnect the machine from the main power supply. Loosen tension on the saw blade and remove the upper wheel assembly. Unbolt the (A) tensioning handle from the (B) blade tension screw. At the bottom handle mount turn the (B) blade tension screw clockwise until it can be lifted out of the (C) housing.
-
Page 19: Operator's Notes
— NOTES —... - Page 20 Item No. Description Wheel cleaner 18230DL Upper shaft seal, double lip 18247 Upper shaft Item No. Description 18248 Upper wheel hub cap A18227 18252 Bearing cup/cone assembly Upper shaft lock nut A18247 22003U-6 Upper shaft & brg. assembly w/o wheel Upper wheel, 22", 6 spoke A295 Wheel cleanqer assembly...
- Page 22 Item No. Description AS415D-2 Stationary bar assembly Item No. Description HHS025S -20 ´ Hex head screw, , SS AS415D LW10S Stationary bar assembly Lock washer, HHS025S -20 ´ S268 Hex head screw, , SS Stationary bar headless screw LW10S 119A Lock washer, Saw guide in stationary bar S268...
- Page 23 Item No. Description Item No. Description A175S 16155-13 Thumb guard assembly, NSS Carriage stop angle, SS AN15S 16159 Acorn nut, -20, SS Meat carriage bearing, SS FW05S 175S Flat washer, , SS Thumb guard HN25S 175-1-S Hex nut, -16, SS Thumb guard nut, SS LW20S 175-2-S...
- Page 24 See Page 27 for parts before Serial No. 55026 Item No. Description Item No. Description AS415D S415D Stationary bar assembly Stationary bar, SS HHS025S -20 ´ 119A Hex head screw, , SS Saw guide in stationary bar LW10S Lock washer, , SS Nylon filler MC-10E...
-
Page 25: Wiring Diagram
Item No. Description A16226A-SG GR/RD palm button assembly HHS041S -28 ´ Hex head screw, , SS HHS070S -16 ´ 1, SS Hex head screw, HN05S Hex nut, 8-32, SS HN20S Hex nut, -18, SS H462 Switch guard H462-1 Switch guard ferrule LW03S Lock washer, #8, SS LW15S... -
Page 26: Optional Double Rolling Tables Parts List & Diagrams
⁄ Wing nut, -14, SS... -
Page 28: Parts List/Ordering
MODEL 55 ITEM NUMBERS AND DESCRIPTIONS ALWAYS ADVISE MODEL & SERIAL NUMBER WHEN ORDERING Item No. Description Item No. Description AN15S 14TP-1 Acorn nut, -20, SS Head door hinge pin, short CB64S -20 ´ 1 14640 Carriage bolt, , SS... -
Page 29: Parts Assemblies List/Ordering
MODEL 55 ITEM NUMBERS AND DESCRIPTIONS (Cont.) Item No. Description Item No. Description 36A1 55172 Grease fitting Blade tension screw 360B-2 55173 -13 ´ Set screw, , flat point Blade tension adjustment handle 55174 Bearing adjusting cap Upper wheel plate... -
Page 30: Wearable Saw Parts
WEARABLE SAW PARTS THAT WILL FIT BIRO POWER CUTTERS MODELS 11-22-1433-33-34-3334-44-4436-55 — EXCEPT WHERE NOTED OTHERWISE — CONTACT YOUR NEAREST BIRO AUTHORIZED DISTRIBUTOR OR CONTACT BIRO MANUFACTURING Ph. 419-798-4451 E-Mail: service@birosaw.com... -
Page 31: Operator's Signature Page
OPERATOR'S SIGNATURE PAGE MY SIGNATURE ATTESTS THAT I HAVE COMPLETELY READ AND UNDERSTAND THIS MANUAL. I REALIZE THAT THIS MACHINE, IF OPERATED CARELESSLY, CAN CAUSE SE- RIOUS INJURY TO MYSELF AND OTHERS. SUPERVISOR’S NAME (PRINT) SIGNATURE DATE INITIALS... -
Page 32: Limited Warranty
The warranty card must be returned to The Biro Manufacturing Company for proper registration. If no warranty card is returned to BIRO, the warranty period will begin from the date the machine was originally shipped from the factory.
Need help?
Do you have a question about the 55 and is the answer not in the manual?
Questions and answers