
Related Manuals for Endecotts Minor 200


Summary of Contents for Endecotts Minor 200
- Page 1 WHEN PARTICLE SIZE MATTERS S I E VI N G M ACHI N ES Op e ra t in g I n str uction s Minor 200 Octagon 200 Octagon 200CL Air Sizer 200 EFL 300 Titan 450...
-
Page 3: Table Of Contents
Safety Safety instructions Summary of safety instructions Confirmation 2. TRANSPORT AND INSTALLATION………………………………… 11 Transport Temperature fluctuations Intermediate storage 3. OPERATING INSTRUCTIONS MINOR 200………………………… 13 Technical specifications General Information Specifications Controls and Functions Setting Up Electrical connections Start-up and commissioning Certificate of CE-Conformity 4. - Page 4 7. OPERATING INSTRUCTIONS EFL 300……………………………… 59 Technical specifications General Information Specifications Controls and functions Setting Up Electrical connections Transport protection Mount sieve clamping unit Operating Instructions Wet sieving Certificate of CE-Conformity 8. OPERATING INSTRUCTIONS TITAN 450…………………………. 73 Technical specifications Copyright © 2015 by Endecotts Ltd.
- Page 5 Electrical connections Transport protection Mount sieve clamping unit Operating Instructions Wet sieving Certificate of CE-Conformity GENERAL INFORMATION……………………………………………… 85 Use of Sieves Test Sieves Available from Endecotts EVALUATION SOFTWARE: SIEVEWARE……………………………… 87 General Information Specifications Function Copyright © 2015 by Endecotts Ltd.
- Page 6 All rights reserved, including the right to copy, distribute and translate this text. No part of this document may be reproduced in any way without written consent of Endecotts Ltd. nor may be modified, copied or distributed with the help of electronic systems.
-
Page 7: Operating Instructions Notes
They give instructions to the target group(s) defined in the respective sections for safe, correct handling of the Endecotts machines. It is important that each target group(s) is (are) familiar with the relevant section, in order to ensure safe, reliable handling of the machine according to its intended use. -
Page 8: Repairs
1. Setting up Repairs This operating manual does not contain any repair instructions. In the interests of your own safety, repairs should only performed by Endecotts Ltd or an authorised representative (service technician). In this case, please notify the following:... -
Page 9: Safety
All persons concerned with the machine in any way. The entire Endecotts machine range is a modern, highly efficient product of Endecotts Ltd, corresponding to state of the art works. If the machine is used according to the intended purpose with knowledge of this technical documentation it is completely safe and reliable to operate. -
Page 10: Summary Of Safety Instructions
Supply schedule If the delivery is incomplete and/or transport damage has occurred, you must immediately notify the transport agent and Endecotts Ltd (within 24 hrs.). It is possible that later complaints may not be considered. Ambient temperature... - Page 11 Never operate your Endecotts machine directly in water. Danger through current surge. During wet sieving always operate your Endecotts machine connected to a mains socket which is protected by an FI protective (safety) switch. The water quantity added should always be dosed in such a way that the sieve surface is only just wetted.
-
Page 12: Confirmation
Use only a cloth moistened with water; solvents are not allowed. Wearing parts These operating instructions do not include repair instructions. For your own safety, repairs should be carried out only by Endecotts Ltd or an authorised agency or Endecotts service technicians. Confirmation I have read and taken note of the sections –... -
Page 13: Transport And Installation
The Endecotts Machine must not be knocked, shaken or thrown during transport; otherwise the electronic and mechanical components may become damaged. Please make sure you have removed all transit bolts before using the Endecotts machine. Specific operating instructions can be found on the relevant pages for every single Endecotts machine in this manual. - Page 14 1. Setting up Copyright © 2015 by Endecotts Ltd.
-
Page 15: Operating Instructions Minor 200
1. Technical specifications 1. Technical specifications Minor 200 3. Operating instructions: Copyright © 2015 by Endecotts Ltd. -
Page 16: Technical Specifications
The sieve stack is held firmly in position by a clamping belt system. Removing it allows the whole unit to be stored in a space less than 200 mm high. There are no rotating parts in the Minor 200 - consequently it is quiet in operation and maintenance free. -
Page 17: Specifications
(included) Model bench top Protection code IP 20 Electrical supply different voltages available Power connection 1-phase Ø x H 262 x 126 mm Net weight 16 kg (*) depending on load Copyright © 2015 by Endecotts Ltd. -
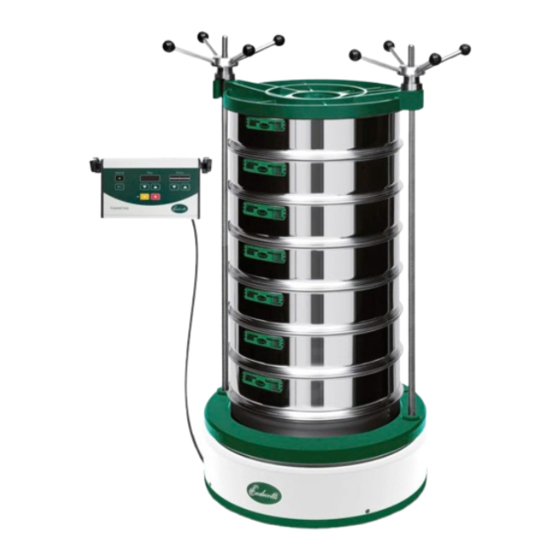
Page 18: Controls And Functions
(Removable knob for lid) CLAMP PLATE CLAMPING LATCH FUSE HOLDER ADJUSTABLE CAM BUCKLES SIEVE STACK STRAP LED (indicates mains power to LOCATION PLATE instrument) PROCESS TIMER COVER On /Off Switch BASE ANTI-VIBRATION FEET CONTINUOUSLY 60 MIN Copyright © 2015 by Endecotts Ltd. -
Page 19: Setting Up
Electrical connections Ensure that the voltage and frequency on the rating label, at the rear of the shaker, correspond with the local electrical mains supply. Connect the Minor 200 to the power supply using the connection cable • provided. Do not connect to any other supply other than stated on the rating label, otherwise electrical and mechanical components can be damaged. -
Page 20: Start-Up And Commissioning
More detail information is displayed in our “TEST SIEVING MANUAL”. 4. Place the clamp plate on top of the sieve stack. 5. Raise the clamping latch lever upwards to expose the latch hook. Copyright © 2015 by Endecotts Ltd. - Page 21 7. Repeat previous action to release or increase tension in the strap as necessary to ensure a firm grip! The Endecotts Minor 200 sieve shaker is maintenance free other than keeping external surfaces clean. Cleaning - The machine can be cleaned with a soft damp cloth using a solution of water and a mild liquid detergent.
-
Page 22: Certificate Of Ce-Conformity
The CE-conformity of the Endecotts Test Sieve Shaker Type Minor 200 is assured herewith. In case of a modification to the machine not previously agreed with us as well as the use of not licensed spare parts and accessories this certificate will lose its validity. -
Page 23: Operating Instructions Octagon 200
1. Technical specifications 1. Technical specifications 4. Operating instructions: Octagon 200 Copyright © 2015 by Endecotts Ltd. -
Page 24: Technical Specifications
Do not make any changes to the machine and use only spare parts and accessories approved by Endecotts Ltd. The declaration of conformity to the European directives by Endecotts will otherwise lose its validity. Furthermore this will result in the loss of any kind of guarantee claims. -
Page 25: Specifications
(Operating conditions: Material to be sieved = quartz sand, grain size < 1mm, 5 sieves Amplitude = 1.5 mm) Example 2: Emission value related to workplace LpAeq = 67 dB (A) (Operating conditions: Material to be sieved = quartz sand, grain size < 1mm, 5 sieves Amplitude = 3 mm) Copyright © 2015 by Endecotts Ltd. -
Page 26: Controls And Functions
This should be done in conjunction with the diagram below and control panel description. MAINS POWER CONNECTION CLAMP PLATE MAINS SWITCH CLAMP HAND WHEELS LARGE PLAIN CLAMP WASHERS SIEVE STACK ROUND CLAMP RODS FUSE HOLDER CONTROL PANEL Copyright © 2015 by Endecotts Ltd. - Page 27 Stop the machine by pressing the STOP button “ “. 9 & 10 “˅“ and “˄” button reduces/increases the amplitude, in 10 steps 10 LED’s for the Power bar indicating amplitude setting in 10 steps Copyright © 2015 by Endecotts Ltd.
-
Page 28: Setting Up
Maximum relative humidity 80% at temperatures up to 31°C, with linear reduction down to 50% relative humidity at 40°C. At high atmospheric humidity the electrical and mechanical components may become damaged and the performance data can change to an unknown degree. Copyright © 2015 by Endecotts Ltd. -
Page 29: Transport Protection
Dismount the clamping unit. • Screw the hexagon screws (transit bolts) into the two holes on the bottom of the sieve • shaker and tighten with open ended spanner until the sieve plate is no longer movable. Copyright © 2015 by Endecotts Ltd. -
Page 30: Mount Sieve Clamping Unit
Screw the two hand wheels loosely onto the 20 mm threads; leave a gap of 5 mm between the large washer and the hand wheel face. Do not tighten right down at this point. Copyright © 2015 by Endecotts Ltd. -
Page 31: Operating Instructions
The side handle levers can be set vertically downwards by pressing on the Red button and pulling the handle outwards to release (figure 4). Turn the handle to a safe, convenient angle downwards and Copyright © 2015 by Endecotts Ltd. - Page 32 5. Set time, interval and amplitude. 6. Press START Damage may occur if the shaker is allowed to operate with a loose clamping plate. Copyright © 2015 by Endecotts Ltd.
-
Page 33: Wet Sieving
During wet sieving always operate your Sieve shaker connected to a mains socket protected by an FI protective (safety) switch. The water quantity added should always be dosed in such a way that the sieve surface is only just wetted. Copyright © 2015 by Endecotts Ltd. -
Page 34: Certificate Of Ce-Conformity
Authorised for the compilation of technical documents: Endecotts Ltd (technical documentation) The following records are held by Endecotts Ltd in the form of Technical Documentation: Detailed records of engineering development, construction plans, study (analysis) of the measures required for conformity assurance, analysis of the residual risks involved and operating instructions in due form according to the approved regulations for preparation of user information data. -
Page 35: Operating Instructions Octagon 200Cl
1. Technical specifications 1. Technical specifications 5. Operating instructions: Octagon 200CL Copyright © 2015 by Endecotts Ltd. -
Page 36: Technical Specifications
Several unique features have been developed specifically for this machine, including the ‘Closed Loop' amplitude control for ultimate reproducibility. The Octagon 200CL is designed to work with Endecotts SieveWare, the new software for easy evaluation and documentation of the sieving process. -
Page 37: Specifications
(Operating conditions: Material to be sieved = quartz sand, grain size < 1mm, 5 sieves Amplitude = 1.5 mm) Example 2: Emission value related to workplace LpAeq = 67 dB (A) (Operating conditions: Material to be sieved = quartz sand, grain size < 1mm, 5 sieves Amplitude = 3 mm) Copyright © 2015 by Endecotts Ltd. -
Page 38: Controls And Functions
This should be done in conjunction with the diagram below and control panel description. MAINS POWER CONNECTION CLAMP PLATE MAINS SWITCH SERIAL CONNECTION CLAMP HAND WHEELS LARGE PLAIN CLAMP WASHERS SIEVE STACK ROUND CLAMP RODS FUSE HOLDER CONTROL PANEL Copyright © 2015 by Endecotts Ltd. - Page 39 Stop the machine by pressing the STOP button “ “. “˅“ and “˄” button reduces/increases the amplitude, 0.20 – 3.00mm, with digital 11 & 12 display Display amplitude shows the amplitude of 0.20 – 3.00mm Copyright © 2015 by Endecotts Ltd.
-
Page 40: Setting Up
Maximum relative humidity 80% at temperatures up to 31°C, with linear reduction down to 50% relative humidity at 40°C. At high atmospheric humidity the electrical and mechanical components may become damaged and the performance data can change to an unknown degree. Copyright © 2015 by Endecotts Ltd. -
Page 41: Transport Protection
Mount sieve clamping unit Fit one M12 nut onto each clamp rod selected for use, then screw the pair of clamp rods into the location plate and tighten the locknuts. Copyright © 2015 by Endecotts Ltd. - Page 42 Screw the two hand wheels loosely onto the 20mm threads; leave a gap of 5 mm between the large washer and the hand wheel face. Do not tighten right down at this point. Copyright © 2015 by Endecotts Ltd.
-
Page 43: Operating Instructions
The side handle levers can be set vertically downwards by pressing on the Red button and pulling the handle outwards to release (figure 4). Turn the handle to a safe, convenient angle downwards and Copyright © 2015 by Endecotts Ltd. - Page 44 The locking side handle levers and clamping hand wheels must be tightened sufficiently to ensure that the sieves and receiver are clamped securely during operation. Set time, interval and amplitude Press START Damage may occur if the shaker is allowed to operate with a loose clamping plate. Copyright © 2015 by Endecotts Ltd.
-
Page 45: Wet Sieving
During wet sieving always operate your Sieve shaker connected to a mains socket protected by an FI protective (safety) switch. The water quantity added should always be dosed in such a way that the sieve surface is only just wetted. Copyright © 2015 by Endecotts Ltd. -
Page 46: Certificate Of Ce-Conformity
Authorised for the compilation of technical documents: Endecotts Ltd (technical documentation) The following records are held by Endecotts Ltd in the form of Technical Documentation: Detailed records of engineering development, construction plans, study (analysis) of the measures required for conformity assurance, analysis of the residual risks involved and operating instructions in due form according to the approved regulations for preparation of user information data. -
Page 47: Operating Instructions Air Sizer 200
1. Technical specifications 1. Technical specifications 6. Operating instructions: Air Sizer 200 Copyright © 2015 by Endecotts Ltd. -
Page 48: Technical Specifications
Wide range voltage supply Can reduce the average sieving times in samples with a high fine fraction • Variable vacuum control • The Air Sizer 200 is not recommended for any wet sieving operations! Copyright © 2015 by Endecotts Ltd. -
Page 49: Specifications
Clamping device Model bench top Protection code IP 40 Electrical supply 100 - 240V 50/60 Hz Power connection 1-phase W x H x D 430 x 235 x 435 mm Net weight 14 kg Standards Copyright © 2015 by Endecotts Ltd. -
Page 50: Controls And Functions
Operators should be familiar with and fully understand the controls and indicators before operating this machine. MAINS POWER MAINS SWITCH CONNECTION PLEXIGLASS LID FOR AIR JET SIEVING TEST SIEVE Electrical Connection to vacuum cleaner AIR OUTLET CHANNEL NOZZLE COMPARTMENT CONTROL PANEL COVER BASE Copyright © 2015 by Endecotts Ltd. - Page 51 “˅“ and “˄” button reduces/increases the sieving time, 00:10 – 99:50 min □ Stop the machine by pressing the STOP button “ “. 8 & 9 “˅“ and “˄” button reduces/increases the rpm, 5-55rpm, with digital display Display speed shows the speed of 5-55rpm Copyright © 2015 by Endecotts Ltd.
-
Page 52: Setting Up
If the power of the Air sizer 200 is switched “ON”, the display LED lights up. Process Timer • The process timer is a digital 00:10-99:50 minute timer. Operating periods are increased by pressing the “˄” button and decreased by pressing the “˅“ button. Copyright © 2015 by Endecotts Ltd. -
Page 53: Start-Up And Commissioning
Position the Air Sizer 200 on a level, rigid and robust bench, suitable for the operation of the Air Sizer. Being placed on a level surface ensures symmetrical distribution of the sample over the sieve, during operation. Copyright © 2015 by Endecotts Ltd. -
Page 54: Operating Instructions
Any caking that has built up during the sieving process is knocked off the inside of the lid by means of the soft-faced mallet. Tap lightly, striking the centre of the knob as far as possible. Copyright © 2015 by Endecotts Ltd. -
Page 55: Use Of The Machine For The Intended Purpose
The Air Sizer 200 itself is constructed in a manner that prevents any significant development of noise. The noise characteristics of the connected industrial vacuum cleaner depend on the set suction force and suction load. Copyright © 2015 by Endecotts Ltd. - Page 56 This device may not be operated with compressed air. • The Air Sizer 200 can be operated only with a suction extractor, such as for example a vacuum cleaner. Copyright © 2015 by Endecotts Ltd.
-
Page 57: Negative Pressure
Switch the device on by pressing the on/off switch at the back. • set the sieving parameters you want. • Put the test sieve with the sample onto the nozzle compartment. • Place the lid on the sieve. Copyright © 2015 by Endecotts Ltd. -
Page 58: Filter (Option)
Clean the air outlet channel regularly using a brush to remove any deposits. Vacuum cleaner – changing the vacuum cleaner bag • Change the vacuum cleaner bag or empty the dust container on your vacuum cleaner • regularly as required. Copyright © 2015 by Endecotts Ltd. - Page 59 • the sieve cover is attached. DROP IN VACUUM Check whether • the sieve cover is attached; • the suction hose has been connected; • the vacuum cleaner bag is full. Copyright © 2015 by Endecotts Ltd.
-
Page 60: Certificate Of Ce-Conformity
The CE-conformity of the Endecotts Analytical Sieve Shaker Type Air Sizer 200 is assured herewith. In case of a modification to the machine not previously agreed with us as well as the use of not licensed spare parts and accessories this certificate will lose its validity. -
Page 61: Operating Instructions Efl 300
1. Technical specifications 1. Technical specifications 7. Operating instructions: EFL 300 Copyright © 2015 by Endecotts Ltd. -
Page 62: Technical Specifications
Do not make any changes to the machine and use only spare parts and accessories approved by Endecotts Ltd. The declaration of conformity to the European directives by Endecotts will otherwise lose its validity. Furthermore this will result in the loss of any kind of guarantee claims. -
Page 63: Specifications
(Operating conditions: Material to be sieved = quartz sand, grain size < 1mm, 5 sieves Amplitude = 1.5 mm) Example 2: Emission value related to workplace LpAeq = 67 dB (A) (Operating conditions: Material to be sieved = quartz sand, grain size < 1mm, 5 sieves Amplitude = 3 mm) Copyright © 2015 by Endecotts Ltd. -
Page 64: Controls And Functions
This should be done in conjunction with the diagram below and control panel description. CLAMP PLATE CLAMP HAND WHEELS LARGE PLAIN CLAMP WASHERS SIEVE STACK ROUND CLAMP RODS REMOVABLE CONTROL BOX MAINS POWER FUSE HOLDER CONNECTION INTERFACE FOR MAINS SWITCH CONTROL BOX Copyright © 2015 by Endecotts Ltd. - Page 65 Stop the machine by pressing the STOP button “ “. 9 & 10 “˅“ and “˄” button reduces/increases the amplitude, in 10 steps 10 LED’s for the Power bar indicating amplitude setting in 10 steps Copyright © 2015 by Endecotts Ltd.
-
Page 66: Setting Up
Maximum relative humidity 80% at temperatures up to 31°C, with linear reduction down to 50% relative humidity at 40°C. At high atmospheric humidity the electrical and mechanical components may become damaged and the performance data can change to an unknown degree. Copyright © 2015 by Endecotts Ltd. -
Page 67: Transport Protection
- Use 4 sufficiently long lifting straps. - Observe the minimum distance between the device and the lifting gear. IMPORTANT If the machine is operated with the transit bolts, or is transported without transit bolts, mechanical components may become damaged. Copyright © 2015 by Endecotts Ltd. - Page 68 Dismount the clamping unit. • Screw the hexagon screws (transit bolts) into the two holes on the bottom of the sieve • shaker and tighten with open ended spanner until the sieve plate is no longer movable. Copyright © 2015 by Endecotts Ltd.
-
Page 69: Mount Sieve Clamping Unit
Screw the two hand wheels loosely onto the 20mm threads; leave a gap of 5 mm between the large washer and the hand wheel face. Do not tighten right down at this point. Copyright © 2015 by Endecotts Ltd. -
Page 70: Operating Instructions
Ensure that the clamping hand wheels at the top (figure 2) are loose and the locking assemblies are fully pushed down. There should be a 5mm gap between the large plain washer and the face of the hand wheel. Copyright © 2015 by Endecotts Ltd. - Page 71 The locking side handle levers and clamping hand wheels must be tightened sufficiently to ensure that the sieves and receiver are clamped securely during operation. 5. Set time and amplitude. 6. Press START Damage may occur if the shaker is allowed to operate with a loose clamping plate. Copyright © 2015 by Endecotts Ltd.
-
Page 72: Wet Sieving
During wet sieving always operate your Sieve shaker connected to a mains socket protected by an FI protective (safety) switch. The water quantity added should always be dosed in such a way that the sieve surface is only just wetted. Copyright © 2015 by Endecotts Ltd. -
Page 73: Certificate Of Ce-Conformity
Authorised for the compilation of technical documents: Endecotts Ltd (technical documentation) The following records are held by Endecotts Ltd in the form of Technical Documentation: Detailed records of engineering development, construction plans, study (analysis) of the measures required for conformity assurance, analysis of the residual risks involved and operating instructions in due form according to the approved regulations for preparation of user information data. - Page 74 1. Setting up Copyright © 2015 by Endecotts Ltd.
-
Page 75: Operating Instructions Titan 450
1. Technical specifications 1. Technical specifications 8. Operating instructions: Titan 450 Copyright © 2015 by Endecotts Ltd. -
Page 76: Technical Specifications
Titan 450 an even better machine than its predecessor. It retains its place as Endecotts' most powerful sieve shaker. It is built for large sieve diameters and can now take up to 7 test sieves in 450 mm or in 18” diameter test sieves. -
Page 77: Specifications
(Operating conditions: Material to be sieved = quartz sand, grain size < 1mm, 5 sieves Amplitude = 1.5 mm) Example 2: Emission value related to workplace LpAeq = 67 dB (A) (Operating conditions: Material to be sieved = quartz sand, grain size < 1mm, 5 sieves Amplitude = 3 mm) Copyright © 2015 by Endecotts Ltd. -
Page 78: Controls And Functions
This should be done in conjunction with the diagram below and control panel description. CLAMP PLATE CLAMP HAND WHEELS LARGE PLAIN CLAMP WASHERS SIEVE STACK REMOVABLE CONTROL BOX ROUND CLAMP RODS MAINS POWER CONNECTION FUSE HOLDER INTERFACE FOR MAINS SWITCH CONTROL BOX Copyright © 2015 by Endecotts Ltd. - Page 79 Stop the machine by pressing the STOP button “ “. 9 & 10 “˅“ and “˄” button reduces/increases the amplitude, in 10 steps 10 LED’s for the Power bar indicating amplitude setting in 10 steps Copyright © 2015 by Endecotts Ltd.
-
Page 80: Setting Up
Maximum relative humidity 80% at temperatures up to 31°C, with linear reduction down to 50% relative humidity at 40°C. At high atmospheric humidity the electrical and mechanical components may become damaged and the performance data can change to an unknown degree. Copyright © 2015 by Endecotts Ltd. -
Page 81: Transport Protection
- Use 4 sufficiently long lifting straps. - Observe the minimum distance between the device and the lifting gear. IMPORTANT If the machine is operated with the transit bolts, or is transported without transit bolts, mechanical components may become damaged. Copyright © 2015 by Endecotts Ltd. - Page 82 Dismount the clamping unit. • Screw the hexagon screws (transit bolts) into the two holes on the bottom of the sieve • shaker and tighten with open ended spanner until the sieve plate is no longer movable. Copyright © 2015 by Endecotts Ltd.
-
Page 83: Mount Sieve Clamping Unit
1. Technical specifications 1. Technical specifications Mount sieve clamping unit Fit one M30 nut onto each clamp rod selected for use, then screw the pair of clamp rods into the location plate and tighten the locknuts. Copyright © 2015 by Endecotts Ltd. -
Page 84: Operating Instructions
Screw the clamp hand wheels down evenly until the sieve stack is properly clamped. Damage may occur if the shaker is allowed to operate with a loose clamping plate. 5. Set time and amplitude. 6. Press START Copyright © 2015 by Endecotts Ltd. -
Page 85: Wet Sieving
During wet sieving always operate your Sieve shaker connected to a mains socket protected by an FI protective (safety) switch. The water quantity added should always be dosed in such a way that the sieve surface is only just wetted. Copyright © 2015 by Endecotts Ltd. -
Page 86: Certificate Of Ce-Conformity
Authorised for the compilation of technical documents: Endecotts Ltd (technical documentation) The following records are held by Endecotts Ltd in the form of Technical Documentation: Detailed records of engineering development, construction plans, study (analysis) of the measures required for conformity assurance, analysis of the residual risks involved and operating instructions in due form according to the approved regulations for preparation of user information data. -
Page 87: General Information
Re-Examination Service Used sieves are examined and inspected in accordance with the appropriate specification. Complying sieves are issued with a Compliance, Inspection or Calibration Certificate, as requested by the customer. Copyright © 2015 by Endecotts Ltd. - Page 88 1. Setting up Copyright © 2015 by Endecotts Ltd.
-
Page 89: Evaluation Software: Sieveware
Complex transformation into charts and tables • Data link to different measurement instruments • Automatic detection and configuration of common analytical scales • • Comprehensive data export Comprehensive help texts and detailed manual • Copyright © 2015 by Endecotts Ltd. -
Page 90: Specifications
Cumulative throughput or residual values, distribution density and histograms can be included in the standard particle size distributions. 4. Data export All measured data can be printed, saved and exported as tables and charts. Copyright © 2015 by Endecotts Ltd. - Page 92 Endecotts Ltd. 9 Lombard Road London, SW19 3UP United Kingdom Telephone: +44 (0)20 8542 8121 Telephone: +44 (0)20 8542 8121 Telephone: +44 (0)20 8542 8121 Telephone: +44 (0)20 8542 8121 Fax: +44 (0)20 8543 6629 Fax: Fax: Fax: +44 (0)20 8543 6629...
Need help?
Do you have a question about the Minor 200 and is the answer not in the manual?
Questions and answers