Broan HRV90H Series Installation Instructions Manual
Hide thumbs
Also See for HRV90H Series:
- Installation instructions manual (26 pages) ,
- Installation instructions manual (54 pages)
Table of Contents
Advertisement
Available languages
Available languages
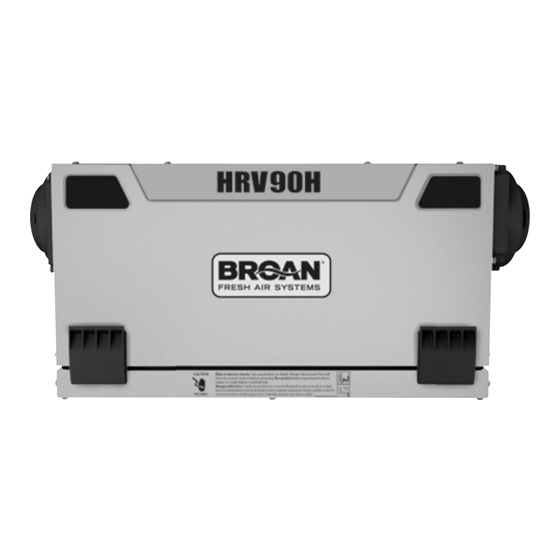
Model no.: HRV90HT
(HRV with top ports)
VB0082
Model no.: ERV90HCT
(ERV with top ports)
VB0080
INSTALLATION INSTRUCTIONS
HRV90H AND ERV90HC
!
RESIDENTIAL USE ONLY
READ AND SAVE THESE INSTRUCTIONS
Model no.: HRV90HS
(HRV with side ports)
VB0081
Model no.: ERV90HCS
(ERV with side ports)
VB0079
!
06010C rev. 11
Advertisement
Chapters
Table of Contents

Subscribe to Our Youtube Channel
Related Manuals for Broan HRV90H Series


Summary of Contents for Broan HRV90H Series
- Page 1 INSTALLATION INSTRUCTIONS HRV90H AND ERV90HC Model no.: HRV90HT Model no.: HRV90HS (HRV with top ports) (HRV with side ports) VB0082 VB0081 Model no.: ERV90HCT Model no.: ERV90HCS (ERV with top ports) (ERV with side ports) VB0080 VB0079 RESIDENTIAL USE ONLY READ AND SAVE THESE INSTRUCTIONS 06010C rev.
- Page 2 ABOUT THIS MANUAL Because of the large amount of models covered by this publication, the illustrations are typical ones. Some details of your unit may be slightly different than the ones shown. Please take note that this manual uses the following symbols to emphasize particular information: WARNING Identifies an instruction which, if not followed, might cause serious personal injuries including possibility of death.
-
Page 3: Table Of Contents
TABLE OF CONTENTS 1. T ..........................4-6 ECHNICAL 1.1 A ) ........................4 ISTRIBUTION ORMAL PERATION 1.2 A ) .....................4 ISTRIBUTION ECIRCULATION OR EFROST 1.3 S ..............................4 PECIFICATIONS 1.4 P ............................5 ERFORMANCE HARTS 1.5 D .................................6 IMENSIONS 1.6 C ........................6 ONTROLS AND INKAGE OSSIBILITY 2. -
Page 4: Technical Data
TECHNICAL DATA ISTRIBUTION ORMAL PERATION XHAUST AIR XHAUST AIR RESH AIR RESH AIR FROM BUILDING FROM BUILDING FROM OUTSIDE FROM OUTSIDE RESH AIR RESH AIR XHAUST AIR XHAUST AIR TO BUILDING TO BUILDING TO OUTSIDE TO OUTSIDE VF0039 VF0038 ISTRIBUTION ECIRCULATION OR EFROST XHAUST AIR... -
Page 5: Performance Charts
TECHNICAL DATA ( ’ CONT ERFORMANCE HARTS 1.4.1 HRV U NITS ENTILATION ERFORMANCE NERGY ERFORMANCE UPPLY OWER ENSIBLE PPARENT ATENT ECOVERY ROSS XTERNAL UPPLY EMPERATURE ONSUMED ECOVERY ENSIBLE OISTURE TATIC RESSURE UPPLY XHAUST °C °F WATTS FFICIENCY FFECTIVENESS RANSFER EATING 0.01 64 109 0.01... -
Page 6: Dimensions
TECHNICAL DATA ( ’ CONT IMENSIONS 1.5.1 D IMENSIONS FOR ORTS ON IDES NITS 27 / ” (688 mm) ” (503 mm) 4” (102 mm) 22 / ” (574 mm) 12 / ” 6” 13¾” (310 mm) (152 mm) (349 mm) 2”... -
Page 7: Typical Installations
TYPICAL INSTALLATIONS Installations may vary according to the type of unit and the ports configuration (top or sides). Use the following illustrations as guidelines to help you decide on how the unit will be installed. All the units should be hung from the joists. In every case, bathroom fans and a range hood should be used to exhaust stale air. -
Page 8: Erv Units Only
TYPICAL INSTALLATIONS ( ’ CONT ERV U NSTALLATION FOR NITS 2.4.1 G EOGRAPHICAL OCATION The ERV units are created to meet specific requirements related to geographical locations. Take a look at the map below; the shaded area shows the limits where the ERV unit can be installed. However, there is no geographical limitation for installing an HRV unit. YELLOWKNIFE HAY RIVER WHITEHORSE... -
Page 9: Installation
INSTALLATION NSPECT THE ONTENTS OF THE • Inspect the exterior of the unit for shipping damage. Ensure that there is no damage to the door, door latches, power cord, etc. • Remove and discard both transport brackets (A) and open the door. Discard the styrofoam fillers (ERV units only) and remove the hardware kit from the unit. -
Page 10: How To Hang The Unit
INSTALLATION ( ’ CONT OW TO ANG THE Hang the unit with the 4 chains, hooks and springs provided. CAUTION Make sure the unit is level. VD0185 VD0184 If there is not enough space on top of the unit, slightly bend the hooks and install them lower on the unit. - Page 11 INSTALLATION ( ’ CONT ’ NSTALLING THE UCTWORK AND EGISTERS CONT 3.6.2 C 2.2) ENTRAL OINT YSTEM AS ILLUSTRATED IN ECTION Stale air exhaust ductwork: Same as for Fully Ducted System, described on point 3.6.1 Fresh air distribution ductwork: WARNING When performing duct connections, always use approved tools and materials.
- Page 12 INSTALLATION ( ’ CONT ’ NSTALLING THE UCTWORK AND EGISTERS CONT 3.6.3 S 2.3) IMPLIFIED NSTALLATION AS ILLUSTRATED IN ECTION WARNING When performing duct connections, always use approved tools and materials. Respect all corresponding laws and/or safety regulations. Please refer to your local building code. CAUTION When performing duct connections to the furnace supply duct, this duct must be sized to support the additional airflow produced by the HRV/ERV.
-
Page 13: Connecting The Ducts To The Unit
INSTALLATION ( ’ CONT ONNECTING THE UCTS TO THE Insulated flexible ducts: Use the following procedure for connecting the insulated flexible ducts to the port of the unit (Exhaust air to outside and Fresh air from outside ports). CAUTION Make sure the balancing dampers are set to their appropriate position before connecting the ducts to the ports. See Section 3.3. VJ0042 VJ0043 VJ0041... -
Page 14: Installing The Tandem ® Transition Kit
INSTALLATION ( ’ CONT NSTALLING THE ANDEM RANSITION CONT 3.8.1 C ONNECTION TO TANDEM RANSITION 1. For each duct, pull back the insulation to expose the interior flexible duct. 2. Connect the interior flexible duct to the smaller part of the Tandem Transition (5” oval) using a tie wrap. 3. -
Page 15: Installing 2 Exterior Hoods
INSTALLATION ( ’ CONT NSTALLING THE ANDEM RANSITION CONT 3.8.4 C ONNECTING ANDEM RANSITION TO THE XTERIOR CONT MAS TREE PIN 2. Join the end of the Tandem Transition to the rear of the exterior backplate. Secure with 2 Xmas tree pins and seal properly with duct tape. CAUTION The exterior backplate must be installed with the word “TOP”... -
Page 16: Controls
CONTROLS NTEGRATED ONTROL All units are equipped with an integrated control, located under the unit, in front of the electrical compartment. Use the push button (1) to control the unit. The LED (2) will then WARNING AVERTISSEMENT Risk of electric shock. Before performing Danger d’électrocution. -
Page 17: Electrical Connection To Optional Wall Controls
CONTROLS ( ’ CONT LECTRICAL ONNECTION TO PTIONAL ONTROLS CONT 4.2.1 E VT4W M LECTRICAL ONNECTION TO ONTROL VT4W MAIN WALL CONTROL NO C NC I OC OL Y R G B REAR VIEW NOTE: On some older wall control model, the left terminal is identified OC instead of Y;... -
Page 18: Ptional Uxiliary All Ontrols Peration
CONTROLS ( ’ CONT PTIONAL UXILIARY ONTROLS PERATION 4.4.1 20-M INUTE IGHTED UTTON IMER Set the push-button timer to ON. The fan motors will then operate at high speed for 20 minutes and the indicator will light up. To stop activation, push one time; the unit will then get back to previous selection. VC0084 4.4.2 60-M INUTE... -
Page 19: Wiring Diagram
WIRING DIAGRAM WARNING • Risk of electric shocks. Before performing any maintenance or servicing, always disconnect the unit from its power source. • This product is equipped with an overload protection (fuse). A blown fuse indicates an overload or a short-circuit situation. If the fuse blows, unplug the product and check the polarity and voltage output from the outlet. -
Page 20: Balancing The Unit
BALANCING THE UNIT To avoid balancing, the difference between stale air ducts total length and fresh air ducts total length must not exceed 50 ft. However, even if the stale air ducts and fresh air ducts lengths are almost equal, your local building codes may require balancing the unit. If the unit does not need to be balanced, shut all the pressure taps (located on the unit door) with the small plastic plugs included in the hardware kit. -
Page 21: Connecting The Drain (Hrv Units Only )
CONNECTING THE DRAIN ( HRV UNITS ONLY VD0181 From the inner side of the unit door, using the provided drain tube, punch out both drain VO0091 holes (A). In order to keep the drain pan intact, hand tighten the 2 plastic drain fittings to the unit door using the gaskets and nuts as shown. -
Page 22: Maintenance
MAINTENANCE WARNING Risk of electric shocks. Before performing any maintenance or servicing, always disconnect the unit from its power source. Since this guide covers both HRV and ERV units, top and side ports, the illustrations shown in the maintenance procedures are typical. The following procedures applies for both HRV and ERV units. -
Page 23: Iannual Aintenance
MAINTENANCE NNUAL AINTENANCE CONT 4. Clean the inside walls of the unit with a clean damp cloth, then wipe with a clean dry one. 5. Wash the 2 core filters under hot water with mild soap. Rinse thoroughly and let dry completely before reinstalling on the core. 6. -
Page 24: 10. Service Parts
Any third party replacement part used may cause serious damage and drastically reduce the performance level of your unit, which will result in premature failing. Also, Broan recommends to contact a certified service depot for all replacement parts and repairs. -
Page 25: 11. Troubleshooting
11. TROUBLESHOOTING If the unit does not work properly, reset the unit by unplugging it for one minute and then replug it. If it still not working properly, refer to table below. If the integrated control LED of the unit is flashing, this means the unit sensors detected a problem. See the table below to know where the problem occurs on the unit. - Page 26 11. TROUBLESHOOTING ( CONT ROBLEMS OSSIBLE CAUSES OU SOULD TRY THIS A. The supply motor does • The supply motor may be defective. • Plug supply motor to J5 connector and exhaust motor to not work, but exhaust J4 connector. If the integrated control LED flashes RED, motor works on both the supply motor is defective.
- Page 27 MANUAL DE INSTALACIÓN MODELOS HRV90H Y ERV90HC Modelo n.°: HRV90HT Modelo n.°: HRV90HS (HRV con aberturas (HRV con aberturas laterales) en la parte superior) VB0082 VB0081 Modelo n.°: ERV90HCT Modelo n.°: ERV90HCS (ERV con aberturas (ERV con aberturas laterales) en la parte superior) VB0080 VB0079 SÓLO PARA USO RESIDENCIAL...
- Page 28 ACERCA DE ESTE MANUAL Dado el gran número de modelos de los que trata este manual, las ilustraciones son de carácter general. Algunos detalles de su aparato pueden ser ligeramente distinos de los que se muestran aquí. Tenga en cuenta que en este manual se emplean los siguientes símbolos cuando se quiere insistir en una información determinada: ADVERTENCIA Se refiere a una instrucción que, de no siguirse, podría causar heridas corporales graves e incluso la muerte.
- Page 29 ÍNDICE 1. D ..........................4-6 ATOS TÉCNICOS 1.1 D ) .....................4 ISTRIBUCIÓN DEL AIRE FUNCIONAMIENTO NORMAL 1.2 D ) ..................4 ISTRIBUCIÓN DEL AIRE MODO RECIRCULACIÓN O DESHIELO 1.3 C í ............................4 ARACTER STICAS TÉCNICAS 1.4 D ...........................5 IAGRAMAS DE RENDIMIENTO 1.5 D ................................6 IMENSIONES...
-
Page 30: Datos Técnicos
DATOS TÉCNICOS ISTRIBUCIÓN DEL AIRE FUNCIONAMIENTO NORMAL IRE DE SALIDA IRE DE SALIDA IRE PURO IRE PURO DEL EDIFICIO DEL EDIFICIO DEL EXTERIOR DEL EXTERIOR IRE PURO DE IRE DE IRE PURO DE IRE DE ENTRADA EN SALIDA ENTRADA EN SALIDA EL EDIFICIO EL EDIFICIO... -
Page 31: Diagramas De Rendimiento
DATOS TÉCNICOS ( CONTINUACIÓN IAGRAMAS DE RENDIMIENTO 1.4.1 A HRV ( PARATOS VENTILADORES DE TERMOR RECUPERACIÓN ENDIMIENTO DE VENTILACIÓN ENDIMIENTO ENERGÉTICO EMPERATURA ORRIENTE NETA FFICIENCA DE FFICACIA ECUPERACIÓN ORRIENTE BRUTA DE AIRE RESIÓN ORRIENTE NETA DE ATIOS DE ENTRADA DE AIRE RECUPERACIÓN SENSIBLE LATENTE... -
Page 32: Dimensiones
DATOS TÉCNICOS ( CONTINUACIÓN IMENSIONES 1.5.1 D IMENSIONES DE LOS APARATOS CON ABERTURAS LATERALES 27 / ” (688 mm) ” (503 mm) 4” (102 mm) 22 / ” (574 mm) 12 / ” 6” 13¾” (310 mm) (152 mm) (349 mm) 2”... -
Page 33: Instalaciones Habituales
INSTALACIONES HABITUALES La instalación del aparato depende del tipo de aparato y de la ubicación de las aberturas (en la parte superior o laterales). Utilice las ilustraciones siguientes como referencias generales que le ayudarán a decidir la forma en que debe instalar el aparato. Todos los aparatos deberían colgarse de vigas. -
Page 34: Nstalación Para Aparatos
INSTALACIONES HABITUALES ( CONTINUACIÓN NSTALACIÓN PARA APARATOS ÚNICAMENTE 2.4.1 S ITUACIÓN GEOGRÁFICA Los aparatos ERV se han concebido para responder at exigencias concretas relacionadas con la situación geográfica. En el mapa de abajo la zona sombreada muestra los límites donde pueden instalarse los aparatos ERV. Sin embargo, no hay límites geográficos para instalar los aparatos HRV. -
Page 35: Instalación
INSTALACIÓN XAMEN DEL CONTENIDO DE LA CAJA • Examine el exterior del aparato para ver si hay daños debidos al envío. Compruebe que la puerta, los pestillos, el cable de alimentación, etc., no estén dañados. • Retire y deseche los 2 soportes de transporte (A) y abra la puerta. Deseche las piezas de renello de espuma de estireno (sólo en los aparatos ERV) y retire el conjunto de piezas del aparato. -
Page 36: Forma De Colgar El Aparato
INSTALACIÓN ( CONTINUACIÓN ORMA DE COLGAR EL APARATO Cuelgue el aparato con las 4 cadenas, ganchos y resortes con él.. CUIDADO Compruebe que el aparato esté a nivel. VD0185 VD0184 Si no hay espacio suficiente arriba del aparato, doble ligeramente los ganchos y instalarse en la parte baja del aparato. - Page 37 INSTALACIÓN ( CONTINUACIÓN NSTALACIÓN DE LOS TUBOS Y REGISTROS CONTINUACIÓN 3.6.2 S 2.2) ISTEMA DE VENTILACIÓN EN EL PUNTO DE ORIGEN COMO SE VE EN LA SECCIÓN Tubos de extracción de aire viciado Siga la misma indicaciones que cuando se trata de un sistema totalmente entubado, descrito en la sección 3.6.1. Tubos de distribución del aire puro: ADVERTENCIA Utilice siempre herramientas y materiales homologados para conectar los tubos.
-
Page 38: Instalación De Los Tubos Y Registros
INSTALACIÓN ( CONTINUACIÓN NSTALACIÓN DE LOS TUBOS Y REGISTROS CONTINUACIÓN 3.6.3 I 2.3) NSTALACIÓN SENCILLA COMO SE VE EN LA SECCIÓN ADVERTENCIA Utilice siempre herramientas y materiales homologados para conectar los tubos. Aténgase a todas las leyes y reglementos de seguridad correspondientes. -
Page 39: Conexión De Los Tubos Al Aparato
INSTALACIÓN ( CONTINUACIÓN ONEXIÓN DE LOS TUBOS AL APARATO Tubos flexibles aislados: Siga el método siguiente para conectar los tubos flexibles aislados a la abertura del aparato (aberturas Aire de salida hacia el exterior y Aire puro del exterior).. CUIDADO Verifique que los registros de equilibrio están en su posición adecuada antes de conectar los tubos a las aberturas. -
Page 40: Andem
INSTALACIÓN ( CONTINUACIÓN ® NSTALLACIÓN DEL CONJUNTO DE CAMBIO DE SECCIÓN ANDEM CONTINUACIÓN 3.8.1 C ONEXIÓN CON EL CAMBIO DE SECCIÓN RANSITION 1. Para cada tubo, tire hacia atrás el aislamiento para dejar a la vista el tubo flexible interior. 2. -
Page 41: Instalación De 2 Bocas Exteriores
INSTALACIÓN ( CONTINUACIÓN ® NSTALLACIÓN DEL CONJUNTO DE CAMBIO DE SECCIÓN ANDEM CONTINUACIÓN 3.8.4 C ONEXIÓN DEL CAMBIO DE SECCIÓN ANDEM A LA BOCA DOBLE EXTERIOR CONTINUACIÓN PASADOR DE ÁRBOL 2. Una el extremo del cambio de sección Tandem a la parte trasera de la placa DE CONEXIONES posterior exterior. -
Page 42: Controles
CONTROLES ONTROL INTEGRADO Todos los aparatos están equipados con un control integrado situado debajo del aparato, en la parte delantera del compartimente eléctrico. Utilice el bóton pulsador (1) para controlar WARNING AVERTISSEMENT el aparato. El diodo (2) le indicará el modo en el que funciona el aparato. Consulte la tabla Risk of electric shock. -
Page 43: Funcionamiento Del Control De Pared Principal Opcional Vt4W
CONTROLES ONEXIÓN ELÉCTRICA CON LOS CONTROLES DE PARED OPCIONALES CONTINUACIÓN 4.2.1 C VT4W ONEXIÓN ELÉCTRICA CON UN CONTROL DE PARED PRINCIPAL VISTA POSTERIOR DEL CONTROL DE PARED NO C NC I OC OL Y R G B PRINCIPAL VT4W NOTA: En algunos controles más antiguos, el terminal de la izquierda este identificado OC en lugar de Y, conectar este terminal a Y en el conector de terminales. -
Page 44: Uncionamiento De Los Controles De Pared Auxiliares Opcionales
CONTROLES ( CONTINUACIÓN UNCIONAMIENTO DE LOS CONTROLES DE PARED AUXILIARES OPCIONALES 4.4.1 T EMPORIZADOR DE BOTÓN PULSADOR ILUMINADO DE MINUTOS Ponga el temporizador de botón pulsador en posición ON (encendido). Los motores de los ventiladores funcionarán a alta velocidad durante 20 minutos y el indicador se encenderá. Para desactivar el temporizador, apriete una vez;... -
Page 45: Diagrama De Cableados
DIAGRAMA DE CABLEADOS ADVERTENCIA • Riesgo de choque eléctrico. Desenchufe el aparato antes de efectuar cualquier reparación o actividad de mantenimiento. • El aparato está equipado con una protección contra la sobrecarga (fusible). Un fusible quemado indica que se ha producido una sobrecarga o cortocircuito. -
Page 46: Equilibrado Del Aparato
EQUILIBRADO DEL APARATO Para evitar el equilibrado, la diferencia entre la longitud total de los tubos de aire viviado y la de los aire puro no debe ser superior a 50 pies. Sin embargo, auque la longitud de los tubos de aire viciado y la de los de aire puro sea casi la misma, sus códigos de construcción locales pueden exigir que se equilibre el aparato. -
Page 47: Conexión Del Desagüe
CONEXIÓN DEL DESAGÜE ( APARATOS ÚNICAMENTE VD0181 Perfore los dos agujeros de desagüe (A) en la parte interior de la puerta del aparato por VO0091 medio del tubo de desagüe.. Para no dañar el depósito de desagüe, apriete a mano los 2 empalmes de plástico de desagüe en la puerta del aparato utilizando para ello las juntas obturadoras y tuercas que se muestran.. -
Page 48: Mantenimiento
MANTENIMIENTO ADVERTENCIA Riesgo de choque eléctrico. Desenchufe el aparato antes de efectuar cualquier reparación o actividad de mantenimiento. Dado que esta guía cubre los aparatos HRV y ERV con aberturas laterales y en la parte superior, las ilustraciones de esta sección son de carácter general. -
Page 49: Mantenimiento Anual
MANTENIMIENTO ( CONTINUACIÓN ANTENIMIENTO SEMESTRAL CONTINUACIÓN 4. Limpie las paredes interiores del aparato con un trapo limpio y húmedo y séquelas son otro trapo limpio y seco. 5. Limpie los 2 filtros de espuma de la unidad con agua caliente y un jabón suave. Enjuáguelos cuidadosamente y deje que sequen completamente antes de volvert a instalarlos en la unidad central. -
Page 50: 10. Piezas
USTICIÓN DE PIEZAS Y REPARACIÓN Para que la unidad se conserve en buen estado, debe usar repuestos genuinos Broan únicamente. Estas piezas se han diseñado especialmente para cada unidad y se han fabricado conforme a las normas de certificación aplicables y un elevado nivel de seguridad. -
Page 51: 11. Solución De Problemas
11. SOLUCIÓN DE PROBLEMAS Si el aparato no funciona bien, reinícielo desenchufándolo durante un minuto y vuélvalo a enchufar. Si sigue sin funcionar bien, consulte la tabla de abajo. Si el diodo del control integrado del aparato parpadea es que los sensores han detectado un problema. Vea la tabla siguiente para saber dónde se ha producido dicho problema. - Page 52 11. SOLUCIÓN DE PROBLEMAS ( CONTINUACIÓN ROBLEMAS AUSAS POSIBLES EBERIA HACER ESTO A. El motor de alimentación • El motor de alimentación puede • Conecte el motor de alimentación con el conector J5 y el no funciona, pero el estar defectuoso. motor de extracción con el conector J4.
Need help?
Do you have a question about the HRV90H Series and is the answer not in the manual?
Questions and answers