Advertisement
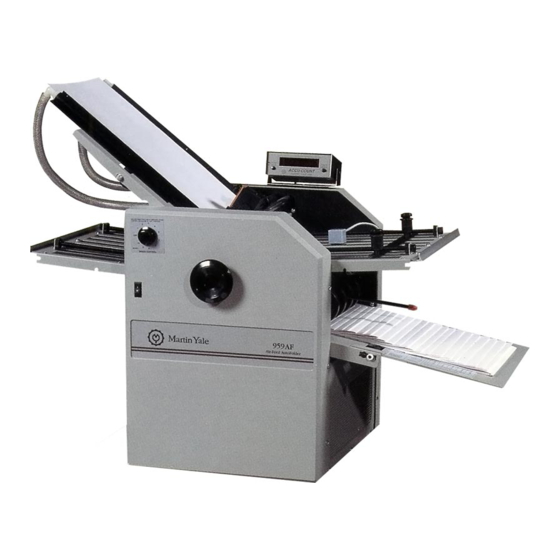
Model 959AF Air-Feed AutoFolder
Installation, Maintenance, & Operating Instructions
Specifications
Feed Speed . . . . . . . . . . . . . . . . . . . . .18,000 pcs. per hour*
Sheet Capacity . . . . . . . . . . . . . . . . . . . . . . . . . . .200 Sheets
Types of Folds . . . . . . . . . . . . . . .Letter, Half, Z, Double Half
. . . . . . . . . . . . . . . . . . . . . . . . . . . . . . . . .French, Baronial
Feeding Method . . . . . . . . . . . . . . . . . . . . . .Bottom Vacuum
Lightest Paper . . . . . . . . . . . . . . . . . . . . . . . . . . .16# (Bond)
Heaviest Paper . . . . . . . . . . . . . . . . . . . . . . . . . .70# (Bristol)
Max. Paper Size . . . . . . . . .20" x 14 1/16" (66.04 x 35.72cm)
Min. Paper Size . . . . . . . . . . . . . .2" x 3 1/4" (5.08 x 8.26 cm)
Max. Fold Length
First Fold . . . . . . . . . . . . . . . . . . . . . . . . . . .13" (33.02cm)
Second Fold . . . . . . . . . . . . . . . . . . . . . . . . .13" (33.02cm)
Min. Fold Length
First Fold . . . . . . . . . . . . . . . . . . . . . . . . . .1 1/2" (3.81cm)
Second Fold . . . . . . . . . . . . . . . . . . . . . . . .1 1/2" (3.81cm)
Electrical Specifications . . . . . . . . . . .115V 60 HZ (9.5 Amps)
UL CSA Approved . . . . . . . . . . . . . . . . . . . . . . . . . . . . . .Yes
Dimensions (Assembled) . . . . . . . . . . . .23"H X 23"W X41"D
Shipping Weight . . . . . . . . . . . . . . . . . . . . . . . . . . . . .220lbs
* 8 1/2 x 11 sheet of paper
17" Long Paper Maximum
Introduction
Thank you for selecting the Martin Yale Model 959AF Air-Feed AutoFolder. All components have been thoroughly inspected and
performance tested to provide you with the best folder value in its class. Before each machine is packed for shipment, it must
pass a critical performance test, including folding, scoring, and perforating. This folder can execute Half, Double Half, Zee,
French, Baronial, and custom folds within its paper size capacity, as well as Letter Folds (up to 17" paper). The machine can also
score, slit, and perforate separately, or while folding.
Please review this publication in its entirety before attempting to operate your folder. Thorough understanding of this information
will help eliminate most operator-associated errors and ensure years of trouble-free performance.
WARNING! Never connect power to the machine until you are ready to set up and operate the folder. This
machine contains moving parts. During setup, operation, and maintenance keep hands, hair, loose clothing, and
jewelry away from all moving parts. Serious bodily injury could result. Service, or disassembly of side covers
should only be attempted with the power disconnected and locked out. The AC outlet for this machine must be
near by and not blocked.
1.0 General . . . . . . . . . . . . . . . . . . . . . . . . . . . . . . . . Page 2
2.0 Nomenclature. . . . . . . . . . . . . . . . . . . . . . . . . . . . Page 2
3.0 Pre-Operation SetUp . . . . . . . . . . . . . . . . . . . . . . Page 2
4.0 Operation . . . . . . . . . . . . . . . . . . . . . . . . . . . . . . . Page 4
5.0 Maintenance. . . . . . . . . . . . . . . . . . . . . . . . . . . . . Page 11
6.0 Troubleshooting. . . . . . . . . . . . . . . . . . . . . . . . . . . . . . Page 15
Wiring Diagram . . . . . . . . . . . . . . . . . . . . . . . . . . . . . . . . . Page 16
Parts List. . . . . . . . . . . . . . . . . . . . . . . . . . . . . . . Pages 17, 20
Parts Diagram #1 . . . . . . . . . . . . . . . . . . . . . . . . Pages 18, 19
Parts Diagram #2 . . . . . . . . . . . . . . . . . . . . . . . . . . . . . . . . Page 20
Serial #
Table of Contents
Advertisement
Table of Contents

Related Manuals for Martin Yale 959AF


Summary of Contents for Martin Yale 959AF
-
Page 1: Table Of Contents
Introduction Thank you for selecting the Martin Yale Model 959AF Air-Feed AutoFolder. All components have been thoroughly inspected and performance tested to provide you with the best folder value in its class. Before each machine is packed for shipment, it must pass a critical performance test, including folding, scoring, and perforating. -
Page 2: General
NOTE: The folder weighs 130lbs(unassembled). Use a mechanical lifting device. Inspect the machine for signs of damage. If damage is apparent, call the freight carrier immediately, then call Martin Yale for instructions. The following items should be unpacked or installed onto the machine. - Page 3 To place the fold 3.4 Installing The Vinyl Air Hoses tables onto the Connect the vinyl air hose extending from the left main frame machine, slide the to the 90° fitting on the left paper guide. Likewise, connect the front slot opening of air hose extending from the right main frame to the 90°...
-
Page 4: Operation
3.11 Connecting Electrical Power NOTE: When aligning the sheet detector to the target marks, look straight down on the target marks and the edge of the paper. Do not look from an angle, or WARNING! Never connect power to the machine until you the alignment will not be correct. - Page 5 Fold the strip in half (1 3/4" x Place a 2" stack of the paper to be folded into an Martin Yale 3"). This strip is the correct thickness and dimension for setting Model 400 or Model 4200 Jogger.
- Page 6 The position of the fold 4.2.4 Setup Of The Feed Table Backstop table paper stop deter- The feed table backstop is a one inch angled aluminum fixture mines the location of each with a magnetic strip attached to one side. The feed table back- fold in the paper.
- Page 7 Section 4.2.3. Jog the paper to be The speed control is an SCR type control that converts alternat- processed on an Martin Yale Model 400 or Model 4200 Jogger, ing current (AC) to direct current (DC). The folding motor of or hand-jog.
- Page 8 Section 4.2.3. Jog the paper to be 5. Turn on the pump motor switch and with the hand wheel, processed on an Martin Yale Model 400 or 4200 Jogger, or hand manually feed the sheet through the folder until the marked jog.
- Page 9 For step 2, follow this procedure. lock each roller onto the flat part of the shaft. 1. Remove the first fold table and the stacking wheel assembly. 7. Manually feed the sheet out of the machine. 2. Disengage the scoring wheel backup hub by rotating the 8.
- Page 10 per-inch perforating wheel, and two rubber guide rollers on the 6. Set the scoring roller by loosening the set screw with the upper accessory shaft. On the lower shaft are two backup hubs, provided hex key wrench. Align the scoring roller(s) to the and two steel guide rollers.
-
Page 11: Maintenance
To clean the folding rollers, follow this procedure. 2. Jog a stack of paper on an Martin Yale Model 400 or Model 1. Remove the feed table, folding tables, the stacking wheel 4200 Jogger, or hand-jog. Jogging fluffs the paper, aligns the assembly, and the top roller cover. - Page 12 To correctly set the spring tension, loosen the screw in the set 2. Remove the speed control, pump motor switch, hand wheel, collar. Pull the collar away from the spring until there is no the circuit breaker, and the six right side cover mounting pressure on the block.
- Page 13 5.3.2 Paper Guide Alignment 2. Shorten the turnbuckle assembly by making 4 1/2 turns with the buckle and bring the locking nuts in contact with the The folder is now in a neutral position and ready to be adjusted buckle. Do not lock the nuts in position at this time. so sheets of paper enter correctly into the folding rollers.
- Page 14 CAUTION: Do not drop oil onto the rubber portion of the folding rollers. If oil is spilled on the rollers, 5.4 Clearing A Jam remove it immediately with Martin Yale Rubber Roller When the folder is set up correctly, jams are unlikely to occur Cleaner & Rejuvenator.
-
Page 15: Troubleshooting
5.6.2 The Vacuum And Air System 6.4 The Paper Wrinkles The pump motor, vacuum, and compressor pumps do not The vacuum may be set too high. Check the settings according require lubrication. to instructions in Sections 4.1, 4.2.8, and 4.5. The guide fingers may be set incorrectly. -
Page 16: Wiring Diagram
instructions in Sections 3.10 and 5.2.2. The air and vacuum set- tings may be set incorrectly. Check the settings according to instructions in Sections 4.1, 4.2.8, and 4.5. The ink on the fold- ed sheet may not be dry. Allow adequate drying time before attempting to fold. -
Page 17: Parts List
PARTS LIST Item # Part No. Qty. Description Item # Part No. Qty. Description M-O095015 Paper Guide Shaft M-S037347 Vacuum Gauge, 1/8 NPT W-O095238 R.H. Rod Clamp M-S013010 3/8 ID Flanged Bushing W-O095214 L.H. Rod Clamp W-O095294 Side Cover Mount Bracket (LH) W-O095215 Grip Plate W-S022019... -
Page 18: Parts Diagram #1
Parts Diagram #1... -
Page 20: Parts Diagram #2
PARTS LIST CONT. Item # Part No. Qty. Description Not Illustrated (cont.) W-O003064 Conveyor Idler Shaft M-S031060 Stack Wheel Support Spring M-O008011 Stacking Wheel Axle M-S010010 5100-62 Ext Retaining Ring W-A095064 Stacking Tray M-S013050 5/8 X 3/4 X 3/16 Bushing M-S024002 Conveyor Belt M-S002015...
Need help?
Do you have a question about the 959AF and is the answer not in the manual?
Questions and answers