Advertisement
Table of Contents
- 1 General Description
- 2 System Components
- 3 Receiver Controls and Connectors
- 4 Wearing the Bodypack Transmitter
- 5 Adjusting Levels
- 6 Adjusting Gain
- 7 Bodypack Transmitter
- 8 Handheld Transmitter
- 9 Single System Setup
- 10 Multiple System Setup
- 11 Locking and Unlocking Controls
- 12 Troubleshooting
- 13 Specifications
- 14 Licensing Information
- 15 Australia Warning for Wireless
- Download this manual
Advertisement
Table of Contents

Related Manuals for Shure PGXD Series


Summary of Contents for Shure PGXD Series
- Page 1 PGXD -- Wireless System Quick Start 1/21...
- Page 2 Shure Incorporated 2/21...
- Page 3 Shure Incorporated 3/21...
- Page 4 Shure Incorporated 4/21...
-
Page 5: General Description
General Description Offering uniquely tailored wireless solutions for vocalists, guitarists, and presenters, PGX-Digital combines the trusted legacy of Shure wired micro- phones with state-of-the-art, 24-bit digital wireless technology to deliver strong, clean RF performance. The result is wireless audio that sounds like wired, rock-steady RF signal even at extended distances, and plug-and- play setup and operation. -
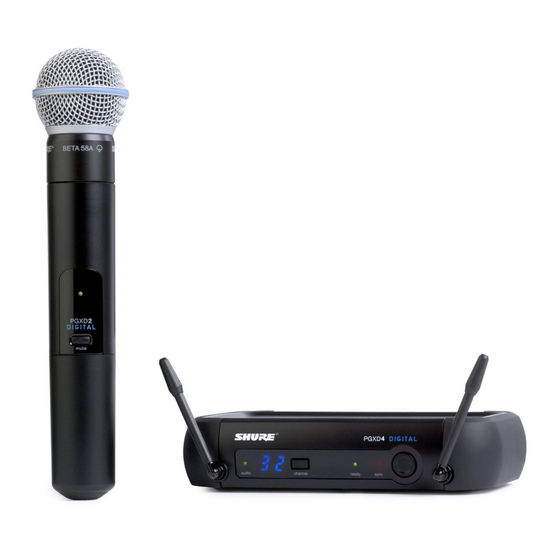
Page 6: Receiver Controls And Connectors
Shure Incorporated • 1/4” to mini 4-pin guitar cable (WA302) Receiver Controls and Connectors Front Panel 1. audio LED: Indicates strength of incoming audio signal: green for normal, amber for strong and red for clipping. 2. LED Screen: Displays group and channel setting. See "Single System Setup" for details. - Page 7 Shure Incorporated Transmitter Controls and Connectors ① Indicator LED: Displays battery level, mute, and IR transmission status (see table). ② Power/Mute Switch: Press to mute or unmute. Press and hold to power on or off. ③ Infrared (IR) port: Receives infrared beam to synchronize frequencies. When using multiple systems, only one transmitter IR port should be exposed at a time.
-
Page 8: Wearing The Bodypack Transmitter
Shure Incorporated LED Indicator Status Green Ready Flashing green Controls locked Amber Mute on Solid red Battery power low Flashing red Batteries dead (change batteries to power on trans- mitter) Rapidly flashing red IR transmission in process Flashing amber and red... -
Page 9: Adjusting Levels
Shure Incorporated Adjusting Levels Adjusting Gain For best audio quality, set transmitter gain so the audio LED on the receiver flickers green and amber during the performance. Decrease gain if the signal clips (LED turns red). The amber LED may appear to be red when viewed at an angle. For best results, monitor the LED from directly in front. -
Page 10: Handheld Transmitter
Shure Incorporated Handheld Transmitter Access the gain switch by unscrewing the head of the microphone. Use the tip of a pen or a small screwdriver to move the switch. • 0dB: For quiet to normal vocal performance. • -10dB: Use only if audio is distorted due to high vocal levels. -
Page 11: Single System Setup
Shure Incorporated Single System Setup 1. Scan: Use the scan feature on the receiver to find a clear channel. 1. LED screen displays current channel 11/21... -
Page 12: Multiple System Setup
Shure Incorporated 2. Press channel button to scan for a clear channel 3. System scans for the channel with the least interference 2. Synchronize: Synchronize the transmitter to the receiver by aligning the infrared (IR) ports and pressing the sync button. Make sure the IR ports are closely aligned. After a successful sync, the transmitter LED mo- mentarily flashes red and the receiver ready light illuminates. - Page 13 Shure Incorporated 4. Turn on the first transmitter and sync it to the receiver. 5. Repeat for each system. After syncing each transmitter, leave it on so that scans from the other receivers will not select that channel. ◦ Be sure only one transmitter IR port is exposed when synchronizing each system.
-
Page 14: Locking And Unlocking Controls
Replace transmitter batteries LED screen shows dash and value Error code displayed. Contact your Shure reseller for assistance. Transmitter LED flashes red for 7 Transmitter and receiver incompat- seconds after attempting to sync ible. Contact your Shure reseller for assistance. 14/21... -
Page 15: Specifications
Cannot turn transmitter on Transmitter LED slowly flashing Replace transmitter batteries Transmitter LED rapidly flashing Contact your Shure reseller for as- sistance Specifications Working Range Line of Sight 60m (200 ft) RF Carrier Range 902–928 MHz 915–928 MHz... - Page 16 Shure Incorporated Audio Frequency Response 20 to 20,000 Hz System Gain PGXD1 6.35 mm Connector 0 dB at minimum gain setting XLR output -12.5 dB at minimum gain setting PGXD2 XLR output: -54.5 dBV/Pa at –10 dB gain setting Total Harmonic Distortion <0.02%, A-weighted, typical...
- Page 17 Shure Incorporated audio On instrument adapter cable, pin 4 floats Dimensions 108 mm x 64 mm x 19 mm Weight 128 g (4.5 oz.) (without batteries) Housing Molded Polycarbonate Case Power Requirements 2 AA size alkaline or rechargeable batteries Battery Life...
- Page 18 Shure Incorporated Dimensions 108 mm x 64 mm x 19 mm Weight 128 g (4.5 oz.) (without batteries) Housing Molded Polycarbonate Case Power Requirements 2 AA size alkaline or rechargeable batteries Battery Life up to 10 hours Dimensions 40 mm x 181 mm x 104 mm Weight 289 g (10.2 oz.)
- Page 19 Shure Incorporated Maximum Audio Output Level XLR connector -2.5 dBV 6.35 mm Connector +10 dBV Impedance 50 Ω 6.35 mm Connector 50 Ω Pin Assignments 1=ground, 2=audio, 3=no audio 6.35 mm (1/4") TRS Tip=audio, Ring=no audio, Sleeve=ground XLR Output 19/21...
-
Page 20: Licensing Information
Changes or modifications not expressly approved by Shure Incorporated could void your authority to operate the equipment. Licensing of Shure wireless microphone equipment is the user’s re- sponsibility, and licensability depends on the user’s classification and application, and on the selected frequency. -
Page 21: Australia Warning For Wireless
Shure Incorporated Note: EMC conformance testing is based on the use of supplied and recommended cable types. The use of other cable types may degrade EMC performance. Changes or modifications not expressly approved by the manufacturer could void the user’s authority to operate the equipment.
Need help?
Do you have a question about the PGXD Series and is the answer not in the manual?
Questions and answers