Table of Contents
Advertisement
Available languages
Available languages
Quick Links
Download this manual
See also:
User Manual
Advertisement
Table of Contents

Related Manuals for Smanos SS2800


Summary of Contents for Smanos SS2800
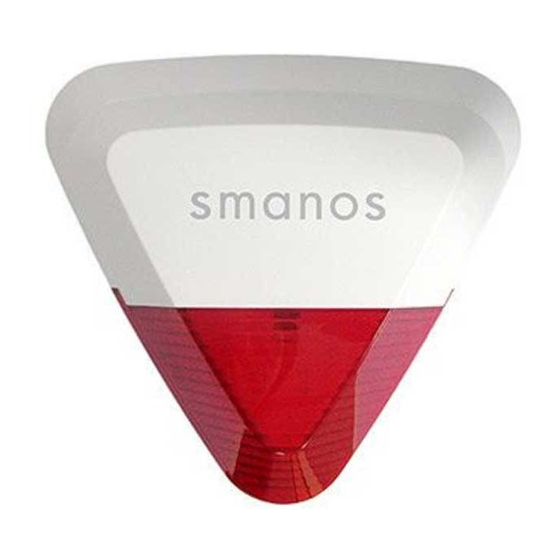
- Page 1 M U LT I L I N G U A L U S E R M A N U A L SS2800 Wireless Outdoor Strobe Siren Printed in China © 2015 SMANOS HOLDING LTD. All Rights Reserved. Ver: SS2800-UM-EN/DE/FR/NL-V1.0...
-
Page 2: Product Overview
Status LED Indication Introduction Status Wireless outdoor strobe siren is to deter the intruders through Arm/Home Mode Flash once every 5 seconds hooting once it receives wireless signal from connected control panel or sensors. More wireless strobe sirens could be connected Disarm No light indication to the same control panel to strengthen the deterring effect. -
Page 3: Jumper Setup
PCB Layout Alarming Volume Setup Siren Interface HIGH MUTE Learn Button Battery Slot Alarming Volume Setup Alarming Duration Setup Adapter Jack Default Setting DC 12V Terminals Note: When the siren is connected to control panel, it will hoot at the pre- set volume even if the control panel is set to mute alarm. - Page 4 Work as Wireless Siren Work as Standalone Alarm Panel When it works as a wireless siren, it should be connected with When it works as a standalone alarm panel, it should be connected wireless control panel in advance. When the control panel is with wireless sensors or wired sensors in advance, when the alarming, it hoots and the strobe light flashes to deter illegal intrusion is detected, it hoots and the strobe light flashed to deter...
-
Page 5: Installation Mode
24-Zone (24-H zone mode): Once the sensor in 24-H zone mode Hold the positioning paper in right place, stick the gradienter on the ① is triggered, the system will alarm immediately, no matter what positioning paper to check and adjust the position. circumstances the system is in. -
Page 6: Specifications
FCC STATEMENT Specifications 1.This device complies with Part 15 of the FCC Rules. Operation is subject to the following two conditions: (1)This device may not cause harmful interference. Power Supply: DC 12 V 500 mA (2)This device must accept any interference received, including Backup Battery: interference that may cause undesired operation. - Page 7 FCC Radiation Exposure Statement: Einleitung This equipment complies with FCC radiation exposure limits set forth for an uncontrolled environment. In order to avoid the possibility of exceeding the FCC radio frequency exposure limits, Die drahtlose Stroboskopsirene für den Außenbereich dient zur Human proximity to the antenna shall not be less than 20cm(8 inches) during normal operation.
- Page 8 Status LED-Anzeige PCB-Layout Sirenen-Schnittstelle Status Lerntaste Batteriefach Scharf/Modus Zuhause Einmaliges Blinken alle 5 Sekunden Einrichtung der Alarmlautstärke Einrichtung der Alarmdauer Unscharfschalten Keine Leuchtanzeige Keine Unscharfschaltung Einmaliges Blinken alle 2 Sekunden nach Alarm 2 Stunden lang Adapterbuchse Anschluss DC 12 V Rückansicht Befestigungslöcher Kabelgebundene Sensoranschlüsse (Normale Zone)
- Page 9 Einrichtung der Alarmlautstärke Einsatz als drahtlose Sirene HOCH STUMM NIEDRIG Beim Einsatz als drahtlose Sirene sollte sie zuvor mit dem drahtlosen Bedienfeld verbunden werden. Wenn das Bedienfeld einen Alarm signalisiert, ertönt ein Heulton und das Stroboskoplicht leuchtet zur Abschreckung unbefugter Eindringlinge. Anschließen des Bedienfelds Standardeinstellung Drücken Sie die Lerntaste 0,5...
- Page 10 24-Zone (24-h-Zonenmodus): Sobald der Sensor im Einsatz als eigenständiges Alarmsystem 24-h-Zonenmodus ausgelöst wird, löst das System sofort Alarm aus, egal, in welchem Zustand das System ist. Rauchmelder, Gasmelder, und IR-Strahlen sind auf den 24-h-Modus eingestellt. Beim Einsatz als eigenständiges Alarmsystem sollte der Anschluss an drahtlose oder verkabelte Sensoren im Voraus erfolgen.
-
Page 11: Technische Daten
Wechsel in den Verbindungsstatus Installation per Fernbedienung Bitte beenden Sie die Systemeinrichtung auf der Leiterplatte und Diese Funktion ist für Benutzer, um neu erworbene Zubehörgeräte wechseln Sie vor der Installation in den Installationsmodus. anzuschließen, ohne die Sirene von der Wand zu demontieren. ①... -
Page 12: Vue D'ensemble Du Produit
Signification de l'état des indicateurs lumineux Introduction État Indicateur lumineux Une sirène stroboscopique d'extérieur sans fil permet de dissuader Armer/Mode à des intrus au moyen de sa sonnerie dès qu'elle reçoit un signal sans Clignote une fois toutes les 5 secondes domicile fil des détecteurs et du tableau de commande connectés. - Page 13 Description de la carte de circuit imprimé Réglage du volume d'alarme Interface de la sirène FORT SILENCIEUX FAIBLE Bouton d'acquisition Logement de la batterie Réglage du volume d'alarme Réglage de la durée d'alarme Prise de l'adaptateur Réglage par défaut Bornes 12 V CC Remarque : Lors que la sirène est connectée au tableau de commande, elle...
- Page 14 Fonctionnement comme Fonctionnement comme sirène sans fil tableau d'alarme autonome Lorsqu'elle fonctionne comme sirène sans fil, la sirène doit être Lorsqu'elle fonctionne en tableau d'alarme autonome, la sirène doit connectée préalablement avec un tableau de commande sans fil. être connectée préalablement avec des détecteurs sans fil ou des Lorsque le tableau de commande est en alarme, la sirène sonne et détecteurs filaires.
-
Page 15: Mode D'installation
mode « zone de 24 heures » se déclenche, le système donne Placez le gabarit d'installation au bon endroit, collez le niveau à ① immédiatement l'alarme, peu importe les circonstances rencontrées bulle sur le gabarit d'installation pour vérifier et régler la position. par le système. -
Page 16: Spécifications
Spécifications Introductie De draadloze flitslicht/sirene voor buiten is bedoeld om indringers Alimentation : 12 V CC 500 mA af te schrikken door sirenegeluid, zodra het een draadloos signaal Batterie de secours : ontvangt van het aangesloten bedieningspaneel of van de sensoren. Batterie au lithium rechargeable 18650 3,7 V 1200 mAh Om het afschrikwekkende effect te versterken, kunnen er meerdere Intensité... - Page 17 Status LED-indicatie Overzicht binnenzijde Sirene-interface Status Bevestigingsknop Batterijsleuf Alarm aan/thuismodus Flitst één keer per 5 seconden Instelling alarmvolume Instelling alarmduur Alarm uit Geen lichtindicatie Geen alarm uit-functie Flitst eenmaal per 2 seconden na alarm gedurende 2 uur Adapterjack DC 12V aansluitingen Achteraanzicht Montagegaten...
- Page 18 Instelling alarmvolume Werking als draadloze sirene HOOG GEDEMPT LAAG Wanneer hij als een draadloze sirene werkt, moet hij eerst met het draadloze bedieningspaneel worden verbonden. Als het bedieningspaneel alarm geeft, geeft deze een geluidssignaal en het licht flitst om de indringers af te schrikken. Standaardinstelling Verbinden met het bedieningspaneel Druk 0,5 seconde op de...
- Page 19 24-zone (modus 24-uurs-zone): Zodra de sensor in de 24-uurs- Werking als zelfstandig alarmpaneel zone wordt geactiveerd, zal het systeem direct alarm slaan, ongeacht in welke status het systeem verkeert. In de 24-uurs-zone worden de rookmelder, het gasalarm en de IR-stralen opgenomen. Als hij als een zelfstandig alarmpaneel werkt, moet het vooraf met draadloze of bekabelde sensoren worden verbonden.
- Page 20 Ga in de verbindingsstatus Installatie via de afstandsbediening Rond de systeeminstellingen af op de printplaat en schakel de Deze functie is bedoeld voor gebruikers om nieuw aangeschafte installatie-modus in vóór de installatie. accessoires aan te sluiten zonder de demontage van de sirene van de muur.
Need help?
Do you have a question about the SS2800 and is the answer not in the manual?
Questions and answers