Siemens SINAMICS G120 Compact Operating Instructions
Hide thumbs
Also See for SINAMICS G120:
- List manual (1256 pages) ,
- Manual (732 pages) ,
- Operating instructions manual (550 pages)
Table of Contents
Advertisement
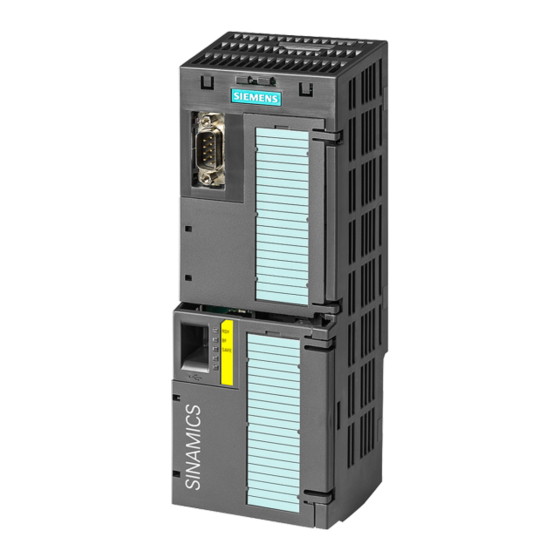
CU240B-2 and CU240E-2 Control
Units
SINAMICS
SINAMICS G120
CU240B-2 and CU240E-2 Control
Units
Compact Operating Instructions
Edition 04/2015
04/2015
A5E35792002B AA
Fundamental safety
___________________
instructions
___________________
Scope of delivery
___________________
Installing
___________________
Commissioning
___________________
More information
Scan the QR code
for additional
information about
SINAMICS G120.
1
2
3
4
5
Advertisement
Table of Contents

Related Manuals for Siemens SINAMICS G120


Summary of Contents for Siemens SINAMICS G120
- Page 1 CU240B-2 and CU240E-2 Control instructions Units ___________________ Scope of delivery ___________________ SINAMICS Installing ___________________ Commissioning SINAMICS G120 CU240B-2 and CU240E-2 Control ___________________ Units More information Compact Operating Instructions Edition 04/2015 Scan the QR code for additional information about SINAMICS G120.
- Page 2 Note the following: WARNING Siemens products may only be used for the applications described in the catalog and in the relevant technical documentation. If products and components from other manufacturers are used, these must be recommended or approved by Siemens. Proper transport, storage, installation, assembly, commissioning, operation and maintenance are required to ensure that the products operate safely and without any problems.
-
Page 3: Table Of Contents
Manuals for your inverter ......................31 Product support ........................32 This manual describes how you install the CU240B-2 or CU240E-2 Control Unit of the SINAMICS G120 inverter and commission it. What is the meaning of the symbols in the manual? An operating instruction starts here. -
Page 4: Fundamental Safety Instructions
Fundamental safety instructions General safety instructions WARNING Risk of death if the safety instructions and remaining risks are not carefully observed If the safety instructions and residual risks are not observed in the associated hardware documentation, accidents involving severe injuries or death can occur. •... -
Page 5: Industrial Security
Siemens recommends strongly that you regularly check for product updates. For the secure operation of Siemens products and solutions, it is necessary to take suitable preventive action (e.g. cell protection concept) and integrate each component into a holistic, state-of-the-art industrial security concept. -
Page 6: Scope Of Delivery
● A CU240B-2 or a CU240E-2 control unit with firmware, which is ready to run. Options for upgrading and downgrading the firmware can be found on the Internet: Firmware (http://support.automation.siemens.com/WW/news/en/67364620). The fieldbus interface of the Control Unit depends on the Article No. The Article No., the designation and the version of the hardware (e.g. -
Page 7: Installing
Installing Plugging the Control Unit onto the Power Module Permissible Power Modules You may operate the Control Unit with the following Power Modules: Power Module ✓ = operation with Power Module permissible, --- = not permissible CU240B-2 CU240E-2 PM340 1AC ✓... -
Page 8: Overview Of The Interfaces
Installing 3.2 Overview of the interfaces Overview of the interfaces Interfaces at the front of the Control Unit To access the interfaces at the front of the Control Unit, you must lift the Operator Panel (if one is being used) and open the front doors. ①... - Page 9 6SL3264-1EA00-0HB0 PROFINET interface Further information about EMC-compliant wiring is available on the Internet: EMC installation guideline (http://support.automation.siemens.com/WW/view/en/60612658) Interfaces at the lower side of the CU240B-2 and CU240E-2 Control Units CU240B-2 and CU240E-2 Control Units Compact Operating Instructions, 04/2015, A5E35792002B AA...
-
Page 10: Terminal Strips On Cu240B-2 Control Units
Installing 3.3 Terminal strips on CU240B-2 Control Units Terminal strips on CU240B-2 Control Units Terminal strips with wiring example All terminals labelled with reference potential "GND" are connected internally in the inverter. Reference potential "DI COM" is electrically isolated from "GND". →... - Page 11 Installing 3.3 Terminal strips on CU240B-2 Control Units Additional options for wiring the digital inputs You must remove the jumper between terminals 28 and 69 if it is necessary to have electrical isolation between the external power supply and the internal inverter power supply.
- Page 12 Installing 3.3 Terminal strips on CU240B-2 Control Units Control Units with PROFIBUS interface The function of the fieldbus interface and digital inputs DI 0, DI 1 depends on DI 3. --- No function. DO 0: p0730 AO 0: p0771[0] DI x: r0722.x Speed setpoint (main setpoint): p1070[0] = 2050[1] Figure 3-3 Factory setting of the CU240B-2 DP and CU240B-2 PN Control Units...
-
Page 13: Terminal Strips On Cu240E-2 Control Units
Installing 3.4 Terminal strips on CU240E-2 Control Units Terminal strips on CU240E-2 Control Units Terminal strips with wiring example All terminals labelled with reference potential "GND" are connected internally in the inverter. Reference potentials "DI COM1" and "DI COM2" are electrically isolated from "GND". →... - Page 14 Installing 3.4 Terminal strips on CU240E-2 Control Units Additional options for wiring the digital inputs If you wish to connect the potential of an external power supply with the po- tential of the internal inverter power supply, then you must connect "GND" with terminals 34and 69.
- Page 15 Installing 3.4 Terminal strips on CU240E-2 Control Units Factory setting of the terminal strip on the CU240E-2 The factory setting of the terminal strip depends on the Control Unit. Control Units with USS interface The fieldbus interface is not active. --- No function.
- Page 16 Installing 3.4 Terminal strips on CU240E-2 Control Units Control Units with PROFIBUS or PROFINET interface The function of the fieldbus interface and digital inputs DI 0, DI 1 depends on DI 3. --- No function. DO x: p073x AO 0: p0771[0] DI x: r0722.x Speed setpoint (main setpoint): p1070[0] = 2050[1] Figure 3-6...
- Page 17 Installing 3.4 Terminal strips on CU240E-2 Control Units Changing the function of the terminals The function of the terminals marked in color in the two figures above, can be set. In order that you do not have to successively change terminal for terminal, several terminals can be jointly set using default settings ("p0015 Macro drive unit").
-
Page 18: Commissioning
If you are using your own connection cable, carefully note the maxi- mum permissible length of 5 m. PC tools STARTER STARTER on DVD: 6SL3072-0AA00-0AG0 System requirements and download: STARTER (http://support.automation.siemens.com/WW/view/en/26233208) Help regarding operation: STARTER videos (http://www.automation.siemens.com/mcms/mc-drives/en/low- voltage-inverter/sinamics-g120/videos/Pages/videos.aspx) Startdrive Startdrive on DVD: 6SL3072-4CA02-1XG0 System requirements and download: Startdrive (http://support.automation.siemens.com/WW/view/en/68034568) -
Page 19: Commissioning With Bop-2 Operator Panel
Commissioning 4.2 Commissioning with BOP-2 operator panel Commissioning with BOP-2 operator panel Plugging on an operator panel Procedure To plug an Operator Panel on the Control Unit, proceed as follows: 1. Locate the lower edge of the Operator Panel into the matching recess of the Control Unit. - Page 20 Commissioning 4.2 Commissioning with BOP-2 operator panel Selecting a suitable application class When selecting an application class, the inverter assigns the appropriate settings to the motor control. Application class Standard Drive Control Dynamic Drive Control Motors that can be Induction motors Induction and synchronous motors operated Power Modules that...
-
Page 21: Standard Drive Control
Commissioning 4.2 Commissioning with BOP-2 operator panel 4.2.2 Standard Drive Control Motor standard KW 50HZ HP 60HZ NEMA KW 60HZ IEC 60 Hz Supply voltage for the inverter 8. Enter the motor data: 8.1. Motor type Depending on the particular inverter, it is possible that the BOP-2 does not list all of the following motor types. - Page 22 Commissioning 4.2 Commissioning with BOP-2 operator panel Select the application: VEC STD Constant load: Typical applications include belt conveyor drives. PUMP FAN Speed-dependent load: Typical applications include pumps and fans. Select the default setting for the interfaces of the inverter that is suita- ble for your application.
-
Page 23: Dynamic Drive Control
Commissioning 4.2 Commissioning with BOP-2 operator panel 4.2.3 Dynamic Drive Control Motor standard KW 50HZ HP 60HZ NEMA KW 60HZ IEC 60 Hz Supply voltage for the inverter 8. Enter the motor data: 8.1. Motor type Depending on the particular inverter, it is possible that the BOP-2 does not list all of the following motor types. - Page 24 Commissioning 4.2 Commissioning with BOP-2 operator panel Select the application: OP LOOP Recommended setting for standard applications. CL LOOP Recommended setting for applications with short ramp- up and ramp-down times. This setting is not suitable for hoisting gear and cranes/lifting gear. HVY LOAD Recommended setting for applications with a high break loose torque.
- Page 25 Commissioning 4.2 Commissioning with BOP-2 operator panel Identifying the motor data and optimizing the closed-loop control The inverter has several techniques to automatically identify the motor data and optimize the speed control. To start the motor data identification routine, you must switch-on the motor via the terminal strip, fieldbus or from the operator panel.
-
Page 26: Connecting The Inverter To The Fieldbus
Where can I find instructions for the fieldbus connection of the inverter? You can find instructions for the fieldbus connection on the Internet: ● Application examples (http://support.automation.siemens.com/WW/view/en/60733299) ● Operating instructions - inverter with Control Units CU2…: Manuals for the Control Unit (http://support.automation.siemens.com/WW/view/en/30563628/133300) - Page 27 Commissioning 4.3 Connecting the inverter to the fieldbus Examples for telegrams via PROFIBUS and PROFINET Telegram 1: STW1 Control word 1 ZSW1 Status word 1 PZD01/02 Process data 16-bit NSOLL_A Speed setpoint NIST_A Speed actual value Control word 1 (STW1), PZD receive word 1 (word: r2050[0], bits: r2090.00 … r2090.15) Meaning Explanation 0 = OFF1...
-
Page 28: Frequently Required Parameters
Commissioning 4.4 Frequently required parameters Status word 1 (ZSW1), PZD send word 1 (word: p2051[0], bits: p2080[0] … p2080[15]) Meaning Comments 1 = Ready to start Power supply switched on; electronics initialized; pulses locked. 1 = Ready Motor is switched on (ON/OFF1 = 1), no fault is active. With the command "Enable operation"... - Page 29 Commissioning 4.4 Frequently required parameters Parameter Explanation p0601 Motor temperature sensor type Terminal 14 T1 motor (+) 0: No sensor (factory setting) 2: KTY84 (→ P0604) 1: PTC (→ P0604) 4: Bimetal Terminal 15 T2 motor (-) p0625 Motor ambient temperature during commissioning [° C] p0640 Current limit [A] r0722...
- Page 30 Commissioning 4.4 Frequently required parameters Parameter Explanation p0776 Analog outputs, type 0: Current output (0 mA … +20 mA) 1: Voltage output (0 V … +10 V) AO 0 2: Current output (+4 mA ... +20 mA) AO 1 p0922 PROFIdrive telegram selection p1001 Fixed speed setpoint 1...
-
Page 31: More Information
(this manual) English, Manuals for the Control German, Unit Operating instructions Installing, commissioning and Italian, (http://support.automation. for the SINAMICS G120 inverter operating the inverter. French, sie- with a CU240B-2 and CU240E-2 Setting the inverter functions. Spanish, mens.com/WW/view/en/30 Control Units Technical data. -
Page 32: Product Support
Great Britain +33 (0) 821 801 122 +49 (0)911 895 7222 +39 (02) 24362000 +34 902 237 238 +44 161 446 5545 Other service telephone numbers: Product support (http://www.siemens.com/automation/service&support) CU240B-2 and CU240E-2 Control Units Compact Operating Instructions, 04/2015, A5E35792002B AA...
Need help?
Do you have a question about the SINAMICS G120 and is the answer not in the manual?
Questions and answers