Table of Contents
Advertisement
Available languages
Available languages
Quick Links
ATTACH YOUR RECEIPT HERE
READ AND SAVE THESE INSTRUCTIONS
Serial Number
Questions, problems, missing parts? Before returning to your retailer, call our customer
service department at 1-888-567-2055, 8 a.m.-5 p.m., EST, Monday-Friday.
Purchase Date
ROTATION
™
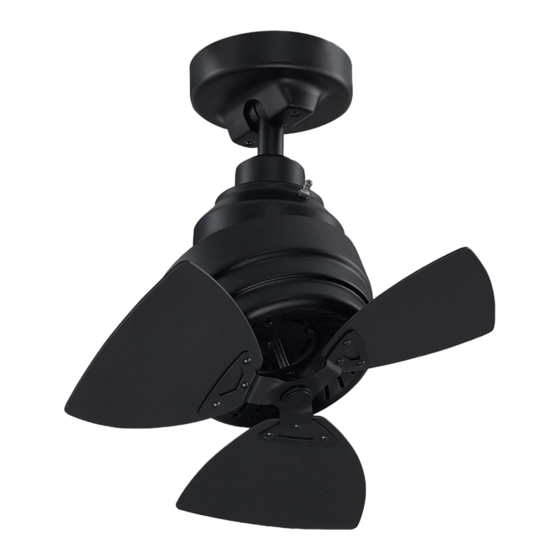
Net Weight : 10.21 lbs (4.63 kg)
CEILING FAN
MODEL #FP8018**
Español p. 16
Advertisement
Table of Contents

Related Manuals for Fanimation ROTATION FP8018 series


Summary of Contents for Fanimation ROTATION FP8018 series
- Page 1 CEILING FAN ROTATION ™ MODEL #FP8018** Español p. 16 ATTACH YOUR RECEIPT HERE READ AND SAVE THESE INSTRUCTIONS Serial Number Net Weight : 10.21 lbs (4.63 kg) Purchase Date Questions, problems, missing parts? Before returning to your retailer, call our customer service department at 1-888-567-2055, 8 a.m.-5 p.m., EST, Monday-Friday.
- Page 2 Fanimation. 7. Fanimation reserves the right to modify or discontinue any product at any time and may substitute any part under this warranty. 8. Under no circumstances may a fan be returned without prior authorization from Fanimation. The receipt of purchase must ac- company authorized returns and must be sent freight prepaid to Fanimation.
-
Page 3: Table Of Contents
Table of Contents Unpacking Instructions......Installing Your Canopy Housing ....Energy Efficient Use of Ceiling Fans . -
Page 4: Unpacking Instructions
– Ceiling Support Cable Fanimation. Substitution of parts or accessories not – Cable Clamp designated for use with this product by Fanimation could – 3/8˝ x 2˝ lag bolt result in personal injury or property damage. Contact – 3/8˝ flat washer your retail store for missing or damaged parts. -
Page 5: Energy Efficient Use Of Ceiling Fans
10 - 11 feet from floor to the blade for optimal down into the occupied space.Remember to adjust your airflow. Consult your Fanimation Retailer for optional thermostat when using your ceiling fan - additional energy mounting accessories. - Page 6 Electrical and Structural Requirements (Continued) Deep box with brace (Figure 3) Paired with a deep box, this hanger is meant to span CEILING JOIST between two joists and takes the place of wooden blocking. WARNING To reduce the risk of fire, electric shock, or personal injury, mount to outlet box marked acceptable for fan support of 15.9 kg (35 lbs) or less and use mounting screws provided with the outlet box.
-
Page 7: How To Assemble Your Ceiling Fan
How to Assemble Your Ceiling Fan CAUTION To prevent damage to housing and/or blade, leave the Ceiling Fan Assembly in its original packing during installation of down rod, motor coupling cover and ceiling canopy. (Figure 1) NOTE: Do not set Ceiling Fan Assembly on fl oor or hard surface. -
Page 8: How To Hang Your Ceiling Fan
How to Assemble Your Ceiling Fan (continued) 5. Cut off excess lead wire approximately 6 to 9 inches above top of the downrod. Strip insulation 1/2 inch from the end of each lead off wire. (Figure 6) NOTE: All set screws must be checked, and retightened where necessary, before installation. - Page 9 How to Hang Your Ceiling Fan (continued) Ceiling Joist 2. Attaching Ceiling Support Cable (Figure 4): Drill ¼˝ pilot hole through into the ceiling joist or structural member. Securely attach the ceiling support cable with Wood Member ⁄ ˝ x 2˝ lag bolt and fl at washer. (2”...
-
Page 10: How To Wire Your Ceiling Fan
How to Wire Your Ceiling Fan If you feel that you do not have enough electrical wiring NOTE: If fan or supply wires are different colors than indicated, knowledge or experience, have your fan installed by a licensed electrician. ▲WARNING To avoid possible electrical shock, be sure electricity is MAIN FUSE BOX turned off at the main fuse box before wiring. -
Page 11: Installing Your Canopy Housing
Installing Your Canopy Housing NOTE: This step is applicable after the necessary wiring is completed. ▲WARNING To avoid possible fire or shock, make sure that the electrical wires are completely inside the canopy housing and not pinched between the housing and the ceiling. Ceiling Canopy 1. -
Page 12: Maintenance
Maintenance Periodic cleaning of your new ceiling fan is the only CAUTION maintenance that is needed. When cleaning, use only a soft brush or lint free cloth to avoid scratching the fi nish. Do not use water when cleaning your ceiling fan. It could Abrasive and/or non-abrasive cleaning agents are not damage the motor or the finish and create the possibility required and should be avoided to prevent damage to... -
Page 13: Parts List
Parts List Model #FP8018** Ref.# Description Part # Hanger Bracket with Screws AP1160BL Downrod DR1-4.5** Ceiling Canopy P801816** Motor Coupling Cover AP801802** Motor Assembly AMA8018F** Blade Assembly AP801817** Wall Control CWFP8018 Hardware Bag Containing: 7/16˝ Wrench (2) ⅜˝ x 5˝ Lag Bolt with Flat Washer Wire Connectors (4) HDWFP8018 Support Cable Bag Containing:... -
Page 14: Exploded-View Illustration
Rotation ™ FP8018** Exploded-View Illustration NOTE: The illustration shown is not to scale or its actual confi guration may vary. Wires partially removed for clarity. Figure 1... - Page 15 10983 Bennett Parkway Zionsville, IN 46077 Phone: 888-567-2055 Outside U.S.: 317-733-4113 2018/01 V.01 FAX: 866-482-5215 Copyright 2018 Fanimation FANIMATION.COM...
- Page 16 VENTILADOR DE TECHO ROTATION ™ MODELO #FP8018** ADJUNTE SU RECIBO AQUÍ Y REGISTRE SU VENTILADOR EN FANIMATION.COM LEA Y GUARDE ESTAS INSTRUCCIONES Número de serie Fecha de compra Peso neto 4.63 kg (10.21 lbs) Preguntas, problemas, piezas faltantes? Antes de volver a la tienda, llame a nuestro Departamento de Servicio al Cliente al 1-888-567-2055, 8 a.m.
- Page 17 Instrucciones de seguridad importantes ADVERTENCIA: Siga estas instrucciones para prevenir incendios, descargas eléctricas y lesiones personales graves. Lea el manual del propietario y la información de seguridad antes de instalar su nuevo ventilador. Observe los diagramas de ensamblaje adjuntos. Antes de llevar a cabo el mantenimiento o la limpieza de la unidad, desconecte la electricidad en el panel de servicio y bloquee los medios de desconexión del mismo para evitar que se active accidentalmente.
- Page 18 1. GARANTÍA LIMITADA DE POR VIDA DEL MOTOR: si se produce una falla en alguna de las partes del motor de su ventilador debido a un defecto en los materiales o en la fabricación durante el tiempo de vida del comprador original, Fanimation proporcionará la pieza de repuesto sin cargo una vez que se devuelva el ventilador defectuoso a nuestro centro de servicios nacional.
- Page 19 Fanimation específicamente para el mismo. La pag-nant et/ou les accessoires spécifiquement conçus sustitución de piezas o accesorios que Fanimation no designó pour ce produit par Fanimation. La substitution de para usar con este producto podría ocasionar lesiones pièces ou d'accessoires non conçus par Fanimation...
- Page 20 óptimo. Consulte en que obliga al aire cálido que se acumula cerca del techo a su tienda minorista de Fanimation para obtener accesorios bajar al espacio ocupado. No olvide ajustar el termostato de montaje opcionales.
- Page 21 Requisitos eléctricos y estructurales (cont.) Uso del soporte (Figura 3) Conectado a una caja de distribución eléctrica, este colgador Vigas del techo sirve para abarcar el espacio entre dos vigas y ocupar el lugar de bloqueo de la madera. ADVERTENCIA Para reducir el riesgo de incendios, descargas eléctricas o lesiones personales, fije el ventilador a la caja de distribución eléctrica marcada como aceptable para...
- Page 22 Cómo ensamblar el ventilador de techo PRECAUCIÓN Para prevenir daños en la cubierta o en las aspas, deje el ventilador de techo en su empaque original durante la instalación del barral, la cubierta de unión del motor y el capuchón. (Figura 1) ATTENTION Pour éviter d'endommager le boîtier et/ou les pales, conservez l'ensemble du ventilateur de plafond dans...
- Page 23 Cómo ensamblar el ventilador de techo (cont.) 5. Corte el exceso de cable aproximadamente de 15 a 23 cm (6 a 9 pulgadas) por encima de la parte superior del barral. Pele 1,2 cm (1/2˝)) del aislamiento en cada extremo del cable. (Figura 6) NOTA: Se deben revisar todos los tornillos de fijación y volver a ajustarlos cuando sea necesario antes de realizar la instalación.
- Page 24 Cómo colgar el ventilador de techo (cont.) 2. Fijación del Cable de Soporte para Techo (Figura 4): Viga del techo Taladre un orificio guía de 0,6 cm (¼˝) a través de la viga de Miembro de madera techo o el miembro estructural. Fije firmemente el cable de (5 x 10 cm [2”x 4”] soporte para techo con el tornillo de cabeza cuadrada de aprox.)
- Page 25 Cómo realizar la instalación eléctricadel ventilador de techo Si siente que no posee la experiencia o los NOTA: si los cables de suministro o del ventilador son de colores diferentes que los indicados, contrate a un electricista calificado conocimientos eléctricos necesarios, contrate a un para que realice la instalación.
- Page 26 Cómo realizar la instalación eléctricadel ventilador de techo (cont.) Instalación del placa de pared: (Figura 4) • Fije la unidad de control de pared a la caja de distribución eléctrica con los dos tornillos de 6-32 suministrados. • Fije la placa de pared al frente del control. Figura 4 Instalación de la cubierta del capuchón NOTA: este paso se debe realizar luego de completar la...
- Page 27 Cómo utilizar su ventilador de techo (cont.) 2. Para optimizar el rendimiento de su ventilador según la estación, utilice el interruptor de reversa ubicado en la parte la parte superior del ensamble de motor. Gire en dirección de las manecillas del reloj una vez para un flujo de aire para el verano (hacia abajo) y gire en dirección de las manecillas de reloj dos veces Interruptor...
- Page 28 Lista de piezas Modelo N.º FP8018** N.° de Ref. Descripción Pieza N.º Soporte de suspensión con accesorios para montaje AP1160BL Barral DR1-4.5** Capuchón P801816** Cubierta de unión del motor AP801802** Unidad del motor AMA8018F** Unidad del aspa AP801817** Control de pared CWFP8018 Bolsa de accesorios que contiene: Llave de 7/16˝...
- Page 29 Rotation ™ FP8018** Ilustración del despiece NOTA: la ilustración que se muestra no está hecha a escala y su configuración real puede variar. Los cables se dibujaron en forma parcial para mayor claridad. Figura 1...
- Page 30 10983 Bennett Parkway Zionsville, IN 46077 Llame sin cargo al (888) 567-2055 FAX (866) 482-5215 Desde fuera de los EE.UU., llame al (317) 733-4113 2018/01 V.01 Visite nuestro sitio Web en www.fanimation.com Copyright 2018 Fanimation...