Table of Contents
Advertisement
Quick Links
w ww .vo lt e ch. co m
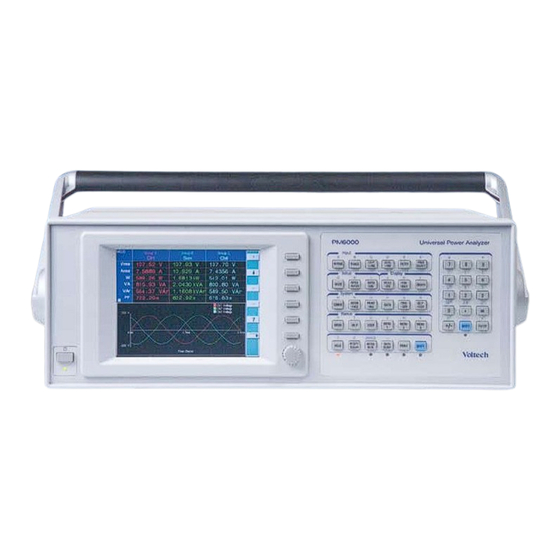
PM6000
P
A
OWER
NALYZER
U
M
SER
ANUAL
Voltech Instruments Inc.
Voltech Instruments Ltd.
11637 Kelly road, Suite 306
148 Harwell Business Centre
Fort Myers, FL33908
Didcot, Oxon, OX11 0RA
U.S.A.
U.K.
Tel: 239 437 0494
Tel: +44 1235 834555
Fax: 239 437 3841
Fax: +44 1235 835016
sales@voltech.com
sales@voltech.co.uk
V
PM6000 U
M
I
19
I
OLTECH
SER
ANUAL
SSUE
PAGE
Advertisement
Table of Contents

Subscribe to Our Youtube Channel
Related Manuals for Voltech PM6000


Summary of Contents for Voltech PM6000
- Page 1 .vo lt e ch. co m PM6000 OWER NALYZER ANUAL Voltech Instruments Inc. Voltech Instruments Ltd. 11637 Kelly road, Suite 306 148 Harwell Business Centre Fort Myers, FL33908 Didcot, Oxon, OX11 0RA U.S.A. U.K. Tel: 239 437 0494...
- Page 2 Voltech Instruments is committed to a policy of continuous product development. Hence product specification and the information given in this manual are subject to change without notice. No part of this publication may be reproduced, stored in a retrieval system, or transmitted in any form, or by means electronic, mechanical photocopying, recording or otherwise, without prior written permission of Voltech Instruments.
- Page 3 Solo personale qualificato può installare questo strumento, dopo la lettura e la comprensione di questo manuale. Se esistono dubbi consultate il vostro rivenditore. IMPORTANT: Please consult the safety information section of this user manual before installation and use. PM6000 U OLTECH ANUAL SSUE PAGE...
- Page 4 PM6000 U PAGE OLTECH ANUAL SSUE...
-
Page 5: Table Of Contents
4.9. Configuration Commands (:CFG command) ............29 4.10. :INP Commands ....................33 4.11. :INST Commands .................... 34 4.12. :SENS Commands ................... 37 4.13. :SYST Commands ................... 38 4.14. Examples of Using Commands ................ 41 PM6000 U OLTECH ANUAL SSUE PAGE... - Page 6 5. Remote Access ..............1 5.1. Connecting to the PM6000 using ethernet ............1 5.2. FTP ........................3 6. Fitting Options ..............1 6.1. Voltech Shunts ....................1 6.2. PCMCIA Cards ....................1 7. Software .................. 1 7.1. IEC 61000-3-2/3 Current Harmonics and Flicker Software ........1 7.2.
-
Page 7: Introduction
NTRODUCTION use this Voltech product. If you experience any difficulty during installation or use of the Voltech PM6000, or are unsure of any of its features or abilities, please do not hesitate to contact either your local Voltech supplier or one of our Voltech main service centers. - Page 8 Up to 40 MSPS are available for burst and transient measurement modes. There is room for up to 6 wattmeter channels to be installed into a PM6000 with a variety of shunts and current sensors, creating flexible test options.
-
Page 9: Package Contents
ACKAGE ONTENTS The following items are supplied with your PM6000. Please check that you have every item and report any missing items to your Voltech supplier as soon as possible. • PM6000 Chassis (NOTE: No floppy disk is fitted on models sold after February 2008) •... -
Page 10: Options
NTRODUCTION 1.3. PTIONS The following items may also be supplied with the PM6000. For logistical reasons, some items may be supplied in separate packages. All these items are also available post sale. • PM6000 Measurement Channel (Fitted by a Voltech service center only) High performance wattmeter channel. -
Page 11: Quick Start
2.2. AVIGATING THE YSTEM The menu system provides complete access to all settings of the PM6000. The menu system may be accessed as follows: 1. By use of the 6 soft keys found to the right of the display 2. By using the short-cut keys on the front panel. These keys are grouped in a logical left to right sequence for setting up the instrument and provide fast access to the top-level menu items. - Page 12 Clear the current alpha or numeric entry. Clear Escape from the menu without saving changes. Escape Save changes. Save Rotary The rotary knob is used to scroll up and down through measurements or menu items PM6000 U OLTECH ANUAL SSUE PAGE...
- Page 13 To hide numeric results columns, see the [FORMAT], [DISPLAY COLUMNS] menu The Status area is used to show important status indicators such as an over-range (OVR) on a measurement input, or if [HOLD] has been pressed. PM6000 U OLTECH ANUAL...
-
Page 14: Wiring And Groups
[WIRING] menu or by remote commands. The appropriate number of adjacent channels will be included in the group. This should be done before connecting the test leads to avoid confusion when wiring up to the PM6000 Channel 1 • Figure 1 Rear View of Instrument... - Page 15 UICK TART • Figure 2 Common Wiring Configurations PM6000 U OLTECH ANUAL SSUE PAGE...
- Page 16 3. Then make the physical connections, taking care to observe health and safety regulations. Each measurement channel has inputs for both voltage and current. The inputs are fully isolated from each other and from ground. The instrument chassis must be Earth grounded at all times PM6000 U OLTECH ANUAL SSUE PAGE...
- Page 17 UICK TART For a discussion of three-phase measurements, see Voltech application note 104-022 ‘Three-Phase Measurements’. The three-phase 7-wire configuration may be used to measure total power on distribution systems with center-tapped three-phase transformers. The connection method is similar to the three-phase 4-wire 3-wattmeter method above, with all V...
- Page 18 This input allows a very wide range of external current transducers to be connected, from low mA current shunts to MA current transformers. For each type of transducer, the PM6000 may be scaled to read the correct current. See the [SCALING] menu.
- Page 19 For optimum rejection of common mode signals, the 0V guard terminal must be used. Connect this to the shield of the twisted pair cable, if 0V – Guard terminal ± 5V isolated supply at shunt potential PM6000 U OLTECH ANUAL SSUE...
- Page 20 DO NOT USE Incorrect use will damage PM6000 Connections for Voltech accessories only Voltage Input V 4. Enter the value in mΩ of the external shunt into the PM6000. See the [SCALING], [External Shunt mV/A] menu. E.G. For a 100mΩ shunt, enter the value 100 2.4.3 To connect a transducer with a voltage output...
- Page 21 0V return for those transducers that require one. 2.4.4 To connect a transducer with a current output only To use a conventional current transformer like the Voltech CL series, use a Voltech 1A shunt as described later, and use the [SCALING] [AMPS SCALING] function to enter the ratio of the current transformer.
- Page 22 Having an appropriate choice of voltage and current transducers and a careful wiring arrangement, the PM6000 can now be set up via its menu system to make a wide variety of power related measurements. For a description of each of the menu options, see the next section.
-
Page 23: Menu System
3.1. AVIGATION The PM6000’s menu is a powerful yet easy-to-use system for control of the analyzer. See the ‘Quick Start’ section of this manual for an overview of how to access and use the menu system. The soft-key actions are repeated here for convenience. -
Page 24: Menu Items
Menu 2 Frequency Self Test Menu 3 Source Other functions HOLD RESET / CLEAR INTEG RUN DATA DUMP PRINT This section describes these menu and submenu functions in order of the buttons in each group. PM6000 U OLTECH ANUAL SSUE PAGE... - Page 25 Move to the next group using the group rotate key and repeat as required. The example below shows CH1 and CH2 grouped together for a three-phase, three-wire connection and CH3 and CH4 grouped for a similar connection. The new configuration is saved upon exiting this menu. PM6000 U OLTECH ANUAL SSUE...
- Page 26 Default: Group A, Group B, etc Change the name of the group. The group name may be up to 19 characters long. Permitted characters are those available on the keyboard of the PM6000. The name will be displayed above the grouped channels on the instrument display.
- Page 27 200V then signals with a peak of ± 200V can be measured. Voltech Shunts will be scaled on instrument power up. For other shunts the relevant scaling should be applied using the External Shunt Scaling menu (see 3.2.4)
- Page 28 3.2.3 Coupling Default: AC+DC In AC+DC mode, the PM6000 includes DC signals in its analysis. Select 'AC' to measure AC signals only. This is useful when attempting to measure the ac characteristics of a signal that are superimposed on a high level of dc. For example, to measure the ac ripple on a dc bus, select 'AC' only.
- Page 29 Enter the scale factor of the transducer being used. For example, the Voltech CL1000 produces 1 amp for every 1000 amps flowing in the opening of the CL. It is a 1000:1 current transformer. Enter the scale factor 1000 and the PM6000 will display the correct current.
- Page 30 This is the filter applied to all measurements for the group. It defines the measurement bandwidth. Different filter settings may be applied to different groups. The default setting of 2MHz is suitable for most general applications. The PM6000 always maintains a sample rate sufficient to avoid aliasing problems at any filter setting.
- Page 31 The waveforms at the output of a PWM motor drive are an example of this. External sets the external input at the back of the PM6000 as the frequency source. Choose this option if the frequency cannot be detected from volts or amps but is available elsewhere.
- Page 32 YSTEM 3.2.7 Mode Default: Normal This menu contains the special application modes of the PM6000. When selected, the analyzer will be automatically set to use the optimum measurement techniques for the waveforms under test Normal This is the default operating mode of the analyzer and is ideal for making measurements in most applications.
- Page 33 These waveforms are found at the output of electronic lighting ballasts, ultrasonic supplies for cleaning, medical imaging and radio frequency cutting equipment. The PM6000 sets the sample time to be an integral number of cycles of the modulation frequency to ensure accurate results.
- Page 34 This setup parameter allows the user to control how the instrument determines the modulation frequency. This is important for AM signals as the PM6000 will adjust the analysis period to an integer number of complete cycles to ensure accurate results...
- Page 35 YSTEM IEC Harmonics The testing of IEC harmonic to the EN 61000-3-2 standard requires Voltech’s IEC Software for the PM6000. Please contact your local Voltech distributor (see www.voltech.com) for further information. IEC Flicker The testing of IEC flicker to the EN 61000-3-3 standard requires Voltech’s IEC Software for the PM6000.
- Page 36 For the integrator function the trigger events have the following effect START Start or resume the integration STOP Stop the integration RESET Clear the integration parameters to zero See also the Trigger menu (3.2.17) PM6000 U OLTECH ANUAL SSUE PAGE...
- Page 37 Some thought should be given to the amount of data to be logged, as a fully configured PM6000 is capable of producing vast number of results. Many spreadsheets have a limited number of columns or data file size limit. If generating large datafiles, ensure the...
- Page 38 Default: As Format-Display Columns menu Select which display columns will become output rows in the datalog file. A row will be added to the data log file every log point for each display column selected PM6000 U OLTECH ANUAL SSUE...
- Page 39 The data logging will only start when a START trigger event is received. This setting specifies which trigger is used to start and stop the data logging. Only the START and STOP events apply to data logging; the other PM6000 U OLTECH ANUAL...
- Page 40 The Memory option is available on all PM6000 instruments and provides approximately 6Mbytes of non-volatile file storage. PM6000 instruments can also fitted with an optional PC Compatible floppy disk drive with a formatted capacity of 1.44Mbytes.
- Page 41 Default: ON (overridden by top level harmonic enable) The magnitude of the Watts harmonics selected are displayed in new rows for the selected group Default: 1 The lowest harmonic to display Default: 7 The highest harmonic to display PM6000 U OLTECH ANUAL SSUE PAGE...
- Page 42 Amps Harmonics As Volts Harmonics Phase Default: 0 to 360 Choose the convention used to display the phase angle. Phase angles may be displayed as 0 to 360 degrees or -180 to 180 degrees PM6000 U OLTECH ANUAL SSUE PAGE...
- Page 43 RMS is not less than the fundamental. If the fundamental is larger than the RMS the display shows ‘----‘. Volts THD THD (Total Harmonic Distortion) is a measure of the distortion of a waveform. Default Reference: Fundamental PM6000 U OLTECH ANUAL SSUE PAGE...
- Page 44 Default Vref: Vrms Formula: harm ∑ × Vtif harm The number of harmonics used in the calculations is taken from the Volts Harmonics menu settings. TIF Weighting Factors Harm Harm Harm 6050 10340 6370 10600 PM6000 U OLTECH ANUAL SSUE PAGE...
- Page 45 RMS is not less than the fundamental. If the fundamental is larger than the RMS the display shows ‘----‘ Amps THD THD (Total Harmonic Distortion) is a measure of the distortion of a waveform. Default Reference: Fundamental PM6000 U OLTECH ANUAL SSUE PAGE...
- Page 46 Default Aref: Arms Formula: harm ∑ × Atif harm The number of harmonics used in the calculations is taken from the Amps Harmonics menu settings. TIF Weighting Factors Harm Harm Harm 6050 10340 PM6000 U OLTECH ANUAL SSUE PAGE...
- Page 47 +3V. However, if the DC level was changed to +4V, then the positive peak would be +6V and the negative peak would be +2V. For both voltage and current, the absolute, the positive and the negative peaks can be displayed. PM6000 U OLTECH ANUAL SSUE...
- Page 48 Repeat the measurement to capture the worst case current, since the peak current will vary with the point in the voltage cycle at which the supply is connected See also • Voltech PS1000 Inrush Switch data sheet. (This accessory greatly simplifies inrush testing). PM6000 U OLTECH ANUAL...
- Page 49 Use this to average a signal that will significantly change. Depth Default: 16 The averaging depth is the number of readings used to return the displayed result. It may be set to any value from 1 to 64. PM6000 U OLTECH ANUAL SSUE PAGE...
- Page 50 3.2.27) and the columns used for data logging (see DataLog section 3.2.9) Math This menu provides access to the formula editor of the PM6000. Any combination of parameters may be used and manipulated to provide a new measurement. An example of this the calculation of efficiency based on different watts measurements.
- Page 51 Ampere Hours Watt Hours VAHR VA Hours VARH VAr Hours Watts Average PFAV PF average TINT Integration Time 5. The valid group parameters are GRP<A-F> followed by ":SUM:" and then one of the following parameters: PM6000 U OLTECH ANUAL SSUE PAGE...
- Page 52 LN(), LOG() {which returns the logarithm of the number between the brackets. LN is log to the base e, LOG is log to the base 10} 8.Constants that may be typed: PI() (3.14159) Some examples are: PM6000 U OLTECH ANUAL SSUE PAGE...
- Page 53 When disabled each harmonic magnitude will be displayed in the normal units of V, A or W 3.2.12 Graph This menu is used to control the display of waveforms and other graphics. PM6000 U OLTECH ANUAL SSUE PAGE...
- Page 54 Default: CH1:V and CH1:A Choose the items to display as a waveform. The graph time base will be determined by the frequency of the first item displayed Up to 6 may be shown at one time. PM6000 U OLTECH ANUAL SSUE PAGE...
- Page 55 The PM6000 provides two ways of storing user configurations; 10 user configurations and File Location. The Save menu provides the functionality that enables users to save how they have set up the PM6000. The ten quick access configurations are listed on this menu as well as the File Location option.
- Page 56 Config Clock Set the date and time for the PM6000's internal clock that is displayed in the bottom right corner of the screen. When prompted to enter dates or times, the keypad will be put into character mode to allow entry of letters and numbers.
- Page 57 OFF for the duration of the measurement. Config Beeper The internal beeper of the PM6000 may be used to emphasize important key actions and warnings. If operator safety or damage to the analyzer is possible, the ON / OF...
- Page 58 YSTEM Default: 3 Adjust the beeper volume. 1= Min. 4 = Max. PM6000 U OLTECH ANUAL SSUE PAGE...
- Page 59 The ‘System Upgrade’ menu function restarts the PM6000 in a special maintenance mode needed to allow the upgrade application to install the new files. See section 9.4 for further information on upgrading the firmware in a PM6000. PM6000 U OLTECH...
- Page 60 RS232 The RS232 port is a standard PC type 9 way male D-type located on the rear of the instrument and may be used for remote control of the PM6000. A null modem cable should be used. The RS232 port uses 8 bit, no parity, one stop bit and hardware flow control.
- Page 61 YSTEM user data areas of the PM6000 file system. See Section 5.2 for more information on using FTP. Set IP using DHCP Default: ON Dynamic Host Configuration Protocol (DHCP) is a standard TCP/IP protocol designed to reduce the complexity of administering address configurations by...
- Page 62 YSTEM 3.2.15 Printing There are currently no user specified parameters for printing. See the [Print] key PM6000 U OLTECH ANUAL SSUE PAGE...
- Page 63 YSTEM 3.2.16 Data This menu provides access to the user file system on the PM6000 It displays the available storage media and allows the user to organize files including creating and moving between directories. It also allows moving files between media such as floppy drive (if fitted) and hard drive (grayed out if not fitted).
- Page 64 If the floppy drive is fitted and a disk is present, this provides the facility to format a floppy disk. This will destroy all contents of the disk. The format is PC compatible allowing easy transfer between PM6000 and PC 3.2.17 Trigger Six trigger configurations (T1 to T6) are available which may be set up in separate ways such that different events trigger different actions.
- Page 65 The end time and date must be after the start time and date for the trigger to run, but the PM6000 will let you enter an end date and time that are before the start date and time in order allow for one date being entered before another.
- Page 66 2 seconds can be entered as either 0.000556 Hours or 0:0.033. 3.2.18 Self Test It is not normally necessary for the user to perform any self-tests on the PM6000. However, you may be asked to perform some of them in response to an application or service enquiry.
- Page 67 3.2.26 DATA DUMP This programmable key may be used to initiate a trigger. This is typically assigned to the Data Log function, but may be used by any triggered process. (See the trigger overview) PM6000 U OLTECH ANUAL SSUE PAGE...
- Page 68 By default, the [PRINT] key is used to start printing. When pressed, the LED will briefly flash as the data is formatted and sent to the printer driver for printing. The PM6000 supports ASCII/ MSDOS compatible printers connected to the parallel port using a standard PC Parallel printer cable. The printout is formatted for 80-...
-
Page 69: Overview
YSTEMS The RS232 port is a standard PC type 9 way male D-type located on the rear of the instrument and may be used for remote control of the PM6000. A null modem cable should be used. The RS232 port uses 8 bit, no parity, one stop bit and hardware flow control. -
Page 70: Remote Command Syntax And Conventions
Multiple commands can be sent in a single string where a ‘;’ character is used at the end of each command. The PM6000 will respond to invalid commands by adding an error message to the error queue. It is recommended that the error queue is checked after issuing command sequences by using the SYST:ERROR queries to ensure successful configuration PM6000 will always replys at least one char to the clinet socket. -
Page 71: Status Reporting
:BRF?), then the return string is the results were asked. If the command is a configure command (e.g. :SEL:VLT) that no result was asked, PM6000 will send a " " (a space) as the reply. Thus in your program, writing a configure command must followed by a read (i.e. -
Page 72: Ieee488.2 Common Commands
YSTEM 4.6.2 Background and Display Status Register In the PM3000 these were separate status registers. In the PM6000 the same register is used. Both the “:BSR?” and “:DSR?” commands read from this register. Bit Condition Description Set when data is available... - Page 73 The event status register is cleared once it has been read 4.7.5 *IDN? Unit Identity *IDN? Format: Return VOLTECH, PM6000, Serial Number, Firmware Version format: Description: The serial number returned is the chassis unit serial number 4.7.6 *OPC Initialize Operation Complete Function...
- Page 74 4.7.7 *OPC? Flag when Operation Complete Format: *OPC? Return format: Description: Returns once the OPC bit is set in the standard event status register, indicating that the PM6000 has finished processing commands 4.7.8 *RST Reset Device Format: *RST Return None...
- Page 75 4.7.13 *TST? Report Self Test *TST? Format: Return None format: Description: Always returns 0 for the PM6000. 4.7.14 *WAI Wait for Operation *WAI Format: Return None format: Description: Waits for the operation complete bit in the standard event status register to be set.
-
Page 76: Format Commands
Description: Sets up the averaging buffer for the measurements made by the PM6000. The sample period is approximately a third of a second so for an averaging buffer depth of 16, the buffer will fill in around five seconds. When in ‘auto’ mode, the buffer will be cleared if a significant change in value is detected. - Page 77 Format: :BRD? :BRD:CH<ch>? :BRD:GRP<group>? :BRD:SUM? :BRD:GRP<group>:SUM? :BRD:ALL? Where <ch> is a channel number 1 to 6 Where <group> is a group number 1 to 6 Return A number floating point values depending upon selection. PM6000 U OLTECH ANUAL SSUE PAGE...
- Page 78 If only odd is selected, all the odd harmonics up to the maximum will be sent. :BRD:SUM? The sum results returned are those for the PM6000 U OLTECH ANUAL SSUE...
- Page 79 Description: Sets the bits that are enabled in the background and display status register. In the PM6000 there is only one set of results, but the background results commands are included for backwards compatibility. Command has exactly the same functionality as :DSE 4.8.6 :BSE?
-
Page 80: Configuration Commands (:Cfg Command)
4.8.9 :CFG? Read Configuration :CFG? <prog> Format: Return Integer or floating point as appropriate. format: Description: Returns the configuration of the PM6000. See the Configuration Commands section below for valid prog settings. 4.8.10 :CPL Set AC/DC Coupling :CPL:+DC Format: :CPL:-DC :+DC –... - Page 81 As for :BSE? Above 4.8.13 :DSR? Read Data Status Register :DSR? Format: Return 0 – 255 format: Description: As for :BSR? Above. 4.8.14 :DVC Device Clear :DVC Format: Return None format: Description: Performs a soft reboot. PM6000 U OLTECH ANUAL SSUE PAGE...
- Page 82 VDF – Volts distortion factor VTHD – Volts Total Harmonic Distortion VTIF – Volts Telephone Infl. Factor ADF – Amps distortion factor ATHD – Amps Total Harmonic Distortion ATIF – Amps Telephone Infl. Factor VDC – Volts DC PM6000 U OLTECH ANUAL SSUE PAGE...
- Page 83 (see :INST:NSEL) and can only be read if SUM has been configured for the group (:SEL:SUM). Min/max hold must be enabled prior to reading min/max results by using the :MIN and :MAX commands PM6000 U OLTECH ANUAL SSUE PAGE...
- Page 84 Fund VA, Fund VAr, Fund V, Fund A, Fund PF, R, X, Fund Vmean, Fund Amean, VDC, Voltage harmonics (magnitude & phase), ADC, Current harmonics (magnitude & phase), Watts harmonics (magnitude only), Vthd, Athd, Vtif, Atif. PM6000 U OLTECH ANUAL SSUE...
- Page 85 (see 4.11) :FRD:GRP<group>:SUM return the sum results of the specific group. The sum results only can be return when was enabled by the :SEL:SUM command and the group with more than one channels PM6000 U OLTECH ANUAL SSUE PAGE...
- Page 86 :FSR:VLT|AMP|EXT|SLW Format: VLT – Set voltage frequency source AMP – Set current frequency source EXT – Set external frequency source SLW – Same as EXT on PM6000 Description: Sets the frequency source for the group currently selected Format: :FSR:FIX <freq>...
- Page 87 – integer maximum harmonic 1 – 99 Description: Sets the number of amps harmonics to be calculated for the group currently selected. Also sets whether odd or all harmonics in the group are returned. PM6000 U OLTECH ANUAL SSUE PAGE...
- Page 88 AHM ALL, Number Description: Returned the currently selected value for amps Format: :HMX:VHM? Return : VHM ODD, Number VHM ALL, Number Description: Returned the currently selected value for volts :HMX:WHM? Format: Return : WHM ODD, Number PM6000 U OLTECH ANUAL SSUE PAGE...
- Page 89 – Run time in hours Return None format: Description: Starts the integrator on the currently selected group and any other groups using the same trigger :INT:RUN hours will start an integration over the specified PM6000 U OLTECH ANUAL SSUE PAGE...
- Page 90 The :INT:RESET commands clears the integration results and Tint, but the does not stop the integration. So results will be set to zero but integration will continue Integration results can be read using the :FNC command PM6000 U OLTECH ANUAL SSUE...
- Page 91 Return None format: Description: Sets the measurement mode in the PM6000. In continuous mode, results are continually updated. In single mode, measurements are stopped until a *TRG is received. Measurements are made until the averaging buffer has been filled. Once the averaging buffer has been filled measurements are stopped until the next *TRG is received.
- Page 92 The measurement update rate will be correspondingly slower with lfmode of 2 or 3 :PWM:DIS Format: Return None format: Description: Exits PWM mode and returns to Normal mode 4.8.27 :RAV Reset Averaging Format: :RAV Return None PM6000 U OLTECH ANUAL SSUE PAGE...
- Page 93 - ALL Reset MIN and MAX stores Return None format: Description: Reset the specified MIN/MAX stores. Example: To reset all MIN and MAX results :RES:ALL ALL To reset the MAX store of channel 2 :RES:CH2 MAX PM6000 U OLTECH ANUAL SSUE PAGE...
- Page 94 – floating point scale 0.00001 – 100000 Return None format: Description: Sets the scaling for the group currently selected. 4.8.31 :SEL Select Function List Format: :SEL:CLR – Clear previous selection :SEL:CH1 – Select Channel 1 PM6000 U OLTECH ANUAL SSUE PAGE...
- Page 95 :SEL:AHM – Select current harmonic :SEL:WHM – Select Watts harmonic :SEL:VDF – Select Volts distortion factor :SEL:VTHD – Select Volts Total Harmonic Distortion :SEL:VTIF – Select Volts Telephone Infl. Factor :SEL:ADF – Select Amps distortion factor PM6000 U OLTECH ANUAL SSUE PAGE...
- Page 96 :WRG:ALL – Set 1 phase 2 wire in all groups Return None format: Description: Sets up the wiring configuration for the group currently selected, with the exception of :ALL which sets 1 phase 2 wire in all groups. PM6000 U OLTECH ANUAL SSUE PAGE...
- Page 97 Fixed frequency val Floating point freq For group currently selected Low level blanking 0 = disable Affects all groups 1 = enable Disable channel 0 = disable Disables group containing (ch1) 1 = enable PM6000 U OLTECH ANUAL SSUE PAGE...
- Page 98 0 = voltage Affects group containing ch1. 1 = current Setting 3 is exactly the 2 = external same as 2 on the PM6000. 3 = slow external Voltage range (ch1) 0 = 5V Affects group containing ch1. 1 = 10V...
- Page 99 Floating point num of Affects group currently seconds selected PWM output range 1 = 5Hz Affects group currently selected. On the PM6000, 2 = 0.1Hz determines the minimum 3 = 0.1Hz fundamental frequency. 4 = 5Hz Remote display 0 = disabled (Default)
- Page 100 If 0 then 8 values 1 = enabled per line, if 1 then continuous comma separated values Data return format 0 = 4.5 digit ASCII 1 = 5 digit ASCII 2 = 7 digit ASCII PM6000 U OLTECH ANUAL SSUE PAGE...
-
Page 101: Inp Commands
The frequency value corresponds to the 3dB point of the filter. Format: :INP:FILT:LPAS? Return Floating point 3dB point of the filter selected. format: Description: Returns the low pass filter setting for the group currently selected. PM6000 U OLTECH ANUAL SSUE PAGE... -
Page 102: Inst Commands
The PM6000 combines one or more physical channels into groups. These groups may then be configured causing all the channels within the group to be configured with the same values. To retrieve a list of all the groups configured in a PM6000 the following SCPI command is used :INST:CAT:FULL? - Page 103 In the currently selected group there are 2 channels: ch4 and ch5. 4.11.3 :INST:NSEL :INST:NSEL <group number> Format: group number – integer between 1 and 6, depending on the number of groups available in the PM6000 Return None format: Description: Selects the group specified 4.11.4 :INST:NSEL?
- Page 104 :INST:STAT ON|OFF Format: Return None format: Description: Enables current group. By default all are ON. When disabled, no measurements are updated 4.11.8 :INST:STAT? Format: :INST:STAT? Return ON|OFF format: Description: Returns enable status of current group PM6000 U OLTECH ANUAL SSUE PAGE...
- Page 105 :SENS C 4.12. OMMANDS 4.12.1 :SENS:ZERO :SENS:ZERO IMM Format: Return None format: Description: Performs a one off offset zero immediately 4.12.2 :SENS:ZERO:AUTO :SENS:ZERO:AUTO ON|OFF Format: Return None format: Description: Enables automatic offset zero (Default ON) PM6000 U OLTECH ANUAL SSUE PAGE...
-
Page 106: Syst Commands
To allow any analogue cards or shunt modules installed to be identified, the standard SCPI 1997 :SYST:CTYPE command group has been extended Format: :SYST:CTYPe? <ch>, A Return VOLTECH, ANALOGUE CARD, <serial number>, <card format: revision> Description: Returns the serial number and hardware revision of the analogue card in the requested channel. - Page 107 Description: Sets the system date where <year> is four digit year <month> is 1 to 12 <day> is 1 to 31 :SYST:DATE? Format: Return Year, month, day format: Description: Returns the system date PM6000 U OLTECH ANUAL SSUE PAGE...
- Page 108 .., error number, “error description” Description: Returns the complete error message list, and so clears the queue If no error has occurred since the last error query, then 0, “No error” will be returned Format: :SYSTem:ERRor:CODE:NEXT? PM6000 U OLTECH ANUAL SSUE PAGE...
-
Page 109: Examples Of Using Commands
Returns the number of errors in the error list If no error has occurred since the last error query, then will be returned 4.14. XAMPLES OF SING OMMANDS 4.14.1 Suggested Protocol • Set 10 seconds for read/write timeouts PM6000 U OLTECH ANUAL SSUE PAGE... - Page 110 1 in a 3P4 wire configuration. Next send :INST:NSEL 2, :INP:FILT:LPAS 500000 and :WRG:3P4 sets the last 3 channels as group 2. Now reading individual channels requires :INST:NSEL 2, :FNC:CH1:VLT? Reads channel 1 of group 2 (which is channel 4). PM6000 U OLTECH ANUAL SSUE...
- Page 111 1, :INP:FILT:LPAS 2000000 and :WRG:3P4 sets the first 3 channels as a 3P4 wire configuration under group 1. Now add :SEL:CH2, :SEL:CH3 and change :FRD:CH1? To :FRD? and the results string will contain CH1, CH2 and CH3 in that order. PM6000 U OLTECH ANUAL...
- Page 112 The return order is group 1 ch1, ch2 and ch3 then group 2 ch1, ch2 and ch3, replace the :BRD:CH1? to :BRD? in order to read all results back. The use of :INST:NSEL? And :INST:CHAN? Provides information on group and channel selections. PM6000 U OLTECH ANUAL SSUE...
-
Page 113: Remote Access
Ethernet is required for firmware upgrades (section 9.4) and for access results via FTP (section 5.2). 5.1.1 Network Connection Method This would be the method that you would use if you were to attach your PM6000 to a local area network. The PM6000 supports networks with and without DHCP (Dynamic Host Configuration Protocol). - Page 114 6. Record the subnet mask (usually 255.255.0.0). 7. On the PM6000 Interface->Ethernet menu check Fix Settings 8. Then go down into the Fix Settings submenu and set IP Address to the PM6000 IP address (e.g. 169.254.110.254) and set the subnet mask to be the same as the PC subnet mask (e.g.
-
Page 115: Ftp
Security Center icon on the Control Panel. From there, select Windows Firewall and then select Off. You should now have an Ethernet link between your PC and the PM6000. This can be tested by typing ‘ping’ followed by the PM6000 IP address (e.g. ‘ping 169.254.110.254’) at a DOS prompt. - Page 116 CCESS 5.2.1 Anonymous or User login The PM6000 allows both Anonymous and user logins. The differences are that in anonymous mode files can only be copied from the PM6000. If a user login is provided, files and directories can be copied, deleted and created, allowing better management of the PM6000 storage media.
- Page 117 Files can now be copied from the PM6000 to your PC. In the case of FileZilla, this can be done by dragging the desired file from the PM6000 window in to the desired directory on your PC as listed in the windows on the left.
- Page 118 EMOTE CCESS 5.2.4 Finding your way around The PM6000 allows FTP to all available storage media on the instrument. As such, once connected, the files and directories of interest need to be found. The file system is organized as follows /pub/floppy/ (if fitted) Contains files on the floppy disk in the instrument.
- Page 119 Only files and directories in or below these directories will be visible and accessible from the instrument. WARNING: Various other files and directories may be visible by the FTP browser. Do not attempt to modify or delete these files as this may damage the instrument. PM6000 U OLTECH ANUAL SSUE...
-
Page 120: Fitting Options
3. Switch on the PM6000 and the new shunt will be automatically recognized by the PM6000. This can be confirmed in the [CONFIG] menu. If the shunt is not available, or any warnings are displayed during switch on, please contact you Voltech service center. - Page 121 EMOTE CCESS PM6000 U OLTECH ANUAL SSUE PAGE...
-
Page 122: Software
PM6000 easily meets the requirements of the latest version of EN61000-4-7 (harmonic measurement instrumentation) including the requirements for inter-harmonic grouping and a 200ms measuring window. The PM6000 also implements the requirements for a reference instrument by using a discrete Fourier transform as opposed to a fast Fourier transform (FFT), providing reliable, error-free harmonic measurements in all conditions. - Page 123 NOTE: When using the USB-6009 box from National Instruments, it is essential to ensure that the voltages applied to the USB-6009 do not exceed the rate voltage, which is nominally +/- 20V. Exceeding thr rate voltage could well result in permenant damage to the USB-6009. PM6000 U OLTECH ANUAL SSUE...
-
Page 124: Specification
ECHANICAL AND NVIRONMENT 8.2.1 Dimensions (Approx) • Height: 17cm • Width: 42cm • Depth: 36cm 8.2.2 Weight (Approx) • 12Kg for 6-phase instrument with no shunts 8.2.3 Line Input • 90VAC to 264VAC, 47-63Hz. 170VA PM6000 U OLTECH ANUAL SSUE PAGE... -
Page 125: External Input
• 10 to 90% relative humidity non-condensing 8.3. XTERNAL INPUT Input Impedance: • Edge triggered system - Minimum dv/dt on each edge is 0.5V/uS • 5V TTL compatible • Diode clamp protected to ±20V PM6000 U OLTECH ANUAL SSUE PAGE... -
Page 126: Peripheral Ports
Standard parallel printer interface Signal name Signal name !STROBE BUSY No connection !AUTOFD !ERROR !INIT !SLCTIN !ACKNLG 8.4.3 External Monitor • Output compatible with IBM® VGA • Connector:HD-15 Socket on rear of instrument Connector pin-out: PM6000 U OLTECH ANUAL SSUE PAGE... - Page 127 Blue Signal No Connection H Sync V Sync 8.4.4 External Keyboard and Mouse • Compatible with IBM® PS/2 • Connector: 6-pin Mini-DIN socket on rear of instrument • Mouse input is not currently used PM6000 U OLTECH ANUAL SSUE PAGE...
- Page 128 Common Common Common Status indicators: Green Link/Activity indicator Yellow Speed 100Mbps indicator 8.4.7 Floppy Disk • Compatible with Windows/DOS format • 3 1/2" HD format • Not available on PM6000s sold after February 2008. PM6000 U OLTECH ANUAL SSUE PAGE...
-
Page 129: Measured Parameters
Voltage Crest Peak Value CF = Value Factor Current Crest Peak Value CF = Value Factor Voltage − Distortion × Factor Voltage Total ..Harmonic Distortion Voltage Telephone harm ∑ × Vtif Influence harm Factor PM6000 U OLTECH ANUAL SSUE PAGE... - Page 130 Where θ = phase angle Ohms × θ Resistance (θ = phase angle) (Ω) Ohms θ × Reactance (θ = phase angle) (Ω) Voltage Volt − harmonic n Phase PM6000 U OLTECH ANUAL SSUE PAGE...
- Page 131 There are also two ways to display the phase angle. The first is as the table above where the phase is displayed as 0 to 360°. The second is to display between ±180°. In this case the phases in the table above would read 0, 90, 180, -0 to -180° PM6000 U OLTECH ANUAL...
-
Page 132: Measurement Accuracy
Phase error will be sum of phase error for measured signal and phase error of phase reference signal Specification valid from 500mV and higher Effects of common mode voltage better than: Freq. CMRR PM6000 U OLTECH ANUAL SSUE PAGE... - Page 133 10MHz -50dB See Note 1. × Error Fcomp Fcomp% = 0.002% where F is less than or equal to 100kHz. Fcomp% = 0.004% where F is greater than 100kHz. See Note 2. × Error Fcomp PM6000 U OLTECH ANUAL SSUE PAGE...
- Page 134 π error error error error × × VArf Error VArf VArf θ π θ × × × Error error error PM6000 U OLTECH ANUAL SSUE PAGE...
- Page 135 Notes 1. When comparing the current readings of a PM6000 without a shunt to the signals derived from an external source such as a calibration amplifier, to is essential to ensure that the calibration amplifier is loaded correctly as specified in it's user manual. For example, on a Fluke 6100A, a 10 Ohm resistive load would work.
-
Page 136: Regulatory Compliance
PECIFICATION 8.7. EGULATORY OMPLIANCE 8.7.1 Safety EN61010:2001 8.7.2 EMC Emissions and immunity EN61326:1997, A1:1998 PM6000 U OLTECH ANUAL SSUE PAGE... -
Page 137: Shunts - 30A And 1A
1MHz Shunt Resistance: 10mOhms Temperature Coefficient: < ± 10ppm/K (20ºC to 40ºC) Stability (at 125ºC foil temperature): Deviation <0.1% after 2000h Maximum continuous rated current: 30A RMS, 250A peak PM6000 U OLTECH ANUAL SSUE PAGE... - Page 138 The 1A shunt module is fused at 2.5A to protect against accidental connection to 15A fused 240V mains supply. Fuse type 2.5A HRC Anti-surge 20x5mm Replace only with the same type and rating of fuse PM6000 U OLTECH ANUAL SSUE...
-
Page 139: Warranty, Service And Updates
Repair/verify the customer unit before dispatch. A certificate of verification will be issued as a matter of course. The PM6000 is a complex product and may not be completely free of errors. You are advised to verify your work. In no event will Voltech be liable for direct, indirect, special, incidental or consequential damages arising out of the use of or inability to use the PM6000 or its accessories, even if advised of the possibility of such damage. -
Page 140: Obtaining Service And Applications Support
ERVICE AND PPLICATIONS UPPORT Voltech personnel will be happy to help you with any query that you may have. Please e-mail your local supplier or your regional Voltech service center. E-mail address can be found at Voltech’s web site (www.voltech.com). - Page 141 Off. Before starting, verify that a valid Ethernet connection is available between the PC being used for the upgrade and the PM6000 being upgraded. See section 5.1 for information on creating a valid Ethernet connection. Next download the latest installation utility and firmware from the web. If you have an...
- Page 142 ERVICE AND PDATES Now run the PM6000 upgrade utility by clicking on Start -> All Programs -> Voltech Software -> PM6000Upgrade. This utility will provide all the instruction you need to finish the upgrade of the firmware for the PM6000. If your PM600 has version 1.06.01 firmware or earlier and/or you do not have a DHCP Ethernet connection, then you will need a keyboard connected to the PM6000.
-
Page 143: Safety Information
AFETY EATURES The PM6000 has been designed with safety features, such as shrouded safety connectors, that provide the operator with a high level of protection against the risk of electric shock. As with any dangerous equipment, however, it is important that an assessment of the overall risk to safety is made during installation. -
Page 145: Release History
11. R ELEASE ISTORY Firmware issue 1.08.02; Manual Issue 7 • IEC61000 Current Harmonics and Flicker added to the PM6000 to be used in conjunction with the IEC61000 Software for the PM6000. • Help System enhanced. • VTIF and ATIF distortion measurements added (3.2.10). - Page 146 • Firmware changed to support PM6000 analog card serial numbers on IEC software results. • Manual change to reflect the removal of the floppy disk from the PM6000. Firmware issue 1.20.06RC4; Manual Issue 15 specification changed. RMS, Firmware issue 1.20.06RC4; Manual Issue 16 Reference to PM6 VPAS software added.
- Page 147 • The location of the over range bits for voltage and current in the background status register (section 4.6.2) were incorrect. Bits 3 and 4 were reversed. The manual has been corrected. • BRD?, FRD?, BRF? and FRF? enhanced to returned return results from multiple groups.
- Page 148 Config Zero..........35 Format Commands........8 Configuration Commands (\......Format Floppy Disk.........42 CFG command)........29 Freq source..........12 Connecting to the PM6000......4 Frequency Source........8 Connecting to the PM6000 using ethernet..1 FTP............3 Coupling.............6 Getting Started...........1 Data............41 Graph............31 DATA DUMP..........45 graph time base........32 data log file..........18 Grid............31...
- Page 149 HF Ballast (AM)........11 Obtaining Service and Applications Support HOLD............45 ...............2 ODD and EVEN........20 Options............4 IEC 61000-3..........1 IEEE488.2 Common Commands....4 INP Commands........33 Parallel.............39 INST Commands........34 Parallel Port..........5 INTEG RUN..........45 PCMCIA..........39 Integrator..........13 PCMCIA Cards..........1 Interface...........38 Peripheral Ports..........5 Interfacing with GPIB systems....1 Phase............20 Interfacing with RS232 Systems....1 Phase Reference.........9 Power Analysis Software......1...
- Page 150 Software.............1 User............44 Specification..........3 Sum............19 View Hardware........34 SYST Commands........38 View Settings........34, 39 System Upgrade........37 Voltech Shunts........1, 11 Volts Distortion Factor......21 three-phase 7-wire configuration....7 Volts Harmonics........20 To connect a transducer with a current Volts Peak..........25 output only...........11 Volts Scaling..........7 To connect a transducer with a voltage Volts THD..........21...
Need help?
Do you have a question about the PM6000 and is the answer not in the manual?
Questions and answers