
Subscribe to Our Youtube Channel
Related Manuals for Kraus Aplos KEF-15300


Summary of Contents for Kraus Aplos KEF-15300
- Page 1 I N S TA L L AT I O N MA N UA L Aplos™ Single Handle Vessel Bathroom Faucet KEF-15300 www.kraususa.com I toll free: 1.800.775.0703 I © 2014-2015 Kraus USA Inc. I REV. August 18, 2016...
-
Page 2: Tools You Will Need
∅ 45mm) ∅ • Make sure you have all necessary parts by checking the diagram and parts list. If any part is missing of damaged, please contact Kraus Customer Service at 800- 1 15/16” ∅ 50mm) 775-0703 for a replacement. - Page 3 Diagram and Parts List A. Faucet Body D. Aerator B. Waterlines E. Aerator Key C. Mounting Hardware Assembly C1. Rubber O-Washer C2. Metal O-Washer C3. Mounting Nut C4. Mounting Screws...
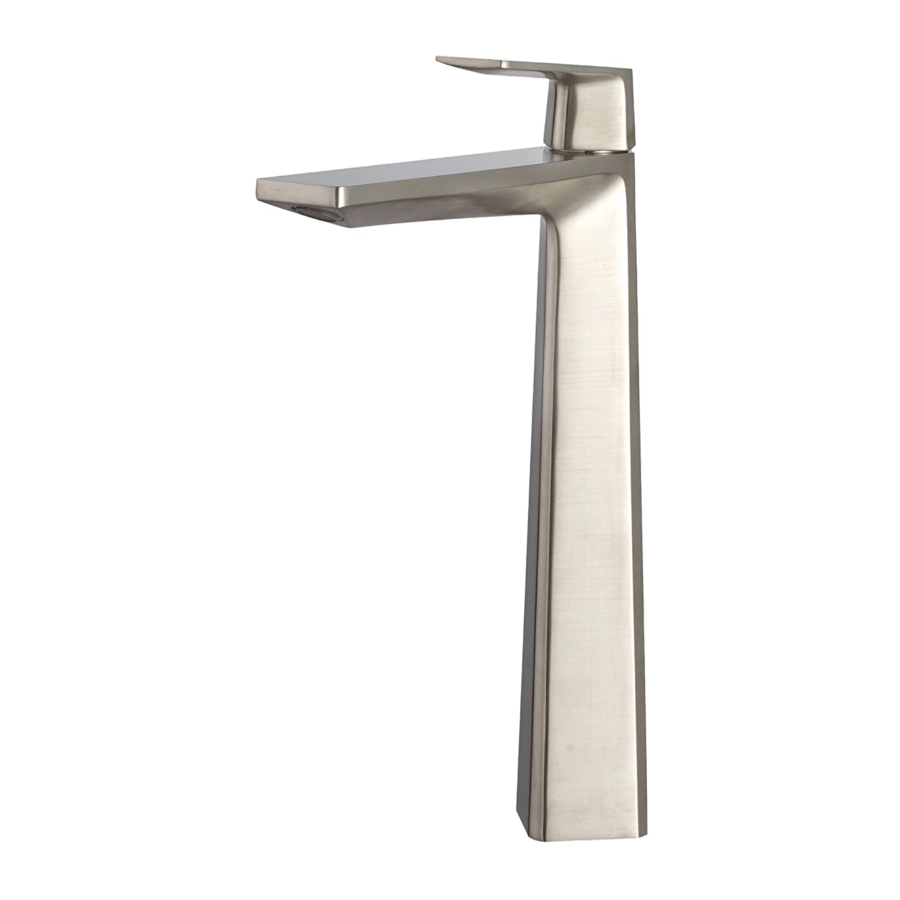
- Page 4 Faucet Dimensions (2-1/4”) 58mm (6-3/8") (1-3/8”) 161mm Ø35mm G1/2...
- Page 5 Step 1 Step 2 Step 1: Remove mounting hardware Step Remove the mounting hardware assembly (C) Step 2 Step 5 Step 2: Install hot & cold waterlines Step 3 Install waterlines (B) • Hot Side: Left • Cold Side: Right Installer Tip: HAND TIGHTEN ONLY Step4...
- Page 6 Step 3: Install faucet Step 3 Place faucet body (A) through 1-3/8” hole in countertop. Attach mounting hardware assembly (C) and secure Step4...
- Page 7 Step4 Step 4: Connect waterlines to main valve Attach waterlines (C) to angle stops and tighten until snug. Turn on angle stops and check for leaks (DO NOT TURN FAUCET ON) Installer Tip: Make sure grid washer is installed at the end of waterlines prior to installing * Grid Washer Step 5...
- Page 8 Replacement Part List - KEF-15300 1B 1A A. Cap B. Set Screw Handle Cap Cartridge Cover Locking Nut O-Ring Cartridge Base O-Ring Rubber O-Washer Metal O-Washer 10. Mounting Nut 11. Mounting Screws 12. Aerator 13. Aerator Key 14. Waterlines 15. Hex Wrench...
-
Page 9: Troubleshooting
Do not clean with soaps, acid, polish, abrasives, or harsh cleaners Do not use cloth with a coarse surface Unscrew the aerator and clean when necessary *This installation manual is subject to change without further notice. Download the Kraus Care & Maintenance Guide at: http://www.kraususa.com/maintenance...
Need help?
Do you have a question about the Aplos KEF-15300 and is the answer not in the manual?
Questions and answers