
Related Manuals for Shimadzu Bransist Alexa


Summary of Contents for Shimadzu Bransist Alexa
- Page 1 M517-E190D Digital Angiography System BRANSIST alexa Operation Guide Read this manual thoroughly before you use the product. Keep this manual for future reference.
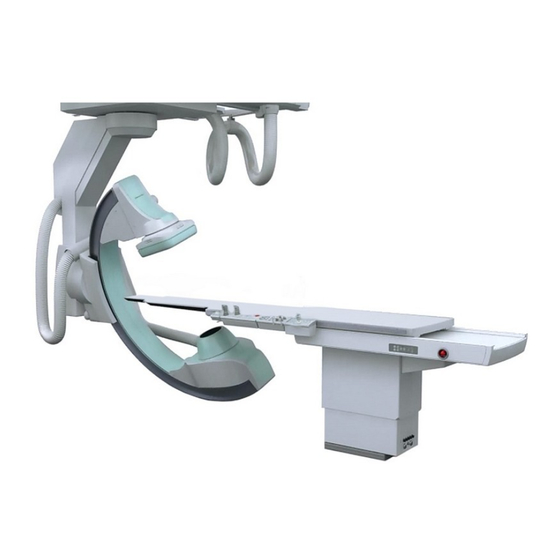
- Page 2 General Description of BRANSIST alexa is the digital angiography system with FPD (Flat Panel Detector). BRANSIST alexa, a combination of high quality digital imaging with low dose exposures, provides fast and efficient operation for PCI and diagnostic studies. This Operation Guide describes the basic operation of BRANSIST alexa.
-
Page 3: Table Of Contents
System Components .......4 Contents Examination Room ..............4 Control Room ................12 System Startup and Shutdown ..... 16 Startup ...................16 X-ray Tube Warm-up .............17 Shutdown ................19 Daily Inspection ..............21 Start Study ..........22 Input Patient Information ............22 Fluoroscopy/Radiography .....23 Operation of C-arm ..............23 Operation of Catheterization Table ........27 Fluoroscopy/Radiography ............28 Change Fluoroscopy/Radiography Program ......29... -
Page 4: System Components
System Components Examination Room C-arm Acquisition C-arm Review Monitor Indicator Monitor CyberGrip (or Cyber Console) Collimator Local Console IVR NEO Catheterization Table X-ray Tube Foot Switch (Examination Room) - Page 5 ■ CyberGrip Stop Switch Field of View Switch Catheterization Table Up/Down Switch Release Switch FPD SID Switch Direct Memory Switches C-arm Travel Selector Switch Tabletop Unlocking Switch C-arm Rotation Selector Switch (Located at the rear side of the grip) ■ Cyber Console C-arm Rotation/Travel Tabletop Unlocking Switch...
- Page 6 ■ Local Console Type A ① ② ③ ④ ⑧ ⑦ ⑥ ⑤ Name or Explanation ① C-arm Working Positions Switch ② Direct Memory Switches ③ Operate the C-leaf of the Collimator by moving up and down. ④ Operates the H/V Collimation. The Collimator opens up when this is pressed down. ⑤...
- Page 7 Type B ② ⑦ ③ ⑥ ④ ① ⑧ ⑨ ⑤ Name or Explanation ① C-arm Working Position Switch ② Direct Memory Switches ③ Operate the C-leaf of the Collimator by moving up and down. ④ Operates the H/V Collimation. ⑤...
- Page 8 * How to use Direct Memory Function (CyberGrip) Type A Select a button from , and Select the location of the C-arm from this area. Press and hold to move the C-arm to memory position. Type B Select a button from Select the location of the C-arm from this area.
- Page 9 * How to use Direct Memory Function (Cyber Console) Type A Select a button from , and Select the location of the C-arm Press and hold to move the from this area. C-arm to memory position. Type B Select a button from Select the location of the C-arm Press and hold to move the...
- Page 10 ■ IVR NEO The IVR NEO features 16 buttons with LED indicators and a multi-function Joystick with button. Default button settings are as following table. Refer to Appendix for the other functions available. Joystick Category Button LED Meaning Select Fluoro Program ON=Fluoro menu displayed.
- Page 11 A= Relevant to Acquisition monitor R= Relevant to Review monitor The function keys of the digital system keyboard can be NOTE configured as IVR NEO buttons (except for [Monitor Select] and [Reference Mode] functions). For details, contact Shimadzu service representative.
-
Page 12: Control Room
Control Room Acquisition Monitor Review Monitor X-ray Generator Console Keyboard Foot Switch Mouse C-arm Remote Digital Operation Console Cabinet... - Page 13 ■ X-ray Generator Console [Tool] menu Radiography Fluoroscopy Heat Unit Setting Button X-ray OFF Button Message Parameters Parameters Indicator Power ON Button Warm-up Button Accumulated Power Fluoroscopy Time Reset Button Button Focus Switch Field of View Button Switch Button Hand Switch Auto/Manual Radiography...
- Page 14 ■ Main Window Acquisition Monitor Side Menu (displayed when the mouse pointer is put on the left edge of the screen) is displayed Study Information Parameters Image Selector in reference mode. Acquisition Active Image Viewer Timer Status Messages Programs Exit Button Modes/Info Network Comment Activity...
- Page 15 Review Monitor Side Menu is displayed Study Information Parameters Study Image in reference mode. Information Selector Digital Program Menu Image Viewer Probe Signal Status Messages Programs Exit Button Modes/Info Network Comment Activity Cine Control...
-
Page 16: System Startup And Shutdown
System Startup and Shutdown Startup Be sure to perform daily inspection before patient use. NOTE "Daily Inspection" P.21 X-ray Generator Console Power ON Button Press (ON) Starting up whole system. -
Page 17: X-Ray Tube Warm-Up
X-ray Tube Warm-up CAUTION Be careful! During warm-up, X-ray exposure is performed automatically without operating hand switch or foot switch. The warm-up procedure can be performed when C-arm is at NOTE the park position even though the "fluoroscopy at park position" setting is set to OFF. - Page 18 If you need to pause warm-up during procedure, ・ Press to pause warm-up. Press to resume. ・ Press to cancel warm-up, and press to confirm.
-
Page 19: Shutdown
Shutdown C-arm (Type A) Set the C-arm to the center position Press and hold the Center Reset Switch until travel is completed. Move the C-arm to the park position Press and hold the C-arm Parking Switch until travel is completed. C-arm (Type B) Set the C-arm to the center position... - Page 20 Digital Radiography System Click A confirmation message is displayed. Confirm the message by clicking X-ray Generator Console Press (OFF) when System Display window is changed Make sure the OFF button is lit. To restart the system, wait 1 minute after turning off power to the NOTE X-ray generator, then press (ON) again.
-
Page 21: Daily Inspection
Daily Inspection Check the following items before using the system. Before turning on the power switch. Ensure there is: • No damage on the exterior. • No Condensation or Water on the system. • No twisting of the cables. After turning on the power switch. Ensure there are: •... -
Page 22: Start Study
Start Study Input Patient Information Click on the side menu [New Study] window is displayed. Input each items Indicates Mandatory Items. Be sure to input the items with a dot. Click Patient information will appear on the upper area of the main window. Patient Information If loops/images have not yet been recorded/ saved, study information can be modified by... -
Page 23: Fluoroscopy/Radiography
Fluoroscopy/Radiography Operation of C-arm ■ CyberGrip Backward/Forward Movement of FPD Move the CyberGrip in the up and down direction while pressing FPD moves according to the direction of the grip. Rotation of C-arm (RAO/LAO) Move the grip in the up/down direction while pressing C-arm rotates according to the direction of the grip. - Page 24 ■ Cyber Console Backward/Forward Movement of FPD Move the FPD SID lever forward/ FPD SID Confirmation Switch (on the far side) backward while pressing confirmation switch. FPD moves according to the direction of the lever. Rotation of C-arm (RAO/LAO) Move the C-arm rotation/ travel lever forward/ backward while pressing C-arm rotation selector...
- Page 25 ■ Local Console (C-arm position change) MH-300 (Floor mount type) ② ③ ① C-arm Working Positions Switch Switch C-arm position ① Home position 0° ② Femoral position CW45° ③ Peripheral position CW40° Movable range of the C-arm rotation is "LAO90-RAO-90" in the NOTE femoral position, however limited to "LAO30-RAO30"...
- Page 26 MH-200S (Ceiling suspended type) ② ⑤ ③ ① C-arm Working Positions Switch ⑥ ④ Switch C-arm position ① Head position ② Left position ③ Left sheltered position ④ Right position ⑤ Left diagonal position (press simultaneously) ⑥ Right diagonal position (press simultaneously)
-
Page 27: Operation Of Catheterization Table
Operation of Catheterization Table Horizontal movement or raising/lowering of catheterization table. Horizontal Movement of Catheterization Table Move the table manually while pressing the unlocking switch. CyberGrip Grip Switch Table Console Raising of Catheterization Table Press (Up) switch. Tabletop rises. CyberGrip Table Console Lowering of Catheterization Table Press... -
Page 28: Fluoroscopy/Radiography
Fluoroscopy/Radiography Fluoroscopy Radiography Confirm the fluoroscopy Confirm the radiography program program ・ Modify the condition as needed. ・ Modify the condition as needed. ・ Positioning shall be set by fluoroscopy. Perform fluoroscopy more than 3 seconds. Press the fluoroscopy foot switch Press the radiography foot switch... -
Page 29: Change Fluoroscopy/Radiography Program
Change Fluoroscopy/Radiography Program Fluoroscopy/Radiography program presets and corresponding parameters are changeable. These parameters can be changed at the digital processing system in the control room or at the IVR NEO. "IVR NEO" P. 10 ■ Change Preset Parameters Fluoroscopy Radiography Click on the Click... -
Page 30: Hv Flip
HV Flip Flip and acquire the fluoroscopy and radiography images in the Horizontal or Vertical direction. Click the flip buttons on the side menu of Acquisition monitor to flip images Flip horizontal (Click the button again to change the setting back to normal) Flip vertical (Click the button again to change the setting... -
Page 31: Change Settings Of Injection Delay
Change Settings of Injection Delay Injection-Acquisition Delay (the delay in seconds between injection and beginning of acquisition), Mask- Acquisition Delay (the delay in seconds between end of mask acquisition and beginning of live acquisition) and Radiation Times are set in advance for each acquisition program. These values can be changed temporary during study according to the following procedure. -
Page 32: Recording Fluoroscopy Image
Recording Fluoroscopy Image Last N seconds fluoroscopy record or Either Direct fluoroscopy record can be used. Default setting is Last N seconds fluoroscopy record. If you NOTE want to use Direct fluoroscopy record, system setting is required beforehand. ■ Last N seconds Fluoroscopy Record Perform fluoroscopy Click or press... -
Page 33: Adjusting Image
Adjusting Image ■ Display Button Function Adjust image brightness. Right-click: + (increase) Left-click: - (decrease) Click both mouse buttons simultaneously: 0 Adjust image contrast. Right-click: + (increase) Left-click: - (decrease) Click both mouse buttons simultaneously: 0 Enhance the image. Right-click: + (increase), Left-click: - (decrease), Sharpness Click both mouse buttons simultaneously: 0 Right-click: + (increase), Left-click: - (decrease),... - Page 34 ■ Playback ① ② Button Function Adjust the loop playback speed. Right-click: + (increase) Left-click: - (decrease) Click both mouse buttons simultaneously: Return to default Change loop playback mode. Play Single Loop with Synchronize: Plays back selected single loop until a new loop is received. Then, the new loop is selected and played back continuously.
-
Page 35: Adding, Deleting And Displaying Reference Images
Control Bar Keyboard IVR NEO Joystick Function Play frame-by-frame forward according to ( Tilt and hold the speed of joystick angle when paused. to the right) (Larger the tilt angle, higher the speed) Play frame-by-frame backward according to ( Tilt and hold the speed of joystick angle when paused. -
Page 36: Related Operation For Study
Related Operation for Study Button Function New study (Start examination) Re-synchronize the Review monitor display to the acquiring study. Open previous study. Close the study. Display study information. Display comment menu. -
Page 37: Measuring And Analyzing
Measuring and Analyzing ■ Quantitative Coronary Analysis (QCA) QCA Tool Bar Click and select QCA tool bar will appear. Perform calibration The default value of calibration factor is calculated as the measured object is located on the ISO center. Perform calibration according to the following procedure if needed. - Page 38 Click on 3 points along the catheter. Calibration factor (mm/pixel) will appear. Click button from side menu to modulate magnification rate NOTE of Ref image. Specify the stenosed artery Click button from [Manual] menu. Click points on opposite sides of the narrowest part of the stenosed artery.
- Page 39 ■ Left Ventricle Analysis (LV) Perform LV analysis with a projected image of RAO 30 degrees (or images of RAO 30 degree and LAO 60 degree). LV Tool Bar Click and select LV Tool bar will appear. Perform calibration The default value of calibration factor is calculated as the measured object is located on the ISO center.
- Page 40 Outline the ventricular wall Outline each image of End-of-Diastole (ED) and End-of-Systole (ES). Outline both ED and ES image repeating the following procedure. Click the projection icon that corresponds to the image. RAO ED RAO ES LAO ED LAO ES Using the mouse, click multiple points along the ventricular wall starting from the base of the aorta.
-
Page 41: Operating Dsa Tool
Operating DSA Tool Click and select [DSA Tools] bar will appear. Button Function Setting mask image. Switching ON/OFF of subtraction. Create peak hold image. Set ROI of MAP. Resetting mask image. Executing reregistration. (Shift the mask image) Create a contour enhanced blood-vessel image from DSA image. -
Page 42: Printing Images
Printing Images Click and select Printer dialog will appear. Setting any required items such Add images with Click Printing is started. Closing Study Click from [Study] menu... -
Page 43: Studies Management
Studies Management Managing Studies Click from [Study] menu [Studies Management] window is displayed. 1 2 3 6 7 8 9 0 Button Function Searches based on the search target set by the [System] and [Drives] Search buttons, plus all search criteria. View Displays the selected study or studies in the Image Viewer window. -
Page 44: Sending Studies
Button Function Info Displays detailed information about the selected patient. Permanently deletes the unprotected studies selected from the local Delete system. Write Prepares and writes the selected studies to CD/DVD. Protect Protects the selected studies from deletion. Unprotect Removes protection from selected studies. Sending Studies Select the desired studies in the Study List... -
Page 45: Writing To Cd/Dvd
Writing to CD/DVD Select the studies Select the desired studies from the Study List. Click Prompted to insert a blank disc to the writer. Insert a blank disk. Media Writing dialog box appears. Volume name is changeable. Select the writing item from [Images], [RDSR] or [Both]. -
Page 46: Trouble Shooting
Trouble Shooting Emergency Halt ■ Halting the C-arm Press (Stop switch) Stop Switch Stop Switch Stop Switch CyberGrip Cyber Console Catheterization Table ■ Resetting the Emergency Halt Turn (Stop switch) clockwise When resetting, be sure to reset the pressed switch. NOTE Reset the STOP switch after the message "Stop Mode: Reset OK"... -
Page 47: Shutdown Failure
Shutdown Failure If trouble occurs when trying to shut down the Digital Radiography System via [Exit] button (system does not shut down), shut down the system according to the following procedure. Digital Operation Cabinet (Control Room) Press and hold the Power button for at least 5 seconds The power goes off. -
Page 48: Digital Angiography System Application Problem
To restart the system, wait 1 minute after turning off power to the NOTE X-ray generator, then press (ON) again. If the acquisition monitor is blank when restarting the system NOTE after shutdown failure, press the power button on the digital control cabinet in the equipment room to turn on the power. -
Page 49: Fpd Problem
FPD Problem Automatic FPD calibration is supported to the system. Manual calibration is not necessary, so follow the instruction below when manually calibrating the system. Select and click on the side menu FPD calibration window appears. Make sure that [Timeout (Seconds)] is set to 10 seconds This defines the maximum number of seconds to wait before cancelling if there is a problem... -
Page 50: Power Failure
Power Failure This system is protected from power failure with UPS (uninterruptible power supply system). If the power failure occurs suddenly such as thunderbolt, screen display disappears. If power supply is restored within 5 minutes, system will be automatically restored and images on monitors will be redisplayed. So you can use system again. -
Page 51: Error Messages
Character XX is not valid. Try other characters. Could not find the PPS Manager. Please configure your PPS Please contact Shimadzu service representative. Manager in the hosts table. Error: Invalid query criteria Input an appropriate value. entered. No DICOM media found in Insert DICOM media. - Page 52 When "FPD ERROR" is displayed at upper left of the system monitor, errors in the following list are also displayed. Action Message Description Error of sensor chassis [Sensor]:Temperature error Stop study immediately temperature. and contact Shimadzu Error of FPD cooling unit service representative. [Cooling Unit]:Water flow error water flow.
- Page 53 Measured kV Over If this message appears exceeded permitted range. repeatedly though Measured tube voltage fell pressing [RESET] key, Measured kV Under below permitted range. contact Shimadzu service representative. Starter Error Starter failure. I.F. Over Abnormal filament heating current. Filament not ready If "No Filament S"...
- Page 54 Abnormal charging voltage Charge Volt Error of primary smoothing capacitor. Abnormal control circuit Power Down supply voltage. Contact Shimadzu service Abnormal connection to representative. H.V.T. Not Connected high-voltage transformer. Arcing Trouble Repeated arcing occurred. Board status Error Abnormal control board.
- Page 55 The continued possible to do exposure use can be detect "Thermal X-ray while this Warning Over". displays.) The starter is in standby Contact Shimadzu service Starter is not working status. representative. Error Messages at Power ON Message Description Action...
- Page 56 Action The examination room door Door/Interlock Close the door. is open. Stop study immediately and Contact Shimadzu service representative. (It Heat Exchanger of FPD FPD Water Flow Error s possible to do exposure detects error. X-ray for about 30 minutes while this Warning displays.)
- Page 57 Drop of battery voltage. Low Battery Shimadzu service representative. Incorrect installation setting Pos. Calibration Error of position detection. Contact Shimadzu service Incorrect installation setting Lever Calib. Error of the console. representative. Detects disconnection of Interlink Error ! XXX console.
-
Page 58: Appendix
Appendix IVR NEO buttons/Keyboard Shortcut keys functions The settings of IVR NEO buttons (default settings: P.10 and P.11) and keyboard function keys can be changed to the functions in the following table. See Chapter 12.8 Physicians Tab on DAR-9500f Operation Manual (M517-E181) for changing the settings. - Page 59 Category Button Function Contour Display the contour enhanced image. Enhancement ROI of DSA-MAP is displayed on the image and the Set Mask Region joystick is in the operation mode. Peak Hold Display the peak hold image. X-ray OFF Ban the X-ray exposure. Dose Reset Dose meter reset upon selection.
- Page 60 Category Button Function Show Annotation Annotations properties shown upon selection. Properties Annotations Pointer Pointer tool selected upon selection. A=[relevant to Acquisition monitor], R=[relevant to Reference monitor]...
- Page 61 http://www.shimadzu.com...
Need help?
Do you have a question about the Bransist Alexa and is the answer not in the manual?
Questions and answers