Table of Contents
Advertisement
Quick Links
belkin.com
Belkin Corporation
501 West Walnut Street
Compton • CA • 90220 • USA
Tel: 310.898.1100
Fax: 310.898.1111
Belkin Components, Ltd.
Express Business Park • Shipton Way • Rushden
NN10 6GL • United Kingdom
Tel: +44 (0) 1933 35 2000
Fax: +44 (0) 1933 31 2000
Belkin Components B.V.
Starparc Building • Boeing Avenue 333
1119 PH Schiphol-Rijk • The Netherlands
Tel: +31 (0) 20 654 7300
Fax: +31 (0) 20 654 7349
Belkin Components, Ltd.
7 Bowen Crescent • West Gosford
NSW 2250 • Australia
Tel: +61 (0) 2 4372 8600
Fax: +61 (0) 2 4372 8603
Belkin Tech Support
US: 310.898.1100 ext. 2263
800.223.5546 ext. 2263
Europe: 00 800 223 55 460
Australia: 1800 666 040
P74178
© 2002 Belkin Corporation. All rights reserved. All trade names are
registered trademarks of respective manufacturers listed. Mac and Mac OS are trademarks of Apple
Computer, Inc., registered in the U.S. and other countries.
OmniView
KVM Switch
Control up to four computers from one PS/2 console
™
User Manual
SE Plus Series
F1DZ102T
F1DZ104T
Advertisement
Table of Contents

Subscribe to Our Youtube Channel
Related Manuals for Belkin OmniView F1DZ102T


Summary of Contents for Belkin OmniView F1DZ102T
-
Page 1: Kvm Switch
Europe: 00 800 223 55 460 Australia: 1800 666 040 P74178 © 2002 Belkin Corporation. All rights reserved. All trade names are registered trademarks of respective manufacturers listed. Mac and Mac OS are trademarks of Apple Computer, Inc., registered in the U.S. and other countries. -
Page 2: Table Of Contents
Step-by-Step Installation Guide ......10 Single KVM Switch Installation ......11 Connecting Multiple KVM Switches (Daisy-Chaining) . -
Page 3: Overview
Switch. This enables your Switch to maintain consistent compatibility with the latest devices and computers. Firmware upgrades are free for the life of your Switch. Refer to the flash upgrade instructions on page 20 or visit us at belkin.com for complete upgrade information and support. OVERVIEW... -
Page 4: Equipment Requirements
75-Ohm coaxial VGA cable to preserve signal integrity. VGA cables must have HDDB15 female-to-HDDB15 male connectors. Belkin highly recommends that you use OmniView All-In-One Cables. These cables offer the highest quality possible to ensure optimal data transmission. All-In-One Cables are molded together for a clean and organized setup, and include PC99 color-coded connectors for easy identification and connection. -
Page 5: Unit Display Diagrams
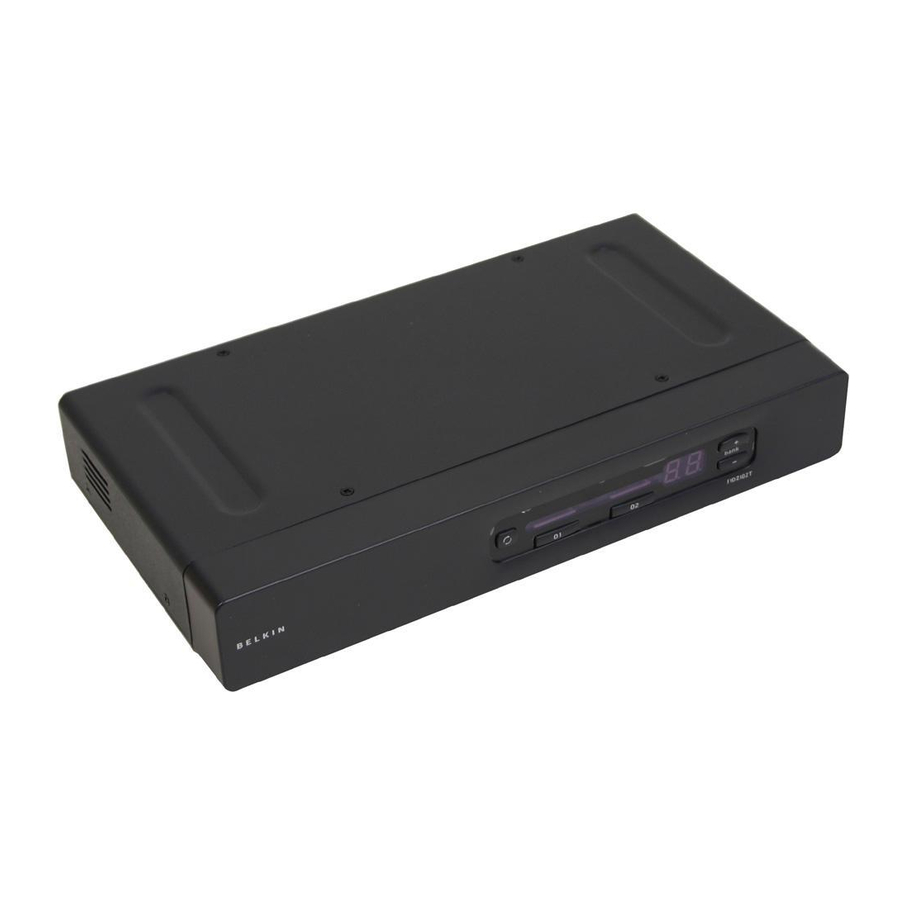
OVERVIEW Unit Display Diagrams The Front of the OmniView SE Plus Series KVM Switch: AutoScan button LED for selected port identification Manual BANK scroll Direct-access buttons port selector The Side of the OmniView SE Plus Series KVM Switch: BANK DIP switch... -
Page 6: Specifications
25 feet. Note: If you need your console to reside further than 25 feet from the Switch, we recommend using the Belkin CAT5 Extender (F1D084) with a standard CAT5 UPT cable. By using this device, you may increase the distance between your Switch and your PS/2 keyboard, PS/2 mouse, and monitor by as much as 500 feet without risking signal degradation. -
Page 7: Step-By-Step Installation Guide
LED for port 01 will begin flashing. Sequentially push the direct-access buttons for ports 01 through 04 (02 for F1DZ102T and 04 for F1DZ104T). The corresponding LED should flash as each button is pressed, indicating that the port is ready for connecting your servers (computer connection). - Page 8 After the operating system finishes loading, connect the Switch to the USB computer using the USB A-to-B cable that is part of your USB KVM cable. Your computer should recognize your Switch and automatically install the HID USB driver if it has not already been installed on your USB computer.
-
Page 9: Connecting Multiple Kvm Switches (Daisy-Chaining)
BANKs 01 through 03 are referred to as “Slave” switches. Note: A daisy-chain cable (F1D108-CBL) is required to daisy-chain each switch and is available through your Belkin reseller or online at belkin.com. All OmniView SE Plus Series KVM Switches feature a “BANK DIP” switch. -
Page 10: Powering Up The Systems
“Single KVM Switch Installation” for instruction on how to connect the Console and the computers to the Switch. 10. Connect the power supply to the Master switch first and power up the Switch. You should see the Switch light up and display the digits “00”, indicating its BANK address. -
Page 11: Using Your Switch
Switch, the Scroll Lock key must be pressed twice within two seconds. The Switch will beep, confirming that it is in hot key mode. Next, press the up or down arrow keys, and the Switch will switch to the prior port or the next port. -
Page 12: Autoscan Mode
Updating Firmware To update your firmware, download the appropriate firmware file and utility from belkin.com. The utility automatically guides you through the process of updating the firmware on your Switch. WARNING: We strongly recommend that you update your firmware only if you are currently experiencing mouse and keyboard problems on your Switch. -
Page 13: Faqs
A: When using PS/2 connections, the Switch can be up to 25 feet away from your computer. If your computer needs to be more than 25 feet from the Switch, you can use the Belkin CAT5 Extender to extend your PS/2 keyboard, PS/2 mouse, and monitor up to 500 feet away using a standard CAT5 UTP cable. -
Page 14: Troubleshooting
• If you are using the Switch only for video switching and have no keyboard and mouse connection between the Switch and PC, you will need to purchase the optional 9V DC, 600mA power adapter (Belkin part number F1D065-PWR). • Connect your monitor directly to the computer to verify that your... - Page 15 I am connecting my computer to the Switch via USB and my keyboard and mouse do not work. • Prior to connecting the Switch, make sure that the HID USB driver is installed on each computer. (To install the HID USB driver, connect a USB mouse and USB keyboard to the computer.
-
Page 16: Warranty, Fcc, Ce, Ices Statement
Belkin Corporation warrants this product against defects in materials and workmanship for its warranty period. If a defect is discovered, Belkin will, at its option, repair or replace the product at no charge provided it is returned during the warranty period, with transportation charges prepaid, to the authorized Belkin dealer from whom you purchased the product.
Need help?
Do you have a question about the OmniView F1DZ102T and is the answer not in the manual?
Questions and answers