Table of Contents
Advertisement
Advertisement
Table of Contents

Related Manuals for Levoit LV455CH


Summary of Contents for Levoit LV455CH
- Page 1 Model No.: LV455CH Ultrasonic Cool Mist Humidifier Questions or Concerns? Questions or Concerns? Please contact us Monday - Friday 9:00 am - 5:00 pm PT Please contact us Mon-Fri 9:00AM-5:00PM PST at support@levoit.com or at (888)-726-8520. at (888) 726-8520 or email support@levoit.com...
- Page 2 B Y L E V O I T. Should you have any questions or concerns regarding your new humidifier, please contact us at support@levoit.com. We hope you enjoy your new humidifier! G E T S T Y L E I N S P I R AT I O N Find @LevoitLifestyle on social media for wellness + style inspiration.
-
Page 3: Table Of Contents
TA B L E O F C O N T E N T S Specifications Package Contents Safety Information Getting to Know Your Humidifier Display Getting Started Operation ɧ General Operation Using the Aroma Box Preventing Water Leaks Keeping Things Clean ɧ... -
Page 4: Specifications
S P E C I F I C AT I O N S Voltage: AC 120V, 60Hz Rated Power: Effective Range: 430.5 - 538.2 ft² (40 - 50 m²) Water Tank Capacity: 1.1 gal (4.5 L) Moisture Output: ɧ Mode 1: 100 mL/h ɧ... -
Page 5: Safety Information
S A F E T Y I N F O R M AT I O N To reduce the risk of fire, electric shock, or other injury, follow all instructions and safety guidelines. General Safety Only use this humidifier as described in this manual. •... - Page 6 • If the relative humidity in your room exceeds 68%, turn off the device or use the low mist setting. • Remove the water tank from the base before moving the humidifier. • Do not immerse the humidifier base, power cord, or plug in water. •...
-
Page 7: Getting To Know Your Humidifier
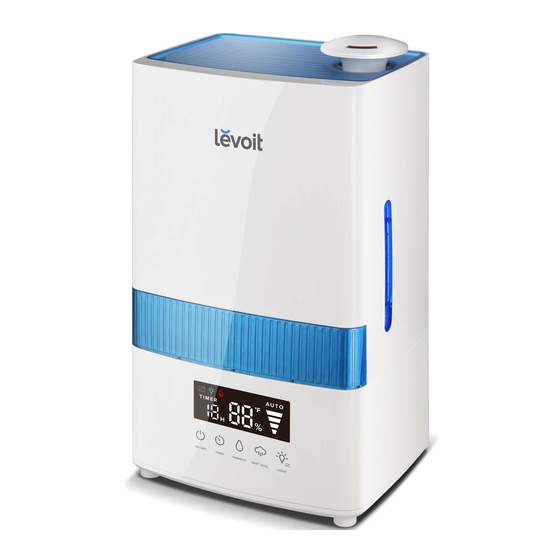
G E T T I N G T O K N O W Y O U R H U M I D I F I E R Nozzle 2. Top Cover 3. Water Tank Handle 4. Mist Tube 5. Water Tank 6. -
Page 8: Getting Started
G E T T I N G S TA R T E D Remove the top cover from the water 3. Fill the water tank with cold or room tank and set it aside. [Figure 1.1] Carefully temperature water. You can check lift the water tank handle to detach the the water level in the tank by looking water tank from the base. - Page 9 4. Once you have filled the water tank, 5. Carefully place the water tank back onto replace the cap, and secure it tightly. the base, aligning the water tank cap [Figure 1.4] with the inner chamber. [Figure 1.5] Figure 1.4 Figure 1.5...
-
Page 10: Operation
O P E R AT I O N General Operation NOTE: Make sure to position the humidifier at least 10 inches away from walls, and direct the nozzle so that the produced mist is at least 40 inches away from walls. Place the humidifier on a level surface NOTE: that is elevated, such as a table and a... - Page 11 D I S P L AY Lights up dimly when the display is Shows the humidity percentage. turned off. Lights up when humidity mode is being Lights up when Auto Mode is selected. changed. The humidifier will produce mist as needed to maintain the relative humidity (RH) at a comfortable level.
- Page 12 ON/OFF • Tap to turn your humidifier on or off. TIMER – You can set a timer between 1 and 12 hours. • repeatedly to choose a time. • When you stop pressing , the display will flash 3 times and the timer will start. •...
-
Page 13: Using The Aroma Box
U S I N G T H E A R O M A B O X Your humidifier can be used as an aroma diffuser to provide added comfort in your home. Turn off and unplug the humidifier. 3. Push the aroma box to release it from the base, then pull it out. - Page 14 4. Put 2-3 drops of essential oil on the 5. Replace the aroma box. Fill the water aroma pad. [Figure 3.4] tank with water and place it back on the base (see Getting Started, page 10). [Figure 3.5] 6. Plug in and turn on the humidifier. Figure 3.4 Figure 3.5 NOTE:...
-
Page 15: Preventing Water Leaks
P R E V E N T I N G W AT E R L E A K S If not placed properly, the water tank on your humidifier may leak. The following tips will ensure that your humidifier operates smoothly. Make sure the blue silicone ring around 3. - Page 16 4. Wipe off any excess water on the top and bottom of the base. [Figure 4.5] Figure 4.5 5. Do not shake the humidifier or place it on an inclined surface. Make sure to place the humidifier on a flat, level surface. [Figure 4.6] Figure 4.6...
-
Page 17: Keeping Things Clean
K E E P I N G T H I N G S C L E A N General Cleaning CAUTION: • Always make sure the humidifier is unplugged from any power source when cleaning. • The water in the inner chamber near the transducer may still be warm after turning off the humidifier. -
Page 18: Cleaning The Aroma Pad
Cleaning the Aroma Pad Disinfecting the Humidifier Press the aroma box to release it from Disinfect the water tank before or after the base, then pull it out. storing the humidifier for long periods of 2. Remove the aroma pad from the aroma time. -
Page 19: Troubleshooting
T R O U B L E S H O O T I N G Problem Cause Solution Plug the humidifier into a powered Humidfier is not plugged in. electrical outlet. Tap the power button to turn on the No mist coming out Humidfier is not turned on. - Page 20 Problem Cause Solution White dust appears Use distilled, purified, or filtered water Water being used has a high mineral around the humidifier with the humidifier. Remember to clean content. after operation. your water tank at least once a month. Switch the humidifier to a lower mist Mist setting is too high.
-
Page 21: Warranty Information
TERMS & POLICY rights and you may also have other rights which may vary from state to state. Levoit warrants all products to be of the highest quality in material, craftsmanship, and service, effective from the date ALL EXPRESSED AND IMPLIED WARRANTIES, of purchase to the end of the warranty period. -
Page 22: Customer Support
Customer Support Support Hours Arovast Corporation Monday - Friday 9:00 am - 5:00 pm PT 1202 N. Miller St., Suite A Anaheim, CA 92806 Email: support@levoit.com Toll-Free: (888) 726-8520 *Please have your invoice and order number ready before contacting Customer Support. - Page 23 Connect with us @LevoitLifestyle...
- Page 24 Levoit.com...
Need help?
Do you have a question about the LV455CH and is the answer not in the manual?
Questions and answers