
Subscribe to Our Youtube Channel
Related Manuals for THOMSON THT709


Summary of Contents for THOMSON THT709
- Page 1 Digital Terrestrial HD Receiver THT709 User Manual Manuel d’utilisation Bruksanvisning Tartalomjegyzék Εγχειρίδιο χρήστη Manual del usuario Korisnički priručnik Používateľská príručka Používateľská príručka...
- Page 2 TV SCART THT709 MODEL ETHERNET ANT IN S/PDIF (COAX.) HDMI ~ 220 - 240 V 50/60 Hz, 8 W max.
- Page 3 TV SCART MODEL THT709 ETHERNET ANT IN S/PDIF (COAX.) HDMI ~ 220 - 240 V 50/60 Hz, 8 W max. TV SCART THT709 MODEL ETHERNET ANT IN S/PDIF (COAX.) HDMI ~ 220 - 240 V 50/60 Hz, 8 W max.
- Page 4 This product has been manufactured and sold under the responsibility of STRONG Group. THOMSON and the THOMSON logo are trademarks of Technicolor (S.A.) or its affiliates and are used under license by STRONG Group. Represented by STRONG Ges.m.b.H. Franz-Josefs-Kai 1 1010 Vienna, Austria Email: support_at@thomsonstb.net...
- Page 5 The full text of the EU declaration of conformity is available at the following internet address: https://www.strong.tv/en/doc THOMSON is a trademark of Technicolor (S.A.) or its affiliates used under license by STRONG Group. Subject to alterations. In consequence of continuous research and development technical specifications, design and appearance of products may change.
-
Page 6: Table Of Contents
TABLE OF CONTENTS 1.0 INTRODUCTION 1.1 Safety Instructions 1.2 Storage 1.3 Equipment Set-up 1.4 Accessories 1.5 Usage of external USB devices 2.0 YOUR RECEIVER 2.1 PIN-CODE DEFAULT: 1234 2.2 Front Panel 2.3 Rear Panel 2.4 Remote Control 2.5 Installing the batteries 2.6 Using the remote control 3.0 CONNECTION 3.1 Connecting to a terrestrial antenna... -
Page 7: Introduction
1.0 INTRODUCTION 1.1 Safety Instructions - Read all of the instructions before operating the device. Keep these instructions well for later use. - Only use attachments/accessories specified or provided by the manufacturer (such as the exclusive supply adapter, battery etc.). - Please refer to the information on the product enclosure for electrical and safety information before installing or operating the apparatus. -
Page 8: Storage
- Do not place candles near the opening area, to avoid flammable foreign material from entering the device. WEEE Directive Correct Disposal of this product. This marking indicates that this product should not be disposed with other household wastes throughout the EU. To prevent possible harm to the environment or human health from uncontrolled waste disposal, recycle it responsibly to promote the sustainable reuse of material resources. -
Page 9: Your Receiver
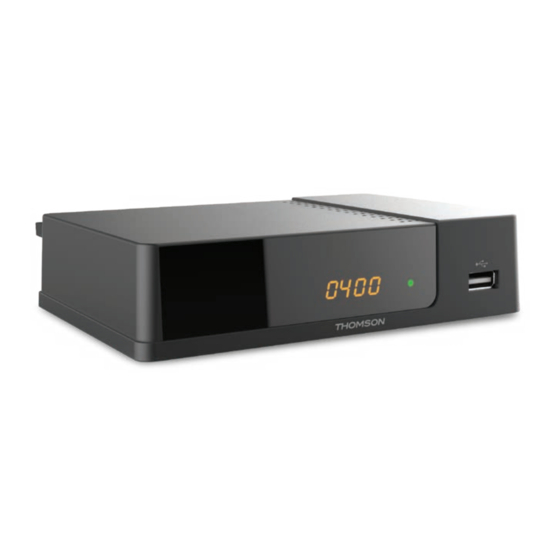
STRONG cannot guarantee the playback of all files although extensions are listed, as it depends on file size, codec, bit rate and resolution. 2.0 YOUR RECEIVER 2.1 PIN-CODE DEFAULT: 1234 2.2 Front Panel Fig. 1 1. Mode indicator: RED indicates that the receiver is in STAND-BY mode. GREEN indicates that the receiver is in OPERATING mode. -
Page 10: Installing The Batteries
25. COLOURED BUTTONS For Editing in menu, Multimedia and Teletext functions. Follow on screen suggestions. Combined on coloured buttons: 26. ZOOM Zoom in Multimedia Picture show. 27. ASPECT Change aspect ratio of the video, default is Auto. 28. V.F. Change the video format of the video. 29. -
Page 11: Connecting To Ethernet
By connecting your receiver to the latest digital amplifiers or home theatre systems with HDMI connections, you will enjoy the best possible sound quality and multi-channel audio (depending on broadcast), up to Dolby Digital Plus. Connect the HDMI output of the receiver to an input of your amplifier, and then connect the HDMI output of the amplifier to your TV set. -
Page 12: Operation
Choose the desired channel with the pq buttons. Alternatively, you can digit the channel number with the 0~9 buttons on the remote control. Or press OK in viewing mode to display the channel list. The volume can be adjusted with the t u buttons. Default Password is 1234. -
Page 13: Subtitles
6.5 Subtitles Some channels support a choice of subtitle languages. Press SUB in viewing mode to display a list of available subtitle languages. Select your subtitle of choice with pq and press OK to confirm. Press EXIT to leave without making changes. 6.6 Timeshift Timeshift allows you to pause live broadcasts and resume playback later. -
Page 14: Epg (Electronic Programme Guide)
Moving channels Use pq to select a channel and press RED to select it to be moved. Now you can move the selected channel up or down inside the channel list by using pq. When the channel is on the position of your choice, press OK again. -
Page 15: Lcn (Logical Channel Numbering)
7.3 LCN (Logical Channel Numbering) If LCN (Logical Channel Numbering) is activated and an LCN signal is provided by the broadcaster, channels will be stored in a broadcaster defined order. Set LCN to On to activate broadcaster defined channel numbering or Off to store channels in found order. This function only applies when a new channel search is performed. -
Page 16: Time
Manual Search Select a particular channel to do a search on just one (known) frequency. Press OK to start the scan. The signal quality bar might be useful to check if the frequency is indeed in use. Country Select the correct country where this receiver is used. If failing to do so, may result in that channels appear randomly in the channel list, instead of a more logical order. -
Page 17: Usb
Parental Guidance Programmes with a Parental Guidance Rating can be blocked from viewing and opened only with a Password. To setup this feature, enter your password first. Then select an age, above which the channel must be protected. Options are: Off, 1 to 18. Default is Off. Set password To set another password than the default one, enter the old 4-digit password first, then enter a new password and confirm it, by entering it... -
Page 18: Troubleshooting
Slide Time Time between advancing to the next photo. Slide Mode Many different modes can be used, for dissolving to the next photo, defined by a number. Also, it is possible to select Random order to view the photos. Movie Confi g ure For Subtitle use in the movie player, setup the features here. - Page 19 Problem Possible cause What to do Check the lead of the antenna or The receiver is not connected to cable. the signal source (DVB-C) or to Check that the coaxial cable is the antenna (terrestrial or satellite correctly fitted to the antenna input antenna).
- Page 20 Problem Possible cause What to do The volume of the TV is set too Increase the volume of the TV with low. its remote control. The volume of the receiver is set Increase the volume of the receiver too low. with its remote control.
-
Page 21: Technical Specifications
Problem Possible cause What to do The default PIN is 0000 or 1234 (refer to the user manual of your Device). Forgotten PIN code/ password. Contact your local Service Hotline or send an email to our Support via www.strong.tv Contact your local Service Hotline Forgotten channel lock or send an email to our Support code. - Page 22 Memory and System: Flash memory: 4 MB SDRAM: 64 MB Connectors: RF IN - IEC Female S/PDIF (coaxial output) HDMI RJ 45 Ethernet TV SCART (CVBS, Audio L&R) USB 2.0 port: 5 V/500 mA (max.) supported General Data: Supply voltage: 220 - 240 V AC (SMPS), 50/60 Hz Power consumption: 4 W (typ.), 8 W (max)
Need help?
Do you have a question about the THT709 and is the answer not in the manual?
Questions and answers