ALDI Ambiano User Manual
Table top dishwasher
Hide thumbs
Also See for Ambiano:
- User manual (42 pages) ,
- User manual (30 pages) ,
- User manual (23 pages)
Table of Contents
Advertisement
Advertisement
Table of Contents

Related Manuals for ALDI Ambiano


Summary of Contents for ALDI Ambiano
- Page 1 User Manual TABLE TOP DISHWASHER...
-
Page 2: Table Of Contents
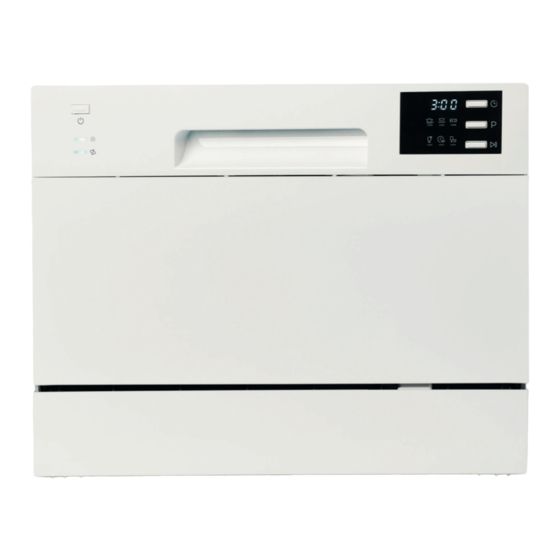
Contents Overview ..................4 Use ....................5 About these operating instructions ..........9 Proper use ..................10 Safety information ................. 11 Package contents ................16 Installation ..................16 Preparations for use ..............19 Starting the wash program ............28 Operating the dishwasher ............29 Cleaning and maintenance ............ - Page 6 Device parts On/Off switch Rinse aid display Salt display Display: Remaining time display Program display START/PAUSE button Program selection button Time delay button Cup rack Dish rack Regeneration salt container Detergent compartment Cutlery basket Filter Rinse aid compartment Spray arm Water connection Wastewater connection Inspection window...
- Page 7 Contents Contents Overview ......................4 Use ........................5 About these operating instructions ............... 9 Proper use ......................10 Safety information ..................11 Transport ......................13 Installation and electrical connection .............13 Water supply .......................14 Important information ..................15 Package contents ...................16 Installation .....................16 Setup and alignment ..................16 Water connection ....................17 Connecting the water outlet................
- Page 8 Contents Antifreeze protection ..................35 Longer periods without use ................35 Transporting the appliance ................35 Troubleshooting .................... 36 Error messages ....................38 Disposal ......................39 Technical data ....................40 Energy label ......................41 Declaration of conformity ................41 Service information ..................42 Legal Notice ....................
-
Page 9: About These Operating Instructions
About these operating instructions About these operating instructions Thank you for choosing our product. We hope you enjoy using it. Read the safety instructions carefully before using the device for the fi rst time. Note the warnings on the device and in the operating instructions. Always keep the operating instructions close to hand. -
Page 10: Proper Use
Proper use Indoor use Appliances with this symbol are intended solely for indoor use. Proper use This appliance may only be used for washing dishes and cutlery. Only use dishwasher-safe dishes and cutlery. Look for markings such as “Dishwasher safe” or “Suitable for dishwashers” when purchasing dishes. -
Page 11: Safety Information
Safety information Safety information IMPORTANT SAFETY INSTRUCTIONS – READ CAREFULLY AND KEEP FOR FUTURE REFERENCE! This appliance may be used by children over the age of 8 and by persons with reduced physical, sensory or mental abilities or by those with limited experience and/or knowledge if they are supervised or have been instructed in the safe use of the appliance and have understood the associated risks. - Page 12 Safety information WARNING! Risk of injury! There is a risk of chemical burns. Detergents for dishwashers are highly alkaline and so dangerous if swallowed: − Avoid contact with the eyes and skin. − Always keep detergents and rinse aids out of reach of children. −...
-
Page 13: Transport
Safety information Transport CAUTION! Risk of injury! The appliance is heavy. There is a risk of injury from the strain of lifting the appliance. − Seek the assistance of at least one other person in order to move the appliance. −... -
Page 14: Water Supply
Safety information DANGER! Risk of electric shock! There is a risk of electric shock due to live parts. − Only connect the appliance to a properly installed and freely accessible socket. The local mains voltage must correspond to the technical specifi cations for the appliance. The socket must have a fuse rated at min. -
Page 15: Important Information
Safety information − Connect the appliance to a drinking water pipe up to 60°C. − If the appliance is to replace an old appliance, never use old hose sets for the connection. Connect the appliance with the hose sets provided or new ones. −... -
Page 16: Package Contents
Package contents Package contents WARNING! Risk of choking and suffocation! There is a risk of suffocation from breathing in or swallowing plastic fi lm or small parts. − Keep packaging away from children. Check whether all the items in the delivery are present. Contact us within 14 days after purchase if any items are missing. -
Page 17: Water Connection
Installation − Only connect the appliance to a properly installed earthed mains socket if the water inlet and outlet have been connected correctly (see next chapter). The socket must have a fuse rated at min. 10 ampere. − The mains plug must remain easily accessible after installing the appliance. Water connection NOTICE! Damage to the appliance! -
Page 18: Connecting The Water Outlet
Installation Connecting the water outlet φ 4 0mm You can connect the outlet hose in different ways: • connect the hose to a special connection on the outlet pipe • introduce the hose into an outlet pipe NOTICE! Material damage! Material damage is possible in the event of water leakage. -
Page 19: Preparations For Use
Preparations for use Preparations for use Opening the door − Hold the recessed grip and open the door by pulling it towards you. Open the door out fully. If the door is opened during operation the wash cycle will automatically be interrupted. -
Page 20: Setting Salt Consumption
Preparations for use − Remove the dish rack and twist the lid off the regeneration salt container. − Fill the regeneration salt container with 700 ml water before the fi rst use. − Then add 1 kg dishwasher salt. It is normal if a small amount of water escapes from the regeneration salt container. -
Page 21: Adding Rinse Aid
Preparations for use − If you do not press any button for about 6 seconds, the setting will be adopted and setting mode quit. Adding rinse aid Rinse aid prevents water droplets and deposits from forming on the dishes in the last part of the wash program. -
Page 22: About Dishwasher Detergents
Preparations for use level of the container: Full 1/2 full 1/4 full – the container should be replenished. Empty Remove surplus rinse aid after fi lling with a damp cloth and close the lid. Setting the rinse aid dosing The dosing controller is located inside the rinse aid container. - Page 23 Preparations for use Types of detergent Dishwasher detergent ensures that dirt is loosened and removed from dishes and cutlery. Always use detergents suitable for dishwashers. There are three types of dishwasher detergent: • Detergents with phosphate and chlorine • Detergents with phosphate and without chlorine •...
-
Page 24: Adding Detergent
Preparations for use Adding detergent Dishwasher detergent must be added before each wash cycle. Only add as much detergent as indicated in the table below. The appliance normally needs less detergent than a conventional dishwasher. One tablespoon of detergent is usually enough to wash a complete load of dishes. Depending on the degree of dirt, more can also be required. - Page 25 Preparations for use − To prevent damage to glass or cutlery, do not remove these from the dishwasher directly after the wash program has fi nished. Allow the dishes to cool down slightly fi rst. − Arrange hollow objects such as cups, glasses, pans etc. with the opening downwards, so that water cannot collect inside.
- Page 26 Preparations for use Dish loading example − Load the dish rack as shown in the example. The arrow shows the slide-in direction. Dishes should be placed in the positions provided to attain the best washing result. Position large plates sloping forwards and place the plates upright after the dish rack has been slid into the appliance.
- Page 27 Preparations for use Cutlery basket − Place the cutlery basket in the lower dish rack. − Place cutlery in the cutlery basket. − Place long and sharp knives horizontally in the lower cup holder to avoid injury. Forks Soup spoons Desert spoons Teaspoons Knives...
-
Page 28: Starting The Wash Program
Starting the wash program Starting the wash program Selecting the program The following table shows the various wash programs and their applications. Set an energy saving or quick program if possible, e.g. the “ECO” or “Quick” program. These programs are marked with *. Intensive Heavy items such Prewash (50°C) -
Page 29: Operating The Dishwasher
Operating the dishwasher Glass Items with light Main wash (45°C) 18 g 1:15 dirt such as Wash glasses, porcelain Wash (60°C) Glass 90 min. Dishes and glasses Main wash 18 g 1:30 0.65 with light dirt (65°C) Wash (70°C) 90 min Quick Items with light Main wash... -
Page 30: Changing The Program
Operating the dishwasher The display shows the remaining time left for the set program to run (e.g. 1:15 for 1:15 h remaining time). Press the PROGRAM button several times to select a program. The corresponding program symbol lights up in the display. ... -
Page 31: Using Start Preselection
Operating the dishwasher Open the door slightly to interrupt the programme. Wait about 3 seconds until the spray arm stops rotating and then open the door completely. The appliance emits an acoustic signal every minute if the door is open during operation. -
Page 32: Cleaning And Maintenance
Cleaning and maintenance CAUTION! Risk of injury! The opened door constitutes a trip hazard. − Close the appliance door again after a wash cycle has fi nished. An acoustic signal will sound for 8 seconds after the program has fi nished. −... -
Page 33: Cleaning The Appliance
Cleaning and maintenance NOTICE! Risk of damage to the appliance! Operation without the fi lter will cause damage to the appliance. − Never start the appliance without the installed fi lter system! − An incorrectly installed fi lter can damage the appliance or dishes. - Page 34 Cleaning and maintenance − To protect the control panel too, make sure that no moisture comes into contact with the electronics. Do not use spray cleaner! − The spray arm inside the appliance can be removed to clean it. Lift this slightly and remove it.
-
Page 35: Antifreeze Protection
Antifreeze protection − Insert the sealing ring and screen with curvature upwards into the hose connection. − Screw the hose connection hand tight on the cold water tap. Antifreeze protection When operating in cold environments, e.g. during winter months, pay attention to the following information after each wash cycle to prevent freezing. -
Page 36: Troubleshooting
Troubleshooting Troubleshooting Technical faults The appliance does Fuse defective or circuit Change the fuse or switch not start. breaker tripped on the circuit breaker again. Make sure that the electric circuit is protected with at least 10 ampere. Appliance is not switched Switch the appliance on. - Page 37 Troubleshooting General faults No program was started Always start the Quick program after adding salt. without dishes after adding salt. Noise Knocking/rattling The spray arm knocks Stop the program and noise in the appliance. against the dishes and/or rearrange the dishes. against an item in the dish rack or one of the dishes is loose in the rack.
-
Page 38: Error Messages
Error messages Unsatisfactory drying results The dishes are not The dishes were not Arrange the dishes as dried. arranged correctly. described in chapter “Arranging the dishes and cutlery”. Not enough rinse aid Use more rinse aid./Replenish the rinse aid compartment. The dishes were removed Do not remove the dishes too soon. -
Page 39: Disposal
Disposal Error message Meaning Possible reason/remedy Water supply fault Water supply not Check water supply, see above. ensured Disposal CARD CARD PLASTIC TRAY FILM Widely Widely Not Yet Recycled Locally Recycled Packaging The product has been packaged to protect it from damage in transit. The packaging is made of materials that can be recycled in an environmentally friendly manner. -
Page 40: Technical Data
Technical data Technical data Power supply 220–240 V ~ 50 Hz Power consumption 1170–1380 W Energy effi ciency class A+ (at 0.61 kWh/Eco wash cycle) Energy consumption (year) 174 kWh (280 Eco wash cycles) Water consumption (year) 1820 litres (280 Eco wash cycles) Water consumption 6.5 l (Eco wash cycle) Power consumption when switched off... -
Page 41: Declaration Of Conformity
Declaration of conformity Energy label Declaration of conformity MEDION AG hereby declares that this product conforms with the essential requirements and the remaining relevant regulations: • EMC Directive 2014/30/EU • Low Voltage Directive 2014/35/EU • Ecodesign Directive 2009/125/EC • RoHS Directive 2011/65/EU. -
Page 42: Service Information
Service information Service information Please contact our Customer Service team if your device ever stops working the way you want or expect it to. There are several ways for you to contact us: • In our Service Community, you can meet other users, as well as our staff, and you can exchange your experiences and pass on your knowledge there. -
Page 43: Legal Notice
Legal Notice Legal Notice Copyright © 2018 Date: 22.11.2018 All rights reserved. These operating instructions are protected by copyright. Mechanical, electronic and any other forms of reproduction are prohibited without the written permission of the manufacturer. Copyright is owned by the distributing company: MEDION AG Am Zehnthof 77 45307 Essen... - Page 45 PRODUCED IN CHINA FOR: ALDI STORES LTD. PO BOX 26, ATHERSTONE WARWICKSHIRE, CV9 2SH. ALDI STORES (IRELAND) LTD.
Need help?
Do you have a question about the Ambiano and is the answer not in the manual?
Questions and answers
No water is going in to dishwasher and cycle light is flashing?
If the ALDI Ambiano dishwasher has no water entering and the cycle light is flashing, check the following:
1. Ensure the appliance is switched on.
2. Make sure the door is fully closed.
3. Verify the water supply is fully turned on.
4. Check that the water outlet hose is not kinked or blocked.
5. Clean the filter if it is blocked.
6. Make sure the fuse or circuit breaker is at least 10 ampere and functioning properly.
This answer is automatically generated
Soap will not desolve
The soap may not dissolve in the ALDI Ambiano dishwasher if it is in powdered form without phosphate, as phosphate helps soften water. Without it, hard water may prevent proper dissolving. Also, incorrect detergent type, insufficient water temperature, or a malfunctioning dispenser can cause this issue. Using a low-dose or low-alkali detergent may also reduce effectiveness unless paired with the correct wash program.
This answer is automatically generated
My ambiano blender keeps showing err
The Ambiano Portable Blender has built-in safety features that may cause it to show an error if certain conditions are not met. Possible reasons include:
1. Jug Not Securely Attached – The blender will not turn on unless the jug is firmly screwed onto the base.
2. Start Button Not Pressed Correctly – The start button must be pressed twice to activate the blender.
3. Defective Unit – Some users have reported defects developing after a short period of use, which may require repairs.
Check these factors to troubleshoot the issue. If the problem persists, the unit may need repair or replacement under the three-year warranty.
This answer is automatically generated