ALDI Ambiano User Manual
Professional nutrition blender
Hide thumbs
Also See for Ambiano:
- User manual (45 pages) ,
- User manual (42 pages) ,
- User manual (19 pages)

Subscribe to Our Youtube Channel
Related Manuals for ALDI Ambiano


Summary of Contents for ALDI Ambiano
- Page 1 User Manual Manual del usuario PROFESSIONAL NUTRITION BLENDER LICUADORA PROFESIONAL PARA BEBIDAS NUTRITIVAS English……3 Español…..13...
-
Page 2: Table Of Contents
Contents Parts list ..............3 Contents ............... 3 Assembly .............. 4 General information ..........5 Safety instructions ..........6 User instructions ............8 Before first use ............. 8 How to use ............8 Helpful hints ............9 Cleaning and maintenance ........10 Other useful information ........ -
Page 3: Parts List
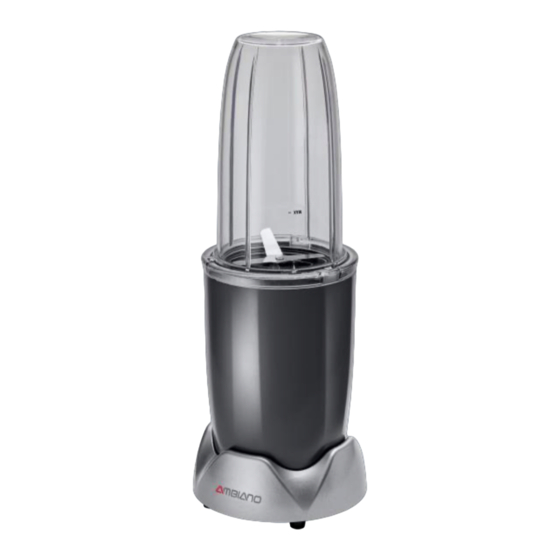
Parts list Main parts 1. 32oz cup 2. Base 3. 24oz cup 4. Lip ring 5. Lip ring with handle 6. Flip-top to-go lid with handle 7. Cross blade assembly Contents of Packaging Blender Base with Power Cord Stainless steel cross blade assembly (1) ... -
Page 4: Assembly
_______ _______ ___Assembly Assembly 1. Unpack the Professional Nutrition Blender from the box. 2. Wipe clean all the parts with a soft damp cloth or sponge and warm water. Rinse and dry thoroughly. DO NOT IMMERSE THE PROFESSIONAL NUTRITION BLENDER BASE IN WATER OR ANY OTHER LIQUID. 3. -
Page 5: General Information
General information General information When using electrical appliances, basic safety precautions should always be followed. PLEASE READ AND SAVE ALL INSTRUCTIONS BEFORE USING THE PROFESSIONAL NUTRITION BLENDER. To protect against electrical shock, do not immerse power cord or plug in water or any other liquid. -
Page 6: Safety Instructions
Safety instructions Safety instructions CAUTION: WARNING: Read and understand all instructions. Failure to follow all instructions listed below may result in electric shock, fire or serious personal injury. The warnings, cautions, and instruction discussed in this instruction manual cannot cover all possible conditions and situations that may occur. It must be understood by the operator that common sense and caution are a factor which cannot be built into this product, but must be supplied by the operator. - Page 7 Safety instructions Safety warning Although your blender is easy to operate, for your safety, the warnings below must be followed: 1. Do not place the blender near a heat source. 2. Never leave the blender unattended while connected to the electrical outlet. 3.
-
Page 8: User Instructions
User instructions USER INSTRUCTIONS Before First Use Read all instructions before first use and follow them carefully. Wash all pieces, except base unit, in warm soapy water. Rinse and dry thoroughly before first use. Do NOT immerse base in water or any other liquid. How to Use 1. -
Page 9: Helpful Hints
Helpful hints FEATURES STAINLESS STEEL CROSS BLADE ASSEMBLY Used for: Chopping – Onion, garlic, carrots and fresh herbs Blending – Smoothies, milk shakes and fruit juice Mixing - Batters Grating – Chocolate and Parmesan cheese Pureeing –... -
Page 10: Cleaning And Maintenance
Cleaning and maintenance Cleaning and maintenance CAUTION: Always be sure that the blender is unplugged and completely cooled before cleaning or attempting to store the item. NEVER IMMERSE base in water or any other liquid. It is important to clean your blender thoroughly after each use to prevent sticky build ups that are difficult to clean later. -
Page 11: Other Useful Information
Other useful information Other useful information Technical specifications Model Number GS158C Rating Voltage 120V, 60Hz Nominal Power 1000W Storing Allow the blender to cool completely before storing. Store the blender in a dry location in the original box if possible. ... - Page 12 Other useful information Contenido Lista de componentes ......... 13 Contenido ............13 Ensamblaje ............. 14 Información general ..........15 Instrucciones de seguridad ......17 Instrucciones para el usuario ......19 Antes del primer uso ........19 Modo de empleo ..........19 Consejos útiles ..........
-
Page 13: Lista De Componentes
Lista de componentes Componentes principales 1. Vaso de 32oz 2. Base 3. Vaso de 24oz 4. Anillo para beber 5. Anillo para beber con asa 6. Tapa para llevar con asa 7. Conjunto de cuchillas cruzadas Contenido del embalaje Base de la licuadora con cable de alimentación eléctrica ... -
Page 14: Ensamblaje
Ensamblaje Ensamblaje 1. Desempaque la licuadora profesional para bebidas nutritivas y sáquela de la caja. 2. Limpie todas las piezas desmontables con un trapo suave o esponja humedecidos con agua tibia. Enjuagar y secar bien. NO SUMERJA LA BASE DE LA LICUADORA PROFESIONAL PARA BEBIDAS NUTRITIVAS EN AGUA NI EN NINGÚN OTRO LÍQUIDO. -
Page 15: Información General
Información general Información general Al usar aparatos electrodomésticos, siempre se deben seguir las precauciones de seguridad básicas. POR FAVOR, LEA Y GUARDE TODAS LAS INSTRUCCIONES ANTES DE USAR LA LICUADORA PROFESIONAL PARA BEBIDAS NUTRITIVAS. 1. Para protegerse contra descargas eléctricas, no sumerja el cable ni el enchufe en agua o cualquier otro líquido. - Page 16 Información general 16. Evite el contacto con las piezas en movimiento. 17. Las hojas de las cuchillas son filosas. Úselas con cuidado. Tenga siempre cuidado al lavar las cuchillas. 18. Para evitar lesiones personales, mantenga las manos y los utensilios fuera de la licuadora y lejos de las cuchillas afiladas durante su funcionamiento.
-
Page 17: Instrucciones De Seguridad
Instrucciones de seguridad Instrucciones de seguridad PRECAUCIÓN: ADVERTENCIA: Lea y comprenda todas las instrucciones. Si no se cumplen todas las instrucciones indicadas a continuación se pueden producir descargas eléctricas, incendios o lesiones graves. Las advertencias, precauciones e instrucciones que se detallan en este manual de instrucciones no cubren todas las condiciones y situaciones posibles que podrían suceder. - Page 18 Instrucciones de seguridad Advertencia de seguridad Si bien la licuadora es fácil de utilizar, se deben cumplir las siguientes advertencias por razones de seguridad: 1. No coloque la licuadora cerca de una fuente de calor. 2. No deje nunca la licuadora desatendida mientras está conectada a la red eléctrica.
-
Page 19: Instrucciones Para El Usuario
Instrucciones para el usuario INSTRUCCIONES PARA EL USUARIO Antes del primer uso Lea todas las instrucciones antes del primer uso y sígalas atentamente. Lave todas las piezas, excepto la unidad base, en agua tibia jabonosa. Enjuáguelas y séquelas completamente antes del primer uso. NO sumerja la base en agua o cualquier otro líquido. - Page 20 Instrucciones para el usuario 21. PRECAUCIÓN: Si la cuchilla se detiene durante el licuado continuo, es posible que un ingrediente duro se haya quedado atascado. Desenchufe el aparato, quite el conjunto de las cuchillas/vaso de la base del motor y agite el vaso para soltar el ingrediente de la cuchilla.
-
Page 21: Consejos Útiles
Consejos útiles CARACTERÍSTICAS CONJUNTO DE CUCHILLAS CRUZADAS DE Se utiliza para: ACERO INOXIDABLE Picar: cebolla, ajo, zanahorias y hierbas frescas Licuar: batidos de fruta, batidos de leche y jugo de fruta Mezclar: masas Rallar: chocolate y queso parmesano ... -
Page 22: Limpieza Y Mantenimiento
Limpieza y mantenimiento Limpieza y mantenimiento PRECAUCIÓN: Asegúrese siempre de que la licuadora esté desenchufada y se haya enfriado completamente antes de limpiarla o tratar de guardarla. NUNCA SUMERJA la base en agua o cualquier otro líquido. Es importante limpiar la licuadora a fondo después de cada uso para evitar acumulaciones pegajosas que son difíciles de limpiar después. -
Page 23: Información Adicional De Utilidad
Información adicional de utilidad Información adicional de utilidad Especificaciones técnicas Número de modelo GS158C Clasificación de voltaje 120 V, 60 Hz Potencia nominal 1000 W Almacenamiento Permita que la licuadora se enfríe completamente antes de guardarla. Guarde la licuadora en un lugar seco, en la caja original a ser posible. ... - Page 25 WARRANTY CARD PROFESSIONAL NUTRITION BLENDER Your details: Name Address Email Date of purchase* *We recommend you keep the receipt with this warranty card Location of purchase Description of malfunction: AFTER SALES SUPPORT 48558 Return your completed warranty card to: 888 367 7373 Wachsmuth &...
- Page 26 This warranty does not limit the statutory obligation of the seller arising from any implied warranties. The period of warranty can only be extended in accordance with applicable law. Neither the service company nor ALDI will assume any liability for data or settings stored on any returned product.
- Page 27 TARJETA DE GARANTÍA LICUADORA PROFESIONAL PARA BEBIDAS NUTRITIVAS Sus datos: Nombre Dirección Correo electrónico Fecha de la compra* *Le recomendamos que guarde el recibo con esta tarjeta de garantía Lugar de la compra Descripción de la avería: Devuelva su tarjeta de garantia completada a: SERVICIO POSVENTA 48558 888 367 7373...
- Page 28 Esta garantía no limita la obligación legal del vendedor derivada de cualquier garantía implícita. El período de garantía solo se puede extender hasta donde lo permita la ley. Ni la compañía de servicio ni ALDI asumen ninguna responsabilidad por los datos o configuraciones que puedan haberse almacenado en cualquier producto retornado.
- Page 30 DISTRIBUTED BY • DISTRIBUIDO POR: ALDI INC., BATAVIA, IL 60510 WWW.ALDI.US 48558 MODEL: GS158C 03/2017...
Need help?
Do you have a question about the Ambiano and is the answer not in the manual?
Questions and answers
which way do i turn for temp-clock or counter clock
To adjust the temperature on the ALDI Ambiano Gooseneck Electric Kettle, rotate the control wheel clockwise to increase the temperature or counterclockwise to decrease it.
This answer is automatically generated
@peter Wilson
which way do i turn for temp
You can set each drawer individually and adjust the times and temperatures as needed.
This answer is automatically generated
Need new O ring that fits the blade screw cap
The context provided does not include a specific replacement O-ring part number for the ALDI Ambiano blade screw cap. Instead, it focuses on user reviews and product descriptions for LATERN replacement extractor blades compatible with NutriBullet 600W/900W models.
Since the ALDI Ambiano blender is a different brand, even if it may look similar to NutriBullet models, the parts (including the O-ring) may not be directly interchangeable. To find the correct O-ring part number for the Ambiano blade screw cap, you would typically need to:
1. Check the Ambiano user manual or ALDI’s product support page.
2. Contact ALDI customer service for assistance with spare part identification.
3. Measure the existing O-ring's diameter and thickness to compare with third-party suppliers if the official part number isn't available.
Would you like help identifying third-party O-rings that might be compatible based on measurements?
This answer is automatically generated
Wanting to buy replacement outer ring gasket that is on the cutter threaded cap. I only see in the manual the one that is under the blade. For an Ambiano Model HL-2070