Table of Contents
Advertisement
Quick Links
Consultation with SebaKMT
User Manual
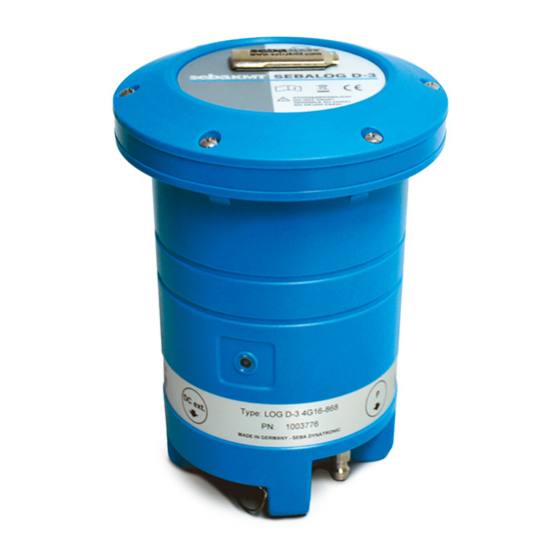
Data Logger
Sebalog D-3
Mess- und Ortungstechnik
Measuring and Locating Technologies
Elektrizitätsnetze
Power Networks
Kommunikationsnetze
Communication Networks
Rohrleitungsnetze
Water Networks
Abwassernetze
Sewer Systems
Leitungsortung
Line Locating
1
Issue:
06 (02/2019) - EN
Article number:
83914
Advertisement
Table of Contents

Related Manuals for sebaKMT Sebalog D-3


Summary of Contents for sebaKMT Sebalog D-3
- Page 1 Consultation with SebaKMT User Manual Data Logger Sebalog D-3 Mess- und Ortungstechnik Measuring and Locating Technologies Elektrizitätsnetze Power Networks Kommunikationsnetze Communication Networks Rohrleitungsnetze Water Networks Abwassernetze Sewer Systems Leitungsortung Line Locating Issue: 06 (02/2019) - EN Article number: 83914...
- Page 2 Consultation with SebaKMT...
-
Page 3: Consultation With Sebakmt
SebaKMT All rights reserved. No part of this handbook may be copied by photographic or other means unless SebaKMT have before-hand declared their consent in writing. The content of this handbook is subject to change without notice. SebaKMT cannot be made liable for technical or printing errors or shortcomings of this handbook. -
Page 4: Terms Of Warranty
This warranty does not apply to faults in the software supplied. During the period of warranty, SebaKMT agree to repair faulty parts or replace them with new parts or parts as new (with the same usability and life as new parts) according to their choice. -
Page 5: Table Of Contents
Terms of Warranty Contents Consultation with SebaKMT ................... 3 Terms of Warranty ......................4 Safety Instructions ................... 9 General Safety Instructions and Warnings ............9 General Notes ....................9 Technical data, scope of delivery and accessories ........11 Technical data ....................11 Scope of delivery and accessories .............. - Page 6 Terms of Warranty 6.1.5 Wiring diagram examples ................. 31 Positioning the logger ..................33 SebaDataView-3 software ................35 Introduction ....................... 35 Installation ......................35 Function and structure ..................36 Device administration ..................38 7.4.1 Creating / deleting folders ................38 7.4.2 Creating / deleting zones..................
- Page 7 Terms of Warranty Retrieving and evaluating data ..............71 ‘Realtime Measurement’ with SDV-3 software ..........71 Retrieving measurement data ................72 9.2.1 Reading out data using the PC/Laptop ............72 9.2.2 Downloading data from a FTP server .............. 72 Managing saved measurement data ..............73 Displaying measurement data ................
- Page 8 Terms of Warranty...
-
Page 9: Safety Instructions
Safety Instructions Safety Instructions General Safety Instructions and Warnings Do not drop the device / the system’s components or subject it / them to • strong impacts or mechanical shocks. The limits described under Technical Data may not be exceeded. •... - Page 10 Use genuine accessories to ensure system safety and reliable operation. The use of other parts is not permitted and invalidates the warranty. Repair and Repair and maintenance work has to be carried out by SebaKMT or authorised service maintenance partners using original spare parts only. SebaKMT recommends having the system tested and maintained at a SebaKMT service centre once a year.
-
Page 11: Technical Data, Scope Of Delivery And Accessories
Technical data, scope of delivery and accessories Technical data, scope of delivery and accessories Technical data Depending on the configuration, the Sebalog D-3 is specified by the following parameters: Parameter Value Communication Short-range radio 868 MHz (in Europe) 913.02 MHz (in the US) -
Page 12: Scope Of Delivery And Accessories
Pressure hose, 2 m, 35 bar. 118304220 GSM-Antenne GSM antenna with connection cable, 2 m 820020888 Optional The following optional accessory parts can be ordered from SebaKMT: accessory parts Accessory part Description Item No. LOG D-EB External accumulator set for the logger... -
Page 13: Technical Description
Technical description Function Sebalog D-3 (in short: Log D-3) is a compact, robust and extremely versatile data logger. The device can record the readings of various sensor types in user-defined intervals. Depending on the configuration, up to 4 freely programmable channels can be connected to sensors for data recording. -
Page 14: Connectors
Technical description Control lamp states Here you find some possible states of the logger’s control lamp: LED status Description green (1 x per sec) logger is switched on red (regularly) logger is sampling (flashing is according to log interval) blue (1x each 10 sec) logger is checking for radio signal blue (rapidly) during data transfer via radio... - Page 15 Technical description Loggers with 2 internal The following figure shows the connections or connection sockets of a logger with two pressure sensors internal pressure sensors. Item Description DC ext. socket for connecting an external power supply or alarm triggering devices Connector P1 pressure sensor (internal measuring channel: "Channel 1") GSM socket...
-
Page 16: Communication
Technical description Communication The SebaDataView-3 software is used on a PC/laptop to program the logger before the measurement and to retrieve the collected data after the measurement. Short range radio is used for communication between the devices. The computer must have a radio interface. -
Page 17: Log Ri Or Log Ri+ Radio Interface
The compact ‘Log RI’ is the standard radio interface for communicating with devices of the Sebalog series. 'Log RI+' The radio interface ‘Log RI+’ is available as accessory from SebaKMT. Compared to the Log RI the device has a higher-performing radio module which allows a higher radio range. -
Page 18: Power Supply
NOTE Peaks of 4 A can occur. External rechargeable There is an external rechargeable battery pack available from SebaKMT which can be battery pack connected to the data logger in order to expand the operating time of the measuring system.The logger is connected to the external battery pack by means of the VK88... -
Page 19: Checking The Battery Status
Technical description DC ext. socket of the logger. Then the 5-pole connector has to be plugged in one of the sockets of the battery, no matter which one. From now on the logger is powered by the external battery only, until the connection is cut or the capacitance of the external battery gets low. -
Page 20: Memory
Available versions The Sebalog D-3 data logger is available in a wide variety of configurations. The type code on the logger’s label showshow the device is equipped.. Type code... -
Page 21: Data Encryption And Password
Radio communication between the computer with SebaDataView-3 software and a • SebaKMT device Radio communication between the PocketServer-3 and a SebaKMT device • Both devices, transmitter and receiver, must at least work with the above- mentioned firmware version (see table in the previous section). Otherwise, only... -
Page 22: Encryption Of Data Uploads And Data Downloads
The devices listed above are able to use an encryption protocol for GSM data transfers between the device and an FTP server or between the device and the SebaKMT Cloud. Whether the data should be transmitted encrypted and which protocol should be used, the user can specify when programming the device. -
Page 23: Commissioning The Logger
FTP server using the server infrastructure of your company or you can rent a server from a commercial internet service provider. You can also rent FTP space from SebaKMT. Please contact your SebaKMT distributor. Under certain conditions the demo server run by SebaKMT can be used. - Page 24 Commissioning the logger Step Description Insert the SIM card. To remove the tray for the SIM card from its fastener, press the yellow spring mechanism (e.g. by the help of a screwdriver or a pen). Remove the tray and place the SIM card on it so it fits. Then push the tray back into the bracket until it locks into place.
-
Page 25: Switching The Logger On/Off
Commissioning the logger Switching the logger On/Off The logger is switched on by the help of a magnetic switch. NOTE Before switching the logger on, all connected devices have to be disconnected (unplug connectors) because the internal relays of the logger are initiated during the switch-on process. - Page 26 Commissioning the logger...
-
Page 27: Connecting The Logger And Installing It On-Site
Connecting the logger and installing it on-site Connecting the logger and installing it on-site Connecting sensors to the logger Depending on its configuration, the following peripheral and measuring devices can be connected to a logger: up to 4 sensors can be attached and the data can be logged (e.g. pressure, flow) •... -
Page 28: Connecting A Hose To The Internal Pressure Sensor
Connecting the logger and installing it on-site 6.1.2 Connecting a hose to the internal pressure sensor If your logger is equipped with one or two internal pressure sensors, hoses can be connected directly to the connectors P1 or P2 . In order to do so, your hose has to be equipped with a female quick-fit connector. -
Page 29: Connecting Sensors
Connecting the logger and installing it on-site 6.1.3 Connecting sensors Any connection of a sensor is established via the VK86 connection cable attached to the IN socket One end of the connection cable is equipped with a box providing a terminal block the colour-coded wires coming from the logger are connected to. -
Page 30: Connecting Devices To The Switching Inputs / Outputs
Connecting the logger and installing it on-site 6.1.4 Connecting devices to the switching Inputs / Outputs The switching input / output connections and the external power supply are established via the VK76 connection cable attached to the DC ext. socket One end of the cable is uncoated and ten colour-coded wires stick out of it. -
Page 31: Wiring Diagram Examples
Connecting the logger and installing it on-site 6.1.5 Wiring diagram examples In the following, some connection examples are described. Depending on the sensor, the actual wiring diagram and the terminal designation may differ. Please refer to the respective sensor manual for detailed information. Output signal type The following example describes how to connect a sensor with a 0 - 5 V voltage output voltage/frequency/... - Page 32 Connecting the logger and installing it on-site Example of an The following example shows an electrical circuit with DC power source connected to alarm loop the switching input of the loggers. If an alarm is raised by the alarm device (e.g. light barrier) is activated, the circuit is closed and the switching input is triggered.
-
Page 33: Positioning The Logger
Connecting the logger and installing it on-site Positioning the logger The logger housing is protected against the ingress of dust and water and, thus, especially qualified for the operation in pipeline shafts where it can be installed next to the measuring point. The logger can be installed in vertical and horizontal position or even upside-down and it can also be hung up using, e.g., a cable tie. - Page 34 Connecting the logger and installing it on-site...
-
Page 35: Sebadataview-3 Software
During start-up, the current version of the software is displayed on the screen. Please check www.sebakmt.com regularly for updates. To install a new version of the software, store the respective file on your PC, execute it and follow the instructions on the screen. -
Page 36: Function And Structure
SebaDataView-3 software Function and structure Introduction SebaDataView-3 (SDV-3) is the multifunctional user software for working with devices of the Sebalog series. Using the software, loggers can be programmed prior to the measurement. After measurement the recorded data can be queried from the loggers, displayed and analyzed. - Page 37 SebaDataView-3 software Directory tree On the left of the screen the directory structure of the software database is displayed. All the devices added to the database by means of their identification number can be found in this so called ‘directory tree’. The directory tree shows the following structure of folders and sub-folders: Main folder Folder...
-
Page 38: Device Administration
SebaDataView-3 software Device administration 7.4.1 Creating / deleting folders Create a folder To create a new folder in the directory tree, proceed as follows: Step Description Mark the folder ‘SebaData’, or any other existing folder which the new folder should be added to as a sub-directory. Open the tab Directory in the multifunction bar. -
Page 39: Creating / Deleting Groups
SebaDataView-3 software Delete a zone To remove a zone from the directory tree, proceed as follows: Step Description Mark the zone to be deleted. Open the tab Directory in the multifunction bar. In the segment Zone, click on Delete. Answer the security query with Yes. Result: The corresponding zone is removed from the directory tree. -
Page 40: Adding / Deleting Single Devices
SebaDataView-3 software 7.4.4 Adding / deleting single devices Add a device To add a device to a group in the directory tree, e.g. a logger, proceed as follows: Step Description Mark the group in the directory tree to which the device should be added. In the multifunction bar, open the tab LogD3/SebaFlow/TDM300. -
Page 41: Map Function
SebaDataView-3 software Map function You have the opportunity to mark the location of installation of each of your devices on a virtual map. Thus, you obtain an overview of the zone and all the devices used. 7.5.1 Creating a map Introduction You have the chance to import any image file into the software - e.g., a sector of a pipe network plan or a detail of a map, etc. - Page 42 SebaDataView-3 software Step Description Use the known tools of the ‘Google Maps’ user interface (moving, zooming, etc.) to customize the map section displayed. Click on OK. Result: The adjusted map section is stored as an image file and now appears in the directory tree in the form of a sub-folder called Map.
-
Page 43: Executing A Map
SebaDataView-3 software 7.5.2 Executing a map To open the map window of a zone, in the directory tree double-click on the Map sub-folder of the zone concerned. Menu bar Map section The markings, indicating the positions of the single devices on the map, show the following design: Symbol of the type of device... - Page 44 SebaDataView-3 software Zoom function You have the chance to get a section of the map magnified in an extra window. Proceed as follows: Step Description In the menu bar of the window, click on Zoom. Result: The cursor changes from mode „show“ to mode „enlarge“...
-
Page 45: System Settings
SebaDataView-3 software System settings In the System settings menu you can make various basic settings for use of the SDV-3 software or specify frequently recurring parameters etc. To open the menu, first click the water drop symbol in the top left. Then, click the Settings button in the appearing context menu. -
Page 46: Saving Access Data For Ftp Server And Email Account
Only when the Use own settings checkbox has been activated will it be possible at a later stage to access the stored data for programming purposes. If the checkbox has not been activated, the user is then offered a choice of using a SebaKMT demo FTP server and/or a demo email account. -
Page 47: Password Protection
SebaDataView-3 software Password protection 7.7.1 Introduction Ex works, the SebaDataView-3 software works without password protection, that is, any user can access and work without restriction. No password is requested. It is possible to restrict access to the application so that only authorized persons can work with it. -
Page 48: Extend Password Protection To Devices
Extend password protection to devices The SebaDataView-3 password protection can be extended from the software to SebaKMT devices, so that these devices can only be used by authorized persons. You will find more information in a separate section of this manual. -
Page 49: Change Password
The passwords for the SebaDataView-3 login can be changed if necessary. NOTE If the passwords are changed in the SebaDataView-3 software, password- protected SebaKMT devices can no longer be contacted via the SebaDataView-3, since access to these devices is still protected with the previous passwords. -
Page 50: Disable Password Protection
SebaDataView-3 software 7.7.5 Disable password protection Users with User level 1 access can completely reset the password protection of the SebaDataView-3. The application then works again without login. Proceed as follows: Step Description Start the software and log in to User level 1. Click on the water drop symbol in the top left. -
Page 51: Programming The Logger Using The Sebadataview-3 Software
Programming the logger using the SebaDataView-3 software Programming the logger using the SebaDataView-3 software Introduction Before use, the logger must be programmed. During this process, the settings are defined for mobile service, the measurement channels of the device are adjusted to the connected sensors, the measurement interval and the measurement period are set and possible alarm thresholds are defined, etc. -
Page 52: Status Of The Device
Programming the logger using the SebaDataView-3 software Step Description Query the current configuration of the logger. (This step is not absolutely necessary in all cases, but it is recommended to nevertheless always perform the step instead of skipping it.) If you want to read the data directly from If you want to download the data from the device via radio, click on Read. -
Page 53: Selecting The Type Of Sensor
Programming the logger using the SebaDataView-3 software Activating channels In the Sensor configuration segment, the measurement channels of the logger are listed. Activate the measurement channels to which the sensors are connected. To do so, tick the checkbox of the corresponding channel. Only when a channel is "activated"... -
Page 54: Configuring An Internal Pressure Sensor
Programming the logger using the SebaDataView-3 software The sensors contained in the list are parameterized. The signal conversion data are already populated and cannot be edited. Usually, no further configuration is required. In some cases you have the chance to specify the unit for the recorded values - e.g. -
Page 55: Configuring A 'User Defined' Sensor
Programming the logger using the SebaDataView-3 software 8.4.1.2 Configuring a ‘user defined’ sensor In the case of a ‘user defined’ sensor which is not contained in the mentioned Drop-Down-List, the input type (carrier) and the unit of the physical value have to be specified manually. -
Page 56: Input Type Examples
Programming the logger using the SebaDataView-3 software 8.4.1.3 Input type examples Input type Voltage A 10 bar pressure sensor with voltage output is connected to a channel of the logger. Input type: Voltage 0-5V Unit: The lower limit of the measuring range (0 bar) is indicated by a voltage value of 0 V while the upper limit (10 bar) correlates with 5 V. - Page 57 Programming the logger using the SebaDataView-3 software Input type Pulse A flowmeter with a digital pulse output is connected to a channel of the logger. The flowmeter transmits one pulse per 16 litres. Input type: Pulse Unit: The checkbox Fast-pulse-mode must be activated if a sensor is used with a pulse rate >50 Hz (ie, more than 50 pulses per second).
-
Page 58: Configuring Alarm Conditions (Threshold Monitoring)
For one hour after the alarm, the logger is available over the cellular network. In this period, a real-time measurement ("FTP step test") can be performed with the device via the SebaKMT Cloud. To save energy, the loggers are not permanently ready to receive messages. - Page 59 Programming the logger using the SebaDataView-3 software A relay cannot be assigned to more than one alarm. If a relay is already included in an existing channel configuration, it cannot be used in combination with any other channel or switching input. Configuring Perform the following steps to configure the alarm thresholds: alarm trigger...
- Page 60 Programming the logger using the SebaDataView-3 software Step Description Select a Debounce value. The input signal must cross the specified threshold not only one time in order to switch an alarm on or off, but two times more after specific periods of time. These periods of time, called ‘debounce’, always are a multiple of the specified logging interval.
-
Page 61: Finishing The Sensor Configuration
Programming the logger using the SebaDataView-3 software Minimum flow The Min. Flow Monitoring checkbox in the Alarm trigger - Exceptions segment is monitoring only relevant in the context of flow measurements. When the connected sensor is not a flow sensor, please disable this checkbox, i.e. - Page 62 Programming the logger using the SebaDataView-3 software Activating an First of all, you have to activate the Alarm Inputs which are going to be part of an alarm alarm input input during the upcoming operation period by marking the respective On/Off checkbox: After an alarm input has been activated, it must be specified which input voltage value Configuring an alarm input...
-
Page 63: Configuring The Mobile Communication
Further information can be obtained from the website or the hotline of the mobile network operator. If necessary, request guidance for setting up data communication in particular. SebaKMT cannot provide any specific technical advice in this case. -
Page 64: Explanations About The Gsm Configuration Dialogue
Programming the logger using the SebaDataView-3 software 8.6.1 Explanations about the GSM configuration dialogue The picture shows the GSM configuration dialogue: You find explanations on the individual segments of the configuration dialogue in the following table: Segment Parameter SIM Card Settings Enter the PIN code of the SIM card which is being used in the device (see mobile communication contract or ask your provider). - Page 65 CSV upload. It is performed without any change. The measured data are then in fact stored on the FTP server twice, once in the standard data format for all SebaKMT applications and once in CSV format. Requirement: Uploading the measured data in CSV format is only possible when the device is connected to a working external power supply.
- Page 66 Use own server checkbox. The access data are then filled in automatically. If you want to use the demo FTP server run by SebaKMT, tick the Seba Demo Mode checkbox . The FTP access data are filled in automatically.
-
Page 67: Testing The Mobile Connection ('Gsm Test')
Use own server checkbox. The access data are then filled in automatically. If you want to use a demo e-mail account run by SebaKMT, tick the Seba Demo Mode checkbox. The respective data are filled in automatically. -
Page 68: Adjusting The Start Time Of Data Recording
Programming the logger using the SebaDataView-3 software Procedure Proceed as follows to carry out a GSM test: Step Description In the SDV-3 software open the GSM configuration dialogue of the respective device (see previous sections). (select the logger in the directrory tree >> click on Program >> click on Configure GSM) On the upper right of the window, click on the Test button. -
Page 69: Activate / Deactivate Circular Buffer
Programming the logger using the SebaDataView-3 software Activate / deactivate circular buffer In the Memory mode segment you can specify whether measurement data is stored using the circular buffer method. If you disable the Ring memory checkbox, the measurement is stopped as soon as the logger memory is full. - Page 70 Programming the logger using the SebaDataView-3 software...
-
Page 71: Retrieving And Evaluating Data
Retrieving and evaluating data Retrieving and evaluating data ‘Realtime Measurement’ with SDV-3 software Using the real-time measurement function of the SebaDataView-3 software you have the chance to carry out a measurement and observe the data recording in real-time. Also a current measurement can be observed. Requirements The following requirements must be met: computer with SebaDataView-3 software... -
Page 72: Retrieving Measurement Data
If measuring data have been transmitted from the device via mobile radio to a FTP server, it can be downloaded from there to your computer. In addition, it is possible to access this data in the SebaKMT Cloud "online" and to further process it. 9.2.1... -
Page 73: Managing Saved Measurement Data
Retrieving and evaluating data Step Description As soon as the download is finished, click the OK button. Result: The small window closes. Measuring data and event list data of the respective device are now available in the software database and can be displayed. -
Page 74: Displaying Measurement Data
Retrieving and evaluating data Displaying measurement data 9.4.1 Calling up a measurement Calling up the most To call up the most recently saved measurement data of a device, double-click this recent measurement device in the directory tree of the software. The window for displaying the measurement data opens (see below). - Page 75 Retrieving and evaluating data The curve is shifted to the foreground. If there are alarm thresholds set for this channel, they are indicated by horizontal black lines. If the curve represents a pressure measurement, all recorded pressure surges are indicated by vertical black lines. Some important characteristics of the measurement are displayed in the blue window.
-
Page 76: Displaying Pressure Surges
Retrieving and evaluating data Function Description Insert label You can use this function to create text fields (labels) within the diagram. These fields can be used to add comments to any points in the diagram. Labels remain saved after the diagram display is closed. Edit text M Double-click the text field –... -
Page 77: Exporting Data In Csv Format
Retrieving and evaluating data Exporting data in CSV format The data collected from a device and stored in the SDV-3 database can be exported in CSV (‘Comma Separated Values’) format. In doing so a file containing all logged value- time pairs line by line is saved to the hard disk or any other memory. The saved file can be accessed using any CSV-capable application (e.g. - Page 78 Retrieving and evaluating data...
-
Page 79: Miscellaneous Functions Of The Sebadataview-3 Software
Miscellaneous functions of the SebaDataView-3 software Miscellaneous functions of the SebaDataView-3 software 10.1 Find out status information of a device Every time data is exchanged between the device and the computer, general information on the status of the device is also transferred to the computer. Status information include, for example: The device firmware version •... -
Page 80: Receiving An 'Event List
Miscellaneous functions of the SebaDataView-3 software 10.2 Receiving an ‘Event List’ Introduction By the help of the Event List function you get information about a device's alarm events up to now, • a device's GSM connection establishments up to now. •... -
Page 81: Password Protection For Log D-3
Password protection for Log D-3 Password protection for Log D-3 11.1 Set password protection Introduction It is possible to restrict access to the Log D-3 by means of a login so that only authorized persons can work with the device. For this purpose, the password protection of the SebaDataView-3 software is extended to the Log D-3, which means that no new password is created for the logger, instead the login passwords of the software also apply to the device. -
Page 82: Canceled Password Protection After Device Reset
Password protection for Log D-3 11.3 Canceled password protection after device reset Introduction It may happen that the passwords for the password-protected Log D-3 Logger are no longer valid or no longer known. In this case, there is no way to contact the logger via radio. -
Page 83: Firmware Update
Firmware update Firmware update We recommend that you keep the firmware the device current at all times. SebaKMT makes improved versions of the firmware available in the download area of www.sebakmt.com on a regular basis. FW version in use The firmware version currently used by the device can be found in the status information of the device (see page 79). - Page 84 Firmware update Step Description In the Update file segment on the lower left of the window, enter the location where you saved the update file that you downloaded to your computer in step 1. To do this, click the folder symbol and use the Explorer window that opens.
-
Page 85: Changing The Battery
90016463 LOG D-3 2 90016466 If you are not sure which kit to choose, please contact your SebaKMT service partner or contact us. Contact information on our web site www.sebakmt.com. Spare seal rings Each replacement kit contains new O-ring seals for the logger housing and the logger lid supplied in addition to the batteries. - Page 86 Changing the battery Step Description Loggers with internal GSM modem have two batteries. Loggers without GSM modem have only one battery. In the middle of the device there is a connection socket with two superimposed jacks. Each battery is connected to one of these jacks. Disconnect the batteries.
-
Page 87: Reset Of The Battery Counter
Changing the battery Step Description Attach the lid to the housing again. The rubber seal inside the lid may possibly fall out. Therefore, when re-assembling the device, it may be helpful not to put the lid on the housing but to take both parts upside down and then put the housing on the lid. - Page 88 Changing the battery...
- Page 89 Changing the battery Tento symbol indikuje, že výrobek nesoucí takovéto označení nelze likvidovat společně s běžným domovním odpadem. Jelikož se jedná o produkt obchodovaný mezi podnikatelskými subjekty (B2B), nelze jej likvidovat ani ve veřejných sběrných dvorech. Pokud se potřebujete tohoto výrobku zbavit, obraťte se na organizaci specializující se na likvidaci starých elektrických spotřebičů...
Need help?
Do you have a question about the Sebalog D-3 and is the answer not in the manual?
Questions and answers