
Related Manuals for Nobles Speed Scrub 300 ec H2O NanoClean


Summary of Contents for Nobles Speed Scrub 300 ec H2O NanoClean
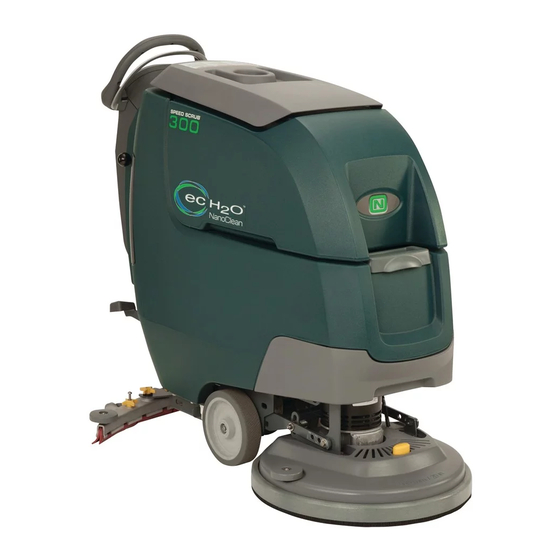
- Page 1 ENGLISH ® SPEED SCRUB Automatic Floor Scrubber Service Information Manual 9014516 For the latest Parts Manuals and other Rev. 01 (3-2017) language Operator Manuals, visit: *9014516* www.tennantco.com/manuals...
-
Page 2: Introduction
INTRODUCTION INTENDED USE The automatic floor scrubber is intended for commercial This manual is available for each new model. It provides necessary operation and maintenance instructions. use, for example in hotels, schools, hospitals, factories, shops, offices and rental businesses. It is designed to scrub hard floor surfaces (concrete, tile, stone, synthetic, Read this manual completely and un- derstand the machine before operating... -
Page 3: Table Of Contents
CONTENTS CONTENTS Introduction .............2 Batteries Failed To Charge/ Reduced Intended Use ...........2 Run Time (Onboard Charger)....53 Machine Data ..........2 Off Board Battery Charging On Serial Number Location ......2 (Option) ..........54 Uncrating Machine ..........2 Batteries Failed To Charge/ Reduced Contents ..............3 Run Time (Off Board Charger) ....55 Power-Up On ...........56 Safety Precautions ..........5... - Page 4 CONTENTS Removing Scrub Head Assembly .....84 Installing Scrub Head Assembly ....85 Checking And Adjusting Cylindrical Scrub Brush Pattern ......85 Removing Lower Orbital Head Isolators ..88 Installing Lower Orbital Head Isolator ..89 Removing Transaxle Assembly (Option) ..89 Installing Transaxle Assembly (Option) ..90 Ptc (Push-To-Conect) Fittings ....91 Making A Connection .......91 Disconnecting ...........92...
-
Page 5: Safety Precautions
SAFETY PRECAUTIONS SAFETY PRECAUTIONS IMPORTANT SAFETY INSTRUCTIONS - SAVE THESE INSTRUCTIONS The following warning precautions are used throughout FOR SAFETY: this manual as indicated in their description: 1. Do not operate machine: WARNING: Unless trained and authorized. To warn of hazards or unsafe practices which could result in severe personal Unless operator manual is read and injury or death. - Page 6 SAFETY PRECAUTIONS 4. Before leaving or servicing machine: 6. When loading/unloading machine onto/off truck or trailer: Stop on level surface. Drain tanks before loading machine. Set the parking brake, if equipped. Use a ramp, truck or trailer that can support Turn off machine and remove key.
- Page 7 SAFETY PRECAUTIONS SAFETY LABELS The safety labels appear on the machine in the locations indicated. Replace labels if they are missing or become damaged or illegible. WARNING LABEL - Located on recovery tank cover. FOR SAFETY LABEL - Do not power spray or hose off machine.
- Page 8 SAFETY PRECAUTIONS SAFETY LABELS The safety labels appear on the machine in the locations indicated. Replace labels if they are missing or become damaged or illegible. FOR SAFETY WARNING LABEL - LABEL - Read Flammable manual before materials or operating reactive metals can machine.
-
Page 9: General Information
GENERAL INFORMATION GENERAL INFORMATION Component Locator Components Batteries Circuit Breakers and Optional Machine Control Module C ec-H2O System Components D Scrub Head Lift Contact Switch Parking Brake Switch Scrub Head Drive Belt G Scrub Motor (Disk Shown) H SE (Severe Environment) System Components Solution Tank Fill Port... -
Page 10: Electrical Schematic Symbols
GENERAL INFORMATION Note: Note: ecH2O Side Brush ecH2O Enable: J7-12 Low=SV3 H20 Valve ON J7-10 Low=Turn ON ecH2O ELECTRICAL SCHEMATIC SYMBOLS CB16 ( ecH2O Pump ON 100% IGN ST Battery Circuit Breaker DPDT Switch Key Switch Fuse Pressure Switch Connected Diode Motor Not Connected... - Page 11 GENERAL INFORMATION SS300 Service Information (3-2017)
-
Page 12: Electrical Schematic (Drive Model) - 1 Of 2
GENERAL INFORMATION ELECTRICAL SCHEMATIC (DRIVE MODEL) - 1 of 2 B+/GND CABLE ASSY B+/GND CABLE ASSY 12 VDC 12 VDC (2) 12VDC BATTERIES 1/RED 13/BLK OFF BOARD CHARGER CABLE ASSY CABLE, CHARGER P1-B- 13/BLK 13/BLK INTERFACE MODULE J7-8 J2-12 13/BLK 13/BLK J3-3 113/BLK/WHT... - Page 13 GENERAL INFORMATION ELECTRICAL SCHEMATIC (DRIVE MODEL) - 2 of 2 120 OHM (LOCATED IN HARNESS) CB-2 J12-11 J12-3 43/ORA 46/BLU VCC_1 CAN- J12-12 J12-2 46/BLU VCC_2 CAN+ J12-13 66/BLU VALVE_SUPPLY MTR-5 J12-14 67/PUR VALVE_OUTPUT J12-5 13/BLK 13/BLK EC-H2O WCM PUMP GND_1 J12-6 GND_2...
-
Page 14: Electrical Schematic (Push Model) - 1 Of 2
GENERAL INFORMATION ELECTRICAL SCHEMATIC (PUSH MODEL) - 1 of 2 B+/GND CABLE ASSY 12 VDC 12 VDC (2) 12VDC BATTERIES 1/RED 13/BLK OFF BOARD CHARGER CABLE ASSY #1077634 CABLE, CHARGER P1-B- 13/BLK 13/BLK INTERFACE MODULE J2-12 J7-8 113/BLK/WHT J3-3 SHLD_GND ( MOM. - Page 15 GENERAL INFORMATION ELECTRICAL SCHEMATIC (PUSH MODEL) - 2 of 2 120 OHM (LOCATED IN HARNESS) CB-2 J12-11 J12-3 43/ORA 46/BLU VCC_1 CAN- 46/BLU J12-12 J12-2 VCC_2 CAN+ J12-13 66/BLU VALVE_SUPPLY MTR-5 67/PUR J12-14 VALVE_OUTPUT J12-5 13/BLK 13/BLK EC-H2O WCM PUMP GND_1 J12-6 GND_2...
- Page 16 GENERAL INFORMATION OPERATIONAL MATRIX FUNCTION ENABLED DISABLED Vacuum Fan • Squeegee Lowered • Squeegee Raised • Low Battery Voltage (Wet < 21.9 V, AGM < 22.7 V) • Fault • Battery Charger ON Interlock Main Scrub Motor • Head Lowered - Foot Pedal •...
-
Page 17: Fastener Torque
GENERAL INFORMATION FASTENER TORQUE SAE (STANDARD) Thread Thread Headless Square Size Grade 1 Grade 2 Cutting Grade 5 Grade 8 Socket Set Head Set Carriage Thread Socket & Screws Screws Bolts Rolling Stainless Steel 4 (.112) (5) - (6.5) (4) - (6) 5 (.125) (6) - (8) (9) - (11) -
Page 18: General Machine Dimensions/Capacities/Performance
GENERAL INFORMATION GENERAL MACHINE DIMENSIONS/CAPACITIES/PERFORMANCE MODEL 17 in / 43 cm Disk 20 in / 50 cm Disk 17 in / 43 cm Disk 20 in / 50 cm Disk (Push) (Push) (Drive) (Drive) Length 51.25 in / 1302 mm 54 in / 1372 mm 51.25 in / 1302 mm 54 in / 1372 mm... -
Page 19: General Machine Dimensions/Capacities/Performance
GENERAL INFORMATION GENERAL MACHINE DIMENSIONS/CAPACITIES/PERFORMANCE MODEL 24 in / 60 cm 20 in / 50 cm 20 in / 50 cm Dual Disk Cylindrical Brush Orbital Length 51.75 in / 1314 mm 50.5 in / 1283 mm 49 in / 1245 mm Width 26 in / 660 mm 25 in / 635 mm... - Page 20 GENERAL INFORMATION MACHINE DIMENSIONS SINGLE DISK MODEL 30.4 in 772 mm 43.1 in 1095 mm 51.25 in 20 in 1302 mm 508 mm 17 in / 43 cm 17 in / 43 cm Model Model 54 in 22 in 1372 mm 559 mm 20 in / 50 cm 20 in / 50 cm...
- Page 21 GENERAL INFORMATION DUAL DISK MODEL 30.4 in 772 mm 43.1 in 1095 mm 51.25 in 26 in 1314 mm 660 mm SS300 Service Information (3-2017)
- Page 22 GENERAL INFORMATION CYLINDRICAL BRUSH MODEL 30.4 in 772 mm 43.1 in 1095 mm 50.5 in 25 in 1283 mm 635 mm SS300 Service Information (3-2017)
- Page 23 GENERAL INFORMATION ORBITAL PAD MODEL 30.4 in 772 mm 43.1 in 1095 mm 49 in 20.5 in 1245 mm 521 mm SS300 Service Information (3-2017)
-
Page 24: Maintenance
MAINTENANCE MAINTENANCE MAINTENANCE CHART Person Interval Resp. Description Prodecure Check, flip or replace Dailey Pad(s) Brush(es) Check, clean Cylindrical Brushes Check, clean Drain, rinse, clean float shut-off screen Recovery tank and debris tray if equipped Solution tank Drain, rinse Check, refill Severe environment tank (option) Squeegee Clean, check for damage and wear... -
Page 25: Machine Maintenance
MAINTENANCE 3. Remove and clean the float shut-off screen (Fig. MACHINE MAINTENANCE 88). To keep the machine in good working condition, simply perform the following maintenance procedures. FOR SAFETY: Before leaving or servicing machine, stop on level surface, turn off machine, remove key and set parking brake if equipped. - Page 26 MAINTENANCE Orbital scrub head - Turn the work pad over or replace 8. Check the scrub head skirt for wear or damage when worn (Fig. 91). (Fig. 94). Replace if worn or damaged. Fig. 91 Fig. 94 6. Click-Quick pad driver/brushes - clean any debris 9.
-
Page 27: After Weekly Use
MAINTENANCE 11. Charge batteries (Fig. 97). See BATTERIES. AFTER WEEKLY USE 1. Check the electrolyte level in all batteries (Fig. 98). See BATTERIES. Fig. 97 Fig. 98 2. Remove the drip tray cover from the squeegee assembly and clean reservoir (Fig. 99). Fig. -
Page 28: After Every 50 Hours Of Use
MAINTENANCE AFTER EVERY 50 HOURS OF USE 4. Inspect and clean the seal on the recovery tank lid (Figure 104). Replace seal if damaged. 1. Remove the solution tank filter and clean screen (Fig. 100). Turn the filter bowl counter-clockwise to remove. -
Page 29: Electric Motors
MAINTENANCE ELECTRIC MOTORS ORBITAL SCRUB HEAD ISOLATORS (LOWER) FOR SAFETY: Before leaving or servicing Replace motor carbon brushes as indicated. Contact- machine, stop on level surface, turn off machine, trained personnel for carbon brush replacement. remove key and set parking brake if equipped. Carbon Brush Replacement Hours Replace the four lower vibration isolators every... -
Page 30: Batteries
MAINTENANCE The electrolyte level should be slightly above the BATTERIES battery plates as shown before charging (Fig. 107). FOR SAFETY: Before leaving or servicing Add distilled water if low. DO NOT OVERFILL. The electrolyte will expand and may overflow when charg- machine, stop on level surface, turn off machine, ing. -
Page 31: Charging Batteries
MAINTENANCE CHARGING BATTERIES 4. For models equipped with on-board chargers, remove the charger’s power cord from the storage hooks and plug power cord into a properly The charging instructions in this manual are intended grounded wall outlet (Fig. 109). for the battery charger supplied with your machine. The use of other battery chargers that are not supplied and approved by Tennant are prohibited. -
Page 32: Squeegee Blade Replacement
MAINTENANCE On-board battery charger: The battery discharge SQUEEGEE BLADE REPLACEMENT indicator lights will ripple back and forth during the charging cycle. When all five lights repeatedly flash FOR SAFETY: Before leaving or servicing two times, the charging cycle is complete (Fig. 111). machine, stop on level surface, turn off machine, remove key and set parking brake if equipped. -
Page 33: Ec-H2O Nanoclean Water Conditioning Cartridge Replacement
MAINTENANCE 4. 4. Rotate the rear blade to a new wiping edge (Fig. ec-H2O NanoClean WATER CONDITIONING 115). Make sure to align the slots in the blade with CARTRIDGE REPLACEMENT retainer tabs. FOR SAFETY: Before leaving or servicing machine, stop on level surface, turn off machine, remove key and set parking brake if equipped. -
Page 34: Loading/Unloading Machine For Transporting
MAINTENANCE Carefully read and understand all steps first before 3. Disconnect the two hose connectors from the top of the cartridge by pressing the gray collars inward performing procedure. and pulling the connectors outward (Fig. 118). Lift A. Turn key on. cartridge to remove. -
Page 35: Storing Machine
MAINTENANCE FOR SAFETY: When loading/unloading machine STORING MACHINE onto/off truck or trailer, use a ramp that can support the machine weight and operator. The following steps should be taken when storing the machine for extended periods of time. FOR SAFETY: Do not operate the machine on a 1. -
Page 36: Troubleshooting
TROUBLESHOOTING TROUBLESHOOTING FAULTS Machine faults are displayed three different ways depending on the machine configuration: Machines equipped with a membrane panel display faults using the BDI (Battery Discharge Indicator). If a fault is present, the BDI displays a combination of flashing and steady LEDs, which can be interpreted using the tables below. - Page 37 TROUBLESHOOTING FAULTS (Cont’d) BDI (Battery Pro-Panel Fault Condition Reason Correction Discharge Indicator) Faults ☼ = Flashing (Option) ☼ ☼ ☼ ☼ ● 0x0102 Voltage/Power 1. Scrub controller board not Check wiring. Inline fuse may Loss detecting power. be blown or bad. Replace inline 2.
- Page 38 TROUBLESHOOTING FAULTS (Cont’d) BDI (Battery Pro-Panel Fault Condition Reason Correction Discharge Indicator) Faults ☼ = Flashing (Option) ☼ ● ● ● ☼ 0x0900 Propel Generic 1. Generic iDrive fault. Power cycle machine. Check Fault 2. Large white iDrive connector pin 2, connections/wiring.
- Page 39 TROUBLESHOOTING FAULTS (Cont’d) BDI (Battery Pro-Panel Fault Condition Reason Correction Discharge Indicator) Faults ☼ = Flashing (Option) ☼ ● ● ● ☼ 0x090C Propel EEPROM iDrive unit is faulty. Replace iDrive. Write Error 0x090D Propel EEPROM iDrive unit is faulty. Replace iDrive.
- Page 40 TROUBLESHOOTING FAULTS (Cont’d) BDI (Battery Pro-Panel Fault Condition Reason Correction Discharge Indicator) Faults ☼ = Flashing (Option) ☼ ● ● ● ☼ 0x0917 Propel Brake iDrive unit is faulty. Replace iDrive. Interlock Fault 0x0918 Propel Relay iDrive unit is faulty. Replace iDrive.
- Page 41 TROUBLESHOOTING FAULTS (Cont’d) BDI (Battery Pro-Panel Fault Condition Reason Correction Discharge Indicator) Faults ☼ = Flashing (Option) ☼ ● ● ● ☼ 0x0924 Propel High Controller detects battery voltage has Check condition of batteries, Battery Voltage 2 exceeded approximately 45V on 24V connectors, and relevant wiring Warning controllers and approximately 49.5V...
- Page 42 TROUBLESHOOTING FAULTS (Cont’d) BDI (Battery Pro-Panel Fault Condition Reason Correction Discharge Indicator) Faults ☼ = Flashing (Option) ☼ ● ● ● ☼ 0x092D Propel Output iDrive unit is faulty. Replace iDrive. Voltage Tracking 0x092E Propel Negative iDrive unit is faulty. Replace iDrive.
- Page 43 TROUBLESHOOTING FAULTS (Cont’d) BDI (Battery Pro-Panel Fault Condition Reason Correction Discharge Indicator) Faults ☼ = Flashing (Option) ☼ ● ● ● ☼ 0x093C Propel Trip Latch iDrive unit is faulty. Replace iDrive. Not Armed 0x093D Propel Failed To iDrive unit is faulty. Replace iDrive.
- Page 44 TROUBLESHOOTING FAULTS (Cont’d) BDI (Battery Pro-Panel Fault Condition Reason Correction Discharge Indicator) Faults ☼ = Flashing (Option) ☼ ● ● ☼ ☼ Verify floor, pad, and down 0x0103 Scrub Motor 1. Current draw higher than expected. Over Current 2. Higher current draw than hardware pressure combination are Fault design limit.
- Page 45 TROUBLESHOOTING FAULTS (Cont’d) BDI (Battery Pro-Panel Fault Condition Reason Correction Discharge Indicator) Faults ☼ = Flashing (Option) ☼ ● ☼ ☼ ☼ 0x0503 Vacuum Over 1. Current draw higher than expected. Check harness and vacuum. Current Fault 0x0504 Vacuum Over 1.
- Page 46 TROUBLESHOOTING FAULTS (Cont’d) BDI (Battery Pro-Panel Fault Condition Reason Correction Discharge Indicator) Faults ☼ = Flashing (Option) ☼ ☼ ☼ ● ● 0xF100 Charger Generic 1. Error condition has occurred with Replace charger. Warning charger unit. ● ☼ ☼ ● ● 0xF101 Charger No Load 1.
- Page 47 TROUBLESHOOTING FAULTS (Cont’d) Icon Code Fault Condition Reason Correction 0x0702 EC-H2O The system pressure switch is 1. System pressure too high; Pressure Switch detecting a trip or unconnected. needs repair. Active 2. Check connections. Verify functionality of scrub head switch and parking brake switch. Connectors possibly wired to incorrect switches.
- Page 48 TROUBLESHOOTING FAULTS (Cont’d) Icon Code Fault Condition Reason Correction 0x072A EC-H2O Cell Cell current is operating below See the NanoClean Electrode Fault allowed operating condition. troubleshooting guide. Replace plumbing half of ec-H2O module. 0x0726 EC-H2O E-Cell 1. Module damage. Repair harness if possible. Short load Fault 2.
-
Page 49: Faults - Off Board Battery Charger
TROUBLESHOOTING FAULTS - OFF BOARD BATTERY CHARGER ERROR CODE REASON CORRECTION Srt:IB Ensure there are no short circuits on bat- Output current has exceeded nominal cur- IBmax tery or battery cables or there is an active rent value by more than 10%. load on battery that draws more currant than charger can provide. -
Page 50: Troubleshooting
TROUBLESHOOTING TROUBLESHOOTING FAULT CONDITION REASON CORRECTION Hour Meter Not Powered 1. Hour meter wires disconnected. Check connections/wiring. 2. Scrub Controller board connector J8 pin 9 disconnected. Bail Not Responding 1. Bail sensor is unplugged. Check connections. Replace user 2. User Interface board defective. interface board. - Page 51 TROUBLESHOOTING SS300 Service Information (3-2017)
-
Page 52: Onboard Battery Charging On (Option)
TROUBLESHOOTING ONBOARD BATTERY CHARGING ON (Option) (2) 12VDC Batteries 12 Volt 12 Volt Onboard Battery Charger BLACK Cable 7/PUR J7-9 Interface Module P2-3 N.O. P2-4 4/YEL 6/BLU J7-10, J7-7 5/GRN Interface N.C. P2-2 Module Switch 1/RED ec-H2O Relay (option) AC Power Cord J8-7 Machine Control Module (option) -
Page 53: Batteries Failed To Charge/ Reduced Run Time (Onboard Charger)
TROUBLESHOOTING BATTERIES FAILED TO CHARGE/ REDUCED RUN TIME (ONBOARD CHARGER) STEP ACTION VALUE(S) • Key On See “Faults” in Go to Step #2 Is there a flashing BDI fault or LCD Pro-Panel • the TROUBLE- (option) fault code present? SHOOTING section of this manual •... -
Page 54: Off Board Battery Charging On (Option)
TROUBLESHOOTING OFF BOARD BATTERY CHARGING ON (OPTION) (2) 12 VDC Batteries 12 Volt 12 Volt Battery Charger Connector Not Used N.O. 4/YEL N.C. 5/GRN 6/BLU J7-10, J7-7 Interface Module Switch Battery Charger Interlock Switch ec-H2O Relay (option) J8-7 Machine Control Module (option) Battery Positive + Battery Negative -... -
Page 55: Batteries Failed To Charge/ Reduced Run Time (Off Board Charger)
TROUBLESHOOTING BATTERIES FAILED TO CHARGE/ REDUCED RUN TIME (OFF BOARD CHARGER) STEP ACTION VALUE(S) • Key On See “Off Board Go to Step #2 • Is there an LCD fault present on the Off Board Battery Char- Charger? ger Faults” in the TROUBLE- SHOOTING section of this... -
Page 56: Power-Up On
TROUBLESHOOTING Power-Up ON POWER-UP ON (2) 12 VDC Batteries 12 Volt 12 Volt Not Used N.O. 5/GRN N.C. BLACK Cable P2-3 N.O. P2-4 4/YEL 5/GRN N.C. P2-2 RED Cable Switch AC Power Cord Onboard Battery Charger (Opt) 6/BLU 13/BLK Interface Module Touch Panel Battery Positive + Battery Negative -... -
Page 57: Machine Failed To Power Up
TROUBLESHOOTING MACHINE FAILED TO POWER UP STEP ACTION VALUE(S) • Key On Go to Step #2 Recharge • Test the total battery voltage using a voltmeter Batteries and • Is the total battery voltage greater than 20 Test Power- VDC? Up Circuit Operation •... -
Page 58: Propel Subsystem (Option)
TROUBLESHOOTING PROPEL SUBSYSTEM (Option) (2) 12 VDC Batteries 12 Volt 12 Volt I-Drive Propel Module 8/GRY 13/BLK Propel Motor 38/GRY 9/WHT E-Stop Switch P1-5 ON/OFF Propel Enable (B+ from J9-1 = ON) 10/TAN Directional Switch 27/PUR (closed = reverse) Scrub Head P1-4 LOW SPEED 37/PUR Pos. -
Page 59: Failed To Propel
TROUBLESHOOTING FAILED TO PROPEL STEP ACTION VALUE(S) • Key On See “Faults” in the Go to Step #2 • Enable propel TROUBLE- Is there a flashing BDI fault fault code pres- • SHOOTING sec- ent? tion of this manual • See SERVICE DIAGNOSTICS TOOL in the Go to Step #3 Reprogram... -
Page 60: Scrub Motor On
TROUBLESHOOTING SCRUB MOTOR ON (2) 12 VDC Batteries 12 Volt 12 Volt NOTE: The scrub motor system uses two relays (stepped) because the M4A coil exceeds the max. Auxiliary Scrub current rating of the J7-6 output Brush Relay circuit. J7-6 Interface Module 6/BLU 20/TAN... -
Page 61: Scrub Motor Failed To Turn On
TROUBLESHOOTING SCRUB MOTOR FAILED TO TURN ON STEP ACTION VALUE(S) • Key On See “Faults” in the Go to Step #2 • Enable scrub motor TROUBLE- Is there a flashing BDI fault fault code pres- • SHOOTING sec- ent? tion of this manual •... -
Page 62: Vacuum Fan On
TROUBLESHOOTING VACUUM FAN ON (2) 12 VDC Batteries 12 Volt 12 Volt Vacuum Fan SW-8 Squeegee Relay Position Switch (Closed= Down) 38/GRY 3/ORA Vacuum Fan Motor CB6 (20A) 15/GRN 29/WHT 13/BLK Operational Matrix: Enabled Disabled • Squeegee Raised • Squeegee Lowered Vacuum Fan •... -
Page 63: Vacuum Fan Failed To Turn On
TROUBLESHOOTING VACUUM FAN FAILED TO TURN ON STEP ACTION VALUE(S) • Key On See “Faults” in Go to Step #2 • Enable vacuum fan the TROUBLE- Is there a flashing BDI fault fault code pres- • SHOOTING sec- ent? tion of this manual •... -
Page 64: Solution Control On (Conventional)
TROUBLESHOOTING SOLUTION CONTROL ON (CONVENTIONAL) (2) 12 VDC Batteries 12 Volt 12 Volt Circuit Breaker 1 1/RED 13/BLK GND J7-8 13/BLK J7-10 KSI KEY SWITCH 6/BLU INTERLOCK Switch J7-7 FLYBACK 6/BLU SV1 Solution Valve J7-5 SOLUTION VALVE OUT 54/YEL Bail Switch (N.O) SENSOR_IN J4-4 31/PNK +5V OUT J4-1... -
Page 65: Solution Control Failed To Turn On (Conventional)
TROUBLESHOOTING SOLUTION CONTROL FAILED TO TURN ON (CONVENTIONAL) STEP ACTION VALUE(S) • Key On See “Faults” in Go to Step #2 • Enable solution control (conventional) the TROUBLE- Is there a flashing BDI fault fault code pres- • SHOOTING ent? section of this manual •... -
Page 66: Solution Control On (Ec-H2O)
TROUBLESHOOTING SOLUTION CONTROL ON (ec-H2O) J7-3 Interface Module 2/BRN ec-H2O Mode Switch 13/BLK ec-H2O Relay 6/BLU 13/BLK 13/BLK GND J12-5 66/BLU J12-13 WCM PUMP GND J12-6 J12-14 WCM 13/BLK PUMP 67/PUR Water Conditioning Module Pump J12-11 VCC_1 J12-12 VCC_2 46/BLU N.C. -
Page 67: Solution Control Failed To Turn On (Ec-H2O)
TROUBLESHOOTING SOLUTION CONTROL FAILED TO TURN ON (ec-H2O) STEP ACTION VALUE(S) • Key On See “Faults” in Go to Step #2 • Enable solution control (ec-H2O) the TROUBLE- Is there a flashing BDI or ec-H2O fault pres- • SHOOTING ent? section of this manual •... -
Page 68: Sun-I/O Circuit Board Testing (Universal Schematic)
TROUBLESHOOTING SUN-I/O CIRCUIT BOARD TESTING (UNIVERSAL SCHEMATIC) (2) 12 VDC Batteries 12 Volt 12 Volt [ ll in the blank] Module Circuit Breaker Unswitched B+ Directional Switch (closed = reverse) Key Switch Input P1-X P1-X Switched B+ Input P1-X Motor 5K Ω... -
Page 69: Sun-I/O Circuit Board Testing Procedure
TROUBLESHOOTING SUN-I/O CIRCUIT BOARD TESTING PROCEDURE STEP ACTION VALUE(S) 1 Switched (+)* • Key On, circuits loaded (preferred) Applied Volt- Go to Step Identify Volt- • All electrical components remain con- age Must age Drop nected to wire harness Be Within 1 Location •... -
Page 70: Can Open Network Issues
TROUBLESHOOTING CAN OPEN NETWORK ISSUES NETWORK RESISTANCE The following items include procedures to help inves- The network resistance must be correct for the tigate a fault related to a CAN open network on the network to operate correctly. Depending on which machine. -
Page 71: Node (Module) Resistance
TROUBLESHOOTING NODE (MODULE) RESISTANCE Each node on the network has a connector for the CAN communication wires. Check each board indi- vidually to make sure the CANH and CANL resistance measurements are > 1M Ω for non-terminating nodes and 122 Ω for terminating nodes. The CAN connec- tions may be on their own connector (pictured below) or combined into another connector. -
Page 72: Machine Node Table
TROUBLESHOOTING MACHINE NODE TABLE The following table outlines the CAN nodes by ma- chine model. A standard node is one that is always present. Optional nodes are dependent on the customer order. Gray box = Terminating Resistor Locations. If only one box marked on a machine, the second termination is made in the harness. -
Page 73: Service
SERVICE SERVICE PROGRAMING A NEW INTERFACE MODULE SYSTEM REQUIREMENTS: Windows® 7 OS, SERVICE DIAGNOSTICS TOOL Microsoft .NET 4.5 or later, USB to Mini-USB cable. 5. Connect a USB cable from a notebook computer Machine software configuration, which is stored in to the machine and turn the key switch On. - Page 74 SERVICE 7. The Service Diagnostics tool now connects to the 10. The programming process begins and all of the control module network. control modules are updated (if applicable). 11. The Service Diagnostic tool may prompt to 8. The Service Diagnostics tool will automatically cycle the key switch off/on during the process.
-
Page 75: Re-Configuring Existing Modules
SERVICE RE-CONFIGURING EXISTING MODULES 2. Launch the software by double clicking the Service Diagnostics desktop shortcut or find the SYSTEM REQUIREMENTS: Windows® 7 OS, software in All Programs. Microsoft .NET 4.5 or later, USB to Mini-USB cable. NOTE: Windows® may prompt a restart after installing the machine driver. - Page 76 SERVICE 4. Click on the Configuration button to display a list of configurable options. 5. Select all of the desired re-configurations that apply from the drop-down menus and then click individual arrow buttons to launch individual module re-programming (this is faster) or the header arrow button to launch all module re- programming (this is slower).
-
Page 77: Programming The I-Drive Module (Option)
SERVICE PROGRAMMING THE I-DRIVE MODULE (OPTION) 2. Launch the software by double clicking the Service Diagnostics desktop shortcut or find the SYSTEM REQUIREMENTS: Windows® 7 OS, software in All Programs. Microsoft .NET 4.5 or later, USB to Mini-USB cable. NOTE: Windows® may prompt a restart after installing the machine driver. -
Page 78: Displaying Fault Codes
SERVICE 4. Click on the I-Drive button. 1. Connect a USB cable from a notebook computer to the machine and turn the key switch On. 5. Click on the Program Factory Defaults button to program the I-Drive module. 2. Launch the software by double clicking the Service Diagnostics desktop shortcut or find the software in All Programs. -
Page 79: Battery Charger Settings
SERVICE BATTERY CHARGER SETTINGS CHANGING OFF-BOARD BATTRY CHARGER SETTINGS The battery charger is set to charge the battery type 1. Disconnect charger from the machine and plug supplied with your machine. If you choose to change charger into power supply. to a different battery type or capacity, the charger’s charging profile must be changed to prevent battery damage. - Page 80 SERVICE 3. Press the middle button to activate the battery 6. Press the up arrow button until the type options (algorithms). The left LED will turn “PROGRAMMING SAVE AND EXIT” screen is red. displayed. TURNS 4. Press the up arrow button to scroll through the 7.
-
Page 81: On-Board Battery Charger
SERVICE ON-BOARD BATTERY CHARGER Pro/Membrane Models - Service application software required, contact service. As an alternative, the char- ger profile may be manually changed. See CHANG- ING ON- BOARD BATTERY CHARGER SETTINGS for Pro-Membrane model. The battery discharge in- dicator will automatically reprogram to match battery type when the battery charger profile is changed. -
Page 82: Changing On-Board Battery Charger
SERVICE CHANGING ON-BOARD BATTERY CHARGER SETTINGS (Pro-Panel model) NOTE: To perform this procedure, machine must be in supervisor mode. See SUPERVISOR CONTROLS instructions at back of manual. To change the on-board battery charger settings for a different battery type : 1. -
Page 83: Battery Charger Operation
SERVICE 4. Press the Battery Type button to select the BATTERY CHARGER OPERATION battery type installed in machine (). Fig. 121 Above is a graph representing the I-U-I (constant current-constant voltage-contant current) charging strategy used to charge batteries. For flooded (wet) lead-acid batteries, the finish voltage can rise up to approximately 34 Volts (24 Volt System). -
Page 84: Removing Scrub Head Assembly
SERVICE REMOVING SCRUB HEAD ASSEMBLY 5. Remove front shroud mounting hardware (2). FOR SAFETY: Before leaving or servicing machine, stop on level surface, turn off machine, remove key and disconnect batteries. 1. Drain recovery tank, turn off key, and disconnect batteries. -
Page 85: Installing Scrub Head Assembly
SERVICE 8. Remove lift mechanism mounting bolts (2). 9. Remove scrub head assembly. Note the orientation of the spacers and nylon washers for reassembly. Also, note the hole selection for the configured scrub head type. INSTALLING SCRUB HEAD ASSEMBLY FOR SAFETY: Before leaving or servicing machine, stop on level surface, turn off machine, remove key and disconnect batteries. - Page 86 SERVICE 2. Disconnect the transaxle motor electrical 4. Move the scrubber so that the brushes are connection. positioned over the chalk. NOTE: This must be done to keep the machine stationary during the brush pattern test. 5. Set parking brake. 6.
- Page 87 SERVICE 10. Turn the adjustment screw counter-clockwise 7. Release parking brake (if equipped) and pull to increase down pressure on the RH side or the machine away from the pattern test site clockwise to decrease down pressure on the RH and inspect the brush pattern.
-
Page 88: Removing Lower Orbital Head Isolators
SERVICE 13. Tighten the top bolt and perform a final pattern 4. Remove flat head screws securing the lower check. Adjustment is complete. plate to the lower isolators. REMOVING LOWER ORBITAL HEAD ISOLATORS FOR SAFETY: Before leaving or servicing machine, stop on level surface, turn off machine, remove key and disconnect batteries. -
Page 89: Installing Lower Orbital Head Isolator
SERVICE INSTALLING LOWER ORBITAL HEAD ISOLATOR REMOVING TRANSAXLE ASSEMBLY (OPTION) FOR SAFETY: Before leaving or servicing FOR SAFETY: Before leaving or servicing machine, stop on level surface, turn off machine, machine, stop on level surface, turn off machine, remove key and disconnect batteries. remove key and disconnect batteries. -
Page 90: Installing Transaxle Assembly (Option)
SERVICE 4. Remove rear squeegee assembly and set aside. 7. Remove transaxle mounting hardware 5. Carefully lower machine onto the left side using a protective blanket. INSTALLING TRANSAXLE ASSEMBLY (OPTION) FOR SAFETY: Before leaving or servicing machine, stop on level surface, turn off machine, remove key and disconnect batteries. -
Page 91: Ptc (Push-To-Conect) Fittings
SERVICE 2. Insert tube. The fitting will grip the hose before PTC (PUSH-TO-CONECT) FITTINGS it seals. Be sure the tube is completely inserted into the fitting. 3. Push into the tube stop. The collet has stainless steel teeth which hold the tube firmly in position while the o-ring provides a permanent leak-proof seal. -
Page 92: Disconnecting
SERVICE REMOVING VACUUM FAN DISCONNECTING FOR SAFETY: Before leaving or servicing CAUTION: Contents may be under machine, stop on level surface, turn off machine, pressure. Relieve system pressure before disconnecting fittings. remove key and disconnect batteries. 1. Push in collet squarely against face of fitting to 1. -
Page 93: Installing Vacuum Motor
SERVICE 4. Remove vacuum fan mounting hardware (3). INSTALLING VACUUM MOTOR FOR SAFETY: Before leaving or servicing machine, stop on level surface, turn off machine, remove key and disconnect batteries. 1. Installation is the reverse of removal. 5. Remove vacuum fan assembly. SS300 Service Information (3-2017) -
Page 94: Removing Carbon Brushes
SERVICE REMOVING CARBON BRUSHES INSTALLING CARBON BRUSHES FOR SAFETY: Before leaving or servicing FOR SAFETY: Before leaving or servicing machine, stop on level surface, turn off machine, machine, stop on level surface, turn off machine, remove key and disconnect batteries. remove key and disconnect batteries. -
Page 95: Removing Water Solenoid
SERVICE 4. Remove rear squeegee assembly and set aside. REMOVING WATER SOLENOID FOR SAFETY: Before leaving or servicing machine, stop on level surface, turn off machine, remove key and disconnect batteries. 1. Drain solution and recovery tanks. 5. Carefully lower machine onto the left side using a protective blanket. -
Page 96: Installing Water Solenoid
SERVICE 7. Disconnect electrical connections and remove INSTALLING WATER SOLENOID T-25 Torx mouting screws (2). Set hardware FOR SAFETY: Before leaving or servicing aside. machine, stop on level surface, turn off machine, remove key and disconnect batteries. 1. Installation is the reverse of removal. 8. -
Page 97: Adjusting Water Solenoid
SERVICE ADJUSTING WATER SOLENOID 3. Disconnect transaxle motor (option) electrical connector. FOR SAFETY: Before leaving or servic- NOTE: This is necessary to prevent movement while ing machine, stop on level surface, turn dispensing water during the adjustment process. off machine, and remove key. 1. - Page 98 SERVICE 8. Reinstall the adjustment knob against the stop 5. Place a shallow catch basin below the water solenoid, turn on floor scrubber and activate pin as shown below. Tighten set screws (2). conventional solution flow by squeezing the NOTE: Tighten one set screw and then rotate the handle assembly.
-
Page 99: Controll Modules
SERVICE 4. Cut zip ties securing hoses and wire harnesses CONTROLL MODULES to cover. REMOVING MACHINE CONTROL MODULE (OPTION) 1. Drain solution and recovery tanks. 5. Remove the heat sink mounting bolts (2). 2. Disconnect batteries. 6. Carefully lower the heat sink and machine control module assembly and then disconnect all 3. -
Page 100: Installing Control Module
SERVICE 7. Remove the heat sink and machine control REMOVING i-DRIVE MODULE (OPTION) module assembly from the scrubber. FOR SAFETY: When servicing machine, disconnect battery connections before working on machine. 1. Key Off and batteries disconnected. 2. Remove T-25 torx mounting screws (2). INSTALLING CONTROL MODULE FOR SAFETY: When servicing machine, disconnect battery connections before working... -
Page 101: Installing I-Drive Module (Option)
SERVICE 5. Disconnect electrical connections and remove REMOVING ONBOARD BATTERY CHARGER I-Drive mounting screws (2). (OPTIION) FOR SAFETY: When servicing machine, disconnect battery connections before working on machine. 1. Key Off and batteries disconnected. 2. Remove T-25 torx mounting screws (2). INSTALLING I-DRIVE MODULE (OPTION) FOR SAFETY: When servicing machine, disconnect battery connections before working... -
Page 102: Installing Onboard Battery Charger
SERVICE 5. Remove battery charger mounting torx hardware INSTALLING ONBOARD BATTERY CHARGER (4). FOR SAFETY: When servicing machine, disconnect battery connections before working on machine. 1. Installation is reverse of removal. NOTE: This battery charger can be programmed for multiple battery configurations. This configuration data is stored in the interface module and will automatically configure a replacement battery charger once installed and following a power-up... -
Page 103: Removing Interface Module
SERVICE 5. Remove T-25 torx mounting screws (2). REMOVING INTERFACE MODULE FOR SAFETY: When servicing machine, disconnect battery connections before working on machine. 1. Key Off and batteries disconnected. 2. Attach a static wrist strap to the battery (-) terminal to prevent ESD damage to the logic board. -
Page 104: Removing Bail Switch, Speed Potentionmeter, Or Directional Switch
SERVICE 5. Carefully separate the touch panel from the REMOVING BAIL SWITCH, SPEED console and disconnect all electrical connections. POTENTIONMETER, OR DIRECTIONAL SWITCH Set instrument panel aside. FOR SAFETY: When servicing machine, disconnect battery connections before working on machine. 1. Key Off and batteries disconnected. 2. - Page 105 SERVICE 8. Remove operator console mounting bolts (2). 12. Remove screws (4) from front of operator’s Lift up and forward to remove the operator console. console and place console on a work bench. Remove plastic knobs and set aside. If replacing the potentiometer or directional switch, use 13.
-
Page 106: Installing Bail Switch, Speed Potentiometer, Or Directional Switch
SERVICE 14. Release spring, rotate mechanism towards INSTALLING BAIL SWITCH, SPEED bottom of operator console, and slide assembly POTENTIOMETER, OR DIRECTIONAL SWITCH to the side to remove. FOR SAFETY: When servicing machine, disconnect battery connections before working on machine. 1. Installation is reverse of removal. 15.
Need help?
Do you have a question about the Speed Scrub 300 ec H2O NanoClean and is the answer not in the manual?
Questions and answers