Bissell SMARTCLEAN 1605 Series User Manual
Hide thumbs
Also See for SMARTCLEAN 1605 Series:
- User manual (16 pages) ,
- Quick start manual (2 pages) ,
- User manual

Related Manuals for Bissell SMARTCLEAN 1605 Series


Summary of Contents for Bissell SMARTCLEAN 1605 Series
- Page 1 SMARTCLEAN Robotic Vacuum ___________ USER GUIDE 1605 SERIES For How-To videos, go to www.bissell.ca Sections marked with this video icon have more information online.
-
Page 2: Safety Instructions
›› Do not plug in your vacuum cleaner UNTIL you are familiar with all instructions and operating procedures. ›› To reduce the risk of electrical shock, turn power switch o and disconnect plug from electrical outlet BEFORE performing maintenance or troubleshooting checks. www.BISSELL.ca... -
Page 3: Table Of Contents
Thanks for buying a BISSELL vacuum! We love to clean and we’re excited to share one of our innovative products with you. We want to make sure your vacuum works as well in one year as it does today, so this guide has tips on using (page 5-10), maintaining (pages 13-16), and if there is a problem, troubleshooting (page 17-18). -
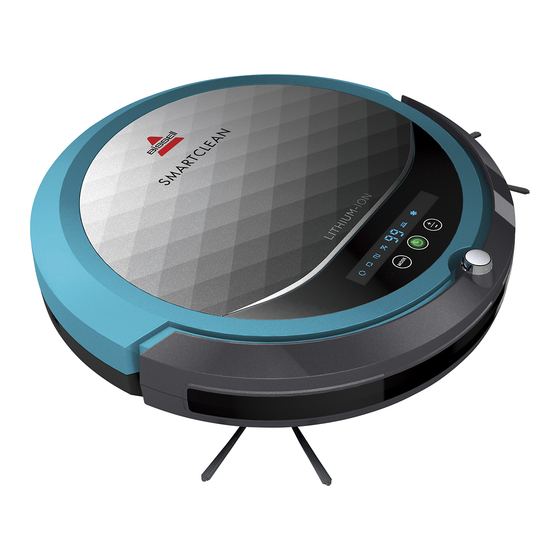
Page 4: Product View
Control Panel and LED Display Bumper IR Receiver (for remote & docking station) Docking Station with LED Control Panel Cliff Sensors 10 Front Wheel Edge-Cleaning Brushes 12 Brush Roll 13 Rear Wheels 14 Wheel Cover Plates 15 Battery Cover Plate www.BISSELL.ca... -
Page 5: Assembly
Installing & Removing the Side Brush To install: Push the brush directly onto To remove: Hold the brush bristle and the holder. pull upward to remove the brush. www.BISSELL.ca... - Page 6 To keep your SmartClean and your home safe, make sure that it cannot get caught on tablecloths, curtains, hanging electric cords, or other cord-like items. TIP! Tie up wires, curtains and other low-hanging items. WARNING Keep your robot away from liquids and wet areas www.BISSELL.ca...
-
Page 7: Operations
DISPOSAL OF BATTERY If your SmartClean robotic vacuum is to be disposed of, the battery should be removed and disposed of properly. For specifi c disposal instructions of the battery, please contact RBRC (Rechargeable Battery Recycling Corporation) 1-800-822-8837 or visit www.rbrc.com www.BISSELL.ca... - Page 8 IMPORTANT! To extend SmartClean’s battery life and keep SmartClean cleaning at peak performance: • Always keep SmartClean charged when not in use. • For storage off of the Docking Station, remove the battery from SmartClean and store in a cool, dry place. www.BISSELL.ca...
- Page 9 IMPORTANT! Thick carpeting, furniture or other obstructions at the top of stairs may affect the robot’s navigation system. To make sure your robot sees the stairs place an Invisible Wall 6 inches from the edge of the stairs. www.BISSELL.ca...
- Page 10 The cliff sensors that recognize an edge or a stair may view this color as an edge and will not clean over it. TIP! If you encounter this situation, place an Invisible Wall 6 inches from the edge of the stairs to prevent the robot from going over the stairs. www.BISSELL.ca...
- Page 11 - “+” “-” Scrolls within the hour setting, minute programmed time. setting, or day setting when setting the clock or cleaning schedule. Charge battery icon displays when the SmartClean is attached to the charging dock. It displays whether charging or full. www.BISSELL.ca...
- Page 12 Suction Selection Button & Function Sequence of button pressed LED Display Function Presented 1st Press Normal 2nd Press Turbo Trash Bin Icons & Function The trash can indicator shows the dust bin is Trash full and needs to be emptied. www.BISSELL.ca...
-
Page 13: Maintenance & Care
Tip! Change the filter in your SmartClean every two to three months or as needed. Factors that determine how often to change the filter include: frequency of vacuuming, size of the area it is cleaning, and the amount of dirt, debris and pet hair it picks up. www.BISSELL.ca... - Page 14 Place dust bin back in cleaner and close and close the dust bin lid. top cover. WARNING Do not operate vacuum with damp or wet fi lters, or without fi lters or the Dust Bin in place. Allow components to dry before reassembling the Dust Bin. www.BISSELL.ca...
- Page 15 Re-install the brush roll by inserting the metal tip into the brass cap and gently pressing to retract the spring mechanism To re-install the brush roll cover insert and press gently to click into place. For optimal performance, replace the brush periodically, or if the brush roll or bristles are damaged www.BISSELL.ca...
- Page 16 Hold the brush bristle and the original shape. Place the cleaned to work more pull upward to remove the brushed back in after they have effectively. brush. completely dried. www.BISSELL.ca...
-
Page 17: Troubleshooting
1. Mode not set with Docking LED 1. Change mode (refer to page 9). return to Icon. 2. Refer to Error code table (pg. 14) base after 2. Cleaning interrupted by error and fix. cleaning code or full dust bin. www.BISSELL.ca... - Page 18 (Power switch is off) installation is complete LED Display Display on screen Indication Charging mode: Battery is fully charged. (Power LED Green On) Battery Low: Battery needs to be charged. (Power LED Red On) www.BISSELL.ca...
-
Page 19: Warranty
Service If your BISSELL product should require service: Contact BISSELL Consumer Care to locate a BISSELL Authorized Service Center in your area. If you need information about repairs or replacement parts, or if you have questions about your warranty, contact BISSELL Consumer Care. -
Page 20: Product Registration
For Parts and Supplies, go to BISSELL.ca and know what you think! enter your model number in the search fi eld. For cleaning tips and more visit www.BISSELL.ca or fi nd us at: BISSELL BISSELLClean BISSELLClean BISSELL BISSELL ©2016 BISSELL Homecare, Inc...
Need help?
Do you have a question about the SMARTCLEAN 1605 Series and is the answer not in the manual?
Questions and answers