Advertisement
Table of Contents
- 1 Table of Contents
- 2 Introduction
- 3 Placing Banknotes in the Hopper
- 4 Operating Instructions Overview
- 5 Normal Counting Mode
- 6 Batch Counting Mode
- 7 Add Mode
- 8 Counterfeit Detection Modes
- 9 Clearing a Jam
- 10 Cleaning & Maintenance
- 11 Feeding Adjustment
- 12 Malfunction Code List
- 13 Error Code List
- 14 Technical Specifications
- Download this manual
Advertisement
Table of Contents

Subscribe to Our Youtube Channel
Related Manuals for Semacon S-1100 Series


Summary of Contents for Semacon S-1100 Series
- Page 1 S-1100 Series Currency Counter Operating Manual Models S-1100, S-1115 and S-1125...
-
Page 2: Table Of Contents
Malfunction Code List Error Code List Technical Specifications Copyright © 2002-2015 Semacon Business Machines, Inc. All Rights Reserved. No part of this document may be copied or reproduced by any individual or entity for any reason without prior written permission from Semacon... -
Page 3: Introduction
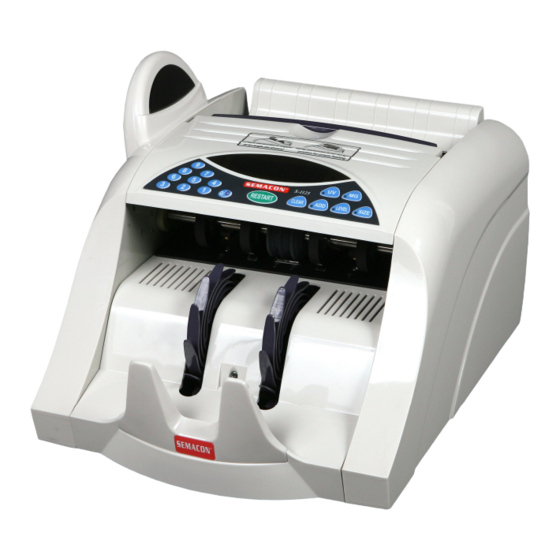
Combined with the capability for the operator to select desired stop points for batching and bundling banknotes, the S-1100 series is capable of greatly reducing the amount of time you spend handling money. - Page 4 S-1100 Series Currency Counter Front View 1) Batch Setting Display 2) Count Display 3) Side View (Second) Count Display 4) Hopper Sensor 5) Hopper 6) Retractable Carrying Handle 7) Function Control Buttons 8) Count Sensors 9) Stacker Wheels 10) Stacker...
- Page 5 S-1100 Series Currency Counter Rear View 13) Hopper Sensor Connection 14) Rear Panel Access Screws 15) External Display Port (for optional External Display) 16) Power Outlet with Fuse 17) On/Off Power Switch 18) Hopper Adjustment Knob 19) Rubber Tongue Spacer...
- Page 6 S-1100 Series Control Panel Model S-1100 Model S-1115 With Ultraviolet Counterfeit Detection Model S-1125 With Ultraviolet And Magnetic Counterfeit Detection Figure 3 FUNCTION Starts or restarts the counting process RESTART CLEAR Clears the counting number display Turns on/off the ADD function which maintains a cumulative total of...
- Page 7 Control Panel Functions The RESTART button is used to restart the counting process after the machine stops during batch counting or after an error. The number buttons are used for selecting the batch stop setting. The operator can select a quantity of banknotes that the counter will stop at by pressing the desired batch number with the numeric buttons.
-
Page 8: Placing Banknotes In The Hopper
Placing Banknotes In The Hopper For proper operation, it is important that the banknotes be placed in the hopper as illustrated in the following diagram (see Figure 4). Following this method of placing the banknotes into the hopper will ensure the most efficient operation of the counter and reduce the likelihood of jams. -
Page 9: Operating Instructions Overview
Operating Instructions Overview Startup and Self-Test Turn on the power switch, located on the back of the counter. The display will appear as follows indicating the unit is completing its self-test process and checking the sensors: Then the display will appear as follows indicating the counter has successfully completed its self-test process and is now in standby mode and ready to be used: The counter has an automatic memory feature that remembers your previous settings. -
Page 10: Normal Counting Mode
Operating Instructions - Counting Modes Selection of the Counting Mode There are two counting modes: NORMAL and BATCH. The NORMAL count mode is selected automatically when there is no batch stop setting entered and shown on the Batch Setting Display. The BATCH mode is selected by enter ing any batch stop setting from 1 to 999 which is shown on the Batch Set- ting Display. -
Page 11: Counterfeit Detection Modes
Counterfeit Detection Modes UV Counterfeit Detection Feature (models S-1115 and S-1125 only) Press the UV button and “Uv” will appear in the Batch Setting Display followed by a number from 1-5. The “Uv” signifies the Ultraviolet Counterfeit Detection feature and the number indicates the Ultraviolet Counterfeit Detection setting. -
Page 12: Clearing A Jam
Depending on your usage level, your counter should be professionally cleaned and serviced periodically by your authorized Semacon distributor or it can be sent to the Semacon Service Center for a general preventative cleaning & maintenance service. Contact your distributor to determine the proper location for service. -
Page 13: Feeding Adjustment
Feeding Adjustment If the banknotes do not feed smoothly through the counter or the counter is generating a lot of feeding errors, you may need to adjust the counter’s feed wheel tension. As the rubber feed wheels and the rubber resistance tongue wear over time, you may need to adjust (tighten) the feeding system to compensate for this normal wear. -
Page 14: Malfunction Code List
If this does not correct the problem, your counter should be sent to an authorized Semacon service center or Semacon for repair. The right count sensor pair is covered with Clean both sensors with a can of compressed air... -
Page 15: Technical Specifications
Technical Specifications 1) Ambient Temperature 0 - 40 ºC 2) Ambient Humidity 30 - 90% 3) Banknote Feeding System Friction Roller System 4) Counting Speed Approximately 1000 notes/min 5) Size of Countable Banknotes 115x50 - 175x85 mm 6) Thickness of Countable Banknotes 0.075 - 0.15 mm 7) Hopper and Stacker Capacity Approximately 100 notes (old banknotes) - Page 16 7430 Trade Street San Diego, CA 92121 USA Tel: 858-638-0100 Fax: 858-638-0110 tech.support@semacon.com www.semacon.com...
Need help?
Do you have a question about the S-1100 Series and is the answer not in the manual?
Questions and answers