Table of Contents
Advertisement
Quick Links
Advertisement
Table of Contents

Related Manuals for Goobay TV EasyMount XL


Summary of Contents for Goobay TV EasyMount XL
- Page 1 MaNual 57408 TV EasyMount Xl...
-
Page 2: Table Of Contents
User‘s Manual usER’s MaNual ............16 usER’s MaNual Content Safety Instructions ............... 17 General Notes ..............17 User Groups ..............18 Warning Levels ..............18 Description and Function ............. 18 Scope of Delivery ............. 19 Required tools ..............20 Intended Use ................21 Use restrictions ..............21 Installing .................. -
Page 3: Safety Instructions
safety Instructions general Notes • Read the including product documentation completely and carefully before use. It is part of the product. • Attend to the safety instructions in product documentation, on product and accessories, such as on the p ackage. • Use product, product parts and accessories only in perfect condition. • Keep the product documentation for other potential users and for later requests. • For questions, defects, mechanical damage, disturbances and other not remediable problems, c onsult your dealer. Risk of life by suffocating Children can suffocate by swallowed or inhaled parts and insulation materials. >>... -
Page 4: User Groups
User‘s Manual d irect exposure to the sun, a s well as vibrations and mechanical pressure. >> Keep enough space around product and to the whole system to ensure p roper ventilation and mobility. The included mounting material is only suitable for mounting on massive stone or concrete walls. >> For other wall types use suitable mounting material. >>... -
Page 5: Scope Of Delivery
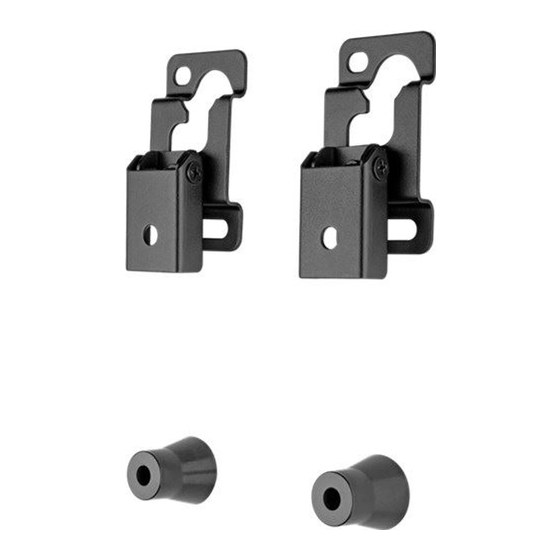
scope of Delivery part Figure symbol amount Wall mounting Wall mount Wall screw 6.3x55 Concrete anchor Spacer D6 Drilling template Flat screen mounting Adapter bracket Supporting spacer M4x14 M5x14 M6x14 M8x20 M6x30... -
Page 6: Required Tools
User‘s Manual M8x30 Washer D5 Washer D8 TV spacer TV spacer Tab. 12: Scope of Delivery Required tools Tool Figure Spirit level Pencil Phillips screwdriver Drilling mashine Concrete drill 8x60mm Second person Line tester Tab. 13: Required tools... -
Page 7: Intended Use
Intended use This product is made for mounting lat screens with speciic screen sizes, weights and mounting points, which are summarized in chapter “Technical data“, on a vertical wall. Another use than described in chapter “Description and Function“ is not permitted. Neglegting and ignoring these regulations and safety instructions can cause serious accidents, personal injury and material damage. Also refer to chapter “Warranty and Liability“. use restrictions Only use in dry interior rooms. Installing preparing Checking the completeness and integrity >> C heck the packing content by comparing it to the scope of delivery regarding completeness and integrity. Ensuring compatibility Bid / Warning level safety instruction Risk of material damage by improper product combination The speciications of all used products must >>... - Page 8 User‘s Manual Risk of material damage by inappropri- ate ambient conditions >> Keep enough space around product and to the whole system to ensure proper ventilation and mobility. Tab. 15: Wall mounting 1. Before drilling, attend to live cables or other lines lying behind plaster, and do not damage them. 2. Remove the protection foil from the drilling template (D). 3. Tape the drilling template (D) on the mounting area by using a spirit level. Fig.
-
Page 9: Mounting The Lat Screen
Mounting the lat screen 4.3 Warning level safety instruction Bid / Ban Risk of injury by tripping and falling >> Place, transport and install product, parts and acceories in a safe way. Risk of material damage by improper procedure Only use moderate force when tightening >> the screws in order to avoid damaging threads. NEVER set the screen on the front during >> installation! Do not damage the lat screen by too >> long screws. -
Page 10: Flat Screens With Arched Back
User‘s Manual 4.3.2 Flat screens with arched back Fig. 9: Flat screens with arched back 1. Apart from the following working step - proceed like shown in chapter 4.3.1. 2. Mount the itting TV spacers (M-I) and/or ( M-J) between lat screen and supporting spacers (C). Attaching the lat screen 4.4 Warnibng level safety instruction Bid/Ban Risk of injury by tripping and falling Place, transport and install product, parts... -
Page 11: Warranty And Liability
Risk of material damage by inappropri- ate ambient conditions >> Keep enough space around product and to the whole system to ensure proper ventilation and mobility. Tab. 17: Attaching the lat screen Attaching the lat screen Fig. 10: 1. A ttach the prepared lat screen adapter brackets (B) to the wall mounts (A) together with a second person. -
Page 12: Maintenance, Care, Storage And Transport
User‘s Manual • Any use other than described in this user`s manual is not permitted and causes loss of warranty, loss of guarantee, and non-liability. • We reserve our right for misprints and changes of the device, packing, or user`s manual. 6 Maintenance, Care, Storage and Transport • The product is maintenance-free. • Use a dry and soft cloth to clean your product. Be careful to avoid scratches. Use a slightly moist cloth for heavy stains. Look out for live cables! Do not use any cleaning supplies. This can cause burns to the materials. Avoid liquid entry to the device. • Periodically check, if all attachments and screws are secured, and tighten them again when they are loosened. This may be caused e.g. by frequent movements. Do not overtighten screws. • Avoid places with high temperatures, humidity, or places which can become wet, also during maintenance, care, storage, and transport. • Keep the product away from children and store it at dry and dust-proof places! • Drill holes are still visible after removing the product. After use for a longer time period, a spot may remain on the surface. • Keep the original packing for transport and to avoid damages. Troubleshooting problem Help Loads for home are regulated in various European standards. How to test wall >>... -
Page 13: Speciications
8 Speciications Speciication phys. size unit VESA / individually Hole distance TV diameter “ / Inch 37-70 VESA max. 800x600 Load max. 50 Tilting angle +/-0 ° Swivel angle +/-0 ° Wall distance 24.5 Dimensions 2x { 120 x 60 x 2 } Weight 0.388 Tab. 19: Speciications Information for VEsa standard To harmonize attachment options of monitors, TV devices and their stands and wall brackets in a user-friendly manner, VESA (Video Electronic Standard...
Need help?
Do you have a question about the TV EasyMount XL and is the answer not in the manual?
Questions and answers