Table of Contents
Advertisement
Quick Links
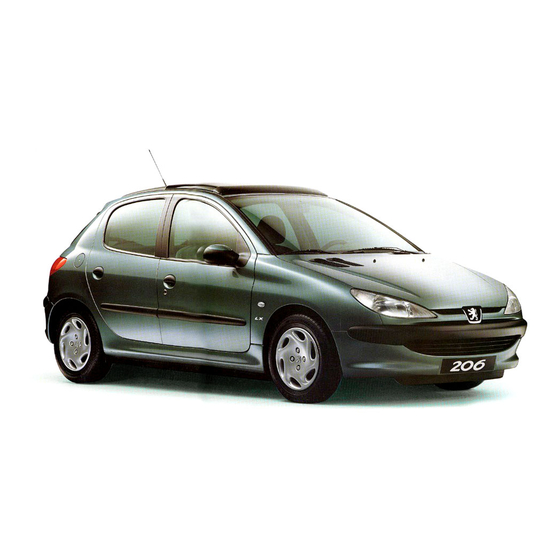
YOUR 206 AT A GLANCE
Seats
Instruments and controls
Control panel
Mirrors
Checks
Access
Changing a wheel
126 - 130, 160
Changing a bulb
Each model may only be fitted with some of the equipment shown, according to its specification and the
technical requirements in the country of first registration of the vehicle.
206 SW: version available according to country.
26-05-2003
Pages
74 - 85
29 - 31
37 - 73, 97 - 98
100
Pages
117 - 125
87 - 92
131 - 135
1
Advertisement
Table of Contents

Related Manuals for PEUGEOT 206


Summary of Contents for PEUGEOT 206
- Page 1 131 - 135 Each model may only be fitted with some of the equipment shown, according to its specification and the technical requirements in the country of first registration of the vehicle. 206 SW: version available according to country. 26-05-2003...
- Page 2 YOUR 206 AT A GLANCE 26-05-2003...
- Page 3 YOUR 206 AT A GLANCE Side window demisting vents 13 Driver's air bag Horn Adjustable side vent 24 Front electric window 14 Audio equipment remote switches Passenger air bag control 25 Electric mirrors switch Windscreen demisting vents 15 Headlamp height adjustment...
- Page 4 Operates the starter. the locks on the front doors and the tailgate (saloon) as well as 206 SW: press and hold button B Steering lock operating the passenger air bag to unlock the vehicle and open Before starting, unlock the steering disarming switch and the fuel the rear screen.
- Page 5 Operates the starter. the locks on the front doors and the tailgate (saloon) as well as 206 SW: press and hold button B Steering lock operating the passenger air bag to unlock the vehicle and open Before starting, unlock the steering disarming switch and the fuel the rear screen.
-
Page 6: Front Airbags
YOUR 206 AT A GLANCE Starting a petrol engine FRONT AIR BAGS Do not press the accelerator. Disarming the passenger air Operate starter, without bag* releasing key, until Insert the ignition key into switch engine turns. Precautions regarding the 1 and turn it to: passenger air bag –... -
Page 7: Steering Wheel Controls
YOUR 206 AT A GLANCE STEERING WHEEL Rear fog lamp (ring B) Windscreen wipers CONTROLS Front Lights Fast wipe Rear fog lamp Front lights (ring A) (rotation of the ring Normal wipe forwards) Intermittent wipe Lights off AUTO Automatic wipe... - Page 8 YOUR 206 AT A GLANCE FRONT SEATS 1- Forwards/backwards adjust- ment. 2- Access to rear seats (3-door). 3- Seat back angle adjustment. 4- Height adjustment. 5- Head restraint height and angle adjustment. Never drive with the head restraints removed. Modifiable passenger seat...
- Page 9 YOUR 206 AT A GLANCE Rear seats Load space cover – Lift the front of the seat cushion 1, To install: – Tilt the seat cushion 1 against the front – position (1) one end of the cover roller in one of the two supports, seats, –...
- Page 10 YOUR 206 AT A GLANCE Starting a petrol engine FRONT AIR BAGS Do not press the accelerator. Disarming the passenger air Operate starter, without bag* releasing key, until Insert the ignition key into switch engine turns. Precautions regarding the 1 and turn it to: passenger air bag –...
-
Page 11: Electric Windows
YOUR 206 AT A GLANCE ELECTRIC MIRRORS ELECTRIC WINDOWS Turn knob 5 to the right or to the left to select the cor- 1. Driver's electric window responding mirror. Manual operation: press or pull the switch lightly. Move knob 5 in all four directions to adjust. - Page 12 YOUR 206 AT A GLANCE DOORS LOCKING/UNLOCKING THE BOOT AND THE REAR SCREEN (206 SW) Front doors The boot and the rear screen cannot be opened simultaneously. With the rear screen closed, to open the boot, pull the handle A and lift.
-
Page 13: Steering Wheel Height Adjustment
YOUR 206 AT A GLANCE STEERING WHEEL HEIGHT OPENING THE BONNET ADJUSTMENT When stationary, lower the han- From the outside: lift the catch From inside the vehicle: pull the dle to unlock the steering wheel. handle. and raise the bonnet. Secure the strut to hold the bonnet open. - Page 14 YOUR 206 AT A GLANCE THE AUTOMATIC AUTOADAPTIVE GEARBOX Starting To start the engine, place the selector lever in position N or P. Press the brake to leave position P and when selecting forward or reverse gears. Position of the selector lever This is shown by an indicator on the instrument panel.
-
Page 15: Heating/Air Conditioning
YOUR 206 AT A GLANCE HEATING/AIR CONDITIONING N° Symbol Function Setting the air distribution. Air intake control. Temperature adjustment. Demisting the rear screen and mirrors. Air flow adjustment. Air conditioning control. 26-05-2003... - Page 16 YOUR 206 AT A GLANCE AUTOMATIC AIR CONDITIONING N° Symbol Function Air flow adjustment. Setting the air distribution. Air intake control. Air conditioning control. Demisting the rear screen and mirrors. Switching off. Temperature adjustment. Automatic comfort programme. Automatic visibility programme.
- Page 17 The date of this visit is not shown by the service indicator. It is to be carried out at least every 10 000 miles (15 000 km) for saloon and 206 SW petrol engines; every 6 000 miles (10 000 km) for 206 GTi 180 direct injection diesel engines and every 5 000 miles (7 500 km) for indirect injection diesel engines.
- Page 18 • Every 10 000 miles (15 000 km) or every year for 206 GTi petrol engine vehicles. • Every 12 000 miles (20 000 km) or every year for saloon or 206 SW petrol engine vehicles. • Every 10 000 miles (15 000 km) or every year for Direct Injection Diesel engine vehicles.
-
Page 19: Service Indicator
PEUGEOT SERVICING SERVICE INDICATOR The distance remaining before the The service is overdue. next service is less than 500 miles. Each time the ignition is switched on This is a visual reminder of when the and for 5 seconds, the symbol and next service is due. -
Page 20: Resetting The Service Indicator
PEUGEOT SERVICING Resetting the service indicator Your PEUGEOT dealer carries out this operation after each service. However, if you carry out the service yourself, the reset procedure is as fol- lows: – Switch off the ignition. – Press and hold button 1. -
Page 21: Types Of Service
When the first service is carried out and at each subsequent service, your dealer will advise you of the type and content of the next service due. THE MAINTENANCE CYCLE FOR YOUR SALOON and 206 SW PETROL Service every 20,000 miles (30,000 km) or 2 years. - Page 22 When the first service is carried out and at each subsequent service, your dealer will advise you of the type and content of the next service due. THE MAINTENANCE CYCLE FOR YOUR SALOON and 206 SW PETROL Service every 20,000 miles (30,000 km) or 2 years.
- Page 23 PEUGEOT SERVICING THE MAINTENANCE CYCLE FOR YOUR 206 GTi 180** Service every 12,000 miles (20,000 km) or 2 years. MILES (KM) 12,000 (20,000) 24,000 (40,000) 36,000 (60,000) 48,000 (80,000) 60,000 (100,000) 1st service at 6,000 miles (10,000 km) or 6 months*.
- Page 24 PEUGEOT SERVICING THE MAINTENANCE CYCLE FOR YOUR 206 TURBO DIESEL HDI Service every 12,000 miles (20,000 km) or 2 years. MILES (KM) 12,000 (20,000) 24,000 (40,000) 36,000 (60,000) 48,000 (80,000) 60,000 (100,000) 1st Service at 6,000 miles (10,000 km) or 6 months*.
- Page 25 PEUGEOT SERVICING THE MAINTENANCE CYCLE FOR YOUR 206 INDIRECT INJECTION DIESEL Service every 10,000 miles (15,000 km) or 2 years. MILES (KM) 10,000 (15,000) 20,000 (30,000) 30,000 (45,000) 40,000 (60,000) 1st Service at 6,000 miles 10,000 km or 6 months*.
- Page 26 PEUGEOT SERVICING A & C SERVICE LEVELS AND THE INTERMEDIATE VISIT Level Operations Description of operation 1st service Intermediate - Engine oil DRAIN/REFILL - Bleed fuel filter (diesel) - Oil filter - Fuel filter* (petrol) REPLACE - Fuel filter element (diesel)
- Page 27 TRADE NAMES OF RECOMMENDED ENGINE LUBRICANTS IN EUROPE (1) Minimum quality standard: Petrol engines: ACEA A3 and API SH/SJ; Diesel engines: ACEA B3 and API CF/CD ACEA = Association des Constructeurs Européens Automobiles (Association of European Automobile Manufacturers) - API = American Petroleum Institute. If oil is used which does not conform to the ACEA A3-B3 standards, this requires the "Arduous Conditions"...
- Page 28 "Arduous Conditions" servicing schedule which specifies shorter intervals. Do not hesitate to ask for advice from a PEUGEOT dealer to maintain driving pleasure and to minimise the ONLY ONLY maintenance cost of your vehicle. Manual Gearbox ESSO GEAR OIL BV...
-
Page 29: Instruments And Controls
INSTRUMENTS AND CONTROLS INSTRUMENT DIALS: PETROL - DIESEL MANUAL GEARBOX (saloon and 206 SW) 1. Seat belt not fastened warning 10. Right hand direction indicator 19. Engine oil temperature indicator light* 11. Engine diagnostics warning light 20. Total distance recorder button 2. - Page 30 INSTRUMENTS AND CONTROLS INSTRUMENT DIALS: PETROL MANUAL GEARBOX (206 GTi 180**) 1. Seat belt not fastened warning 9. Right hand direction indicator 17. Engine oil temperature indicator light* 10. Engine diagnostics warning light 18. Total distance recorder button 2. Passenger disarming 11.
- Page 31 INSTRUMENTS AND CONTROLS INSTRUMENT DIALS: PETROL AUTOMATIC GEARBOX (saloon and 206 SW) 1. Seat belt not fastened warning 9. Right hand direction indicator 18. Gear indicator light* 10. Engine diagnostics warning light 19. Total distance recorder button 2. Passenger disarming 11.
- Page 32 Force Distribution system, if lit at your speed. where it is safe to do so. the same time as the ABS warning Consult a PEUGEOT dealer. light. You must stop. Coolant temperature and low coolant level warning Consult a PEUGEOT dealer.
- Page 33 If it comes on with the engine running, has not fastened his seat belt. Consult a PEUGEOT dealer if the this indicates incorrect operation of ESP/ASR switch indicator light flash- the injection, ignition or emission con- es and this warning light remains on trol system.
-
Page 34: Engine Oil Temperature Indicator
The central STOP – needle in zone (C), the temperature warning light flashes. is correct, You must stop. – needle in zone (D), the temperature Consult a PEUGEOT dealer. is too high. To lower the oil tempera- ture, reduce your speed. 26-05-2003... -
Page 35: Instrument Panel Display
If the flashing of the six squares is confirmed by checking using the dipstick, a surplus of oil can cause damage to the engine. Consult a PEUGEOT dealer without delay. Lack of oil Flashing of the six segments and "min" on the display indicate a lack of oil which can cause damage to the engine. -
Page 36: Lighting Rheostat
INSTRUMENTS AND CONTROLS Total distance records Lighting rheostat HAZARD WARNING LIGHTS Press the button, the direction indica- tors flash. They can operate with the ignition off. Automatic lighting of hazard warning lights* When braking in an emergency, depending on the force of decelera- tion, the hazard warning lights come Briefly pressing button 1 alternates With the lights on, press the button... - Page 37 YOUR 206 IN DETAIL DISPLAY A Adjusting the parameters Press and hold button 1 for two seconds to access the settings; the data flashes, indicating it is ready to be modified. Then, each press of button 1 scrolls through the various data in the following order: –...
- Page 38 YOUR 206 IN DETAIL DISPLAY B Setting the parameters Press and hold button 1 for two seconds to access the settings. The data flashes, indicating it is ready to be modified. Then, individual presses on button 1 allow you to scroll through the various data in the following sequence: –...
- Page 39 YOUR 206 IN DETAIL DISPLAY C – the warning messages (e.g. "fuel level low''), displayed temporarily. These can be cleared using the remote control, – the trip computer (see corresponding section), – the satellite navigation system (see corresponding section). Setting the parameters The remote control allows you to access the settings.
- Page 40 YOUR 206 IN DETAIL AUDIO RB3 Stalk movement Function 1 - Press (behind) Increase volume 2 - Press (behind) Decrease volume 1 + 2 - Simultaneous press Sound cut-off (mute); restoring of the sound by pressing any button 3 - Press...
- Page 41 YOUR 206 IN DETAIL Button Function Radio on/off – Decrease volume Increase volume RDS function on/off Press for more than 2 seconds: regional following mode on/off Traffic information priority on/off Press fully: cassette rewind Press fully: cassette fast forward Press half way: reversal of direction of play of the cassette...
-
Page 42: General Functions
YOUR 206 IN DETAIL GENERAL FUNCTIONS On/off With the ignition key in the accessories or ignition position, press button A to switch the audio system on or off. The audio system can operate for 30 minutes without the vehicle ignition being switched on. - Page 43 YOUR 206 IN DETAIL Adjusting the bass When "BASS" is displayed, press button I or J to vary the setting. – "BASS –9" for a minimum bass setting, – "BASS 0" for a normal setting, – "BASS +9" for a maximum bass setting.
-
Page 44: Selecting Radio Mode
YOUR 206 IN DETAIL RADIO Notes on radio reception Your car radio is subject to phenomena which do not affect domestic radio sets. Both AM (MW/LW) and FM reception are subject to various forms of interference. This is no reflection on the quality of the equipment, but is due to the nature of the signals and the way in which they are transmitted. -
Page 45: Manual Station Search
YOUR 206 IN DETAIL Manual station search Press the "MAN" button. Briefly press button L or N to increase or decrease the frequency displayed. By continuing to press the button in the direction selected, you will obtain continuous scrolling of the frequency. - Page 46 YOUR 206 IN DETAIL Using the RDS (Radio Data System) function on FM Radio Data System allows you to continue listening to the same station, whatever frequency it is using for the region you are going through. Briefly press the "RDS" button to switch the function on or off.
- Page 47 YOUR 206 IN DETAIL CASSETTE: AUDIO RD3 Selecting cassette mode When a cassette is inserted, the cassette player will start automatically. If a cassette is already inserted, press button "SRC" several times to select cassette mode. Note: before inserting the cassette, ensure that the tape is taut.
- Page 48 YOUR 206 IN DETAIL CD CHANGER Selecting CD changer mode Audio RB3: press button "SRC" several times in succession. Audio RD3: press button P. Selecting a disc Press buttons "1" to "6" of the radio to select the corresponding disc.
- Page 49 YOUR 206 IN DETAIL AUDIO RD3 Stalk movement Function 1 - Press (behind) Increase volume 2 - Press (behind) Decrease volume 1 + 2 - Simultaneous press Sound cut-off (mute); restoring of the sound by pressing any button 3 - Press...
- Page 50 YOUR 206 IN DETAIL Button Function Radio on/off – Decrease volume Increase volume RDS function on/off Press for more than 2 seconds: regional following mode on/off Traffic information priority on/off Press for more than 2 seconds: PTY function on/off Adjustment of bass, treble, loudness, sound distribution and automatic...
- Page 51 YOUR 206 IN DETAIL RADIO Notes on radio reception Your car radio is subject to phenomena which do not affect domestic radio sets. Both AM (MW/LW) and FM reception are subject to various forms of interference. This is no reflection on the quality of the equipment, but is due to the nature of the signals and the way in which they are transmitted.
- Page 52 YOUR 206 IN DETAIL Manual station search Press the "MAN" button. Briefly press button L or N to increase or decrease the frequency displayed. By continuing to press the button in the direction selected, you will obtain continuous scrolling of the frequency.
- Page 53 YOUR 206 IN DETAIL Using the RDS (Radio Data System) function on FM Radio Data System allows you to continue listening to the same station, whatever frequency it is using for the region you are going through. Briefly press the "RDS" button to switch the function on or off.
- Page 54 YOUR 206 IN DETAIL PTY function: Audio RD3 This allows you to listen to stations broadcasting a specific type of programme (news, culture, sport, rock etc.). With FM selected, press the "TA" button for more than two seconds to switch this function on or off.
- Page 55 YOUR 206 IN DETAIL COMPACT DISC: AUDIO RD3 Selecting CD mode After insertion of a disc, printed face upwards, the player starts automatically. If a disc is already inserted, press button Q. Ejection of a disc Press button S to eject the disc from the player.
- Page 56 YOUR 206 IN DETAIL 5 CD CHANGER* 6 CD CHANGER* This is located in the glove box. It This is located in the boot on the left-hand side. It holds up to 6 discs. holds up to 5 discs. To insert a disc into the changer: To load the changer, insert the discs –...
-
Page 57: Navigation System
YOUR 206 IN DETAIL The remote control THE SATELLITE NAVIGATION SYSTEM Pointing this at the screen enables the information contained in the various menus to be selected. Introduction Direction arrows: satellite navigation system These enable you to move around the screen and guides you to the destination of your thus select a function. - Page 58 YOUR 206 IN DETAIL The display When the menus are used, the functions which appear at During guidance the screen displays different information the bottom of the screen are presented in various ways: depending on the manoeuvres to be carried out: 1.
- Page 59 This contains all the map- ping data. It must be inserted with the printed face upwards. Use only CD-ROMs approved by PEUGEOT. This is located in the glove box. The use of copied compact discs may cause 1. CD-ROM eject button.
- Page 60 YOUR 206 IN DETAIL Main menu Navigation/Guidance Switch on the ignition. Following selection of the "Navigation/guidance" menu, a screen warns you about the use of the navigation system. Press the "Menu" button to access the main menu. Follow the regulations in force and do not use the remote Select a function using the direction arrows, then confirm control while driving.
- Page 61 YOUR 206 IN DETAIL Entering a new destination Enter the name of the street. Select the "Validate" function The last town entered is displayed. then press the "VAL" button. To enter the name of another town, select each letter using Note: the guidance can be activated from the time the town the direction arrows then confirm ("VAL"...
- Page 62 YOUR 206 IN DETAIL The complete destination is displayed. Select the "Validate" Select a criterion from the list offered then confirm ("VAL" function then press the "VAL" button. button). When the criterion of your choice is selected, select the "Validate" function then press the "VAL" button.
- Page 63 YOUR 206 IN DETAIL Selecting a service The last address entered is displayed. The address of the required service is displayed. There are 3 options for defining the location in which you An indication on the right-hand side of the screen (e.g. 1/50)
- Page 64 YOUR 206 IN DETAIL Storing an address in a directory Selecting a stored destination When a new address is entered, you can store it by selecting the "Store" function. Enter the description of the address. If the description Using the direction arrows, select the directory in which the already exists for a different address, you can replace the address you are looking for is stored then press the "VAL"...
-
Page 65: Display Configuration
YOUR 206 IN DETAIL Display configuration Navigation options From the general menu, the "Configure display" menu From the navigation/guidance menu, the "Navigation gives access to the following parameters: options" menu offers the following options: – Adjustment of the display brightness;... - Page 66 YOUR 206 IN DETAIL Guidance tools Access to the "Guidance tools" menu is by pressing the "VAL" button during guidance. It enables: – the current guidance criterion to be changed, – the programmed destination to be displayed or changed, – the voice synthesis volume to be adjusted, –...
- Page 67 YOUR 206 IN DETAIL 26-05-2003...
-
Page 68: Advice On Operation
YOUR 206 IN DETAIL VENTILATION 1. Windscreen de-icing or demisting vents. 2. Front door windows de-icing or demisting vents. 3. Side vents. 4. Centre vents. 5. Air outlet to front footwells. 6. Air outlet to rear footwells. Advice on operation –... - Page 69 YOUR 206 IN DETAIL HEATING/VENTILATION 1. Temperature adjustment 2. Air distribution adjustment – position the air intake control to the left; the "Outside Air" position, – turn the temperature and air flow To be adjusted to your requirements. Windscreen and side win- controls to maximum, dows (de-icing/demisting).
- Page 70 YOUR 206 IN DETAIL 4. Air intake control 5. Demisting the rear screen and Windscreen, side windows the mirrors and footwells. With the engine running, Intake of exterior air. press once to demist the rear screen and the mirrors. Footwells.
-
Page 71: Air Conditioning
YOUR 206 IN DETAIL AIR CONDITIONING 1. Air conditioning The air conditioning does not oper- 2. Temperature adjustment ate while the air flow adjustment The air conditioning is designed to To be adjusted to your requirements. control is in the "OFF" position. - Page 72 YOUR 206 IN DETAIL 3. Air distribution adjustment 4. Air flow adjustment 6. Demisting the rear screen and the mirrors Turn the control from posi- Windscreen and side win- tion 1 to position 4 to obtain dows (de-icing/demisting). With the engine running,...
-
Page 73: Automatic Air Conditioning
YOUR 206 IN DETAIL AUTOMATIC AIR CONDITIONING Automatic operation 1. Temperature adjustment 2. Automatic comfort programme 3. Automatic visibility programme In some cases, the auto- The chosen temperature is Press the AUTO button. The sys- matic comfort programme displayed. Press the up and... -
Page 74: Manual Operation
YOUR 206 IN DETAIL Manual operation 5. Air distribution 8. Switching the system off If you wish, you can make a different Pressing this button sever- The OFF button enables choice from that offered by the sys- times succession the entire system to be tem by changing a setting. - Page 75 YOUR 206 IN DETAIL 26-05-2003...
-
Page 76: Front Seats
YOUR 206 IN DETAIL FRONT SEATS 5. Head restraint height and angle Rear head restraints adjustment (saloon and 206 SW) These have one position for when 1. Forwards-backwards To raise the restraint, push it they are being used (high) and a adjustment upwards. - Page 77 YOUR 206 IN DETAIL Modifiable front passenger Storage compartment Folding seat back seat (saloon) (all models) – Lift the cover to gain access to the storage compartment. – Remove the head restraint for Access to the storage – Ensure that the cover is locked complete folding of the seat.
- Page 78 YOUR 206 IN DETAIL Removing the modifiable Refitting the modifiable front front passenger seat passenger seat – Push the seat as far back as pos- – Push the seat as far back as pos- sible. sible. – Lift then pull the front of the seat –...
- Page 79 YOUR 206 IN DETAIL FRONT SEATS 5. Head restraint height and angle Rear head restraints adjustment (saloon and 206 SW) These have one position for when 1. Forwards-backwards To raise the restraint, push it they are being used (high) and a adjustment upwards.
-
Page 80: Rear Seats
YOUR 206 IN DETAIL REAR SEATS To fold the rear seats: – lift the front of the seat cushion 1, – tilt the seat cushion 1 against the front seats, – position the seat belt under the belt holder 2, –... -
Page 81: Removing The Rear Seat
YOUR 206 IN DETAIL Removing the rear seat TRANSPORTING LONG OBJECTS – Tilt the seat cushion against the front seats. To allow the transportation of long objects: – Squeeze the seat fasteners to release them from their attach- Front seat: ments. - Page 82 – A child weighing less than 9 kg must travel in the rearwards facing posi- mitted from birth to 13 kg or 18 kg. In tion both in the front and in the rear. PEUGEOT recommends that chil- this position, it is essential to disarm dren should travel in the "rearwards facing"...
-
Page 83: "Isofix" Mountings
In the 206 RC, the body of the child seat must be in the most upright * You can only fit ISOFIX child seats position. - Page 84 YOUR 206 IN DETAIL CHILD SEATS RECOMMENDED BY PEUGEOT In addition to the ISOFIX child seats, PEUGEOT offers a complete range of child seats which are secured using the seat belt: Group 0+: from birth to 13 kg L1 - "Britax Babysure": installed in the rear-facing position in the front or in the rear using a three-point seat belt.
- Page 85 YOUR 206 IN DETAIL Never leave one or more children alone and unsu- pervised in a vehicle. Never leave a child or an animal in a vehicle which is exposed to the sun and has the windows closed. To protect your young children from the sun, fit blinds on the rear windows.
- Page 86 YOUR 206 IN DETAIL SUMMARY TABLE FOR FITTING CHILD SEATS (Saloon and 206 SW) In accordance with the European regulation (Directive 2000/3), the table below indicates the options for the installation of child restraints, depending on the weight group and the seat in the vehicle:...
- Page 87 YOUR 206 IN DETAIL SUMMARY TABLE FOR FITTING CHILD SEATS (206 GTi 180*) In accordance with the European regulation (Directive 2000/3), the table below indicates the options for the installation of child restraints, depending on the weight group and the seat in the vehicle:...
-
Page 88: Seat Belts
Rear seat belts The rear seats are fitted with three three-point inertia reel seat belts (saloon and 206 SW) or with two three-point inertia reel seat belts (206 GTi 180). SEAT BELTS Seat belt height adjustment: –... -
Page 89: Key In Ignition
Unlocking Press button B to unlock the vehicle. This is confirmed by the rapid flashing of the direction indicators. 206 SW: Press and hold button B to Changing the battery of unlock the vehicle and open the rear screen. the remote control... -
Page 90: Electronic Engine Immobiliser
When purchasing a second-hand vehicle: – ensure that you are given the confidential card; – have the key codes memorised by a PEUGEOT dealer, to ensure that the keys in your possession are the only ones which can start the vehicle. -
Page 91: Special Features
SPECIAL FEATURES Using the remote control To deadlock Press button A once to deadlock the vehicle. This is indicated by fixed lighting of the direction indicators for approxi- mately two seconds. A second press on button A within 5 seconds of deadlocking changes this to normal locking. - Page 92 When purchasing a second-hand vehicle: – ensure that you are given the confidential card; – have the key codes memorised by a PEUGEOT dealer, to ensure that the keys in your possession are the only ones which can start the vehicle.
- Page 93 SPECIAL FEATURES THE ALARM* Setting the alarm Disarming the alarm (external and internal protection) (internal and external protection) Setting and deactivating the alarm system Switch the ignition off and get out of Press the release button of the remote the vehicle. control key.
-
Page 94: Door Open Warning
To lock, press button A. Locking one of the front doors locks the front and rear doors, the tailgate and the rear screen (206 SW). On the rear doors, the button only locks the door in question. Unlocking from inside... - Page 95 LOCKING/UNLOCKING OF THE TAILGATE AND REAR THE TAILGATE SCREEN (206 SW) (saloon and 206 GTi 180) It is not possible to open the tailgate and the rear screen simultaneously. Without central locking: To lock, turn the key from A to C.
-
Page 96: Tailgate Release
Close the rear screen using the windscreen wiper arm or by press- ing the centre of the glass. TAILGATE RELEASE SUNROOF (saloon and 206 GTi 180) (saloon and 206 GTi 180) This enables the tailgate to be "Tailgate/rear screen open" To open... - Page 97 Close the rear screen using the windscreen wiper arm or by press- ing the centre of the glass. TAILGATE RELEASE SUNROOF (saloon and 206 GTi 180) (saloon and 206 GTi 180) This enables the tailgate to be "Tailgate/rear screen open" To open...
-
Page 98: Filling The Fuel Tank
YOUR 206 IN DETAIL Always remove the key from the ignition when leaving the vehicle, even for a short time. If an obstacle is detected when operating the roof, you must reverse the movement of the roof. To do this, press the control con- cerned. - Page 99 YOUR 206 IN DETAIL Always remove the key from the ignition when leaving the vehicle, even for a short time. If an obstacle is detected when operating the roof, you must reverse the movement of the roof. To do this, press the control con- cerned.
- Page 100 YOUR 206 IN DETAIL Dipped/Main beam change Vehicles fitted with front fog lamps and a rear fog lamp Pull the stalk towards you. (ring C) Note: with the ignition off, when the Front fog lamps (first driver's door is opened, a buzzer rotation of the ring sounds if you have left your lights on.
- Page 101 (1st notch), multifunction display. Do not forget to switch them off – Press the end of the lights stalk Contact a PEUGEOT dealer to have when they are no longer needed. for more than four seconds. the system checked.
- Page 102 (1st notch), multifunction display. Do not forget to switch them off – Press the end of the lights stalk Contact a PEUGEOT dealer to have when they are no longer needed. for more than four seconds. the system checked.
-
Page 103: Windscreen Wiper Stalk
YOUR 206 IN DETAIL WINDSCREEN WIPER STALK After ignition been switched off, if the stalk was in a wipe position, you must reacti- vate this function: – move the stalk to any position, – then move it back to the required position. - Page 104 206 SW: the rear screen wiper and In the event of malfunction, the rear screen wash functions are dis- driver is informed by an audible sig- armed when the rear screen is nal and the message "Auto wiper...
- Page 105 206 SW: the rear screen wiper and In the event of malfunction, the rear screen wash functions are dis- driver is informed by an audible sig- armed when the rear screen is nal and the message "Auto wiper...
-
Page 106: Trip Computer
YOUR 206 IN DETAIL TRIP COMPUTER Pressing the button on the end of the wash/wipe stalk enables the following data to be displayed: Display C Display B – the current consumption and the range, – the range – the average consumption, the distance travelled and the –... - Page 107 YOUR 206 IN DETAIL Range Average consumption Distance travelled The display shows the distance that This is the ratio between the amount This shows the distance travelled can still be covered with the fuel of fuel consumed and the distance since the computer was last reset to remaining in the tank.
- Page 108 YOUR 206 IN DETAIL 2. Passenger's electric window Always remove the key switch. from the ignition when 3. Rear left electric window switch. leaving the vehicle, even 4. Rear right electric window for a short time. switch. If an obstacle is detected when...
-
Page 109: Manual Exterior Mirrors
YOUR 206 IN DETAIL Manual interior mirror Manual exterior mirrors ELECTRIC EXTERIOR MIRRORS The interior mirror has two positions: Move the lever in all four directions to adjust. Turn knob 1 to the right or to the left – day (normal), to select the corresponding mirror. -
Page 110: Courtesy Lights
With the key in the accessories or ignition on position, turn button B to the left or to the right. Rear courtesy light (206 SW) Comes on when a door, the tailgate or the rear screen is opened. In this position the... -
Page 111: Headlamp Adjustment
YOUR 206 IN DETAIL STEERING WHEEL HEIGHT HORN HEADLAMP ADJUSTMENT ADJUSTMENT Press one of the spokes or Depending on the load in your vehi- the centre of the steering cle, it is recommended that the When stationary, lower the handle to wheel. -
Page 112: Front Ashtray
YOUR 206 IN DETAIL FRONT ASHTRAY GLOVE BOX To empty, close the cover. To open the glove box, lift the handle. Pull the lug and release the ashtray The light comes on when the cover upwards. is opened. 1. Handbook pack storage. - Page 113 YOUR 206 IN DETAIL BOOT LAYOUT (SALOON) Rear parcel shelf Stowing rings Retaining strap To remove the shelf: – unhook the two strings 1, Use the stowing rings on the boot A strap secured to the side of the – slightly...
- Page 114 YOUR 206 IN DETAIL 26-05-2003...
- Page 115 YOUR 206 IN DETAIL BOOT LAYOUT (206 SW) 1. Grab handles and coat hooks 2. Coat hooks There are six hooks to accommodate coats. 3. High load retaining net fastenings The high load retaining net can be installed behind the front seats or behind the rear seat.
- Page 116 YOUR 206 IN DETAIL 26-05-2003...
- Page 117 YOUR 206 IN DETAIL BOOT LAYOUT (206 GTi 180*) Puncture repair aerosols insulated storage box. Cover containing the jack and the folding chock. Grab handles with coat hook. Removable rear shelf. Retaining strap for miscellaneous objects: can, first aid kit, etc.
- Page 118 YOUR 206 IN DETAIL AUTOMATIC AUTOADAPTIVE GEARBOX Moving Off To move off, move the selector lever to position N or P. Press the brake to exit position P. Stopped or parked Always leave the lever in position P when you get out of your vehicle.
- Page 119 YOUR 206 IN DETAIL Operating programmes Snow Programme Any disruption of the sys- You have a choice of three operating In position D, the Snow programme tem is signalled by the programmes: provides smooth driving suited to simultaneous flashing of slippery roads in order to improve –...
-
Page 120: Emergency Braking Assistance System
"hand- of control of the vehicle when braking. brake on" on the multifunction display, indicates that the handbrake is still on or Stop immediately. has not been properly released. In both cases, consult a PEUGEOT dealer. 26-05-2003... -
Page 121: Operating Check
ABS. advisable to disarm the ASR and The ASR system optimises drive to Contact a PEUGEOT dealer to have ESP systems, so that the wheels can prevent the wheels skidding, by act- the system checked. -
Page 122: Front Airbags
"Air position. ignition is switched on. bag fault" on the multifunction dis- play, contact a PEUGEOT dealer to Note: the gas escaping from the air have the system checked. bags can be a minor irritant. The air bag warning light on the instrument panel is lit throu- ghout the disarming process. -
Page 123: Side Airbags
YOUR 206 IN DETAIL In the "OFF" position, the passen- SIDE AIRBAGS* Operating check ger air bag will not be triggered in These are incorporated into the the event of an impact. frame of the front seat back, on the As soon as the child seat is remo- door side. - Page 124 • Do not leave anything between the occupants of the front seats and the air bags (a child, pet, object...). This could hamper the operation of the air bags or injure the occupants. • All work on the air bag system is strictly forbidden unless it is carried out by qualified personnel of the PEUGEOT network.
- Page 125 YOUR 206 IN DETAIL In the "OFF" position, the passen- SIDE AIRBAGS* Operating check ger air bag will not be triggered in These are incorporated into the the event of an impact. frame of the front seat back, on the As soon as the child seat is remo- door side.
- Page 126 • Do not leave anything between the occupants of the front seats and the air bags (a child, pet, object...). This could hamper the operation of the air bags or injure the occupants. • All work on the air bag system is strictly forbidden unless it is carried out by qualified personnel of the PEUGEOT network.
- Page 127 PRACTICAL INFORMATION 1.1 litre, 1.4 litre ENGINE 1. Power steering reservoir 4. Brake fluid reservoir 7. Dipstick 2. Windscreen and headlamp* 5. Battery 8. Engine oil filler cap wash reservoir 3. Coolant reservoir 6. Air filter * According to destination. 26-05-2003...
- Page 128 PRACTICAL INFORMATION 1.6 litre 16V ENGINE 1. Power steering reservoir 4. Brake fluid reservoir 7. Dipstick 2. Windscreen and headlamp* 5. Battery 8. Engine oil filler cap wash reservoir 3. Coolant reservoir 6. Air filter * According to destination. 26-05-2003...
- Page 129 PRACTICAL INFORMATION 2 litre 16V ENGINE 1. Power steering reservoir 4. Brake fluid reservoir 7. Dipstick 2. Windscreen and headlamp* 5. Battery 8. Engine oil filler cap wash reservoir 3. Coolant reservoir 6. Air filter * According to destination. 26-05-2003...
- Page 130 PRACTICAL INFORMATION 2 litre 16V ENGINE (180 bhp**) 1. Power steering reservoir 4. Brake fluid reservoir 7. Dipstick 8. Engine oil filler cap 2. Windscreen and headlamp* 5. Battery wash reservoir * According to destination. ** During the year, according to 3.
- Page 131 PRACTICAL INFORMATION 1.4 litre turbo diesel HDI ENGINE 1. Power steering reservoir 4. Brake fluid reservoir 7. Dipstick 8. Engine oil filler cap 2. Windscreen and headlamp* 5. Battery wash reservoir 9. Priming pump 3. Coolant reservoir 6. Air filter * According to destination.
- Page 132 PRACTICAL INFORMATION 1.9 litre Diesel ENGINE 1. Power steering reservoir 4. Brake fluid reservoir 7. Dipstick 2. Windscreen and headlamp* 5. Battery 8. Engine oil filler cap wash reservoir 3. Coolant reservoir 6. Air filter * According to destination. 26-05-2003...
- Page 133 PRACTICAL INFORMATION 2 litre Turbo Diesel HDI ENGINE 1. Power steering reservoir 4. Brake fluid reservoir 7. Dipstick 2. Windscreen and headlamp* 5. Battery 8. Engine oil filler cap wash reservoir 3. Coolant reservoir 6. Air filter * According to destination. 26-05-2003...
-
Page 134: Checking The Levels
According to the information given in pressurised, wait for at least one hour "PEUGEOT SERVICING". after the engine has stopped before carrying out any work. Note: avoid used oil coming into prolonged contact with the skin. -
Page 135: Running Out Of Fuel
If you should run out of fuel, it is neces- manufacturer's servicing schedule. sary to re-prime the circuit: At the start of winter, have your bat- tery checked by a PEUGEOT deal- Automatic gearbox 1.4 litre HDI engine – fill the fuel tank with at least five This does not need an oil change. - Page 136 If you should run out of fuel, it is neces- manufacturer's servicing schedule. sary to re-prime the circuit: At the start of winter, have your bat- tery checked by a PEUGEOT deal- Automatic gearbox 1.4 litre HDI engine – fill the fuel tank with at least five This does not need an oil change.
-
Page 137: Changing A Wheel
PRACTICAL INFORMATION CHANGING A WHEEL – Using the wheelbrace 1, slacken the spare wheel carrier retaining bolt, located inside the boot under the carpet. (saloon) – Lift the carrier to release the hook rearwards, then lower it. Parking the vehicle –... - Page 138 PEUGEOT dealer. Note: If the vehicle is fitted in production with a wheel anti-theft lock, the trim cap on the anti-theft bolt is in two parts.
- Page 139 Tool 4 is located: wheelbrace 1. If you fit snow tyres that are mounted – on the saloon and 206 GTi 180, on on steel rims onto your vehicle, it is Note: take a careful note of the code the rear right inner panel of the...
- Page 140 CHANGING A WHEEL – Using the wheelbrace 1, slacken the spare wheel carrier retaining bolt located inside the boot under the carpet. (206 SW) – Lift the carrier to release the hook rearwards, then lower it. Parking the vehicle – Remove the jack storage box 2 located in the spare wheel.
- Page 141 PEUGEOT dealer. Note: If the vehicle is fitted in production with a wheel anti-theft lock, the trim cap on the anti-theft bolt is in two parts.
- Page 142 Tool 4 is located: wheelbrace 1. If you fit snow tyres that are mounted – on the saloon and 206 GTi 180, on on steel rims onto your vehicle, it is Note: take a careful note of the code the rear right inner panel of the...
- Page 143 – The wheelbrace and the bolt cover tool are secured on the boot rear right inner panel. Wheel changing procedure The wheels of your 206 GTi 180 are fitted with anti-theft bolts. The wheels are changed in the same way as on the saloon.
- Page 144 Tool 4 is located: wheelbrace 1. If you fit snow tyres that are mounted – on the saloon and 206 GTi 180, on on steel rims onto your vehicle, it is Note: take a careful note of the code the rear right inner panel of the...
-
Page 145: Changing A Bulb
PRACTICAL INFORMATION CHANGING A BULB Dipped/main headlamps H7 55 W Side lights W 5 W – Pull the tab A upwards and remove the protective cover. Turn the pin connector B a quarter turn and remove it. – Disconnect the connector. Change the bulb. - Page 146 PRACTICAL INFORMATION PEUGEOT recommends the use of H7 bulbs of brands: – GE/TUNGSRAM, – PHILIPS, – OSRAM, to avoid damaging the headlamps. These comply with the anti-UV (ultraviolet) specifications neces- sary for the correct operation and reliability of the headlamps.
- Page 147 PRACTICAL INFORMATION Third brake light 5 bulbs Front fog lamps H1 55 W W 5 W (saloon, 206 GTi 180) Press under the access flap to release it. Using a 10 mm spanner, unscrew the 2 nuts A. Open the flap.
- Page 148 PRACTICAL INFORMATION Saloon, 206 GTi 180 206 SW Rear lights (saloon, 206 GTi 180) Rear lights (206 SW) Unclip the boot side trim. Unclip the top of the boot trim using 1. Direction indicators P 21 W. a coin. Remove the wing bolt.
- Page 149 PRACTICAL INFORMATION Third brake light 5 bulbs Front fog lamps H1 55 W W 5 W (saloon, 206 GTi 180) Press under the access flap to release it. Using a 10 mm spanner, unscrew the 2 nuts A. Open the flap.
- Page 150 PRACTICAL INFORMATION Rear fog lamp P 21 W Number plate lights W 5 W Unclip the lamp and release the Insert a thin screwdriver into one of assembly. the outer holes of the transparent cover. Turn the pin connector a quarter turn and remove it.
-
Page 151: Changing A Fuse
PRACTICAL INFORMATION CHANGING A FUSE Removing and fitting a fuse Before changing a fuse, the cause of the fault must be found and remedied. The The fuse boxes are located under the fuse numbers are indicated on the fuse box. fascia and in the engine compartment. -
Page 152: Engine Compartment Fuse Box
Built-in systems interface supply – Not used 30 A Ignition switch supply – Not used * The maxi fuses provide additional protection for the electrical systems. Any work on these fuses must be carried out by a PEUGEOT dealer. 26-05-2003... - Page 153 Throttle housing heater - Diesel injection pump - Oxygen sensor - Engine control unit - Air flow sensor - Ignition coil - Engine management solenoid valve - Diesel heater - Injectors - Engine variable timing solenoid valve (206 GTi 180) - Engine variable air intake solenoid valve (206 GTi 180)
- Page 154 PRACTICAL INFORMATION CHANGING A FUSE Removing and fitting a fuse Before changing a fuse, the cause of the fault must be found and remedied. The The fuse boxes are located under the fuse numbers are indicated on the fuse box. fascia and in the engine compartment.
- Page 155 Right-hand brake light 15 A Left-hand brake light - 3rd brake light 20 A Front and rear (206 SW) courtesy light - Map reader - Glove box lighting - Lighter - 12 volts rear socket (206 SW) Shunt PARC shunt 26-05-2003...
- Page 156 "Sunroof - Safety auto-reverse". – After every reconnection of the battery, switch on the ignition and wait 1 minute before starting to allow the electronic systems to be initialised. If slight difficulties are experienced after this, please contact a PEUGEOT dealer. 26-05-2003...
- Page 157 – 130 mm diameter speakers in the B7 : (+) Rear left speaker rear doors, B8 : (–) Rear left rear speaker – 22.5 mm diameter tweeters in the mirror trims. Consult PEUGEOT dealer before installing audio equipment speakers in your vehicle. 26-05-2003...
-
Page 158: Towing Your Vehicle
PRACTICAL INFORMATION TOWING YOUR VEHICLE Saloon and 206 GTi 180 rear towing eye 206 SW rear towing eye Without lifting (four wheels on the ground) Special features of the automatic gearbox You must always use a tow bar. When towing with all four wheels on... -
Page 159: Driving Advice
Driving advice CARAVAN, BOAT etc. Lights: Check the electrical signalling Distribution of loads: Distribute the Only use original PEUGEOT tow on the trailer. load in the trailer so that the heaviest bars that have been tested and items are as close as possible to the... - Page 160 When refitting the mat, position it and replace the fixings by turning them a quarter of a turn. FITTING ROOF BARS (206 SW) When fitting transverse roof bars, accessories approved ensure that they are positioned PEUGEOT and follow the manufac- correctly.
-
Page 161: Bodywork Maintenance
PRACTICAL INFORMATION BODYWORK MAINTENANCE – Clean bird drop- To preserve the paintwork and the pings, resinous depo- plastic trim on your vehicle, we recom- sits, stains mend that you wash them regularly. grease marks as soon – by hand: there are no specific pre- as possible;... - Page 162 206 ACCESSORIES For your PEUGEOT only use accessories and original parts approved by the manufacturer. These accessories and parts are all adapted to your PEUGEOT, after being tested and approved for reliability and safety, which PEUGEOT cannot guarantee for other products.
-
Page 163: Technical Data
TECHNICAL DATA ENGINES AND GEARBOXES PETROL Models 2CHFX 2CK6D 2CKFW Model codes 2AHFX 2AK6D 2AKFW 2SHFX 2EKFW 2EHFX ENGINES 1.1 litre 1.4 litre 1.4 litre Cubic capacity (cm 1 124 1 360 1 360 Bore x stroke (mm) 72 x 69 75 x 77 75 x 77 EU standard maximum power (kW) - Page 164 TECHNICAL DATA ENGINES AND GEARBOXES PETROL Models 2CNFU 2ANFU 2CRFN 2CRFKA/IF Model codes 2HNFU 2ARFN 2KNFU 2ERFN ENGINES 1.6 litre 16V 2 litre 16V 2 litre 16V Cubic capacity (cm 1 587 1 997 1 997 Bore x stroke (mm) 78,5 x 82 85 x 88 85 x 88...
- Page 165 TECHNICAL DATA ENGINES AND GEARBOXES DIESEL 2C8HX 2CWJY Models 2A8HX 2AWJY 2CRHY 2ERHY 2CRHYU Model codes 2S8HX 2SWJY 2ARHY 2KRHY 2ARHYU 2E8HX 2TWJY 2HRHY ENGINES 1.4 litre turbo HDI 1.9 litre 2 litre turbo HDI 2 litre turbo HDI (ECO) Cubic capacity (cm 1 398 1 867...
- Page 166 TECHNICAL DATA SALOON AND 206 GTi 180 CONSUMPTION* In accordance with directive 99/100 in M.P.G. (litres/100 km) Engine Gearbox Model Urban Inter- Mixed Emission of codes driving urban by weight g/Km 1.1 litre Manual HFXF 34.4 (8.2) 56.5 (5) 45.6 (6.2) 1.1 litre...
- Page 167 TECHNICAL DATA 206 SW CONSUMPTION In accordance with directive 99/100 in M.P .G. (litres/100 km) Engine Gearbox Model codes Urban driving Inter-urban Mixed Emission of by weight g/Km 1,1 litre Manual 2EHFXF 32.5 (8.7) 54.3 (5.2) 43.5 (6.5) 1,4 litre...
- Page 168 TECHNICAL DATA WEIGHTS AND TOWING LOADS SALOON AND 206 GTi 180** (IN KG) 3 and 5 DOOR Engine 1.1 litre 1.4 litre 1.4 litre 1.6 litre 16V 1.6 litre 16V 2 litre 16V 2 litre 16V Gearbox Manual Manual Automatic...
- Page 169 TECHNICAL DATA WEIGHTS AND TOWING LOADS 206 SW (IN KG) 5 DOOR Engine 1.1 litre 1.4 litre 1.6 litre 16V 1.6 litre 16V 2 litre 16V 1.4 litre HDI 2 litre HDI Gearbox Manual Manual Manual Automatic Manual Manual Manual...
- Page 170 TECHNICAL DATA SALOON AND 206 GTi 180 DIMENSIONS (3 AND 5 DOOR VERSIONS) 206 SW DIMENSIONS 26-05-2003...
- Page 171 TECHNICAL DATA Saloon and 206 RC 206 SW THE IDENTIFICATION FEATURES OF YOUR 206 A. Manufacturer's plate. B. Serial number on the bodywork (location according to version). C. Serial number on the fascia. D. Tyres and paint reference. The label D on the driver's door centre pillar, near the hinges, gives: –...
Need help?
Do you have a question about the 206 and is the answer not in the manual?
Questions and answers