Table of Contents
Advertisement
Available languages
Available languages
®
Kobalt
is a registered trademark of LF, LLC.
All rights reserved.
ATTACH YOUR RECEIPT HERE
Serial Number
Questions, problems, missing parts? Before returning to your
retailer, please call our Customer Service Department at
1-888-3KOBALT, 8 a.m. – 8 p.m., EST, Monday – Friday.
AB171027
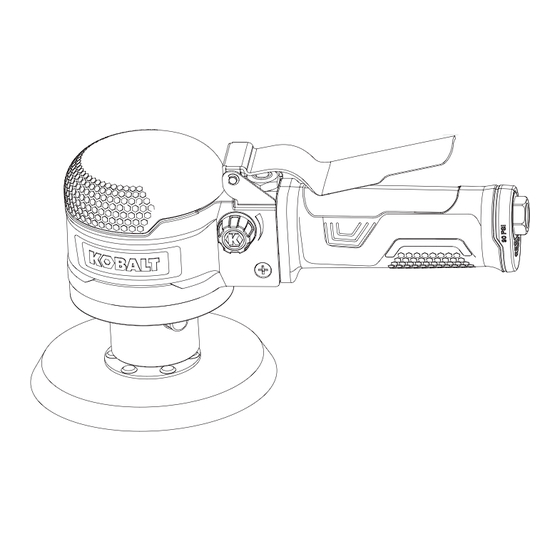
6 IN. DUAL ACTION
Purchase Date
1
ITEM #0858973
SANDER
MODEL #SGY-AIR221
Français p. 16
Español p. 31
Advertisement
Chapters
Table of Contents

Related Manuals for Kobalt SGY-AIR221


Summary of Contents for Kobalt SGY-AIR221
- Page 1 ITEM #0858973 6 IN. DUAL ACTION SANDER MODEL #SGY-AIR221 Français p. 16 Español p. 31 ® Kobalt is a registered trademark of LF, LLC. All rights reserved. ATTACH YOUR RECEIPT HERE Serial Number Purchase Date Questions, problems, missing parts? Before returning to your retailer, please call our Customer Service Department at 1-888-3KOBALT, 8 a.m.
-
Page 2: Table Of Contents
TABLE OF CONTENTS Compressor Requirements................2 Product Specifications..................3 Safety Information..................3 Package Contents..................9 Preparation....................10 Assembly Instructions...................10 Operating Instructions..................11 Remove Sanding Pad..................12 Care and Maintenance.................13 Troubleshooting....................14 Warranty.......................15 COMPRESSOR REQUIREMENTS SCFM Tool Requirements Exigences relatives aux outils Requisitos de herramientas IMPORTANT: To operate correctly, this tool requires airflow that is at least 5.2 Standard Cubic Feet per Minute (SCFM) per minute at 90 pounds per square inch (PSI). -
Page 3: Product Specifications
PRODUCT SPECIFICATIONS COMPONENT SPECIFICATIONS SANDING PAD 6 IN. 10,000 RPM FREE SPEED 5.2 SCFM AVERAGE AIR CONSUMPTION AIR INLET 1/4 IN. NPT AIR HOSE 3/8 IN. WORKING PRESSURE 90 PSI SAFETY INFORMATION Please read and understand this entire manual before attempting to assemble, operate or maintain this product. - Page 4 SAFETY INFORMATION WARNING RISK OF EYE OR HEAD INJURY WHAT COULD HAPPEN HOW TO PREVENT IT This particular air powered tool can Always wear ANSI approved Z87.1 safety glasses. be capable of propelling materials such as fasteners, metal chips, Never leave operating tool sawdust, and other debris at high unattended.
- Page 5 SAFETY INFORMATION WARNING RISK OF ENTANGLEMENT WHAT COULD HAPPEN HOW TO PREVENT IT Loose hair, clothing, jewelry or other Do not wear loose clothing, jewelry, loose objects can become entangled or anything that may get caught or in the moving elements of this tool tangled when using tool.
- Page 6 SAFETY INFORMATION WARNING RISK OF PERSONAL INJURY WHAT COULD HAPPEN HOW TO PREVENT IT A tool left unattended or with the air Remove air hose when tool is not in use and store tool in secure location hose attached can be activated by away from reach of children and unauthorized persons leading to their untrained users.
- Page 7 SAFETY INFORMATION WARNING RISK OF PERSONAL INJURY WHAT COULD HAPPEN HOW TO PREVENT IT Loss of control of the tool can lead Keep proper footing at all times. Do not overreach, as slipping, tripping, to injury to self of others in the work area.
- Page 8 SAFETY INFORMATION WARNING RISK OF PERSONAL INJURY WHAT COULD HAPPEN HOW TO PREVENT IT Follow lubrication instructions for There is a risk of bursting if the tool best and safest operation. is damaged. Follow assembly instructions on how to properly change accessories. Use of an accessory not intended for Use of an accessory not intended for use with a specific tool increases the...
-
Page 9: Package Contents
PACKAGE CONTENTS PART DESCRIPTION QUANTITY 6 in. DA Sander Sanding Pad Bearing Seat Spindle Lock Button Air Regulating Knob Trigger Air Inlet... -
Page 10: Preparation
PREPARATION Before beginning the assembly of the product, make sure all parts are present. Compare parts with package contents list and hardware contents list. If any part is missing or damaged, do not attempt to assemble the product. Estimated Assembly Time: 1 – 3 minutes Tools Required for Assembly (not included): •... -
Page 11: Operating Instructions
ASSEMBLY INSTRUCTIONS 3. Place 2-3 drops of air tool oil (not provided) into the male plug before each use (See Figure 3). 4. Connect the air supply hose to the male plug. Set the working pressure at 90 PSI for best tool performance (See Figure 4). -
Page 12: Remove Sanding Pad
OPERATING INSTRUCTIONS NOTE The tool features an air regulating knob (E). The tool speed can be adjusted by turning the air regulator knob (E) either clockwise or counterclockwise. The maximum tool speed can be obtained when the concave line on the knob (E) is pointing horizontally (See Figure 2). -
Page 13: Care And Maintenance
REMOVE SANDING PAD 2. Place the end of a #2 Phillips screwdriver (not included) into one of the holes and push in on the spindle lock button. You can hold the screwdriver and push in the spindle lock button with the same hand. Using your other hand, loosen and remove the sanding pad (B) by spinning the pad counterclockwise (See Figure 3). -
Page 14: Troubleshooting
TROUBLESHOOTING POSSIBLE PROBLEM CORRECTIVE ACTION PROBLEM 1. Grit or gum in tool. 1. Flush the tool with air-tool oil or gum solvent. 2. No oil in tool. 2. Lubricate the tool. 3. Low air pressure. 3. Adjust the compressor regulator to tool maximum of 90 PSI. -
Page 15: Warranty
WARRANTY This tool is warranted by the manufacturer to the original purchaser from the original purchase date for three (3) years subject to the warranty coverage described herein. This tool is warranted to the original user to be free from defect in material and workmanship. - Page 16 ARTICLE #0858973 PONCEUSE À DOUBLE ACTION DE 6 PO MODÈLE #SGY-AIR221 Kobalt est une marque de commerce ® déposée de LF, LLC. Tous droits réservés. JOIGNEZ VOTRE REÇU ICI Numéro de série Date d'achat Des questions, des problèmes, des pièces manquantes? Avant de retourner l'article au détaillant, communiquez avec notre service...
-
Page 17: Exigences Relatives Au Compresseur
TABLE DES MATIÈRES Exigences relatives au compresseur................17 Caractéristiques du produit................18 Consignes de sécurité..................18 Contenu de l'emballage................24 Préparation....................25 Instructions pour l'assemblage..............25 Mode d'emploi....................26 Retrait du tampon de ponçage..............27 Entretien.......................28 Dépannage....................29 Garantie......................30 EXIGENCES RELATIVES AU COMPRESSEUR SCFM Tool Requirements Exigences relatives aux outils Requisitos de herramientas IMPORTANT : Pour fonctionner convenablement, cet outil nécessite un débit d’air d’au moins 5,2 pi³/min standard à... -
Page 18: Caractéristiques Du Produit
CARACTÉRISTIQUES DU PRODUIT COMPOSANTE CARACTÉRISTIQUES TAMPON DE PONÇAGE 6 PO VITESSE LIBRE 10 000 TOURS/MINUTE CONSOMMATION D'AIR MOYENNE 5,2 PI /MIN STD ENTRÉE D'AIR 1/4 PO NPT TUYAU À AIR 3/8 PO PRESSION DE SERVICE 90 LB/PO CONSIGNES DE SÉCURITÉ Veuillez vous assurer de lire et de comprendre l'intégralité... - Page 19 CONSIGNES DE SÉCURITÉ AVERTISSEMENT RISQUES DE BLESSURE AUX YEUX OU À LA TÊTE RISQUES MESURES PRÉVENTIVES Portez toujours des lunettes de Cet outil pneumatique peut projeter des fixations, des fragments de sécurité conformément à la norme métal, des sciures de bois et ANSI Z87.1.
- Page 20 CONSIGNES DE SÉCURITÉ AVERTISSEMENT RISQUE D'EMMÊLEMENT RISQUES MESURES PRÉVENTIVES Les pièces mobiles de cet outil Ne portez pas de vêtements amples, de bijoux ni tout autre article qui peuvent s’emmêler dans les pourrait s’accrocher ou s’emmêler cheveux, les bijoux ou les vêtements dans l’outil lors de son utilisation.
- Page 21 CONSIGNES DE SÉCURITÉ AVERTISSEMENT RISQUE DE BLESSURE RISQUES MESURES PRÉVENTIVES Si vous laissez un outil sans Lorsque vous n'utilisez pas l'outil, surveillance ou que vous ne rangez-le dans un endroit débranchez pas son tuyau à air sécuritaire, hors de la portée des lorsque vous cessez de l'utiliser, il enfants et autres personnes inexpérimentées, et débranchez le...
- Page 22 CONSIGNES DE SÉCURITÉ AVERTISSEMENT RISQUE DE BLESSURE RISQUES MESURES PRÉVENTIVES Une perte de maîtrise de l’outil Gardez une posture sécuritaire en tout temps. Ne vous étirez pas pour étendre peut causer des blessures à votre portée; vous risqueriez de glisser, l’utilisateur ou aux autres de trébucher ou de tomber et de subir personnes présentes dans l’aire...
- Page 23 CONSIGNES DE SÉCURITÉ AVERTISSEMENT RISQUE DE BLESSURE RISQUES MESURES PRÉVENTIVES Suivez les instructions pour la Un outil endommagé présente des lubrification afin d’assurer un risques de rupture. fonctionnement optimal et sécuritaire. Suivez les instructions pour l’assemblage pour changer les accessoires correctement. L’utilisation d’un accessoire qui n’est L'utilisation d'un accessoire qui n'est pas conçu pour l’outil augmente les...
-
Page 24: Contenu De L'emballage
CONTENU DE L'EMBALLAGE QUANTITÉ PIÈCE DESCRIPTION Ponceuse de 6 po à double action Tampon de ponçage Siège de palier Bouton de verrouillage de l’axe Commande de débit d'air Gâchette Entrée d'air... -
Page 25: Préparation
PRÉPARATION Avant de commencer l’assemblage du produit, assurez-vous d’avoir toutes les pièces. Comparez le contenu de l’emballage avec la liste des pièces et celle de la quincaillerie incluse. S’il y a des pièces manquantes ou endommagées, ne tentez pas d’assembler l’article. Temps d'assemblage approximatif : de 1 à... -
Page 26: Mode D'emploi
INSTRUCTIONS POUR L'ASSEMBLAGE 3. Versez 2 ou 3 gouttes d’huile à outil pneumatique (non incluse) dans le connecteur mâle avant chaque utilisation (consultez la figure 3). 4. Branchez le tuyau d’alimentation en air sur le connecteur mâle. Pour un fonctionnement optimal, réglez la pression de service à... -
Page 27: Retrait Du Tampon De Ponçage
MODE D'EMPLOI REMARQUE Cet outil comprend un bouton (E) du régulateur de débit d’air permettant de régler la vitesse de l’outil, simplement en tournant le bouton (E). La vitesse maximale est atteinte lorsque la ligne concave du bouton (E) est à l’horizontale (consultez la figure 2). -
Page 28: Entretien
RETRAIT DU TAMPON DE PONÇAGE 2. Insérez l’extrémité d’un tournevis cruciforme nº 2 (non inclus) dans l’un des trous, puis enfoncez le bouton de verrouillage de l’axe. Vous pouvez tenir le tournevis et enfoncer le bouton de verrouillage de l’axe d’une seule main. Avec votre autre main, desserrez et retirez le tampon de ponçage (B) en le tournant dans le sens contraire des aiguilles d’une... -
Page 29: Dépannage
DÉPANNAGE CAUSE(S) PROBLÈME MESURE CORRECTIVE POSSIBLE(S) 1. De la gomme ou 1. Rincez l'outil avec de l'huile pour outil des cailloux se sont pneumatique ou du dissolvant de logés dans l'outil. gomme. 2. L'outil manque 2. Lubrifiez l'outil. d'huile. L'outil est 3. -
Page 30: Garantie
GARANTIE Cet outil est garanti par le fabricant pour une période de trois (3) ans à partir de la date d'achat, selon les modalités décrites aux présentes. Cet outil est garanti contre les défauts de matériaux et de fabrication. Si vous croyez qu'il est défectueux, retournez-le, accompagné... - Page 31 ARTÍCULO #0858973 LIJADORA DE DOBLE ACCIÓN DE 6" MODELO #SGY-AIR221 ® Kobalt es una marca registrada de LF, LLC. Todos los derechos reservados. ADJUNTE SU RECIBO AQUÍ Número de serie Fecha de compra ¿Preguntas, problemas, piezas faltantes? Antes de volver a la tienda, llame a nuestro Departamento de Servicio al Cliente al 1-888-3KOBALT, de 8:00 a.m.
-
Page 32: Requerimientos Del Compresor
ÍNDICE Requerimientos del compresor................32 Especificaciones del producto...................33 Información de seguridad................33 Contenido del paquete..................39 Preparación....................40 Instrucciones de ensamblaje................40 Instrucciones de funcionamiento..............41 Retire la almohadilla para lijar...............42 Cuidado y mantenimiento................43 Solución de problemas.................44 Garantía......................45 REQUERIMIENTOS DEL COMPRESOR SCFM Tool Requirements Exigences relatives aux outils... -
Page 33: Especificaciones Del Producto
ESPECIFICACIONES DEL PRODUCTO COMPONENTE ESPECIFICACIONES BASE DE LIJADO 6 pulg. VELOCIDAD LIBRE 10.000 rpm CONSUMO DE AIRE PROMEDIO 5,2 SCFM ENTRADA DE AIRE NPT de ¼ pulg. MANGUERA DE AIRE COMPRIMIDO 3/8 pulg. PRESIÓN DE TRABAJO 90 PSI INFORMACIÓN DE SEGURIDAD Lea y comprenda completamente este manual antes de intentar ensamblar, usar o instalar el producto. - Page 34 INFORMACIÓN DE SEGURIDAD ADVERTENCIA RIESGO DE LESIONES EN LOS OJOS O LA CABEZA LO QUE PODRÍA OCURRIR CÓMO EVITARLO Esta herramienta neumática en Siempre utilice gafas de seguridad particular puede lanzar materiales aprobadas por la norma ANSI Z87.1. como sujetadores astillas de metal, Nunca deje la herramienta en aserrín y otros residuos a alta funcionamiento sin supervisión.
- Page 35 INFORMACIÓN DE SEGURIDAD ADVERTENCIA RIESGO DE INCENDIO O EXPLOSIÓN LO QUE PODRÍA OCURRIR CÓMO EVITARLO Una herramienta rotativa puede Nunca utilice oxígeno, dióxido de producir chispas, las cuales pueden carbono u otros gases embotellados causar la ignición de materiales como fuente de alimentación para inflamables.
- Page 36 INFORMACIÓN DE SEGURIDAD ADVERTENCIA RIESGO DE LESIONES PERSONALES LO QUE PODRÍA OCURRIR CÓMO EVITARLO Si se deja una herramienta sin Cuando la herramienta no esté en uso, retire la manguera de aire supervisión o con la manguera de comprimido y almacene la aire comprimido conectada, herramienta en una ubicación personas no autorizadas pueden...
- Page 37 INFORMACIÓN DE SEGURIDAD ADVERTENCIA RIESGO DE LESIONES PERSONALES LO QUE PODRÍA OCURRIR CÓMO EVITARLO Cierre el paso del suministro de aire y La pérdida del control de la libere/drene la presión de aire de la herramienta puede provocar manguera antes de cambiar los lesiones al usuario o a otras accesorios, realizar reparaciones o personas en el área de trabajo.
- Page 38 INFORMACIÓN DE SEGURIDAD ADVERTENCIA RIESGO DE LESIONES PERSONALES LO QUE PODRÍA OCURRIR CÓMO EVITARLO Si la herramienta se daña, existe el Verifique que no haya mala alineación o trabas en las piezas móviles, piezas riesgo de que reviente. rotas ni cualquier otra condición que afecte el funcionamiento de la herramienta.
-
Page 39: Contenido Del Paquete
CONTENIDO DEL PAQUETE CANTIDAD PIEZA DESCRIPCIÓN Lijadora de doble acción de 6" Base de lijado Alojamiento del rodamiento Botón de bloqueo del husillo Perilla reguladora de aire Gatillo Entrada de aire... -
Page 40: Preparación
PREPARACIÓN Antes de ensamblar el producto, asegúrese de contar con todas las piezas. Compare las piezas con la lista del contenido del paquete y la lista de aditamentos. No intente ensamblar el producto si falta alguna pieza o si estas están dañadas. Tiempo aproximado de ensamblaje: 1 a 3 minutos Herramientas necesarias para el ensamblaje (no se incluyen): •... -
Page 41: Instrucciones De Funcionamiento
INSTRUCCIONES DE ENSAMBLAJE 3. Coloque de 2 a 3 gotas de aceite para herramientas neumáticas (no se incluye) en el conector macho antes de cada uso (Consulte la Figura 3). 4. Conecte la manguera de suministro de aire al conector macho. Establezca la presión de trabajo en 90 PSI para obtener el mejor rendimiento de la herramienta (Consulte la Figura 4). -
Page 42: Retire La Almohadilla Para Lijar
INSTRUCCIONES DE FUNCIONAMIENTO NOTA La herramienta cuenta con una perilla reguladora de aire (E). La velocidad de la herramienta se puede ajustar girando la perilla reguladora de aire (E) ya sea en dirección de las manecillas del reloj o viceversa. La velocidad máxima de la herramienta se puede obtener cuando la línea cóncava de la perilla (E) está... -
Page 43: Cuidado Y Mantenimiento
RETIRE LA ALMOHADILLA PARA LIJAR 2. Coloque el extremo de un destornillador Phillips #2 (no se incluye) en uno de los orificios y empuje el botón de bloqueo del husillo. Puede sostener el destornillador y empujar el botón de bloqueo del husillo con la misma mano. -
Page 44: Solución De Problemas
SOLUCIÓN DE PROBLEMAS PROBLEMA CAUSA POSIBLE ACCIÓN CORRECTIVA 1. Hay polvo o goma 1. Enjuague la herramienta con aceite en la herramienta. para herramientas neumáticas o solvente para goma. 2. No hay aceite en 2. Lubrique la herramienta. la herramienta. 3. -
Page 45: Garantía
GARANTÍA Esta herramienta está garantizada por el fabricante para el comprador original desde la fecha de compra original por tres (3) años y está sujeta a la cobertura de garantía que se describe en el presente. Esta herramienta tiene una garantía para el usuario original contra defectos en los materiales y la mano de obra.
Need help?
Do you have a question about the SGY-AIR221 and is the answer not in the manual?
Questions and answers