
Subscribe to Our Youtube Channel
Related Manuals for neomouv FACELIA


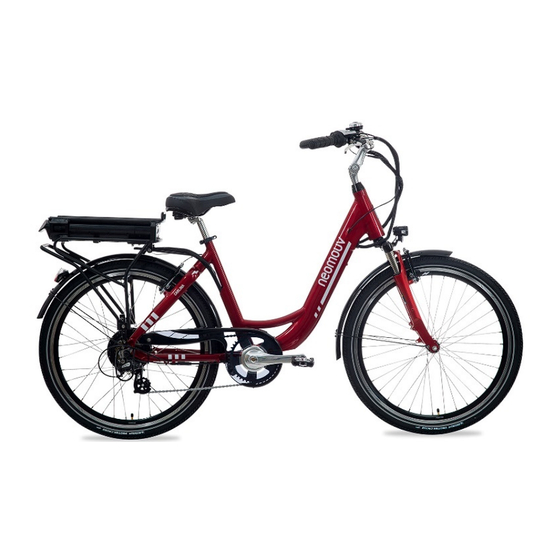
Summary of Contents for neomouv FACELIA
- Page 1 CARLINA FACELIA + Hydraulic version LINARIA ARTEMIS USER MANUAL THIS MANUAL CONTAINS IMPORTANT SAFETY AND OPERATING INSTRUCTIONS Model conforms to safety standards Product may differ from photos...
-
Page 3: Table Of Contents
Lubrication: ............................21 Maintenance: ............................21 SAFETY – RECOMMENDATIONS: ....................22 TECHNICAL DATA ..........................23 DECLARATION OF CE CONFORMITY ..................23 CERTIFICATE OF CONFORMITY ....................23 TERMS OF WARRANTY ........................24 CARLINA (+ HY) – FACELIA – LINARIA – ARTEMIS Manual... -
Page 5: Presentation
Your e-bike has a serial number engraved on the frame by the fork. • Serial number M : 120 AXIMUM LOAD OR YOUR SAFETY YOU SHOULD NOT EXCEED THE MAXIMUM LOAD WHEN USING YOUR BICYCLE CARLINA (+ HY) – FACELIA – LINARIA – ARTEMIS Manual... -
Page 6: Adjustments/Assembly
While pedalling backwards, you should not have to move your hips from side to side. Tighten the quick-release clamp. T HE SEAT POST SHOULD NOT BE EXTENDED BEYOND THE ENGRAVED SAFETY MARK VERTICAL BARS CARLINA (+ HY) – FACELIA – LINARIA – ARTEMIS Manual... -
Page 7: Adjusting The Handlebars And The Stem
HE STEM MUST NOT COME OUT OF THE HEAD TUBE BEYOND THE ENGRAVED MARKINGS VERTICAL BARS AND MINIMUM INSERTION). THE INSCRIPTION After making the adjustment, tighten the screw by turning it clockwise (max. tightening torque: 6 Nm). CARLINA (+ HY) – FACELIA – LINARIA – ARTEMIS Manual... -
Page 8: Adjusting The Brakes
The pads are in the right position when they are an equal distance from the wheel rim. The final adjustment is made by tightening the screws on the brake shoes with a screw driver (a distance of about 0.1 to 0.5 mm from the wheel rim). CARLINA (+ HY) – FACELIA – LINARIA – ARTEMIS Manual... -
Page 9: Rear V-Type Brake
(a distance of about 0.1 to 0.5 mm from the wheel rim). W ARNING N WET WEATHER OR ON DAMP GROUND THE BRAKING DISTANCE INCREASES CARLINA (+ HY) – FACELIA – LINARIA – ARTEMIS Manual... -
Page 10: Hydraulic Brakes
S A GENERAL RULE THE HYDRAULIC DISC BRAKING SYSTEM SHOULD NOT BE ADJUSTED BY NON EXPERTS E RECOMMEND THAT YOU CALL A SPECIALIST SHOULD YOU HAVE ANY DOUBTS ABOUT WHAT TO DO CARLINA (+ HY) – FACELIA – LINARIA – ARTEMIS Manual... -
Page 11: Rack
If the wheel is not centred, loosen the nuts and perform the operation again. D O NOT ADJUST THE LOCKNUTS YOU MAY DAMAGE THE BEARINGS Adjust your brake again (see Chapter 2.3.1). CARLINA (+ HY) – FACELIA – LINARIA – ARTEMIS Manual... -
Page 12: Rear Wheel
NB: the connector is equipped with a keyed connection. Place the two pins so that they are facing each other (follow the arrows). Position the two pins correctly to reconnect the motor plug Adjust the brake pads (see Chapter 2.3.1). CARLINA (+ HY) – FACELIA – LINARIA – ARTEMIS Manual... -
Page 13: Lights
Fixed front and rear lighting. The lights are activated by pressing the UP and MODE buttons on the control pad simultaneously. A LWAYS KEEP YOUR LIGHTS CLEAN AND IN GOOD CONDITION L IGHTS ARE OBLIGATORY AT NIGHT CARLINA (+ HY) – FACELIA – LINARIA – ARTEMIS Manual... -
Page 14: Using The E-Bike
The (indexed) gear selector is located next to the right handle on the handlebars. Activate it by choosing one of the 7 preset positions. With the handle, you can choose one of 7 gears (or one of 6 gears for the FACELIA). -
Page 15: Display
Press and hold the MODE button to accept your changes and return to normal mode. Reset trip information (km travelled, average speed, maximum speed): After selecting the TRIP mode, press and hold Down and MODE simultaneously to reset the trip data to zero. CARLINA (+ HY) – FACELIA – LINARIA – ARTEMIS Manual... -
Page 16: Electric Assistance
(even if slight), your battery life is increased. If you are ascending inclines of more than 5% (the motor “struggles" above a grade of 8%), your battery life will diminish proportionally. CARLINA (+ HY) – FACELIA – LINARIA – ARTEMIS Manual... -
Page 17: Technical Specifications Of The Power-Assistance System
3 years or 25,000 kilometres, we advise you to get it checked by an authorised dealer or specialist. Although it is designed to resist water, we do not recommend cleaning it with a high-pressure jet. Electric Motor CARLINA (+ HY) – FACELIA – LINARIA – ARTEMIS Manual... -
Page 18: Charging The Battery
It is easy to operate: plug the charger’s output jack into your battery’s socket, then plug it into the mains. Connect the charger plug to the battery first and then to the mains. CARLINA (+ HY) – FACELIA – LINARIA – ARTEMIS Manual... -
Page 19: Precautions (Safety Instructions)
ALSO LOOK AT THE PICTOGRAMS ON THE BACK OF THE CHARGER 1) Compliance with CR standards 2) Double insulation 3) Do not throw out with household waste 4) Comply with the polarity CARLINA (+ HY) – FACELIA – LINARIA – ARTEMIS Manual... -
Page 20: Battery
For safe charging, first connect the charger to the battery and then connect the charger's standard plug to the mains (220V/50 Hz). Check that the charger is working correctly (see section 4.1). CARLINA (+ HY) – FACELIA – LINARIA – ARTEMIS Manual... -
Page 21: Recommendations / Precautions To Take With Your Battery
Also read carefully the indications listed on the battery's sticker: The battery provided with your e-bike conforms with: • The standards EN61000-6-1 et EN61000-6-3; The UN38.3 directive on the transport of dangerous goods; • Directive 2006/66/EC; • CARLINA (+ HY) – FACELIA – LINARIA – ARTEMIS Manual... -
Page 22: Tips For Increasing The Battery Life Per Charge
To prolong battery power: start up in position 1. Once your bike has started, set your assistance • level and set the derailleur to the large development. Maintain a constant speed. Your battery charge will last longer. CARLINA (+ HY) – FACELIA – LINARIA – ARTEMIS Manual... -
Page 23: Upkeep And Maintenance
O NOT USE LUBRICANTS ON THE SURFACE OF THE WHEEL RIMS OR ON THE TYRES OR ON THE FRONT AND REAR BRAKE SHOES C HECK THE CONDITION AND CORRECT FUNCTIONING OF THE SIGNALLING DEVICES BULBS CLEAN THEM IF NECESSARY WITH A DRY CLOTH CARLINA (+ HY) – FACELIA – LINARIA – ARTEMIS Manual... -
Page 24: Safety - Recommendations
We strongly recommend that you wear a helmet. Wearing a high-visibility vest is mandatory when riding in rural areas, in traffic at night, or on days when the visibility is poor. CARLINA (+ HY) – FACELIA – LINARIA – ARTEMIS Manual... -
Page 25: Technical Data
(number of teeth on sprockets) (Norton: 14,16,18,21,24,28) Chainring (number of teeth) 9. DECLARATION OF CE CONFORMITY Available on our website, under "Downloads" CERTIFICATE OF CONFORMITY Available on our website, under "Downloads" CARLINA (+ HY) – FACELIA – LINARIA – ARTEMIS Manual... -
Page 26: Terms Of Warranty
The warranty does not cover parts that are cracked or broken or show traces of visible impact WARNING! Do not confuse maintenance and warranty. Maintenance overhauls and adjustments cannot be carried out for free under warranty. Fill out your CERTIFICATE OF WARRANTY ON OUR WEBSITE www.neomouv.fr CARLINA (+ HY) – FACELIA – LINARIA – ARTEMIS Manual... - Page 28 SAS NEOMOUV ZI Ouest - Allée des quatre Journaux 72200 LA FLECHE contact@neomouv.fr SAS with capital of 1 200 000- RCS Le Mans 518 158 183 SIRET 518 158 183 00013 – APE 4649Z – TVA INT FR 91 518158183...
Need help?
Do you have a question about the FACELIA and is the answer not in the manual?
Questions and answers