Advertisement
Quick Links
EVERPURE
COLDRINK
®
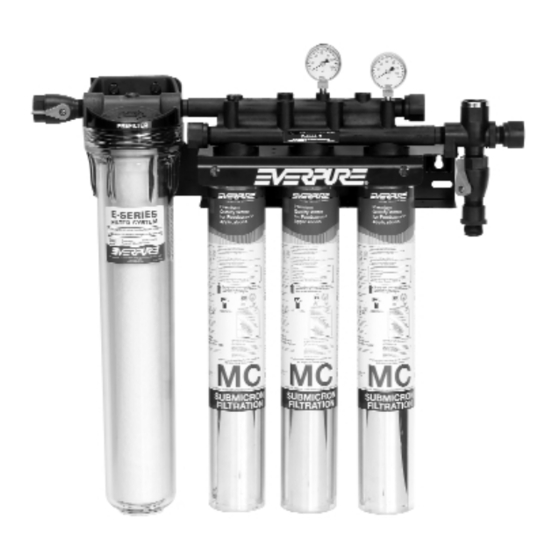
Figure 1 Coldrink 1 System
SELECT A MOUNTING LOCATION
1. Give consideration to the weight of the unit when
operating (filled with water). Operating weights of the
Coldrink Systems are:
• System 1 - 19 lbs (8.62 kg)
• System 2 - 35 lbs (15.9 kg)
• System 3 - 45 lbs (20.4 kg)
INSTALLATION
1. Use the predrilled mounting holes in the manifold
bracket as guides. Mark and drill anchor holes. Mount
securely. See Figures 4-6.
2. Shut off power to equipment.
3. Connect outlet port of Coldrink System to equipment
served. Always use a NSF approved pipe dope or
plumber tape at all connections. Use a backup wrench
on all fittings while connecting to avoid excessive stress
on the system components.
4. Install a manual shut-off valve leading to the system
for servicing.
5. Connect minimum 3/8" water line to the Coldrink 1
System inlet. Use a minimum 1/2" for Coldrink 2
and 3 Systems.
6. Connect tubing to flushing valve and run to drain. The
cross fitting has a flushing valve installed on the bottom.
FILTRATION & PROCESSING SOLUTIONS
SERIES FILTER SYSTEMS
®
Figure 2 Coldrink 2 System
COLDRINK SERIES INSTALLATION AND OPERATION GUIDE
2. The location should allow for:
• Minimum clearance of 2-1/2" (6.4 cm) under the
cartridge(s) so it can be lowered for removal
and replacement.
• Adequate space for "in" and "out" water
line connections.
• Be near a drain for flushing and near a 110V outlet
if the accessory (sold separately) Everguard
Pressure Alarm is used. See Figures 1-6.
NOTE: Some municipal plumbing codes and good
sanitary practices require an air gap at the drain
termination point.
7. Shut off the system inlet valve located on the inlet of the
prefilter head.
8. Check to be sure the o-ring on the prefilter housing is
sufficiently lubricated. Use a good grade of silicone
lubricant, if needed. Position the EC210 Prefilter
Cartridge on guide seat in the bottom of the bowl. Then
thread the bowl into the head by hand. Use a sump
wrench to snug the bowl onto the head.
9. Install the carbon filter cartridge(s) into the filter head(s)
following directions on the cartridge label or as shown in
the Cartridge Change Change Procedure
section illustrations.
10. Turn on inlet water to the filter system and check
for leaks.
Figure 3 Coldrink 3 System
Low
TM
1
Advertisement

Summary of Contents for Everpure Coldrink series
- Page 1 6. Connect tubing to flushing valve and run to drain. The 10. Turn on inlet water to the filter system and check cross fitting has a flushing valve installed on the bottom. for leaks. FILTRATION & PROCESSING SOLUTIONS COLDRINK SERIES INSTALLATION AND OPERATION GUIDE...
- Page 2 If the low pressure condition is not due to an external condition, check/change the prefilter first. If the low pressure condition is still not corrected, change the carbon filter cartridges. COLDRINK SERIES INSTALLATION AND OPERATION GUIDE...
- Page 3 3. Hold head firmly and push upward. Turn label. Insert new cartridge firmly 7. Repeat steps 3-6 for remaining inlet water ahead of system. cartridge to left until it stops. into head. cartridges. 9. Turn on power to equipment COLDRINK SERIES INSTALLATION AND OPERATION GUIDE...
- Page 4 EVERPURE-SHURFLO CHINA, 21F CLOUD 9 PLAZA, NO 1118, SHANGHAI, 200052, CHINA 86.21.3211.4588 TEL • 86.21.3211.4580 FAX • CHINA.WATER@PENTAIR.COM EMAIL EVERPURE-SHURFLO INDIA, GREEN BOULEVARD, B-9/A, 7TH FLOOR - TOWER B SECTOR 62, NOIDA - 201301 91.120.419.9444 TEL • 91.120.419.9400 FAX • INDIACUSTOMER@PENTAIR.COM EMAIL EVERPURE-SHURFLO EUROPE, PENTAIR WATER BELGIUM BVBA, INDUSTRIEPARK WOLFSTEE, TOEKOMSTLAAN, 30 B-2200 HERENTALS, BELGIUM +32.(0).14.283.500 TEL •...


Need help?
Do you have a question about the Coldrink series and is the answer not in the manual?
Questions and answers