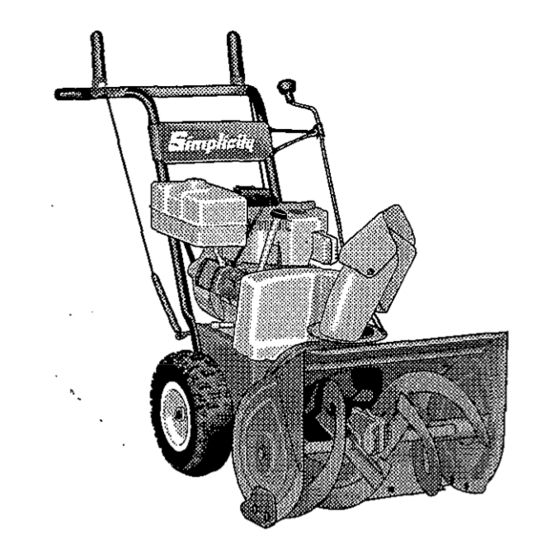
Summary of Contents for Simplicity 1691411
- Page 1 ’ PERATOR ANUAL Sno-Away Models 5-55cd22 7-55cd22 Mfg. No. 1691411 Mfg. No. 1691413 Mfg. No. 1691414...
- Page 2 BakerTM ’ PERATOR ANUAL Model 7/22E...
- Page 3 500 N. Spring Street, P.O. Box 997 Port Washinnton, WI 53074-0997...
-
Page 5: Table Of Contents
SPECIFICATIONS..COMMON REPLACEMENT PARTS ..16 ACCESSORIES ... TECHNICAL MANUAL AVAILABILITY..16 Mfg. No. 1691411 Model Number: 1 6 9 1 4 1 3 1 6 9 1 4 1 4 Manufacturer Number: 1 6 9 2 6 1 5 Engine I.D. -
Page 6: Safety Rules
Safety Rules WARNING This unit is a “two-stage” snowthrower. The first stage is the auger, which feeds the snow back into the impeller housing. The second stage is the impeller, which throws the snow out the discharge chute. If bodily contact is made with the auger or impeller when they are rotating, severe personal injury will occur. -
Page 7: Maintenance & Storage
Never operate machine at high transport speeds on slippery surfaces. Use care when backing up. Disengage auger drive when transporting or not in use. Never operate the snowthrower without good vrstbrlrty or light. Always be sure of your footing. Do not change the engine governor settings or over- speed the engine. -
Page 8: Controls Snowthrower Controls
Controls SNOWTHROWER CONTROLS (Figure 1) R e f N a m e Auger Control Engages auger/impeller when Clutch Lever depressed; disengages when released. Engages drive Drive Control Clutch Lever depressed; disengages when released. Chute Control Controls direction snow is thrown. R o d Chute Controls angle snow is... -
Page 9: Deflector
DEFLECTOR The angle and distance of the discharged snow is con- trolled by the position of the deflector. Engine speed also affects distance of discharge. The more the deflector is tilted back, the farther snow will be thrown. Loosen the knob (figure 3) to tilt the deflector back or forward, then retighten the knob. -
Page 10: Operation General
Operation GENERAL WARNING Before leaving the operator’s area for any reason, stop the engine and remove the key. Disconnect the spark plug wire and secure it away from the plug to prevent accidental start-up of the snowthrower. WARNING To avoid serious injury, do not put your hands into the auger housing or discharge spout. -
Page 11: Operating The Snowthrower
7. As the engine warms up and begins to operate even- ly, turn the choke knob slowly counterclockwise to the OFF position. If engine falters, return to l/2 choke position until it runs smoothly, then turn it to the choke OFF position. NOTE: Allow the engine to warm up for a few minutes before operating the snowthrower. -
Page 12: Regular Maintenance
LUBRICATION 1. Place the snowthrower on a level surface. 2. Remove the pipe plug (A, figure 6). The lubricant should be level with the hole. If not, add Simplicity Winter Weight Worm Gear Oil (available from your dealer). 3. Re-install pipe plug. -
Page 13: Lubrication
LUBRICATION CAUTION It is very important that grease fittings on auger shaft (figure 6) are lubricated regularly. If auger rusts to shaft, damage to worm gear may occur if shear pins do not break. With an oil can, apply medium weight (IOW) oil to points A &... -
Page 14: Troubleshooting
WARNING Before performing any adjustment or service to snowthrower, stop the engine and wait for moving parts to stop. Remove the key. To prevent acciden- tal starting, disconnect the spark plug wire and fasten away from the plug. This section provides troubleshooting and service instructions. -
Page 15: Shift Control Adjustment
SHIFT CONTROL ADJUSTMENT If any of the following conditions exist, it will be neces- sary to adjust the shift control. Snowthrower is not in neutral when shift lever is in NEUTRAL position. Reverse position cannot be fully reached. 3rd gear cannot be fully reached. Adjust as follows: 1. - Page 16 Adjusting Drive Belts If the auger or wheels slip under load, belts could be stretched or worn. Adjust as follows: 1. Remove the belt cover (figure 10). Determine which belt requires adjustment. 2. Loosen the locknut on the appropriate idler pulley and move the idler pulley i/4”...
-
Page 17: Roller Chain Replacement
CAUTION Place a block (approximately 4” high) under front edge of auger housing or snowthrower will not stand on end. 6. See figure 13. Loosen nuts holding lower belt guard and slide guard away from belt. 7. Remove belt from between large pulleys. 13. -
Page 18: Wheel Axle Bearing Replacement
WHEEL AXLE BEARING REPLACEMENT After approximately 100 hours of use (about 5 years), or if drive chain jumps off sprockets, wheel axle bearings may need to be replaced. 1. Disconnect spark plug wire and fasten it away from the spark plug. 2. -
Page 19: Specifications
Specifications ENGINE M a k e ... Tecumseh Cylinders..1 Cycles... 4 Crankshaft ... Horizontal 5 H P - Model No..S e e e n g i n e I.D. plate -Bore&Stroke..Z-13/16 - Displacement..12.04 cu. in. 7 H P - Model No. -
Page 20: Common Replacement Parts
Important assembly notes and special torque values are included in the illustrations. Standard hardware and torque specification charts are also included. For the manuals applicable for your model, contact the Simplicity Customer Publications Department at 414-284-8519. Have the following information available when phoning in your request.


Need help?
Do you have a question about the 1691411 and is the answer not in the manual?
Questions and answers