Table of Contents
Advertisement
Quick Links
Advertisement
Table of Contents

Subscribe to Our Youtube Channel
Related Manuals for Gaggenau CX492610


Summary of Contents for Gaggenau CX492610
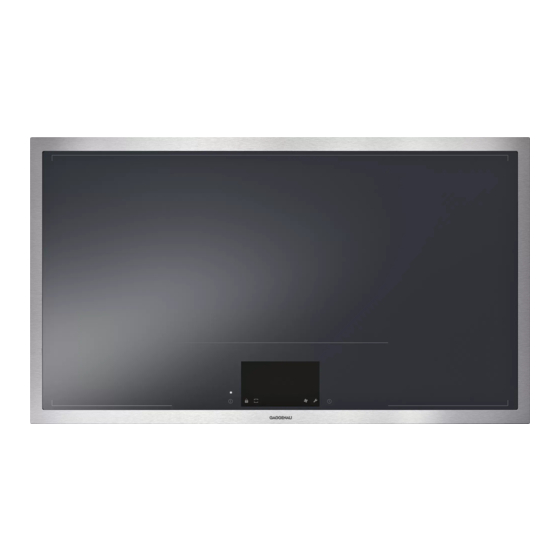
- Page 1 Use and care manual CX492610 Full surface induction cooktop...
-
Page 2: Table Of Contents
en-us Table of Contents Us e a n d c a r e ma n ua l Safety Definitions Power Boost function Activating IMPORTANT SAFETY INSTRUCTIONS Deactivating Fire Safety Pan Boost function Cooking Safety Burn Prevention Recommendations for use Child Safety Activating Cleaning Safety Deactivating... -
Page 3: Safety Definitions
en-us Safety Definitions Safety Definitions Automatic shut-off Basic settings WARNING S a f e t y D e f i n i t i o n s To go to the basic settings This indicates that death or serious injuries may Home Connect occur as a result of non-observance of this Connection to your home network... -
Page 4: Important Safety Instructions
IMPORTANT SAFETY INSTRUCTIONS READ AND SAVE THESE INSTRUCTIONS IMPORTANT SAFETY INSTRUCTIONS WARNING WARNING R E A D A N D S A V E T H E S E I N S T R U C T I O N S When properly cared for, your new TO REDUCE THE RISK OF A appliance has been designed to be... -
Page 5: Cooking Safety
IMPORTANT SAFETY INSTRUCTIONS READ AND SAVE THESE INSTRUCTIONS Cooking Safety WARNING TO REDUCE THE RISK OF INJURY WARNING TO PERSONS IN THE EVENT OF A Use this appliance only for its GREASE FIRE, OBSERVE THE intended use as described in this FOLLOWING: manual. -
Page 6: Burn Prevention
IMPORTANT SAFETY INSTRUCTIONS READ AND SAVE THESE INSTRUCTIONS When using the Cooking Sensor mode, Burn Prevention make sure that the selected cooking zone DO NOT TOUCH SURFACE UNITS OR matches the one on which you have AREAS NEAR UNITS - Surface units may placed the cookware with the cooking be hot even though they are dark in color. -
Page 7: Child Safety
IMPORTANT SAFETY INSTRUCTIONS READ AND SAVE THESE INSTRUCTIONS Secure all loose garments, etc. before appliance, and the unit may tip over, beginning. Tie long hair so that it does potentially causing severe injury. not hang loose, and do not wear loose Do not allow children to use this fitting clothing or hanging garments, such appliance unless closely supervised by... -
Page 8: Proper Installation And Maintenance
IMPORTANT SAFETY INSTRUCTIONS READ AND SAVE THESE INSTRUCTIONS having flat bottoms large enough to cover Proper Installation and Maintenance the surface heating unit. This appliance is Have the installer show you the location equipped with one or more surface units of the circuit breaker or fuse. -
Page 9: Electromagnetic Interference
IMPORTANT SAFETY INSTRUCTIONS READ AND SAVE THESE INSTRUCTIONS To avoid electrical shock hazard, before CAUTION servicing the appliance, switch power off Persons with a pacemaker or similar at the service panel and lock the panel to medical device should exercise prevent the power from being switched caution when standing near an on accidentally. -
Page 10: State Of California Proposition 65 Warnings
IMPORTANT SAFETY INSTRUCTIONS READ AND SAVE THESE INSTRUCTIONS State of California Proposition 65 Warnings: WARNING This product can expose you to chemicals including vinyl chloride, which is known to the State of California to cause cancer and birth defects or other reproductive harm. For more information go to www.P65Warnings.ca.gov. -
Page 11: Causes Of Damage
en-us Causes of damage Causes of damage N OTICE C a u s e s o f d a m a g e Rough pot and pan bases scratch the cooktop. Never leave cookware cooking empty. This can cause damage. Do not place hot pots or pans on the control panel, the displays or the cooktop surround. -
Page 12: Environmental Protection
en-us Environmental protection Environmental protection Cooking with induction E nergy-saving Advice A dvantages of Induction Cooking E n v i r o n m e n t a l p r o t e c t i o n C o o k i n g w i t h i n d u c t i o n Induction cooking is fundamentally different from Place a lid on cookware. - Page 13 en-us Cooking with induction The ferromagnetic area will also be reduced if the Empty cookware or cookware with a thin base material from which the base of the cookware is made Do not heat empty cookware and do not use cookware contains aluminum, for example.
-
Page 14: Getting To Know Your Appliance
en-us Getting to know your appliance Getting to know your appliance G e t t i n g t o k n o w y o u r a p p l i a n c e T his section explains how to use the cooking surface, the control panel and the various functions of the appliance. -
Page 15: Overview Of The Menus
en-us Getting to know your appliance Touchscreen display Notifications and alerts The touchscreen display gives you an overview of the Notifications let the user know that the appliance's status cookware on the cooking surface and the buttons for has changed or tell them when they need to confirm activating the various functions. -
Page 16: Cooking Position Display
en-us Getting to know your appliance Cookware mode menu Selected cooking position The cooktop has various functions for the cooking positions. The cooking position shown has Cookware mode Function been selected. You can now set the Single dynamic Allows a particular power level to power setting. -
Page 17: Residual Heat Indicator
en-us Operating the appliance Residual heat indicator Operating the appliance The cooktop has several residual heat indicators warn you that one or more cooking positions is/are still O p e r a t i n g t h e a p p l i a n c e T his chapter explains how to set a cooking position. -
Page 18: Setting A Cooking Position
en-us Operating the appliance Setting a cooking position Changing the power level Select the cooking position and then select the required The required power level is selected in the settings area. power level in the settings area. Power level 1.0 = lowest setting Switching off a cooking position Power level 9.0... - Page 19 en-us Operating the appliance Recommended dishes The table shows which heat setting is suitable for each type of food. The cooking time may vary depending on the type, weight, thickness and quality of the food. Ongoing cooking Time (min) setting Melting Chocolate, coating 1.0 - 1.5...
- Page 20 en-us Operating the appliance Ongoing cooking Time (min) setting Braising/frying with a small amount of oil Schnitzel, plain or breaded 6.0 - 7.0 6 - 10 Schnitzel, frozen 6.0 - 7.0 6 - 12 6.0 - 7.0 6 - 12 Chops, plain or breaded Steak (1¼"...
-
Page 21: Dynamic Cooking
en-us Dynamic cooking Activation Dynamic cooking Touch the symbol. Touch the symbol followed by the symbol to D y n a m i c c o o k i n g U se this special function in particular for cooking confirm your choice. -
Page 22: Professional Cooking
en-us Professional cooking Note: If the size of the cookware is not suitable for this Professional cooking function, the symbol will light up on the cooking ˆ position. Touch the symbol for information. P r o f e s s i o n a l c o o k i n g U se this special function in particular for cooking To return to the main screen, touch the symbol. -
Page 23: Deactivating
en-us Time-setting options Changing the power level Time-setting options You can change the power levels while you are cooking. To choose a different power level in the programming area, touch the area you want to change the power level T i m e - s e t t i n g o p t i o n s T he cooktop has three timer functions: Cooking timer Note: If the function is deactivated, the power level will... -
Page 24: Stopwatch Function
en-us Time-setting options Stopwatch function Touch the symbol to confirm the selected time. The time you have set will appear on the cooking position The Stopwatch function displays the time that has display. elapsed since activation. This works independently from the cooking positions and from other settings. -
Page 25: Short-Term Timer
en-us Time-setting options Short-term Timer Changing or deleting the time Touch the symbol. You can set a time of up to 9 hours, 59 minutes and 59 seconds on the short-term timer. Change the time that is currently set and touch the symbol to confirm the setting you have chosen. -
Page 26: Power Boost Function
en-us Power Boost function Activating Power Boost function Select the cooking position and scroll up with your finger until the symbol appears. P o w e r B o o s t f u n c t i o n T he Power Boost function allows large volumes of water The function has now been activated. -
Page 27: Pan Boost Function
en-us Pan Boost function Recommendations for use Pan Boost function Always use cookware that has not been preheated. Use cookware with a completely flat base. Do not use P a n B o o s t f u n c t i o n T he Pan Boost function allows cookware to be heated up cookware with a thin base. -
Page 28: Keep Warm Function
en-us Keep warm function Keep warm function Transfer function K e e p w a r m f u n c t i o n T r a n s f e r f u n c t i o n T his function is suitable for melting chocolate or butter T his function lets you transfer the selected power level and for keeping food warm. -
Page 29: Wireless Cooking Sensor
en-us Wireless cooking sensor Press down all over the surface of the silicone patch, Wireless cooking sensor including in the center. ‚ The adhesive requires 1 hour to fully cure. Do not use or clean the pot during this time. W i r e l e s s c o o k i n g s e n s o r Y ou will need to connect the wireless cooking sensor to the cooktop before using Cooking Sensor mode for the... -
Page 30: Cleaning
en-us Wireless cooking sensor To connect another cooking sensor, touch the Cooking sensor window symbol. To return to the basic settings, touch the The sensor window must always be clean and dry. symbol. Proceed as follows: The Cooking Sensor mode is made available once the Remove dirt and oil splatters regularly. -
Page 31: Declaration Of Conformity
® brand are registered trademarks and property of Bluetooth SIG, Inc. These trademarks are used by Gaggenau Hausgeräte GmbH under license. All other trademarks and brand names are owned by the respective companies. Close the cap on the cooking sensor (the indentations for the screws on the cap must be aligned with the indentations on the lower section of the casing). -
Page 32: Cooking Sensor Mode
en-us Cooking sensor mode Cooking sensor mode is available anywhere on the Cooking sensor mode cooking surface if you have a wireless cooking sensor. Ü The wireless cooking sensor forwards the temperature of the cookware to the control panel. C o o k i n g s e n s o r m o d e T he cooking sensor processes make cooking easy and produce exceptional results. -
Page 33: Advantages
en-us Cooking sensor mode Advantages Notes Always cook with the lid on except when using the The cooking position is only powered when this is "Deep fat frying" function. necessary to maintain the temperature. This saves If an audible signal does not sound, make sure there energy. -
Page 34: Table
en-us Cooking sensor mode Use your finger to scroll up to the symbol. Then touch the symbol to confirm your choice. Once the signal tone has sounded, remove the lid and add the food. Leave the lid on while cooking. Touch the symbol on the wireless cooking sensor Note: The temperature can be increased or decreased by... - Page 35 en-us Cooking sensor mode Fish Temperature °F (°C) Time (min) Simmering Stewed fish 195 (90) 15 - 20 Deep fat frying Deep fat frying fish in beer batter 340 (170) 10 - 15 Deep fat frying breaded fish 340 (170) 10 - 15 Heat and cook with the lid on.
- Page 36 en-us Cooking sensor mode Potatoes Temperature °F (°C) Time (min) Boiling Gnocchi 212 (100) 3 - 6 Boiling potatoes 212 (100) 30 - 45 Boiling sweet potatoes 212 (100) 30 - 45 Cooking in a pressure cooker Potatoes in a pressure cooker 240 (115) 10 - 20 Sweet potatoes in a pressure cooker...
- Page 37 en-us Cooking sensor mode Soups Temperature °F (°C) Time (min) Cooking in a pressure cooker Home-made broths in a pressure cooker 240 (115) 20 - 30 Add the food at the start. Stir frequently. Dessert Temperature °F (°C) Time (min) Simmering Rice pudding 185 (85)
-
Page 38: Dynamic Cooking For An Item Of Cookware
en-us Dynamic cooking for an item of cookware Move the cookware over the cooking surface until the Dynamic cooking for an item of power level you require is set. The power level you ‰ cookware have selected will appear on the cooking position display. -
Page 39: Teppanyaki Mode
en-us Teppanyaki mode Touch the symbol to confirm your choice. Teppanyaki mode ‹ T e p p a n y a k i m o d e T his mode allows you to split the teppanyaki grilling area into two halves: A hot area to which a heat setting is assigned, and an area to which no heat setting is assigned. -
Page 40: Panel Lock
en-us Displaysperre Panel Lock Pause function Š D i s p l a y s p e r r e P a u s e f u n c t i o n T he panel lock lets you lock the cooktop so that it cannot W hile the Pause function is active, the settings you have be switched on accidentally. -
Page 41: Basic Settings
en-us Basic settings Basic settings B a s i c s e t t i n g s T he appliance has various basic settings. You can adapt these settings to your personal requirements. Settings Description and options Brightness You can change the brightness of the touchscreen display. [ Start screen You can choose whether or not the brand logo will be displayed when you switch on the cooktop. -
Page 42: To Go To The Basic Settings
en-us Home Connect To go to the basic settings Home Connect All cooking positions must be deactivated. Touch the symbol. The basic settings menu will H o m e C o n n e c t T his appliance is Wi-Fi enabled and settings can be sent appear on the display. - Page 43 en-us Home Connect Start the app and create your Home Connect login A message will be displayed to notify you when the details. The app will guide you through the cooktop is successfully connected to your home registration process. Make a note of your e-mail network.
- Page 44 en-us Home Connect Manual Registration in the Home Network A message will be displayed to notify you when the cooktop is successfully connected to your home To open the basic settings, touch the symbol on the network. Touch the symbol to confirm. main screen.
-
Page 45: Home Connect Settings
en-us Home Connect Home Connect Settings You can adjust Home Connect to suit your requirements In the basic settings for your cooktop, navigate to the at any time. Home Connect settings to display network and appliance information. Settings Description Connection Enables the Wi-Fi network to be switched on and off. - Page 46 en-us Home Connect Select Delete Home Connect settings. Touch Connect to app. Tap the symbol to confirm your choice. An additional Home Connect account can be connected to the cooktop. To do this, touch Connect to another app. This disconnects the appliance from your home network; symbol will go out on the control panel.
-
Page 47: Software Update
en-us Home Connect Confirming settings Note: Ensure that the Home Connect functions can be used only in conjunction with the Home Connect app. Once the settings have been transferred to a cooking Information on data protection can be accessed in the zone, a confirmation message will appear on the Home Connect app. -
Page 48: Ventilation Control
en-us Ventilation control Connecting appliances via your home network Ventilation control If the appliances are connected to each other via your home network, both the hood controls and Home Connect can be used to operate the cooktop. V e n t i l a t i o n c o n t r o l Y ou can connect this appliance to a matching hood and then control the functions of the hood via your cooktop. -
Page 49: Disconnecting From The Network
en-us Ventilation control Controlling the hood via the cooktop If you wish to change the setting, select the Hood control option again and then change the setting as required. In the cooktop's basic settings, you can configure what Connecting via your home network the hood should do when the cooktop or individual cooking positions are switched on or off. -
Page 50: Hood Control Settings
en-us Ventilation control Setting the hood lighting Select the Light Brightness option. Select the brightness level. The hood light can be switched on and off using the control panel for the cooktop. Depending on the basic settings you have selected, the light will automatically be switched on or off when the Touch the symbol on the main screen. -
Page 51: Clean
en-us Clean Apply a small amount of the glass ceramic cooktop Clean cleaner. When dry, buff surface with a clean paper towel or cloth. D aily Cleaning C l e a n Cleaning guidelines Note: Recommended cleaners indicate a type of cleaner and do not constitute an endorsement of a specific When using a cleaner, use only a small amount;... -
Page 52: Maintenance
en-us Clean Type of Soil Possible Solution Greasy spatters Use a soapy sponge or cloth to remove grease; rinse thor- oughly and dry. Apply glass ceramic cooktop cleaner. Metal marks: Iridescent stain Pans with aluminum, copper or stainless steel bases may leave marks. -
Page 53: Frequently-Asked Questions And Answers (Faq)
en-us Frequently-asked questions and answers (FAQ) Frequently-asked questions and answers (FAQ) F r e q u e n t l y - a s k e d q u e s t i o n s a n d a n s w e r s ( F A Q ) Nothing appears on the display The brightness may not be set correctly. - Page 54 en-us Frequently-asked questions and answers (FAQ) Cookware Which types of cookware can be used with an induction cooktop? For information on which types of cookware can be used with an induction cooktop, see the section enti- "Cooking with induction" tled Why is the cooktop not heating? Make sure the cookware is suitable for use with an induction cooktop.
- Page 55 en-us Frequently-asked questions and answers (FAQ) The heat setting cannot be increased. The appliance has reached its maximum power consumption or the Power management setting has been activated. Switch the positions of the cookware on the cooking surface. Check the installation and correctly config- "Basic settings"...
-
Page 56: Faults - What To Do
en-us Faults – what to do? Warnings and fault messages Faults – what to do? Warnings are displayed if an internal fault has occurred that will compromise use of the cooktop. F a u l t s – w h a t t o d o ? I f a problem or fault occurs in the appliance, Follow the instructions on the display and touch the instructions, alerts, warnings or fault messages will be... -
Page 57: Demo Mode
en-us Faults – what to do? Problem Solution There is hot cookware near the control panel. To Remove the cookware that is causing the problem. Wait a few sec- protect the electronics, the cooking position has onds. When the fault code on the display disappears, you can been switched off. -
Page 58: Customer Service
en-us Customer Service Customer Service C u s t o m e r S e r v i c e O ur Customer Service is there for you if your appliance needs to be repaired. We will always find an appropriate solution in order to avoid unnecessary visits by engineers.
Need help?
Do you have a question about the CX492610 and is the answer not in the manual?
Questions and answers